Counting Block Towers

Counting BLock Towers (6)

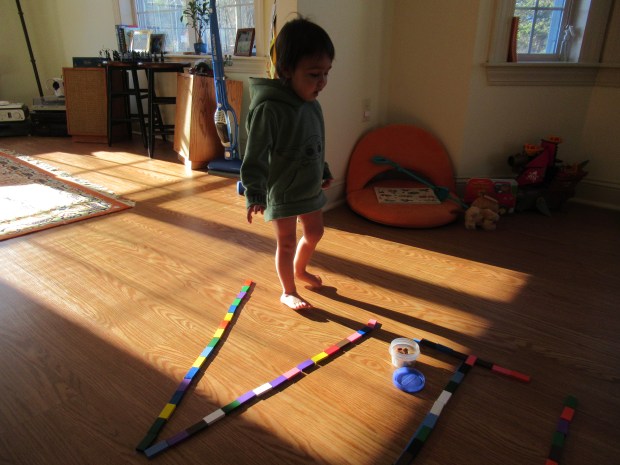
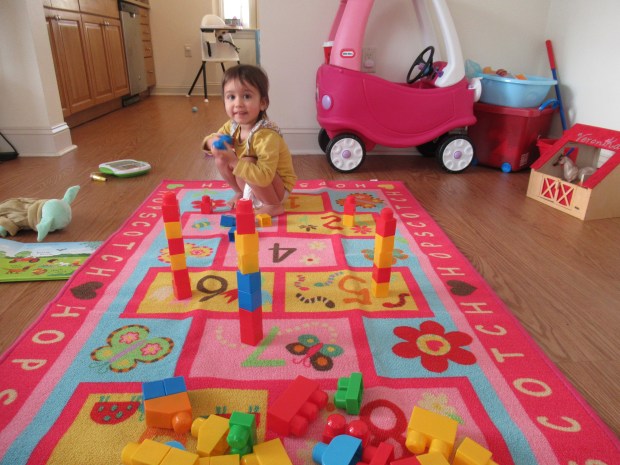
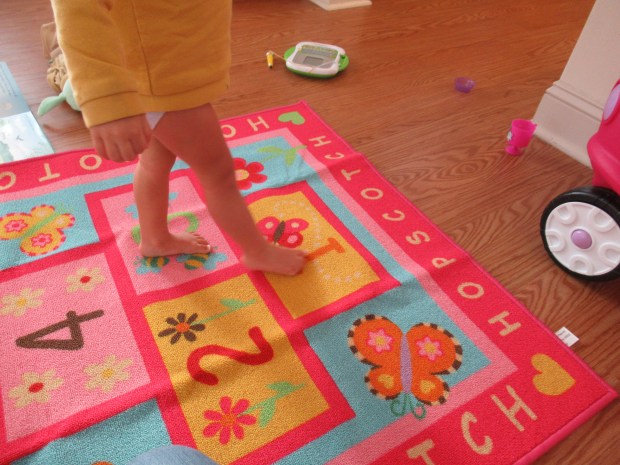
I recently purchased a new rug for the playroom featuring a hopscotch board. I can envision so many ways we’ll use this in the future, including obviously as an indoor hopscotch mat. But as Veronika was playing with blocks today, I realized the mat will also be great for teaching numbers and counting practice with my toddler!

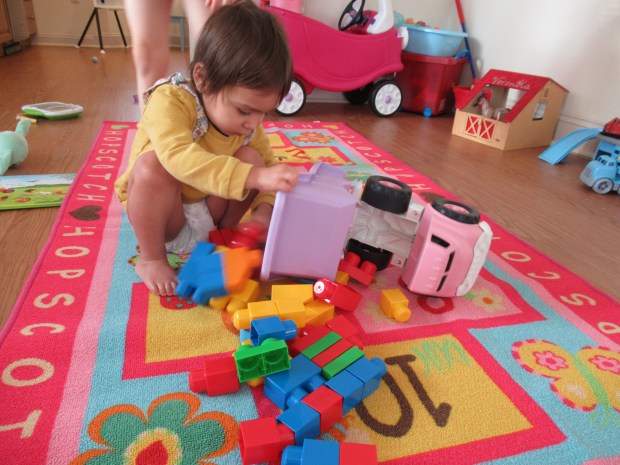
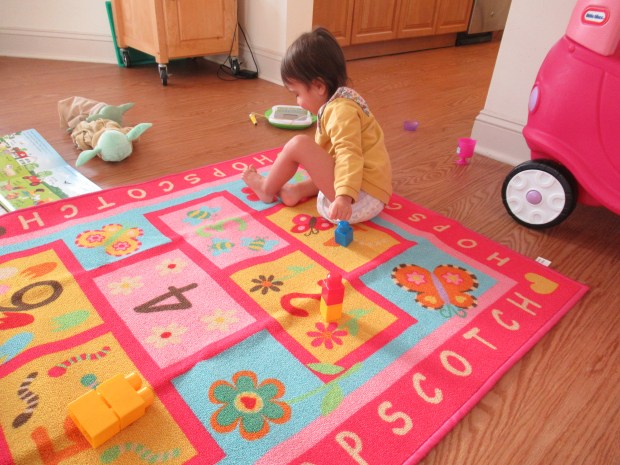
We’ve used her dump truck to clean up blocks before; now it was time to use the truck to bring them out for play. I ferried the blocks from where she’d been playing with them in the living room and she loved dumping them out atop the hopscotch rug.

Counting BLock Towers (1)

Once we had enough blocks, I sat down with her at the beginning, next to number 1.

Counting BLock Towers (2)

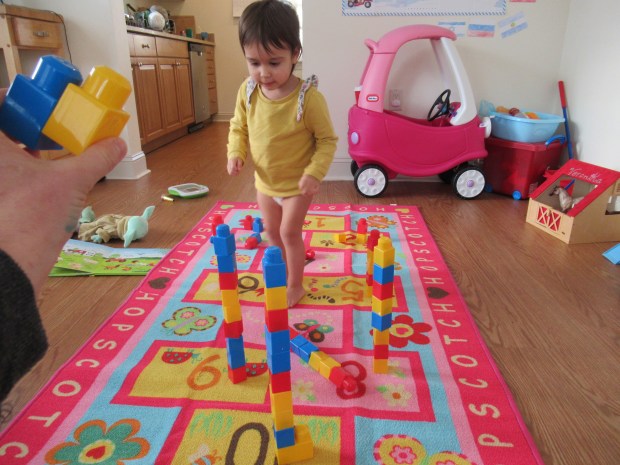
For each number, I named it and pointed to the symbol, and then built a block tower with the corresponding number of blocks. This was fun for her to watch because…

Counting BLock Towers (3)

…the towers kept getting taller!

Counting BLock Towers (4)

At first she helped build. Then she lost interest and wanted to play her own way with the blocks, which was fine. I kept naming the numbers and counting each tower of blocks out loud, knowing she was listening and absorbing.

Counting BLock Towers (5)

As I neared the end with the towering skyscrapers of 8, 9, and 10, she suddenly was mesmerized.

Counting BLock Towers (7)

As soon as 10 was finished, she trotted over and my baby Godzilla knocked down the whole block city!

Counting BLock Towers (8)

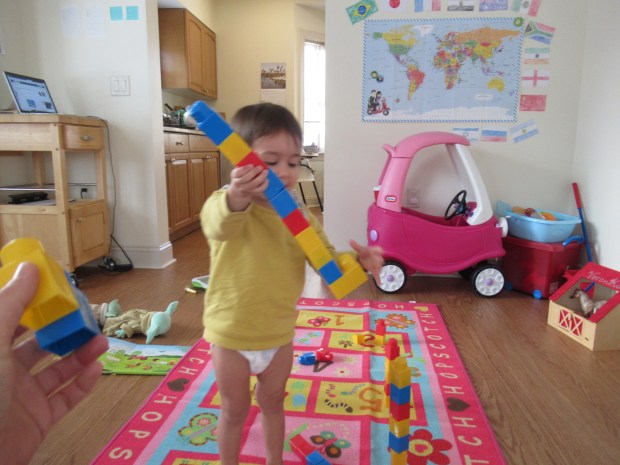
This was a great way to introduce the notion that numbers get successively bigger as you count up 1 through 10. We’ll be building on our hopscotch mat again soon!

DIY Cups for Color Sorting

DIY Color Cups (7)

Save up your empty non-dairy yogurt containers for a few days, and then you’ll have all the materials needed to make a color sorting game for your toddler!

I decided to stick with just three colors today (choosing the primary colors of blue, yellow, and red), instead of overwhelming Veronika with the full rainbow. It started out with some messy painting play, first painting each clean empty container with one color. Let dry completely.

DIY Color Cups (2)

Once the containers were dry, they were ready for color sorting! We used a set of colored dominoes for this game, and Veronika could readily fill each one with the corresponding color domino. If you don’t have dominoes, try other small objects like pom poms or beads.

DIY Color Cups (6)

But here’s the twist to this game; after the first round of proper sorting, we made it silly! I mixed up all the dominoes into the wrong colored cups, and challenged her to sort them back to where they belonged.

DIY Color Cups (9)

She caught onto the humor of it, and laughed as she dumped the dominoes back and forth for a while, giggling that they were “trash”.

DIY Color Cups (10)

Your toddler will end up with a big pile and can sort things back into their proper places once more.

DIY Color Cups (4)

Rainbow Toy Scavenger Hunt

Rainbow Toy Scavenger Hunt (4)

Here’s a great color lesson for toddlers that’s interactive and hands-on!

To start, I drew a rainbow with markers on the biggest piece of paper available, in this case an old paper grocery bag that I opened up to lie flat. Ideally I would have made the rainbow even bigger on poster board or butcher paper, but the grocery bag worked in a pinch. This was a fun chance for a little art side-by-side, since Veronika wanted to color, too.

Rainbow Toy Scavenger Hunt (1)

Once the rainbow was complete, it was time to make it 3-D! I curated this activity slightly for Veronika since she’s so young, gathering a variety of toys in easy-to-spot solid colors, and placing them in piles near the rainbow. These included blocks, toy cars, dominoes, plastics fruits and veggies, and bean bags.

Rainbow Toy Scavenger Hunt (2)

Now I asked Veronika to help me fill in the rainbow! She quite quickly grasped the idea, reaching to put items on the line of the same color. Our bumpy rainbow quickly took shape.

Rainbow Toy Scavenger Hunt (5)

Even better, the completed rainbow is likely to invite your child to play solo for some time after, since all those toys are now right at hand!

Rainbow Toy Scavenger Hunt (6)

Older toddlers and preschoolers can make this more of a true hunt, and trot all about the house looking for one color at a time before lining up the items they’ve found on the rainbow lines. But even this sit-down “hunt” was great for my two year old!

Rainbow Toy Scavenger Hunt (3)

Beginner Object Line Tracing

Object Line Tracing (5)

Here’s a neat hack that allows a toddler to practice following lines like tracing, but which doesn’t require holding a pencil or marker: “Trace” with objects instead!

Great first letters for toddlers are always their name, since this is often the first world they’ll have to write. I like to use Veronika’s nickname so she’s not overwhelmed too many letters, so I spelled out V-I-K-A in blue painter’s tape.

Object Line Tracing (1)

Next, I showed her how to arrange our set of colored dominoes along these lines.

Object Line Tracing (6)

She caught on quickly, and although her focus often wandered (she was very interested in talking about the colors of the dominoes, too), she was easily redirected to the task and followed along as I helped her fill in all the letters.

Object Line Tracing (4)

This was a great chance to say the name of each letter, too, and the sound it makes. The giant size of the tape letters definitely invited interaction! She loved standing in the empty space of the V…

Object Line Tracing (7)

…or walking along the lines of the A. In fact, you could encourage your toddler to trace the letters with his or her feet!

Object Line Tracing (8)

Just to gauge where she’s at with pen control, I did give her a marker at the end of our play to see if she wanted to follow the big lines of tape with it. She preferred drawing small circles or loops on the tape instead, so we’re not quite there yet!

Object Line Tracing (10)

Seek and Find Shapes Water Activity

Seek and Find Shapes Water (4)

Toddlers always love the chance for a little splashy water play, and here’s a way to combine that with shape review!

To start, I used marker to draw a few shapes on a regular piece of white paper. I also labeled them for early sight words, although Veronika is a ways off from understanding that.

Seek and Find Shapes Water (1)

Place this piece of paper under any clear baking dish. Ideally use a large casserole dish, but even my smaller cake pan worked in a pinch. Fill the clear dish with a shallow layer of water. If your child wants colored water, go ahead and add a few drops of food coloring! But Veronika wanted to leave it clear.

Seek and Find Shapes Water (2)

Now, simply call out the name of a shape and your child can pinpoint it under the water! If you’re using a large dish, you could have a clear cup on top that your child moves from shape to shape. That wouldn’t fit in the cake pan, so Veronika used a shiny pipe cleaner as a pointer instead.

Seek and Find Shapes Water (3)

She aced this test in moments.

Seek and Find Shapes Water (5)

Even once we quickly ran through the shapes, she had so much fun looking at the shapes and swirling around the pipe cleaner for a while. Because as mentioned, toddlers always love water play!

Seek and Find Shapes Water (6)

Touch and Feel Shapes Board

Touch and Feel Shapes (1)

Veronika loves the bumpy feel of hot glue, so when I spotted this fun, tactile way to help a toddler learn shapes, I knew we had to try it!

Ideally I would have liked to make the shape outlines on sturdy poster board, but construction paper worked fine in a pinch. Using hot glue, make the outlines of as many shapes as you can fit on your piece of paper.

Of course the wonder of hot glue is how quickly it sets and cools, so within moments, I set this down in front of Veronika to explore.

Touch and Feel Shapes (2)

She immediately started shouting out the names of the shapes she saw. I showed her how to run her fingers around the bumpy lines of each, and she delighted in the feel. Without knowing it, this can be your toddler’s first introduction to tracing, which itself is the precursor to someday drawing shapes with a pencil!

There was lots more we could do with this little piece of paper. Veronika liked filling in the outlines with dried beans since the bumpy hot glue made little “containers”. If your child is learning to count, you can also count out the beans as you add them!

Touch and Feel Shapes (4)

Next we placed a piece of white paper on top and I showed Veronika how to make shape rubbings.

Touch and Feel Shapes (5)

She wasn’t very interested in that activity, but did like using a marker to color directly in the lines of each shape.

Touch and Feel Shapes (6)

Overall, this was a simple activity that’s easy to set up and extend in multiple ways.

Sorting Blocks by Shape and Color

Stacking by Color and Shape (6)

Veronika received a set of foam blocks over the holidays that came with picture patterns to follow and fill in. The activity is still advanced for her at age 2, but today we found other ways she can play with the set!

First, we divided the foam pieces into big piles by color.

Stacking by Color and Shape (1)

I started the piles so she would understand what we were up to, and then she was a happy helper.

Stacking by Color and Shape (2)

Sorting these foam pieces by shape was harder because they come in so many different varieties. When I saw that she seemed confused, I winnowed our piles down to a manageable amount, including squares, triangles,  semi-circles, diamonds, and circles.

Stacking by Color and Shape (7)

Now she could help sort by shape!

Stacking by Color and Shape (5)

It was fun to make a big pile of each kind. Your child might even want to make designs or patterns, once the sorting is through.

Stacking by Color and Shape (3)

If you don’t have foam pieces like this, you could easily do this game with blocks that come in a variety of colors and shapes.

Move & Learn Shapes with a Ball + Tape

Move and Learn Shapes (2)

I’ve combined shape learning with gross motor skills before, but this was a great twist on the activity. Veronika has added a few new shapes to her repertoire, and she’s also been interested in learning all the various ways that she can move a ball lately (kicking, bouncing, rolling). This activity combined both beautifully!

On the floor, I first made giant shapes with masking tape, adding one of each she knows so far (minus the circle, which is tricky to make out of tape!). We ended up with: square, rectangle, triangle, star, pentagon, and hexagon.

Move and Learn Shapes (1)

I handed her a bouncy ball and let the game begin! From here, simply give your toddler instructions for both how to move the ball and which shape to move it to.

Move and Learn Shapes (8)

“Bounce the ball to the triangle!” I told her. Or, “Kick the ball to the star.”

Move and Learn Shapes (7)

Sometimes I let her pick a shape, and simply let her get the ball there anyway she wanted. But she had to tell me the shape each time!

Move and Learn Shapes (5)

This was great for shape review, and I loved that it got her thinking more about kicking and tossing the ball, since her fall-back has usually been bouncing.

Move and Learn Shapes (4)

Magic Letter Learning

Magic Letter Learning (5)

This game can be tailored for toddlers who are just starting to recognize letters, preschoolers who know them well, or even big kids who are reading early sight words!

To start, write out the alphabet (or the above-mentioned sight words) with white crayon on a white piece of paper.

Magic Letter Learning (1)

Now to reveal the letters magically, I gave Veronika a cup of water and we stirred in a little red food coloring. She curiously brushed this magical mixture over the paper. At first she thought we were just painting, but she gave a little squeal of delight when she realized the white crayon showed up like a secret code.

Magic Letter Learning (4)

As her “paint” revealed each letter, I told her the name of it. Once the full alphabet was uncovered, we sang through the Alphabet Song together! That made this a great lesson for a toddler just starting to realize that each letter shape has a name attached to it. As mentioned, though, you can make this more like a hunt for preschoolers who know their letter names and have them shout out each one as they paint over it.

Magic Letter Learning (6)

In sum, this was quick and simple letter learning for a rainy morning.

Learning Letters Lineup to Squirt

Learning Letter Squirt (11)

I’ve noticed Veronika singing the alphabet to herself a lot lately, and she’s starting to identify a few of the letters correctly by name. This little game seemed like a fun next step to test her letter knowledge. After all, what toddler doesn’t love to squirt things with water?

Ideally, I would have done this activity on a chalkboard so it could be repeated, but I don’t own one large enough. Instead, I wrote out the alphabet in white crayon on a thick piece of black poster board. I then set out a tray with the magnet letters from our fridge and handed her the first one as a test.

Learning Letter Squirt (3)

“What letter is it?” I asked her. She correctly identified V, and then I asked if she could find the corresponding V on the poster board.

Learning Letter Squirt (2)

Once she matched each magnet letter to crayon letter, I told her she could spritz her target. Whoa, permission to spritz! She immediately loved this game.

Learning Letter Squirt (10)

It was eye opening to see which letters she knows (m, v, and i are early ones), and which ones she wasn’t sure (s, r).

Learning Letter Squirt (4)

Either way, she could always pair a magnet to its corresponding crayon shape even if she didn’t know the letter’s name, simply by matching them, and much more quickly than I would have guessed!

Learning Letter Squirt (6)

And then came the fun chance to squirt.

Learning Letter Squirt (9)

This was a great set-up to leave out for her all afternoon, as she happily mixed and matched the magnets or scribbled some more on the “chalkboard”.

Learning Letter Squirt (5)