Halloween Countdown Day 3: Jack O’ Paper Plates

Halloween 3 Cute Paper Plates (4)

We kept our Halloween countdown simple with a classic today, since it was a busy Saturday. But we knew we wanted to fit in at least some Halloween fun!

So grab white paper plates and any orange coloring supplies, and turn those plates into pumpkins.

Halloween 3 Cute Paper Plates (1)

I used marker, while Veronika preferred orange crayon.

Halloween 3 Cute Paper Plates (2)

Next I cut facial features from black construction paper. Older siblings can help with the cutting and little ones will no doubt want to help glue the shapes on with a glue stick.

I kept our pumpkins friendly looking so they weren’t scary, but certainly feel free to make them spooky if your kids are older.

Halloween 3 Cute Paper Plates (3)

They look perfect over a doorway in our house. Boo!

Halloween 3 Cute Paper Plates (5)

Halloween Countdown Day 2: Spider Web Stroll

Spider Web Walk (1)

Now that our kitchen is nice and spooky, it was time to continue our countdown to Halloween with a hunt for outdoor spookiness!

Veronika has a love-hate relationship with spiders; she’s clearly a little fearful of them, but also drawn to looking at them, particularly one that lives in our kitchen window.

Spider Web Walk (5)

That tension is probably why spiders are the perfect just-scary-enough Halloween decoration for little kids. There’s a fear factor, but you can also show your child that there’s nothing to really fear. To help, go on a spider web walk!

As we strolled around our neighborhood, we kept our eyes open for pretty webs. You can demystify spiders for your toddler by looking up close, and finding webs that are close to a perfect circle.

Spider Web Walk (2)

Bonus points for any you find with dew drops or a spider in it! But for all that, Veronika prefers the fake spiders strung up on our bushes, which is just fine too.

Spider Web Walk (3)

Halloween Countdown Day 1: Scream Halloween in the Kitchen

Halloween 1 Decorate Kitchen (5)

The kids won’t be trick-or-treating this year, no thanks to coronavirus, but there is still so much we can do to make Halloween feel special. In fact, knowing things won’t culminate in a neighborhood trick-or-treat, I find myself determined to make this the best Halloween yet.

To wit, we started a Halloween Countdown today, and will continue to add a “spooky” activity each day between now and the 31st. So follow along for dozens of ways to make your kids’ Halloween full of haunted magic.

Today’s activity was really just to get into the Halloween spirit (heh) of course, and that meant going Halloween crazy in our kitchen. We kept most of these decorations fairly simple, the most complicated being spider web window clings.

I knew Veronika would be excited when I dumped out a big bag of Halloween supplies. But I hadn’t anticipated how thrilled Travis would be, too!

Halloween 1 Decorate Kitchen (2)

Immediately, he began using markers to make faces on felt ghost shapes and foam pumpkin shapes and Veronika joined in.

Halloween 1 Decorate Kitchen (3)

I had Halloween stampers from the drugstore and the kids used these to stamp all over some of the foam pumpkins.

Halloween 1 Decorate Kitchen (1)

A line of skeleton stickers soon marched across our kitchen cabinets.

Halloween 1 Decorate Kitchen (4)

We added a fake spiderweb above the kitchen table, dotted with spider rings from last year.

Halloween 1 Decorate Kitchen(7)

Halloween stickers were fun to put all over orange and black construction paper and then tape to the wall. I also had Halloween cupcake liners which made quick window decorations.

Halloween 1 Decorate Kitchen (6)

And the ghosts were soon haunting the doorway.

Halloween 1 Decorate Kitchen (11)

I had intended to only decorate the kitchen, but Travis insisted we continue outside. So soon we had a bush covered with webs and spiders.

Halloween 1 Decorate Kitchen (9)

And some fearsome faces on the front door!

Halloween 1 Decorate Kitchen (13)

So here’s to kicking off what is surely going to be a very different but very awesome Halloween. Please add your suggestions in the comments for making this year extra spook-tacular!

Halloween 1 Decorate Kitchen (12)

Halloween Shaving Cream Sensory Activity

Halloween Shaving Cream (6)

To get in the mood for all things orange this month, I turned the color into a sensory experience for Veronika today!

To start, I filled a shallow tray with a thick layer of foamy shaving cream. You can use orange food coloring for the next step, but I preferred to drizzle on some red and some yellow.

Halloween Shaving Cream (5)

This way, Veronika could see it “magically” turn orange as we mixed it all together.

Halloween Shaving Cream (3)

She wasn’t hesitant about getting her hands in it, but she quickly decided she didn’t like being goopy.

Halloween Shaving Cream (4)

Instead, I passed over a paintbrush. Now, she loved stirring through! So we pulled out orange and black construction paper and soon she was smearing the pages with the mixture. To make it more like puffy paint, add a little glue and stir to combine.

Halloween Shaving Cream (7)

As a final messy element (since, heck, we were already a mess!), sprinkle a little glitter on before the puffy paint dries. Once dry, scrape off any excess shaving cream.

Halloween Shaving Cream (8)

This is great way to have Halloween-themed sensory play with one- and two-year-olds, even before they’re old enough to understand the holiday!

Mansion of Mystery

Cardboard Haunted House (10)

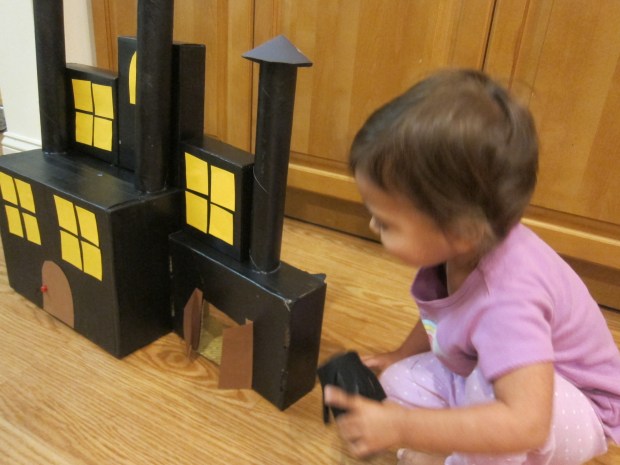
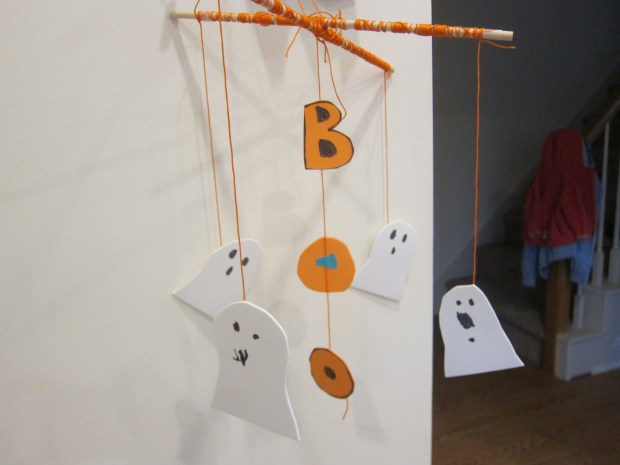
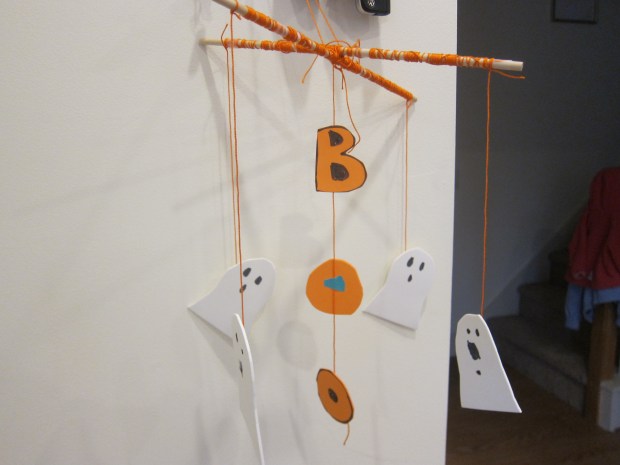
We’re kicking off Halloween with a big BOO around here! This project is definitely a complicated one, but so worth the effort when your kids see not just a dollhouse but a haunted dollhouse… that includes its very own witch!

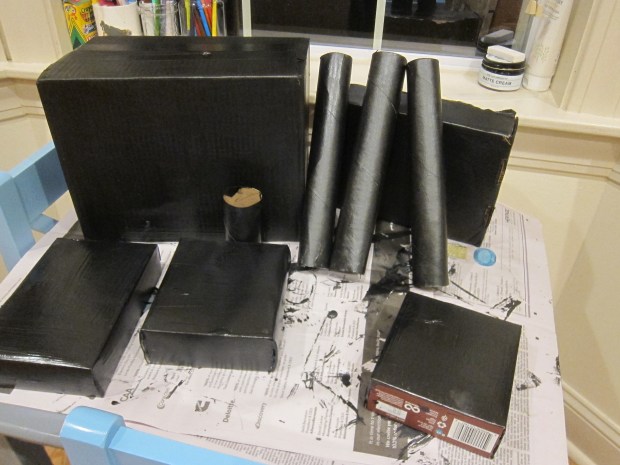
To assemble the house, start collecting cardboard boxes, empty paper towel tubes, and empty toilet paper rolls, and wait until you have a good assortment. Paint all of the cardboard pieces with black acrylic paint and let dry. I recommend two coats of paint for maximum spookiness.

Cardboard Haunted House (1)

The next day, I mixed and matched the boxes and tubes until I liked the arrangement, and then used hot glue to attach everything together.

Cardboard Haunted House (2)

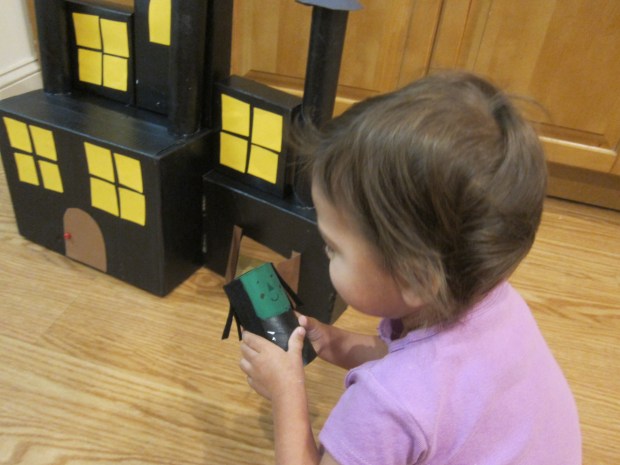
On the third day, I added adornments. Cut squares of yellow construction paper to be window panes and arrange in groups of 4 around your boxes. I also had one arched window for added spookiness.

Cardboard Haunted House (4)

For tower tops, cut circles from black construction paper and cut one notch in toward the center of each, then fold into cones and use tape or glue to attach atop each paper towel tube

For doors, cut shapes from brown construction paper, either rectangular or arched. One door couldn’t actually open, and had a red bead glued on as a handle.

Cardboard Haunted House (5)

Because Travis requested we actually be able to put figures inside the house, I cut one box so it was open in the back and added doors that could swing open and closed.

Cardboard Haunted House (8)

You can get a lot crazier with decoration, using construction paper for a fence or shutters, or adding additional boxes cut on the diagonal for a roof. But I reined in the haunted-housiness there.

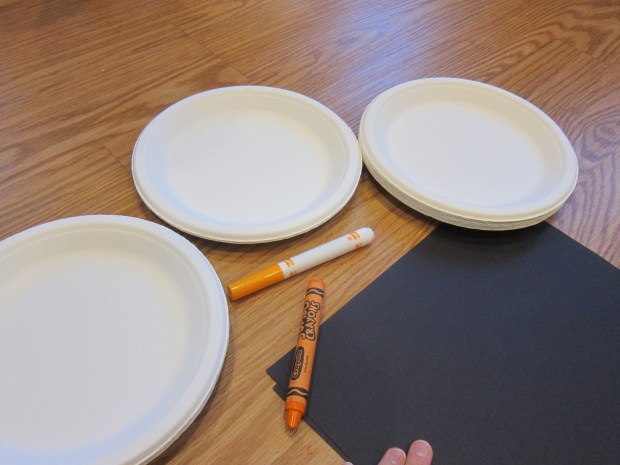
All we needed now was a witch! Paint a toilet paper tube black. Once completely dry, paint a green square on the top for the face. You’ll need several coats of green to hide the black. Cut a rectangle from black felt and fringe the bottom with scissors, then glue on for hair.

Cardboard Haunted House (7)

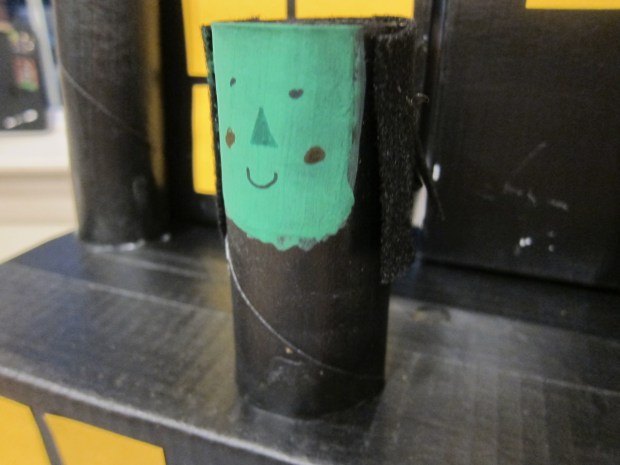
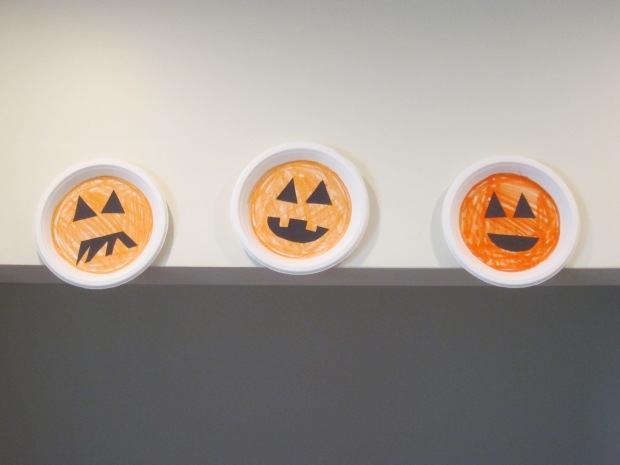
Add facial details with marker. So as not to spook the kids, we had a happy witch.

Cardboard Haunted House (11)

You can make a whole witch family if you have enough cardboard tubes. Want to get really crafty? Add brooms! Just glue fringed brown construction paper around the bottom of a short stick.

Needless to say, I think the kids will find ways to play with this house all October.

Cardboard Haunted House (12)

Not-So-Spooky Spider Handprint Window Cling

Not Creepy Spider (7)

It’s October which means it’s officially time for all things spooky! For this particular decoration, we started the night before to give the paint time to dry. In the morning, we then could quickly assemble a few spiders in the window.

Tape a piece of contact paper onto a table, with the backing still on. Paint your child’s hand with black washable paint, making sure to paint only the palm and 4 fingers, but not the thumb.

Not Creepy Spider (2)

Press onto the contact paper, then immediately repaint the hand and press again so the palms overlap and the 4 fingers stick out in the opposite direction. An 8-legged spider!

Not Creepy Spider (3)

Veronika loves getting paint all over hands, so I didn’t have to sell her on this project one bit. We made two baby spiders and then she giggled as I painted my own hand for a mommy spider. We invited big brother Travis to contribute a medium spider, but he didn’t want his hand painted.

Not Creepy Spider (4)

Once the paint dried, we added wiggle eyes for decoration. You can add smiles or other accessories to your spiders, too, if desired!

Not Creepy Spider (5)

For the web, use white glue to create a web design in the corner of a windowpane. The internet tells me that this will peel off easily when the time comes, and I sure hope so!

Not Creepy Spider (8)

In the meantime, peel the backing off the contact paper spiders, and simply stick to the window. They look just spooky enough up there.

Not Creepy Spider (6)

Black Bean Indoor Sandbox

Black Bean Sandbox (1)

Perhaps I should have held off on this particular indoor sandbox for a couple of days until October is officially here. But when I spotted my bulk bag of dried black beans, the color instantly made me think of all the Halloween decor I just stocked up on. So it was a spooky indoor sandbox a few days early!

I poured the beans into a shallow tray and added a few Halloween items that lent themselves well to sensory play. These included cupcake liners (with spiderweb and black-and-orange print designs), as well as felt skeleton figures.

Black Bean Sandbox (2)

First her attention went to the little skeletons, and she loved putting them in the cupcake liners, or burying them under the beans and then digging them back up again (spooky!).

Black Bean Sandbox (5)

She could also use the cupcake liners for scooping and pouring, which was great for fine motor skills.

Black Bean Sandbox (3)

She spent quite some time transferring beans back and forth this way.

Black Bean Sandbox (4)

I had planned just to let her use her hands, but she requested a spoon to scoop through, too.

Black Bean Sandbox (7)

Then to my surprise, she first sat in the beans…

Black Bean Sandbox (8)

…and then stood right up in them! This gave her the giggles.

Black Bean Sandbox (9)

In sum, the bin was a great one for keeping her busy and for introducing the upcoming holiday!

Black Bean Sandbox (6)

Gallant Challenge: Candy Drive

Candy Drive (4)

After reading  this month’s Gallant challenge in Highlights magazine, about a girl who started a candy collection after Halloween to benefit military veterans, Travis knew he wanted to get involved with Treats for Troops!

Luckily we didn’t have to reinvent the wheel; his school already has a collection bin each year. But I was so proud of Travis, parting with candy with zero protest and in fact so excited at the idea that the candy would go to soldiers.

We always have a surplus since many candies he receives knocking door-to-door aren’t vegan. We also had tons extra from our own bowl, since a rainy night meant not too many trick-or-treaters stopped by.

Candy Drive (1)

Travis parted with surplus peanut butter cups and lollipops, saving just enough to still have treats at home in the coming days.

Candy Drive (3)

This is such a win-win; your children get to enjoy the spirit of sharing and you don’t have to worry about all that sugar and dental bills! In fact, many dentists’ offices have collection bins after Halloween, so check with your provider!

Candy Drive (6)

Here he is proudly dumping the candy in the bin, his gallant moment.

Candy Drive (5)

Do you donate candy after Halloween? Please share in the comments!

Monster Balloon Decorating

Halloween Balloon (8)

Blow up these “monsters” to decorate the house on the eve of Halloween! The LED lights should last about 48 hours.

Halloween Balloon (1)

Travis was thrilled with the little balloon lights (you can find these at party stores). Turn one on and slip into an uninflated balloon, then blow up.

Halloween Balloon (3)

I had pre-cut a few monster features for Travis on sticky-back black craft foam. As an alternative, you can make mouths, eyes, and noses on black cardstock and use a glue stick to attach to the balloons. But we found that the sticky backing made things very easy!

Halloween Balloon (4)

Our monsters were wiggly and wobbly as we decorated them; it was ultimately easier to hold them between my legs than to tape them onto a table, which we had tried first.

Halloween Balloon (7)

The darker it gets, the more your monsters glow!

Halloween Balloon (6)

Travis loved having these creatures around to set the mood for Halloween.

Halloween Balloon (9)

Boo Mobile

Boo Mobile (5).JPG

The spooky decor continues! On the heels of eerie snack cups, Travis helped make a mobile to hang in the house this Halloween.

First, wrap 2 dowels in orange. Thick yarn would have made quicker work of this step but since I only had orange needlepoint thread, so I was proud of Travis sticking with it.

Boo Mobile (1)

Secure the thread with tape. Tie the two dowels crosswise to each other with more thread.

Boo Mobile (2)

For decorations, we cut simple ghost shapes from white craft foam. Travis loved adding their spooky faces, including one with “fangs”.

Boo Mobile (3)

I also cut the letters B-O-O from orange craft foam. Attach these decorations to more thread with tape, and tie each thread to one end of the dowels. Hang with a final piece of thread, whether in black or orange.

Boo Mobile (4)

Boo!

Boo Mobile (6)