Cookie Dough Log

Cookie Log (2)

Cookie dough is one of the easiest and earliest ways to get toddlers in the kitchen. I loved this variation on simply making cookies together, allotting Veronika her own portion of dough to play with in a log.

I kept this activity as simple as could be, whipping up a batch of chocolate chip cookies from a mix instead of from scratch. Because this only required three ingredients (the bag of mix, a stick of Earth Balance butter, and a flaxseed egg) it meant Veronika could stir it all together. She was so proud to help!

Cookie Log (1)

Once the dough came together, I divided it in half. Half was for real cookies (of course) and the other half I rolled into a log. I handed across a craft stick and she used this as a knife to “slice” the cookies.

Cookie Log (3)

And of course the stick was also useful for tasting. Then we divided the log into separate portions, and I showed her how to roll it into balls.

Cookie Log (4)

I thought she might want to play pretend bakery for a little while, but she was more interested in the real cookies that were now baking in the oven, asking when they would be done.

Cookie Log (5)

So then it was snack time!

Cookie Log (6)

Pita Faces

Eggy Faces (3)

Even young chefs will dig putting this lunch together because they can do the slicing all by themselves. The secret? Don’t hand them a knife, but a piece of dental floss instead! Make sure you’re using unwaxed and unflavored floss for this activity, or you might wind up with a mint-flavored sandwich.

First, I showed Travis how he could slice easily through a few items, if he held the string of dental floss taut enough. It slid easily through tofu…

Eggy Faces (1)

…and a wheel of Miyoko’s soft cheese!

Eggy Faces (2)

Once he had slices, I let him decide how he was going to decorate a face for lunch. We toasted a pita, then added the following:

  • circles of the cheese for eyes
  • an avocado smile
  • a cucumber slice for a nose
  • celery for eyebrows
  • shredded carrots for hair

If your family eats eggs, the dental floss trick will work on those, too, and those would make fun eyes on the pita. What else goes on your Pita Face? Please share in the comments!

Treasure-Map Pizza

Treasure Map Pizza (6)

This pizza was so fun to put together, complete with a tropical island background, an X-marks-the-spot, and golden treasure! You can prepare your edible mini maps on individual pita pockets, or do as Travis did and make a full-size pizza.

Treasure Map Pizza (1)

To start, pat pizza dough onto a pizza pan, then spread with tomato sauce, leaving a 1/2-inch crust. Sprinkle with your favorite non-dairy mozzarella.

Treasure Map Pizza (2)

Travis loved assembling a little pirate island that included the following: two bell pepper strips to mark an X for treasure; palm trees made of orange bell pepper trunks and green bell pepper fronds; mushroom rocks; olive footprints leading to the treasure; and corn kernels as nuggets of gold.

Treasure Map Pizza (4)

The kids had so much fun peaking while it baked!

Treasure Map Pizza (5)

Bubbles in the crust after baking even meant that we had some fun topography, like a little “hill” now below our X.

Treasure Map Pizza (7)

Then it was time to gobble up the treasure.

Treasure Map Pizza (8)

Ice Cream Science

Ice Cream Science (4)

Although this is pretty much a repeat of homemade ice cream that Travis shook up back in March, we had no qualms doing it again on a 95 degree day! The recipe was a fun addition to Travis’s Edible Elements kit from Raddish Kids.

For variation, we decided to make two different flavors this time, turn the project into a blind taste test, too! We poured 1/2 cup non-dairy creamer and 1 tablespoon sugar into each of two small zip-top bags. Then we added 1/4 teaspoon vanilla extract to one and 1/4 teaspoon mint extract to the second.

Ice Cream Science (1)

We placed both these small bags in a gallon-sized zip-top bag filled with 4 cups ice and 1/2 cup coarse salt. Seal and shake!

Ice Cream Science (2)

Travis took a few shakes, but then he passed it my way for some mama muscle.

Ice Cream Science (3)

Get ready, because you may need to shake for as long as 10 minutes. Luckily, by the five-minute mark, our liquid creamer had turned into ice cream. (Note: we used oat milk creamer, and we’re curious to hear if other plant-based milks take less time or more, so please share in the comments!).

During all that shaking, we talked about the science behind what was happening; because salt lowers water’s freezing point, it makes the ice melt. As the ice melts, it absorbs heat from the cream. The cream, conversely, becomes colder. And here’s the important bit: because it’s churned, not just resting still on the ice, tiny ice crystal form. These give you smooth ice cream instead of a big chunk of ice.

All that aside, now it was time for the taste test! I spooned a scoop of each flavor into Travis’s bowl, and he proudly deduced which was which.

Ice Cream Science (5)

If your child prefers, you can add other toppings, too, like sprinkles, crumbled cookies, or candy. However you flavor it, this project is sure to beat the heat.

Ice Cream Science (6)

Little Passports: South Africa

LP South Africa (17)

There was lots to like in the latest from Little Passports, all about South Africa. With an emphasis on the country’s amazing animals and safaris, there was also plenty to learn about the country’s history, crafts, archaeological significance, and natural wonders.

LP South Africa (8)

Travis enjoyed this kit’s booklet, including a color activity to learn some Afrikaans, a bit about Nelson Mandela, and a tricky safari animal count! It was all quite doable for a 6 year old, with grown-up assistance.

LP South Africa (14)

Souvenir:

This month’s package from “Sam and Sofia” included not one but two souvenirs. The first was a dehydrated washcloth in the shape of an elephant. Travis was agog with the way it expanded into a square after we placed it in a dish of warm water, and it featured a beautiful indigenous print. He seemed so touched by the gift!

LP South Africa (6)

The second souvenir was more of a craft, a basket to weave. Travis did the first round of weaving the provided raffia around the cardboard frame, though I did then jump in to help out (there was a lot of raffia!).

LP South Africa (10)

As I wound, he was fascinated to learn that many cultures still make baskets like this, and by the idea that in some places you can’t just go to a store to buy a basket. He wanted to know what these villages might look like, or how the doors and houses would look.


LP South Africa (11)

Further Activities:

There were fewer crafts suggested in the booklet and online than with previous countries we’ve explored, but Travis enjoyed learning to draw a crocodile step-by-step, a pattern activity about traditional Zulu baskets, and coloring in the country’s flag for his garland.

LP South Africa (16)

Finally, I surprised Travis with this month’s add-on: 3-D puzzles of safari animals. He not only loved piecing together the giraffe, lion, and other animals the first time through, but then wanted to take them apart and do it again.

LP South Africa (3)

And then again!

LP South Africa (4)

As a bonus, the puzzle comes with an informative book from Nat Geo kids. There was true quality to this product, an excellent add-on option from Little Passports.

LP South Africa (1)

Recipe:

Now all that was left was to explore the country with our bellies! We learned that this particular recipe is the national dish of South Africa, with regional variations throughout the country. Unfortunately, as with previous recipes from Little Passports, it wasn’t very kid-friendly either in preparation or taste (this one is spicy!).

Bobotie (1)

But Travis enjoyed helping shred the apple, and bravely gave it a taste test before deciding it had too much curry powder.

Ingredients:

  • 2 slices of bread
  • 3/4 cup plain almond milk
  • 1 tablespoon Earth Balance butter
  • 2 tablespoons canola oil
  • 1 and 1/2 cups chopped onion
  • 2 tablespoons curry powder
  • 1 tablespoon brown sugar
  • 1 teaspoon salt
  • 2 (12-ounce) packages meatless crumbles
  • 2 Ener-G eggs
  • 1 peeled and grated apple
  • 1/2 cup raisins
  • 1/4 cup blanched almonds
  • 6 bay leaves
  1. Crumble the bread into a small bowl and cover with the almond milk. Let stand for 10 minutes.
  2. Meanwhile, heat the butter and canola oil in a large skillet over medium heat. Add the onion and cook for about 5 minutes, until softened.
  3. Stir in the curry powder, brown sugar, and salt. Add the meatless crumbles into the pan, breaking apart into pieces, and cook for 5 minutes, until browned. Remove from heat and set aside.
  4. Meanwhile, remove the bread from the bowl of milk, squeezing out the excess milk. Set the bread aside, and whisk the Ener-G eggs into the milk.
  5. Add the bread crumbles, grated apple, raisins, and almonds to the skillet. Spoon the whole mixture into a 13×9-inch baking dish. Pour the milk mixture on top, and top with the bay leaves.
  6. Bake at 350 degrees F for 30 minutes.

Bobotie (2)

Fire and Flavor

Fire and Corn (2)

Travis has been exploring how to cook with different elements (air, ice) thanks to his latest Raddish Kids, and today we did a quick test: would the same ingredients taste different, if cooked using 3 different “elements”? We chose corn on the cob for the experiment and tested out the following: air (roasted in the oven), water (boiled on the stove), and fire (cooked on the grill). Unfortunately we weren’t truly using fire for the last, since I only have an indoor grill pan. But we still had interesting results!

Fire and Corn (1)

Of course first comes the fun of shucking corn. Then for “air”, roast the corn in a 400 degree F oven for about 30 minutes. Boil the “water” version for about 5 minutes in boiling water. Grill the “fire” version over your barbecue or grill pan for about 10 minutes.

Once the three methods of corn had cooked, Travis first wanted to smell them. I had never realized how different these three cooking methods smelled, but it was so apparent when they were lined up on the plate! The oven method had roasted caramel notes, the boiled one smelled sweet and fresh, and the grilled one had a toasty aroma.

Fire and Corn (4)

Once they cooled, it was time for a taste test. Travis far and away preferred the sweet tenderness of the boiled corn. Air (oven) was his second favorite. “It’s sweet and tart!” he declared.

Fire and Corn (5)

He decided he didn’t like the grilled one, which may again be the fault of the grill pan versus a real grill. Which method do your kids prefer? Please share in the comments!

Air Science

Air Science (4)

Having recently prepared a recipe reliant on air to cook (a.k.a. a recipe that needs a leavener), today Travis played around with two different kinds of leaveners to see which worked its magic faster.

In one empty water bottle, combine 1 cup warm water, 1 packet active yeast, and 1 teaspoon sugar. Put on the lid and shake, then remove the lid and place an uninflated balloon over the opening. Set a timer for 20 minutes.

Air Science (1)

Meanwhile, fill a second empty water bottle with 1/2 cup water and 1 cup white vinegar. Working quickly, add 1/4 cup baking soda. Add a balloon as fast as you can over the top of the bottle; it will immediately inflate with air.

Air Science (2)

This was fantastic fun for Travis, since the second bottle will be exploding a volcano of vinegar as you attach the balloon.

Air Science (3)

The results were immediately obvious; baking soda acts much faster than yeast. In fact, our yeast balloon took longer than the 20 minutes we had set on the timer, but after about an hour the balloon was beginning to inflate.

IMG_0001

I explained to Travis that this was part of the difference between a slow (yeast) bread and a quick bread (like banana bread), which comes together must faster. Now he understood why!

Air Science (5)

Stayed tuned for more elemental food science soon!

Moroccan Spices

Moroccan Spices (1)

This lesson was a culinary extension to the recipes in the Morocco kit from Raddish Kids. Travis got to pretend to be a spice seller at his very own bazaar! For a kindergartner, the lesson was a mix between learning and sensory play (you’ll notice my toddler was eager to leap in, too). Older kids can take the lesson more seriously, researching spice blends from around the world, grinding their own spices, and using exact proportions to create their own blend.

First up was being a scent detective! I poured eight common Moroccan spices into small cups and gave them to Travis one at a time. I labeled each cup just so I wouldn’t forget what was what!

Moroccan Spices (2)

He loved smelling each, summoning up the vocabulary to describe it, and adding tasting notes and color to the provided chart.

Moroccan Spices (8)

He knew three of them without needing to be told (cinnamon, ginger, and black pepper), and I challenged him to think of why he knew these three. He correctly realized it’s because we cook with them often, whereas the other spices were less familiar!


Moroccan Spices (3)

The lesson plan then included facts about spices, where they come from, the health benefits of spices, and information on common blends like Italian seasoning or ras el hanout.

Moroccan Spices (7)

That was all a bit over Travis’s head; instiead, it was time to create his own blend! Mostly he pretended to be a spice merchant, and there was lots of spooning onto paper plates, or pouring in and out of cups. If he gave a spice a thumbs up, we added 3 teaspoons to a glass jar. If he didn’t like it, we added only 1 teaspoon, and if he rated it a medium, we added 2 teaspoons.

In this way we ended up with:

  • 1 tablespoon ground cumin
  • 1 tablespoon ground cinnamon
  • 2 teaspoons ground cloves
  • 1 teaspoon ground turmeric
  • 1 teaspoon ground ginger
  • 1 teaspoon ground nutmeg
  • 1 teaspoon ground allspice
  • 1 teaspoon black pepper

Well, wouldn’t you know, he liked it!

Moroccan Spices (5)

We creamed 1 tablespoon spice mix into 4 tablespoons Earth Balance butter for a spread that worked nicely on homemade bread or crackers. We might try it as a dry rub on tofu, next!

Moroccan Spices (9)

A fun book to read together was My Five Senses, by Aliki. We finished with a virtual trip to a Moroccan bazaar.

Moroccan Spices (6)

Older kids can extend the lesson plan by gifting their spice blend along with a recipe, or researching how spices are grown and harvested.

Moroccan Spices (4)


Little Passports: Mexico

LP Mexico (22)

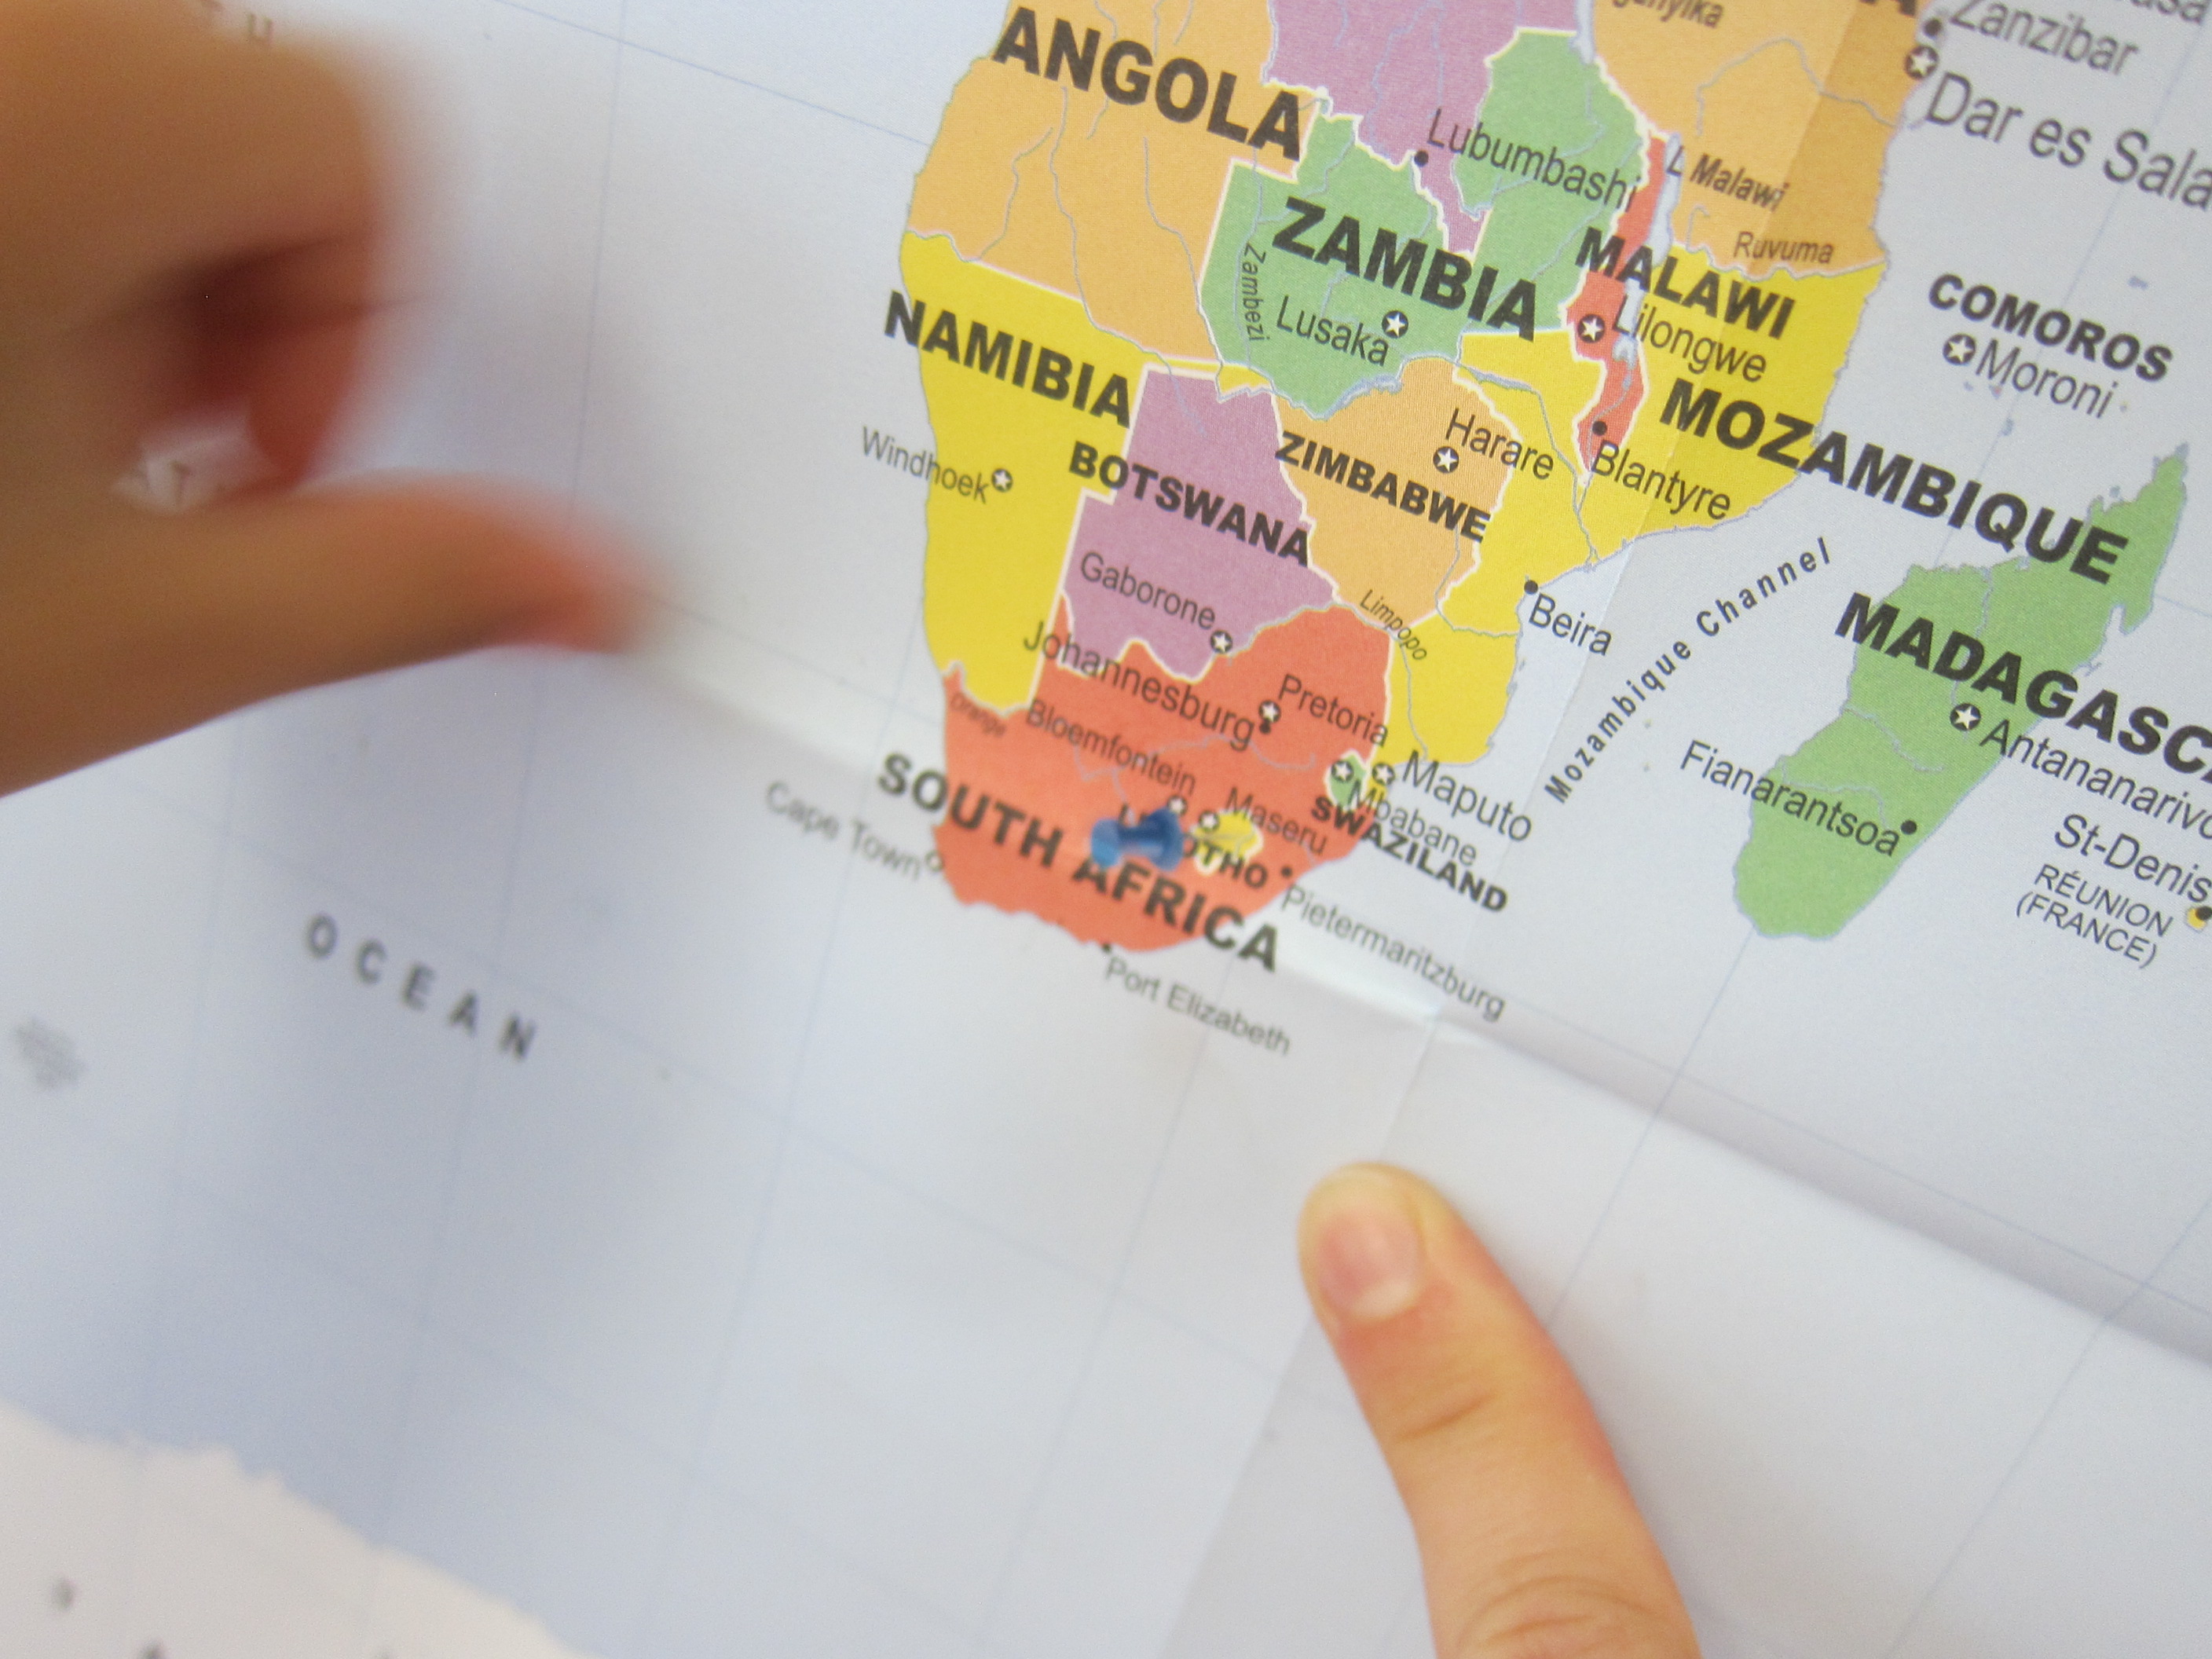
We may not be able to travel right now, but Travis journeyed to Mexico this week thanks to Little Passports! He was thrilled when the package arrived, so we wasted no time setting off on the virtual journey. He added stickers to his map, suitcase, and passport as I read him “Sam and Sofia’s” letter from the country.

LP Mexico (1)

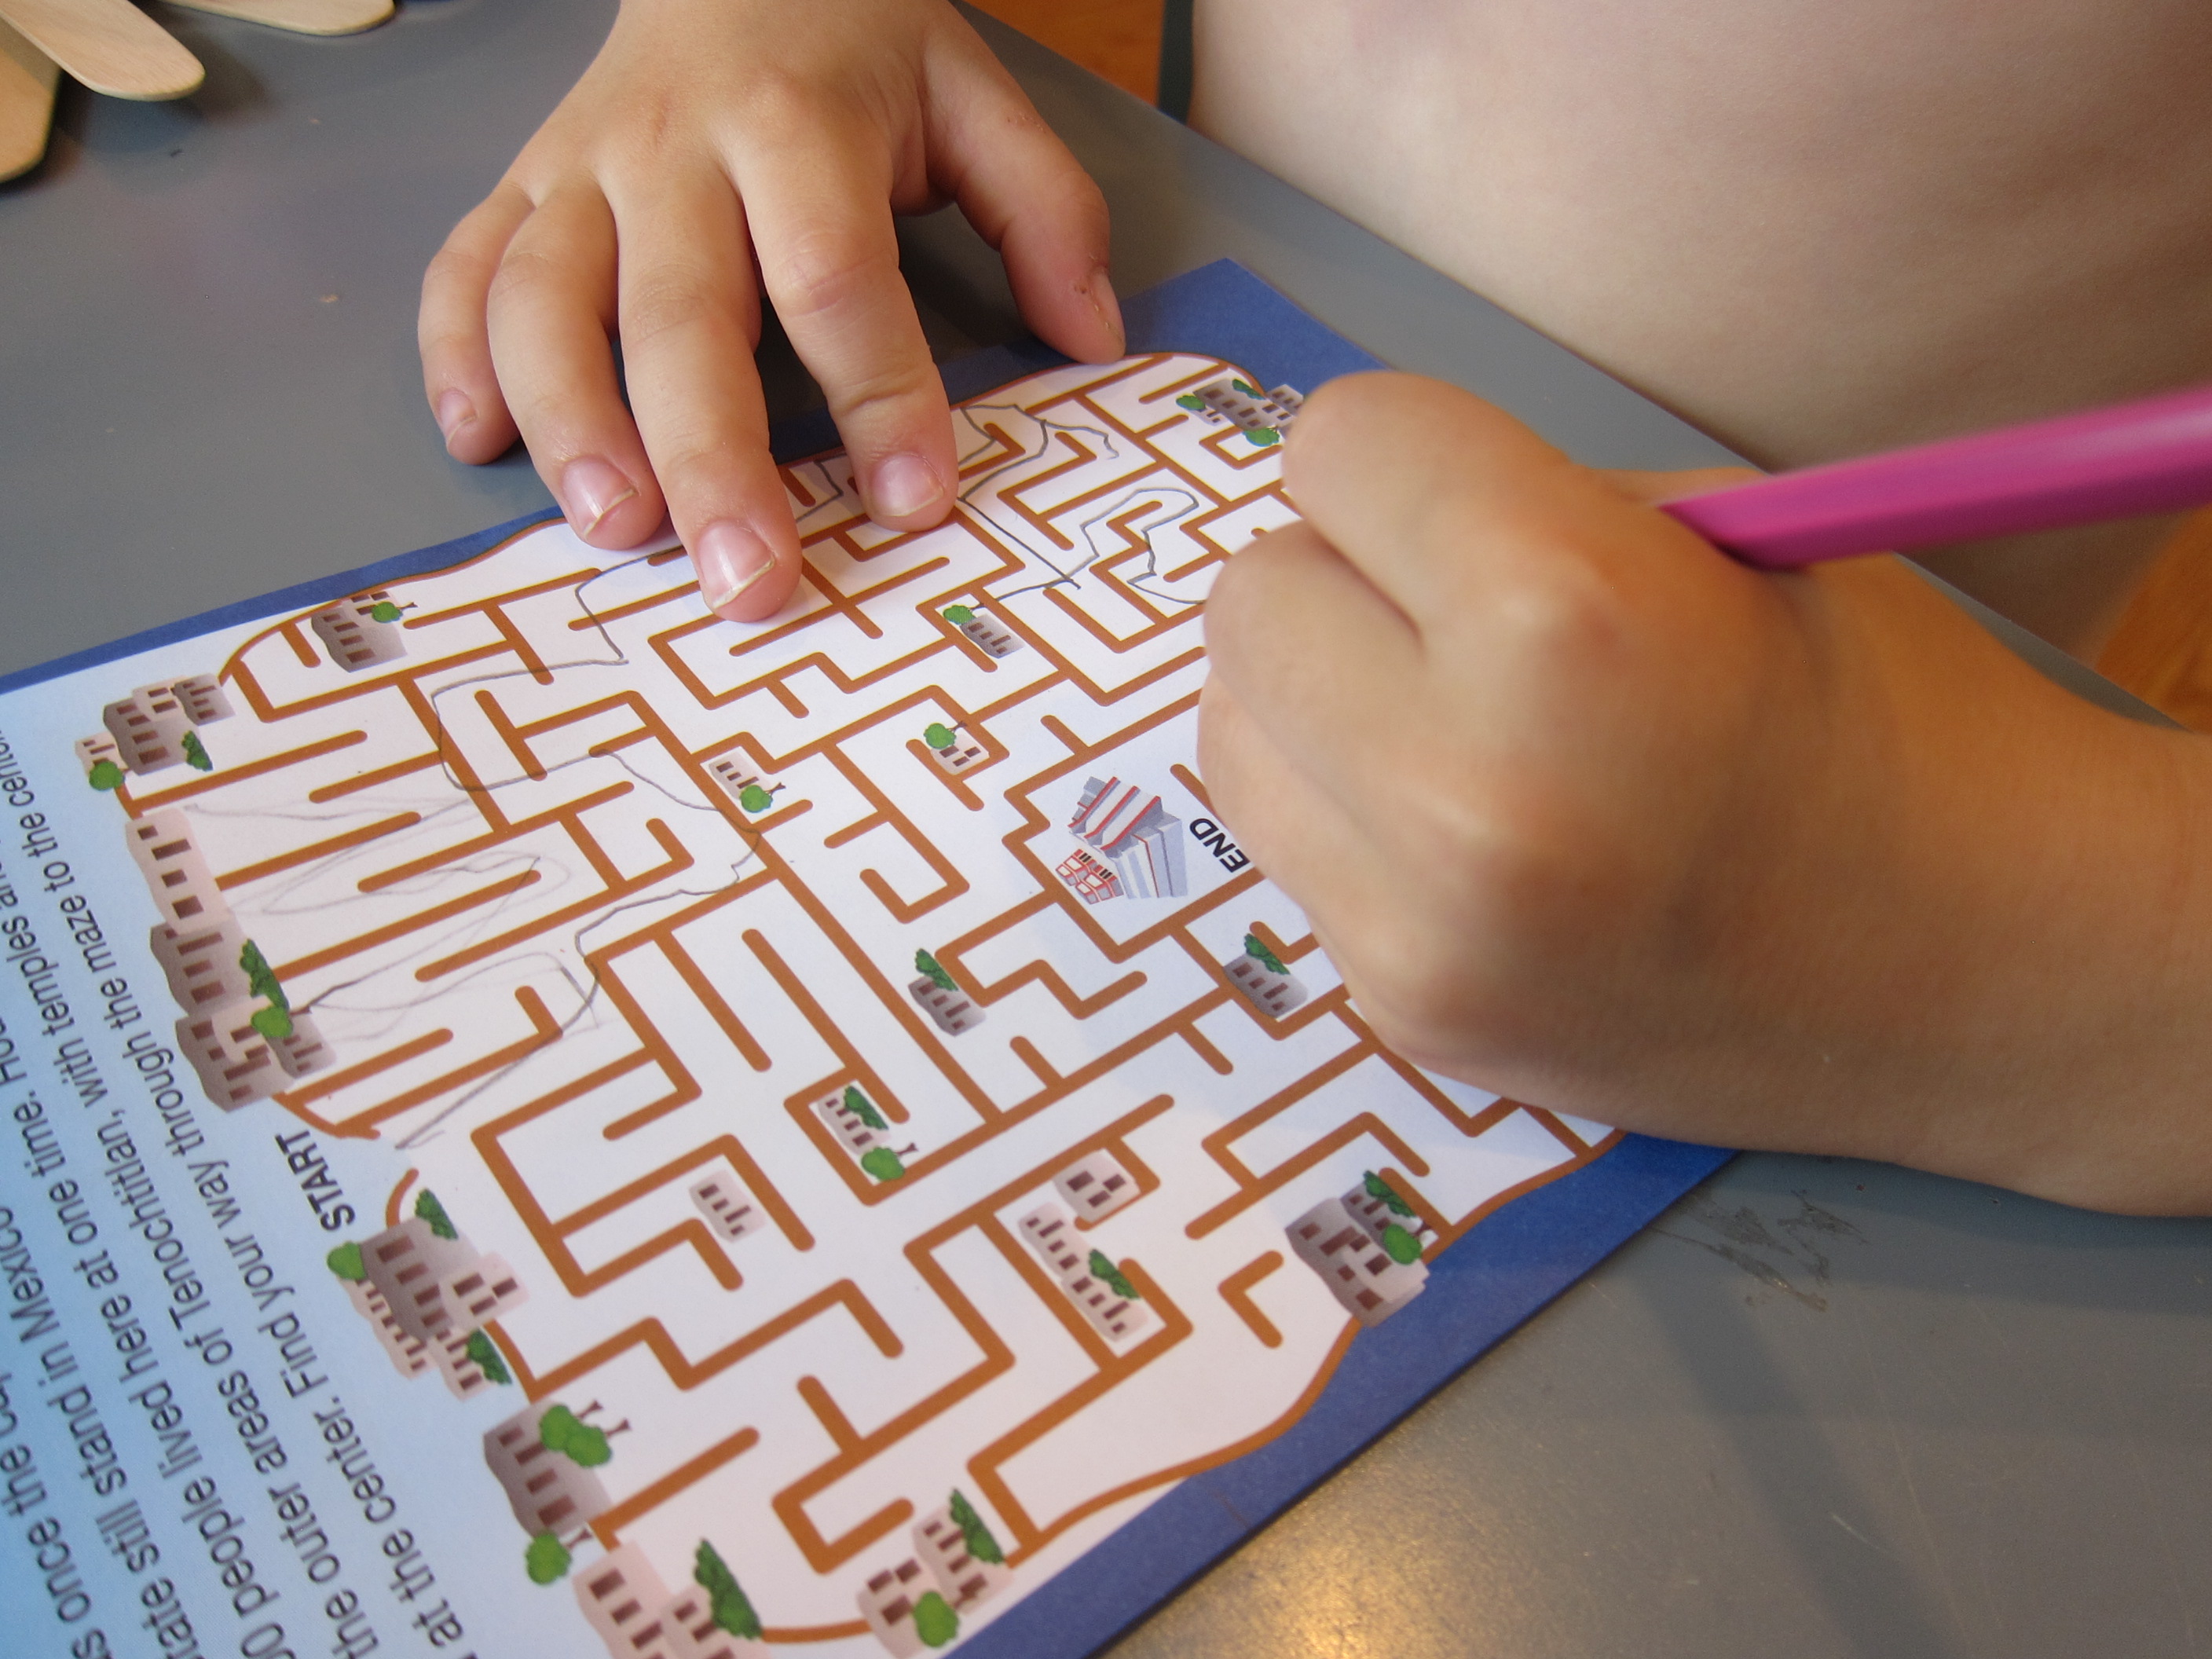
The booklet was just shy of too advanced for a kindergartner. He was proud to solve a tricky maze, and enjoyed information about Mexican animals. Online activities included learning familiar Spanish phrases and completing a tricky dot-to-dot with points 1 through 85 of a Mexican landmark.

LP Mexico (14)

Souvenir:

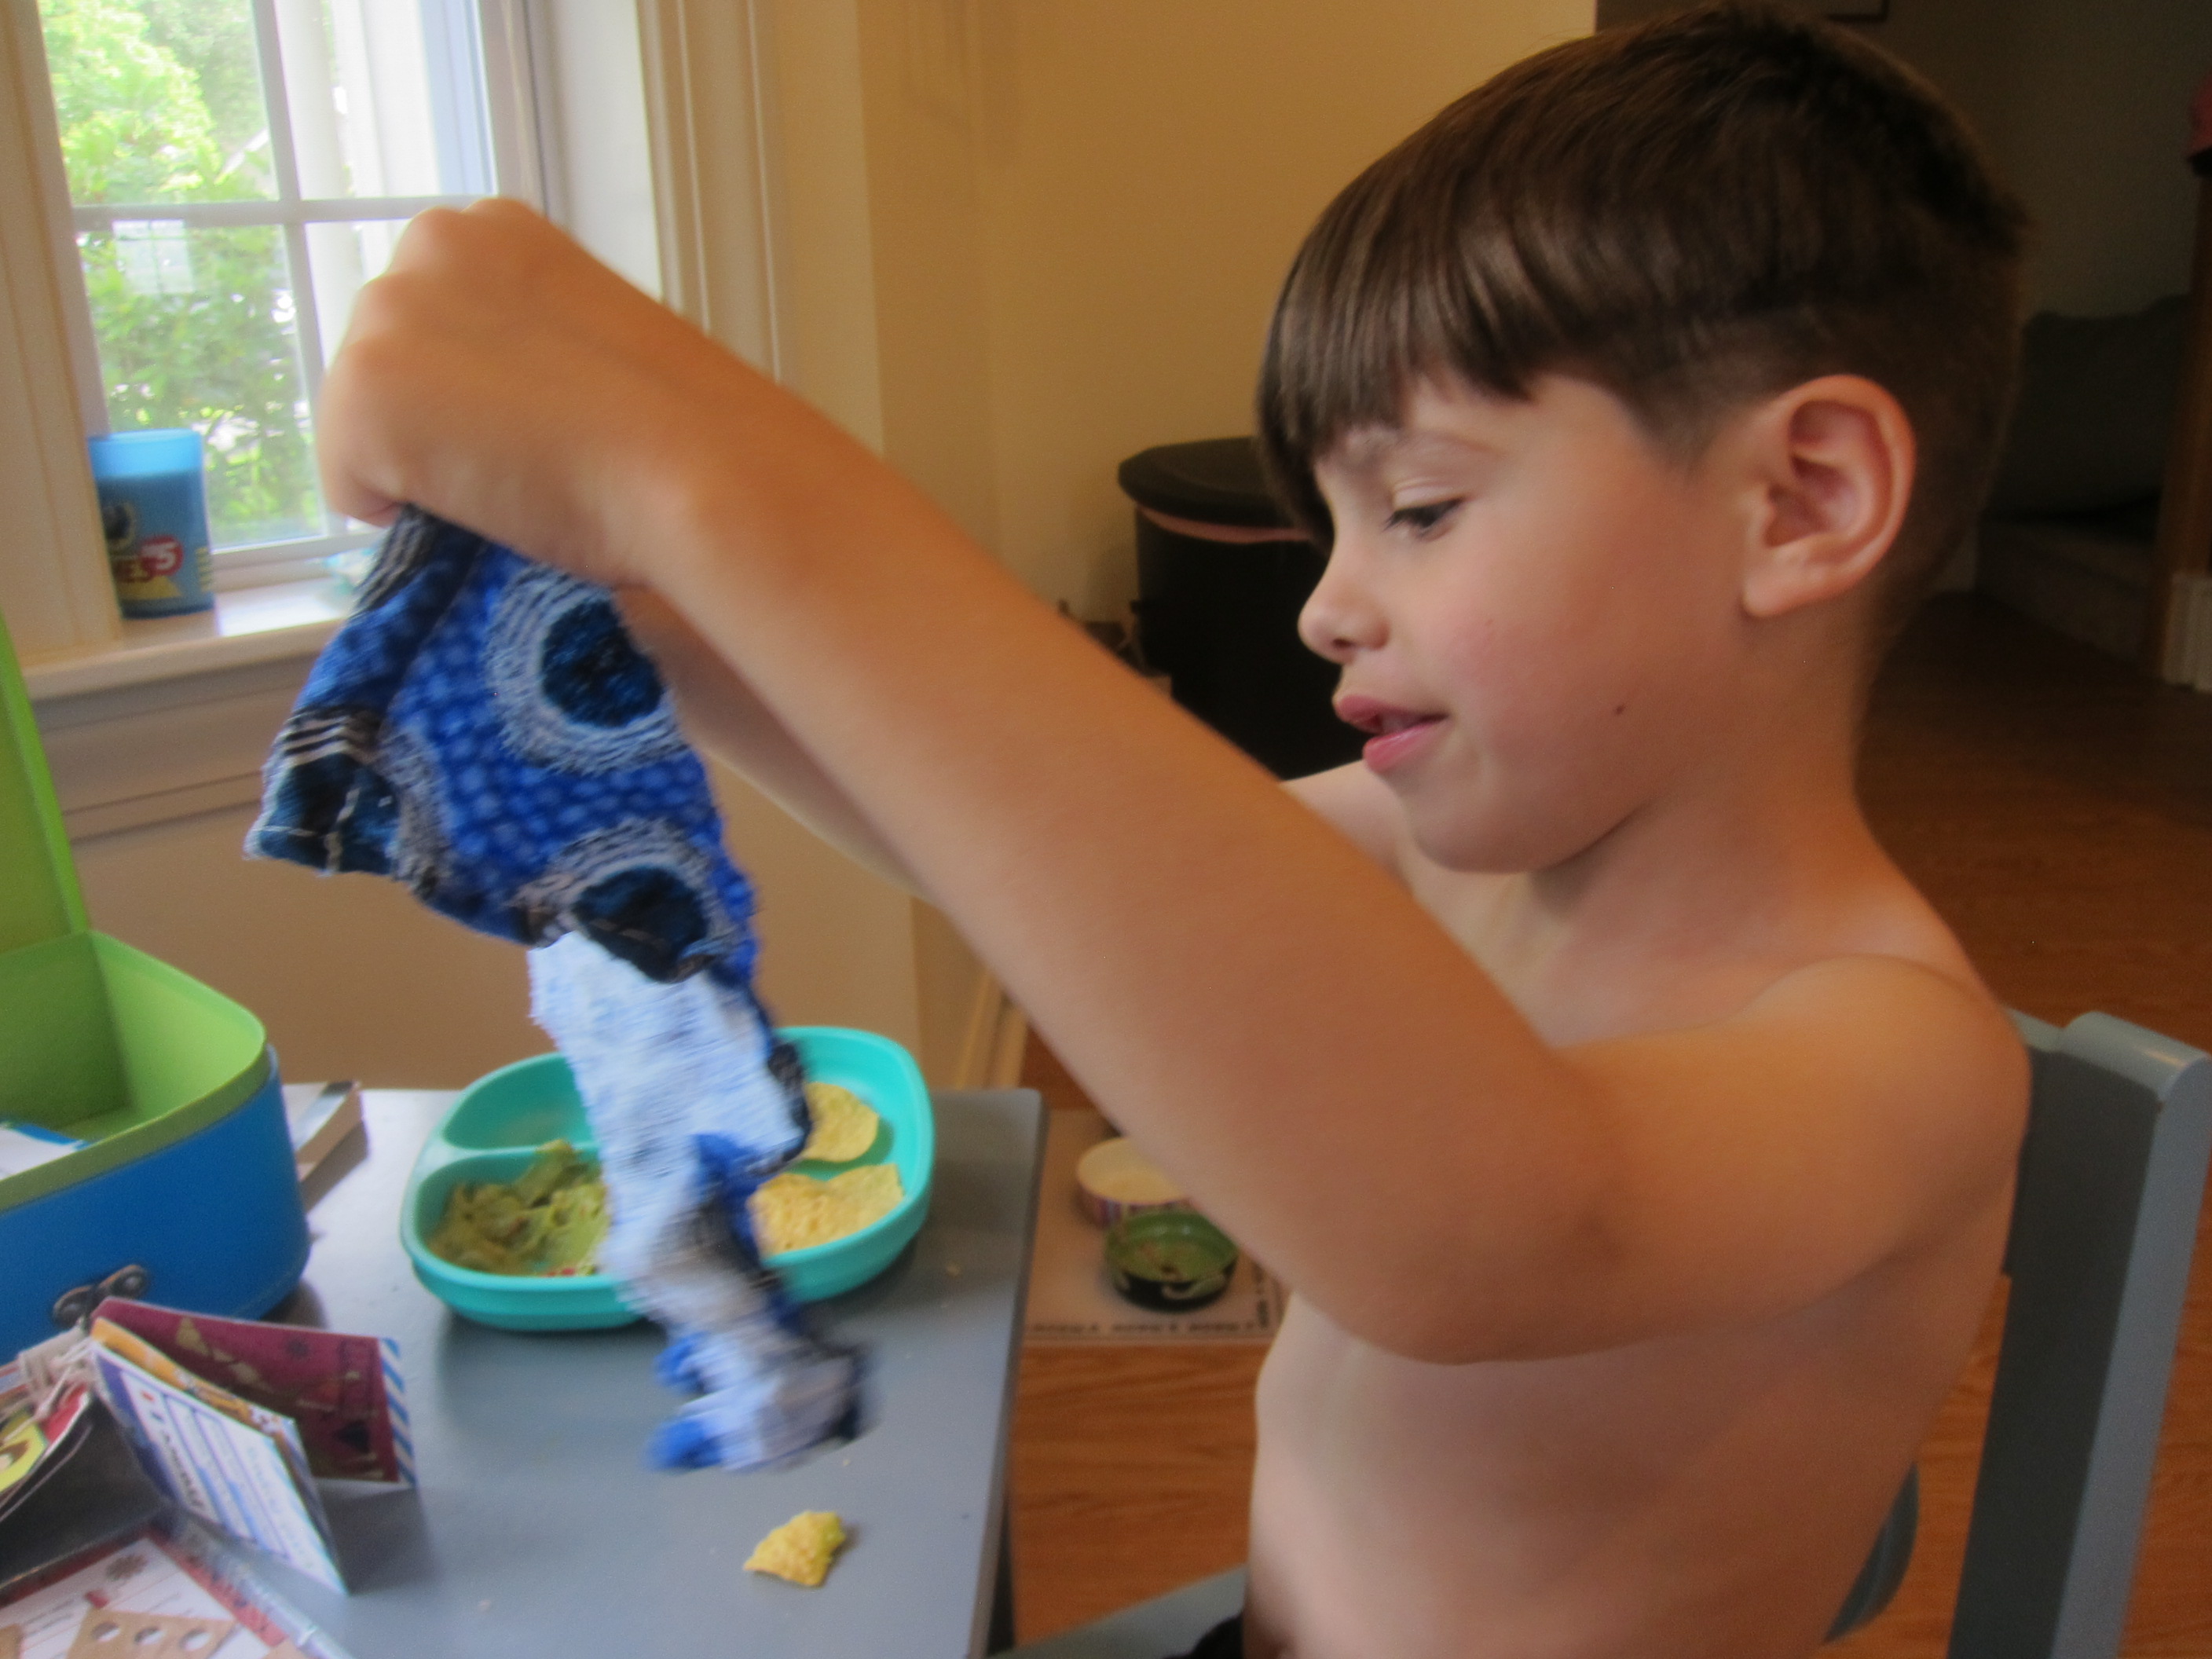
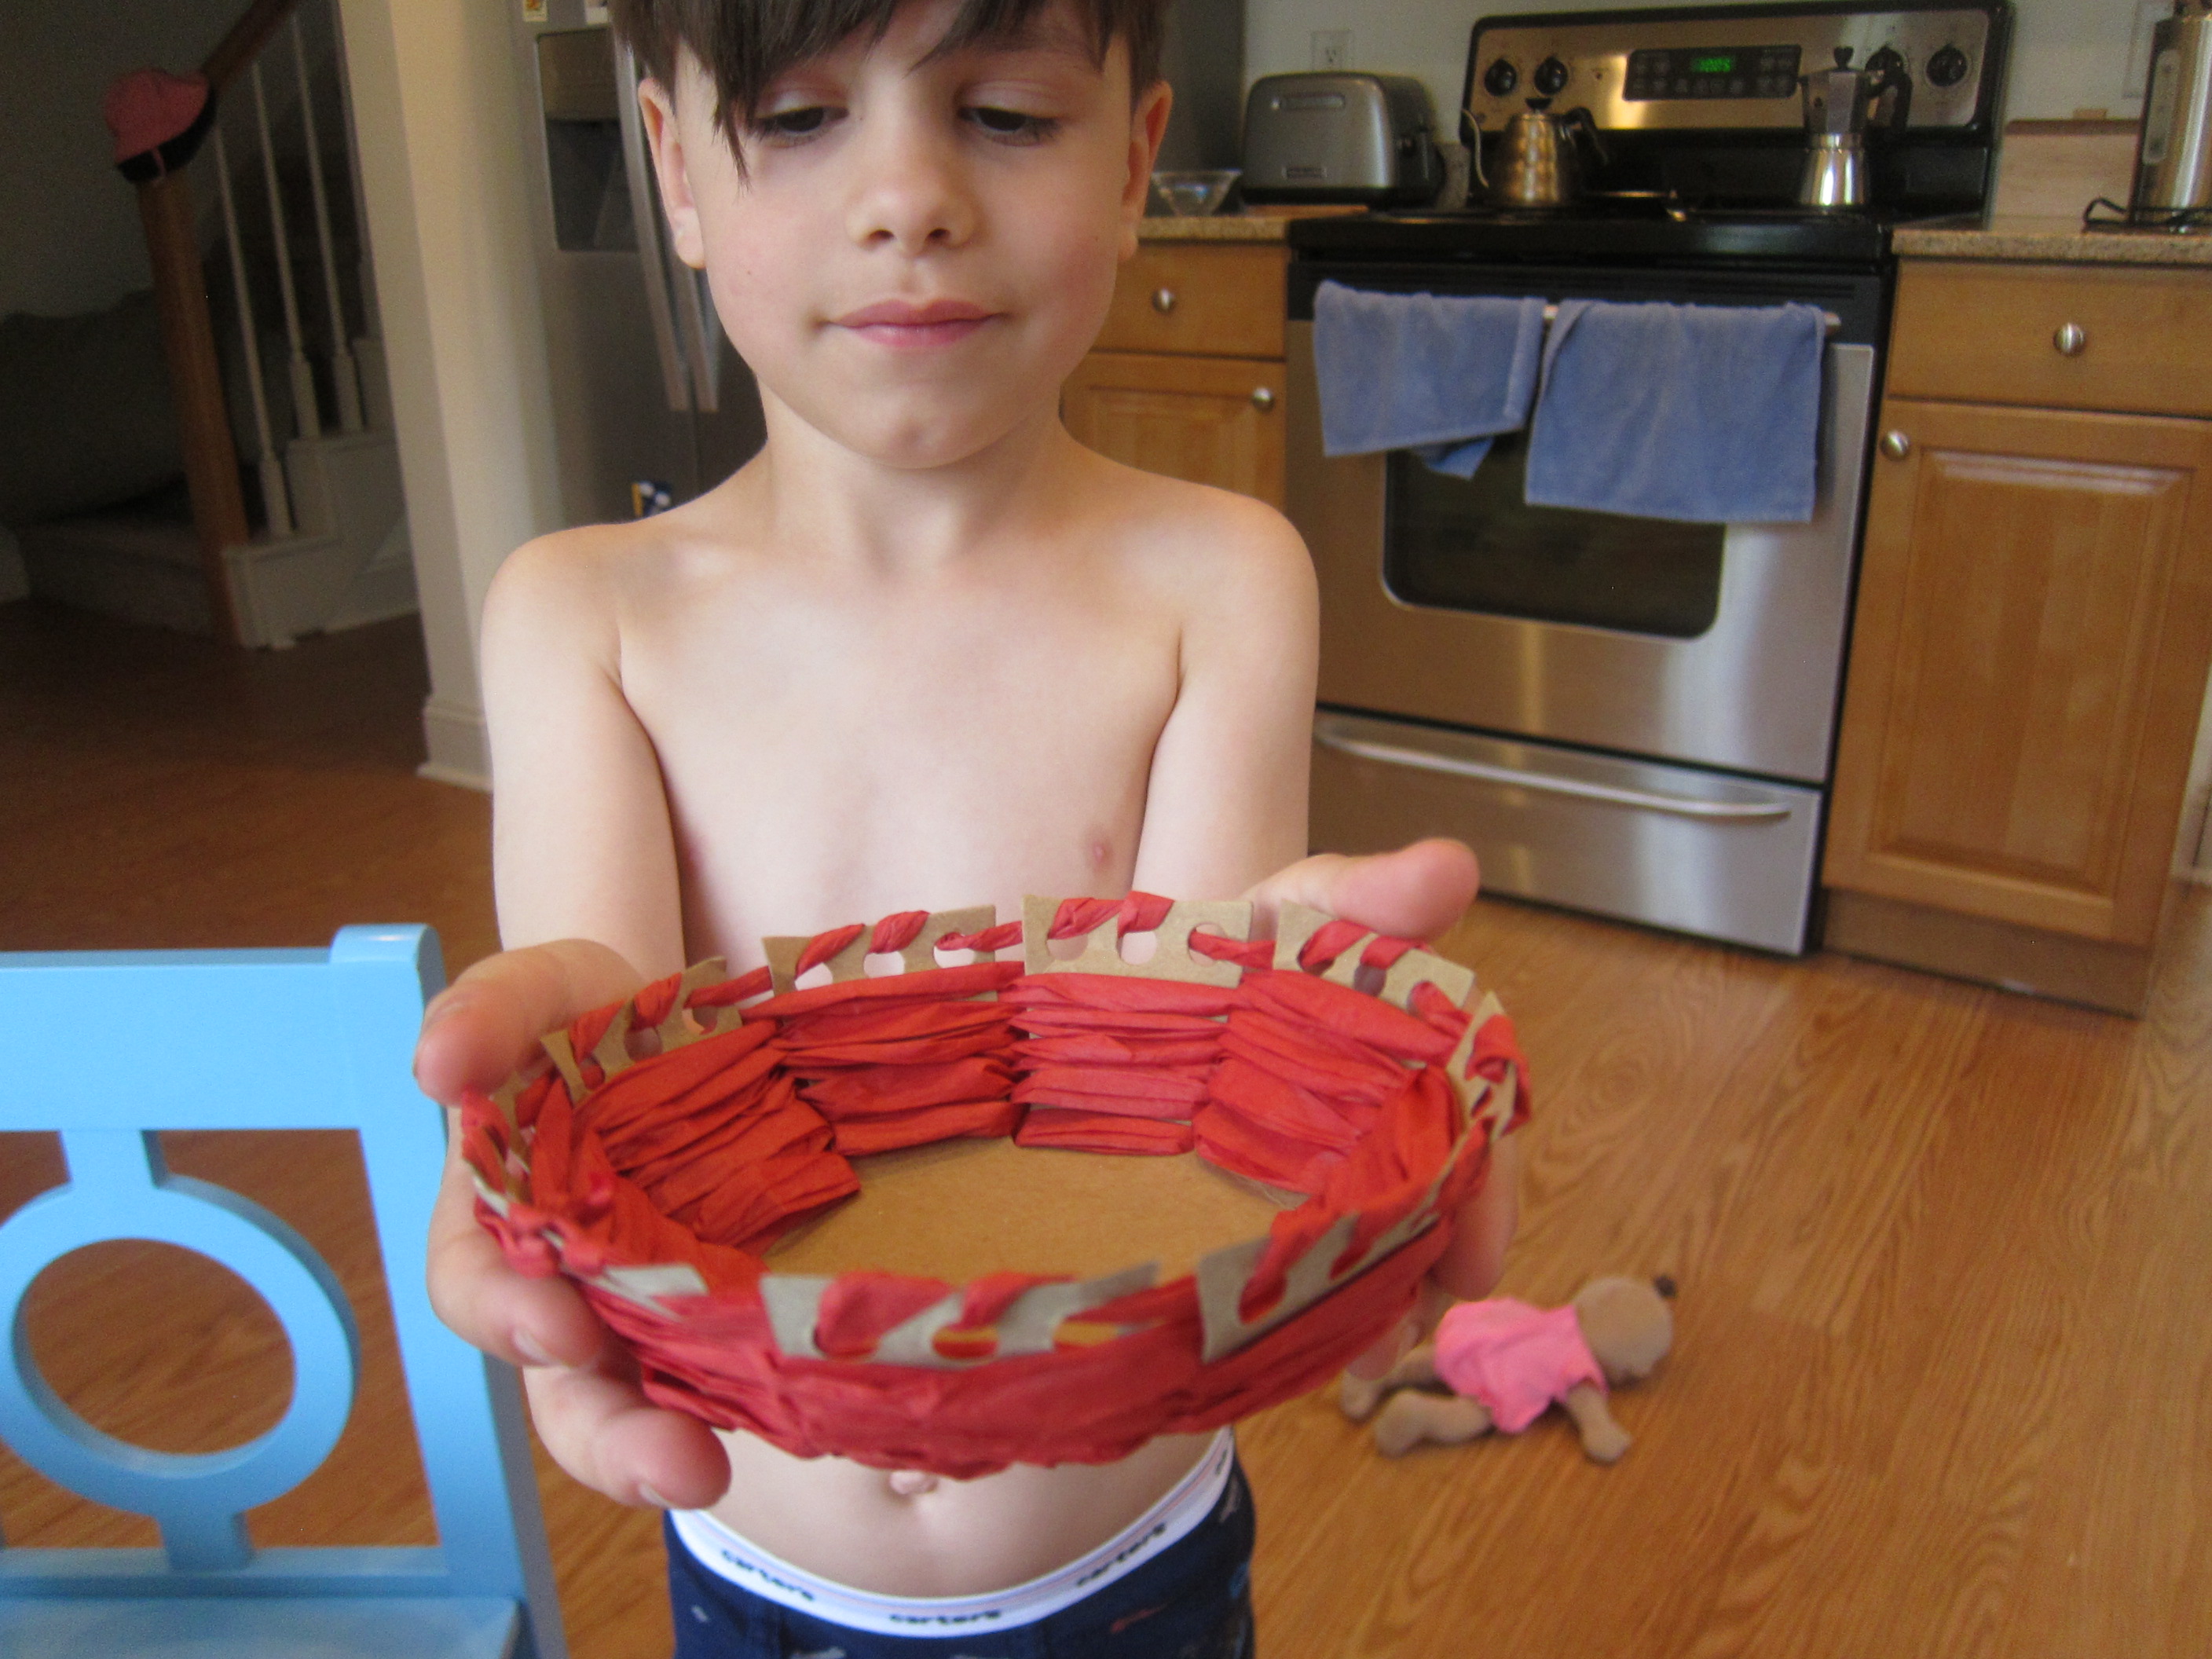
The kit contained a D.I.Y. pinata; any activity that involved candy got a big thumbs up from Travis! The pinata was tricky to put together, so turned into more of a mommy project, following instructions to fold the cardboard cactus shape and glue on strips of provided tissue paper.

LP Mexico (7)

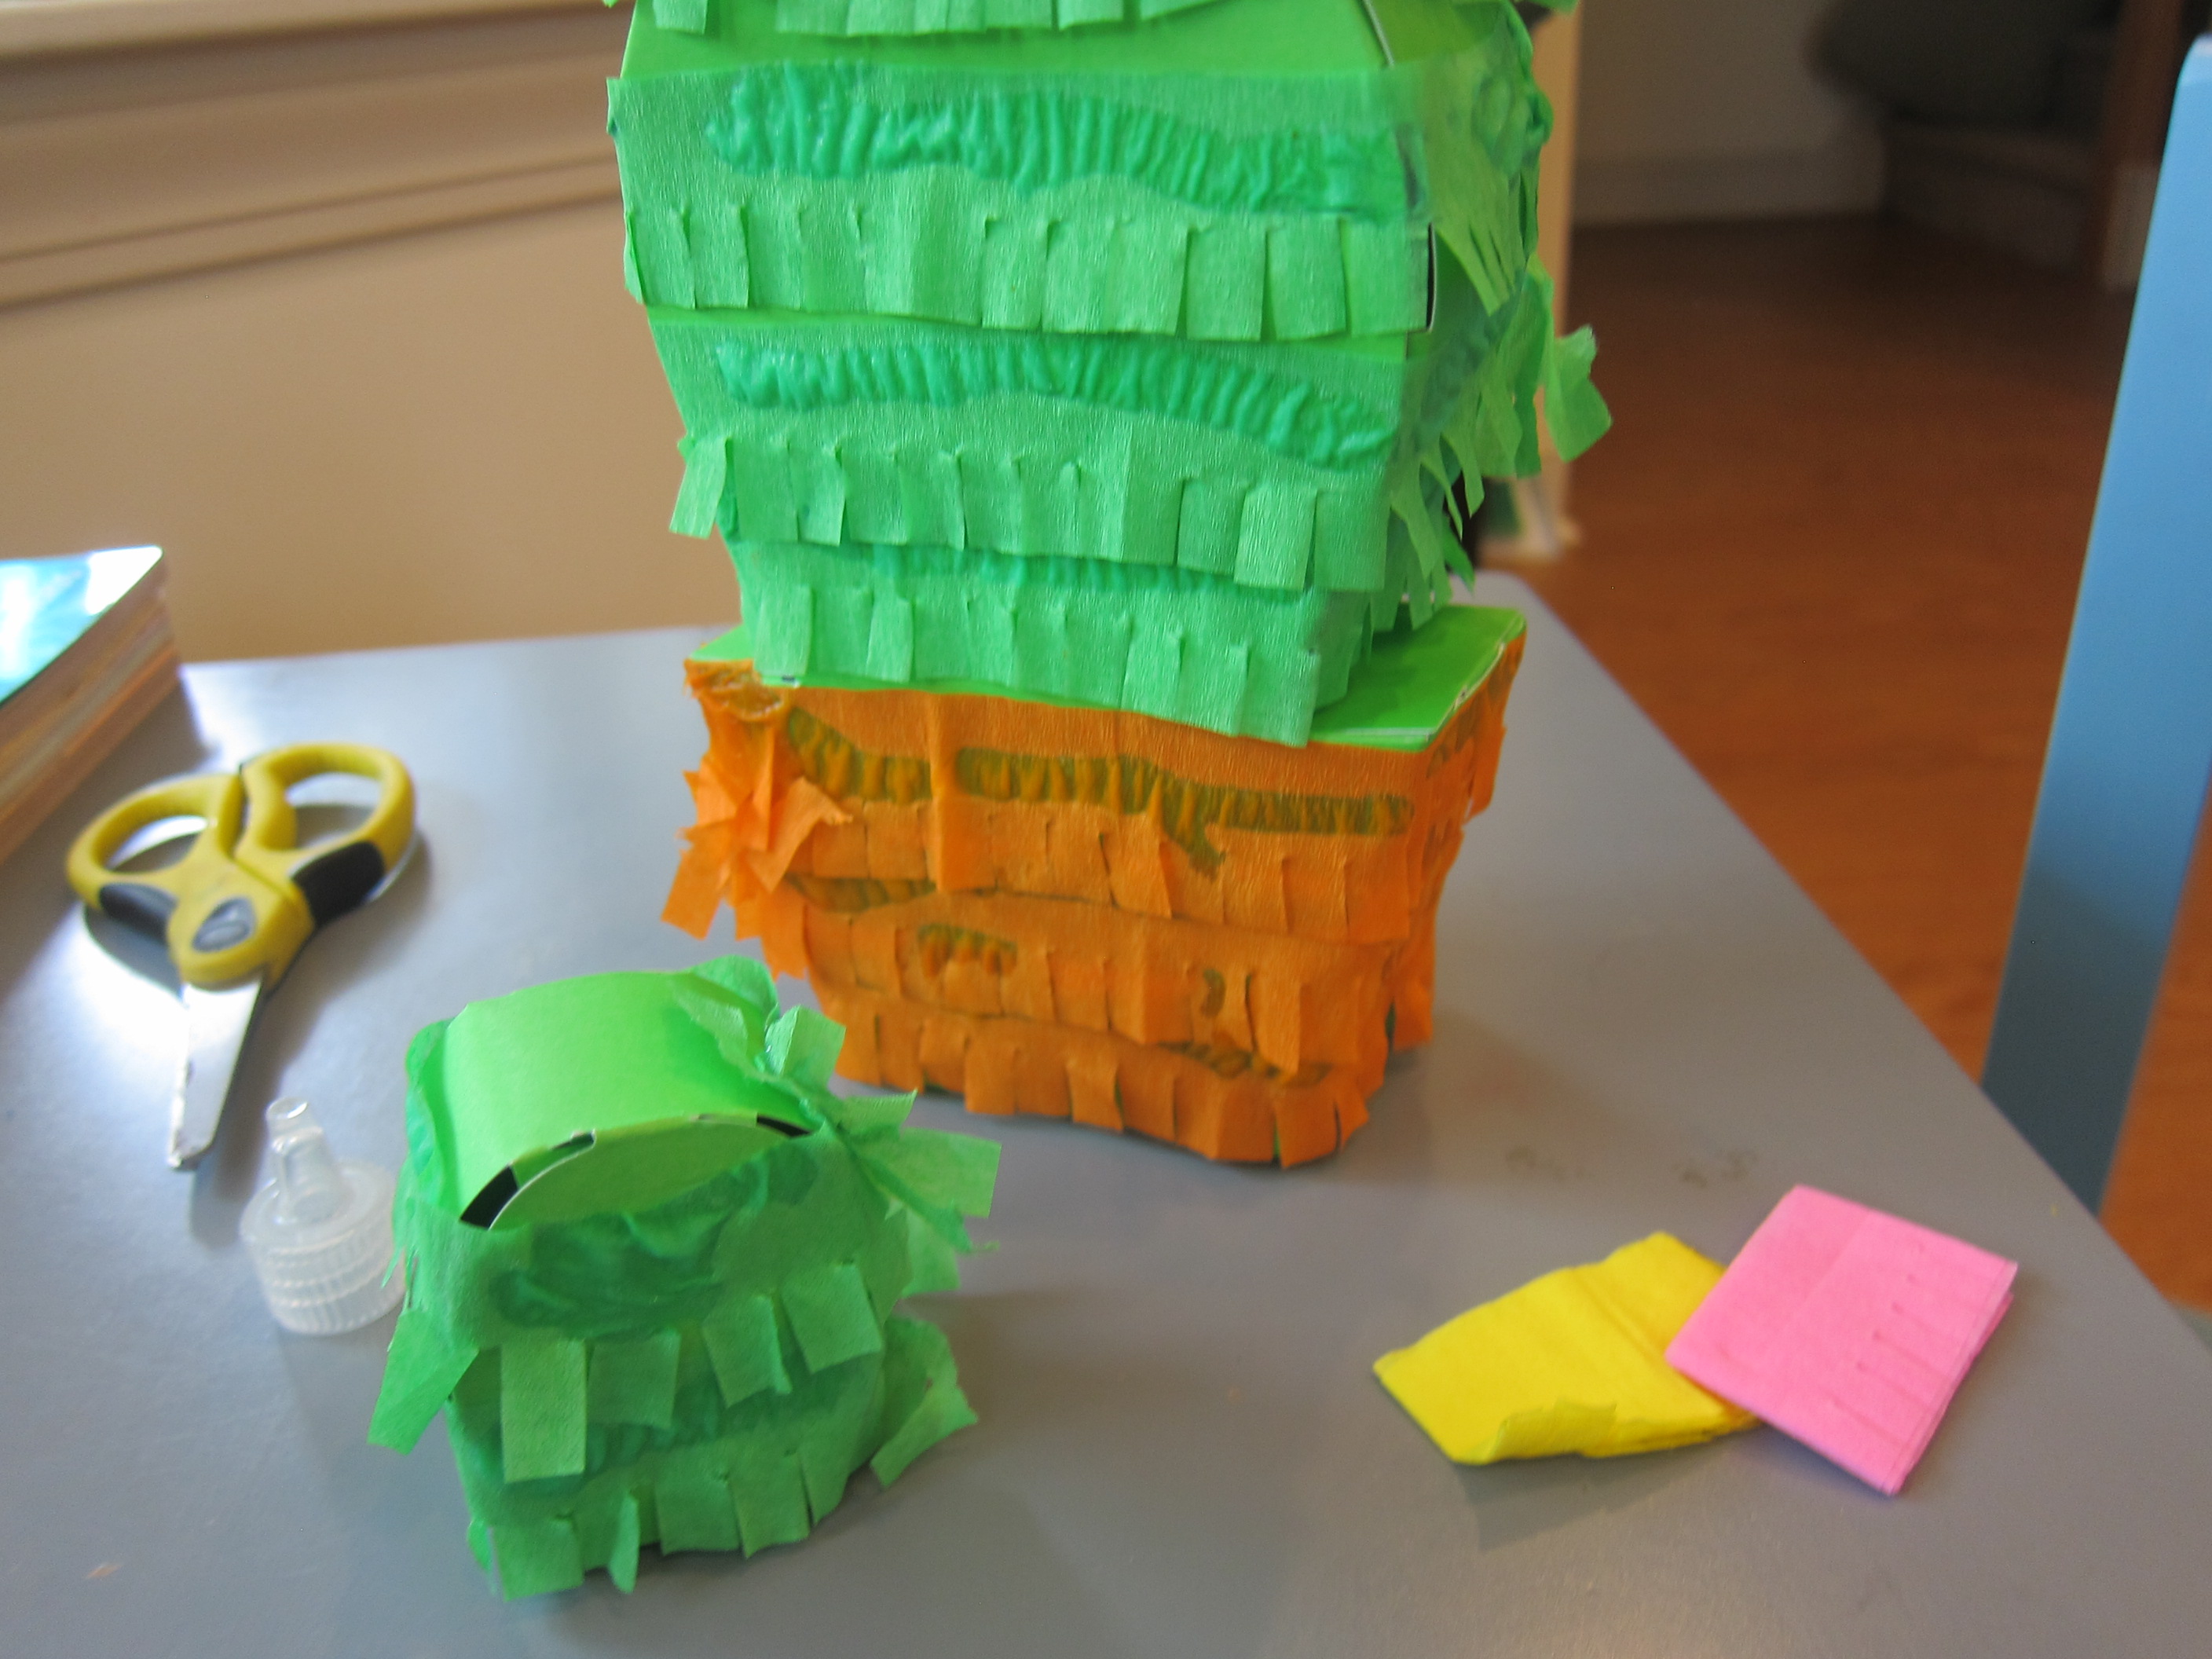
We made beautiful flowers, too, by rolling tissue paper around a pencil tip, then removing from the pencil and pressing down to bend the “petals” outward.

LP Mexico (6)

Travis proudly selected candy at the store to fill the cactus for a mini fiesta. Here he is gearing up for the big hit.

LP Mexico (9)

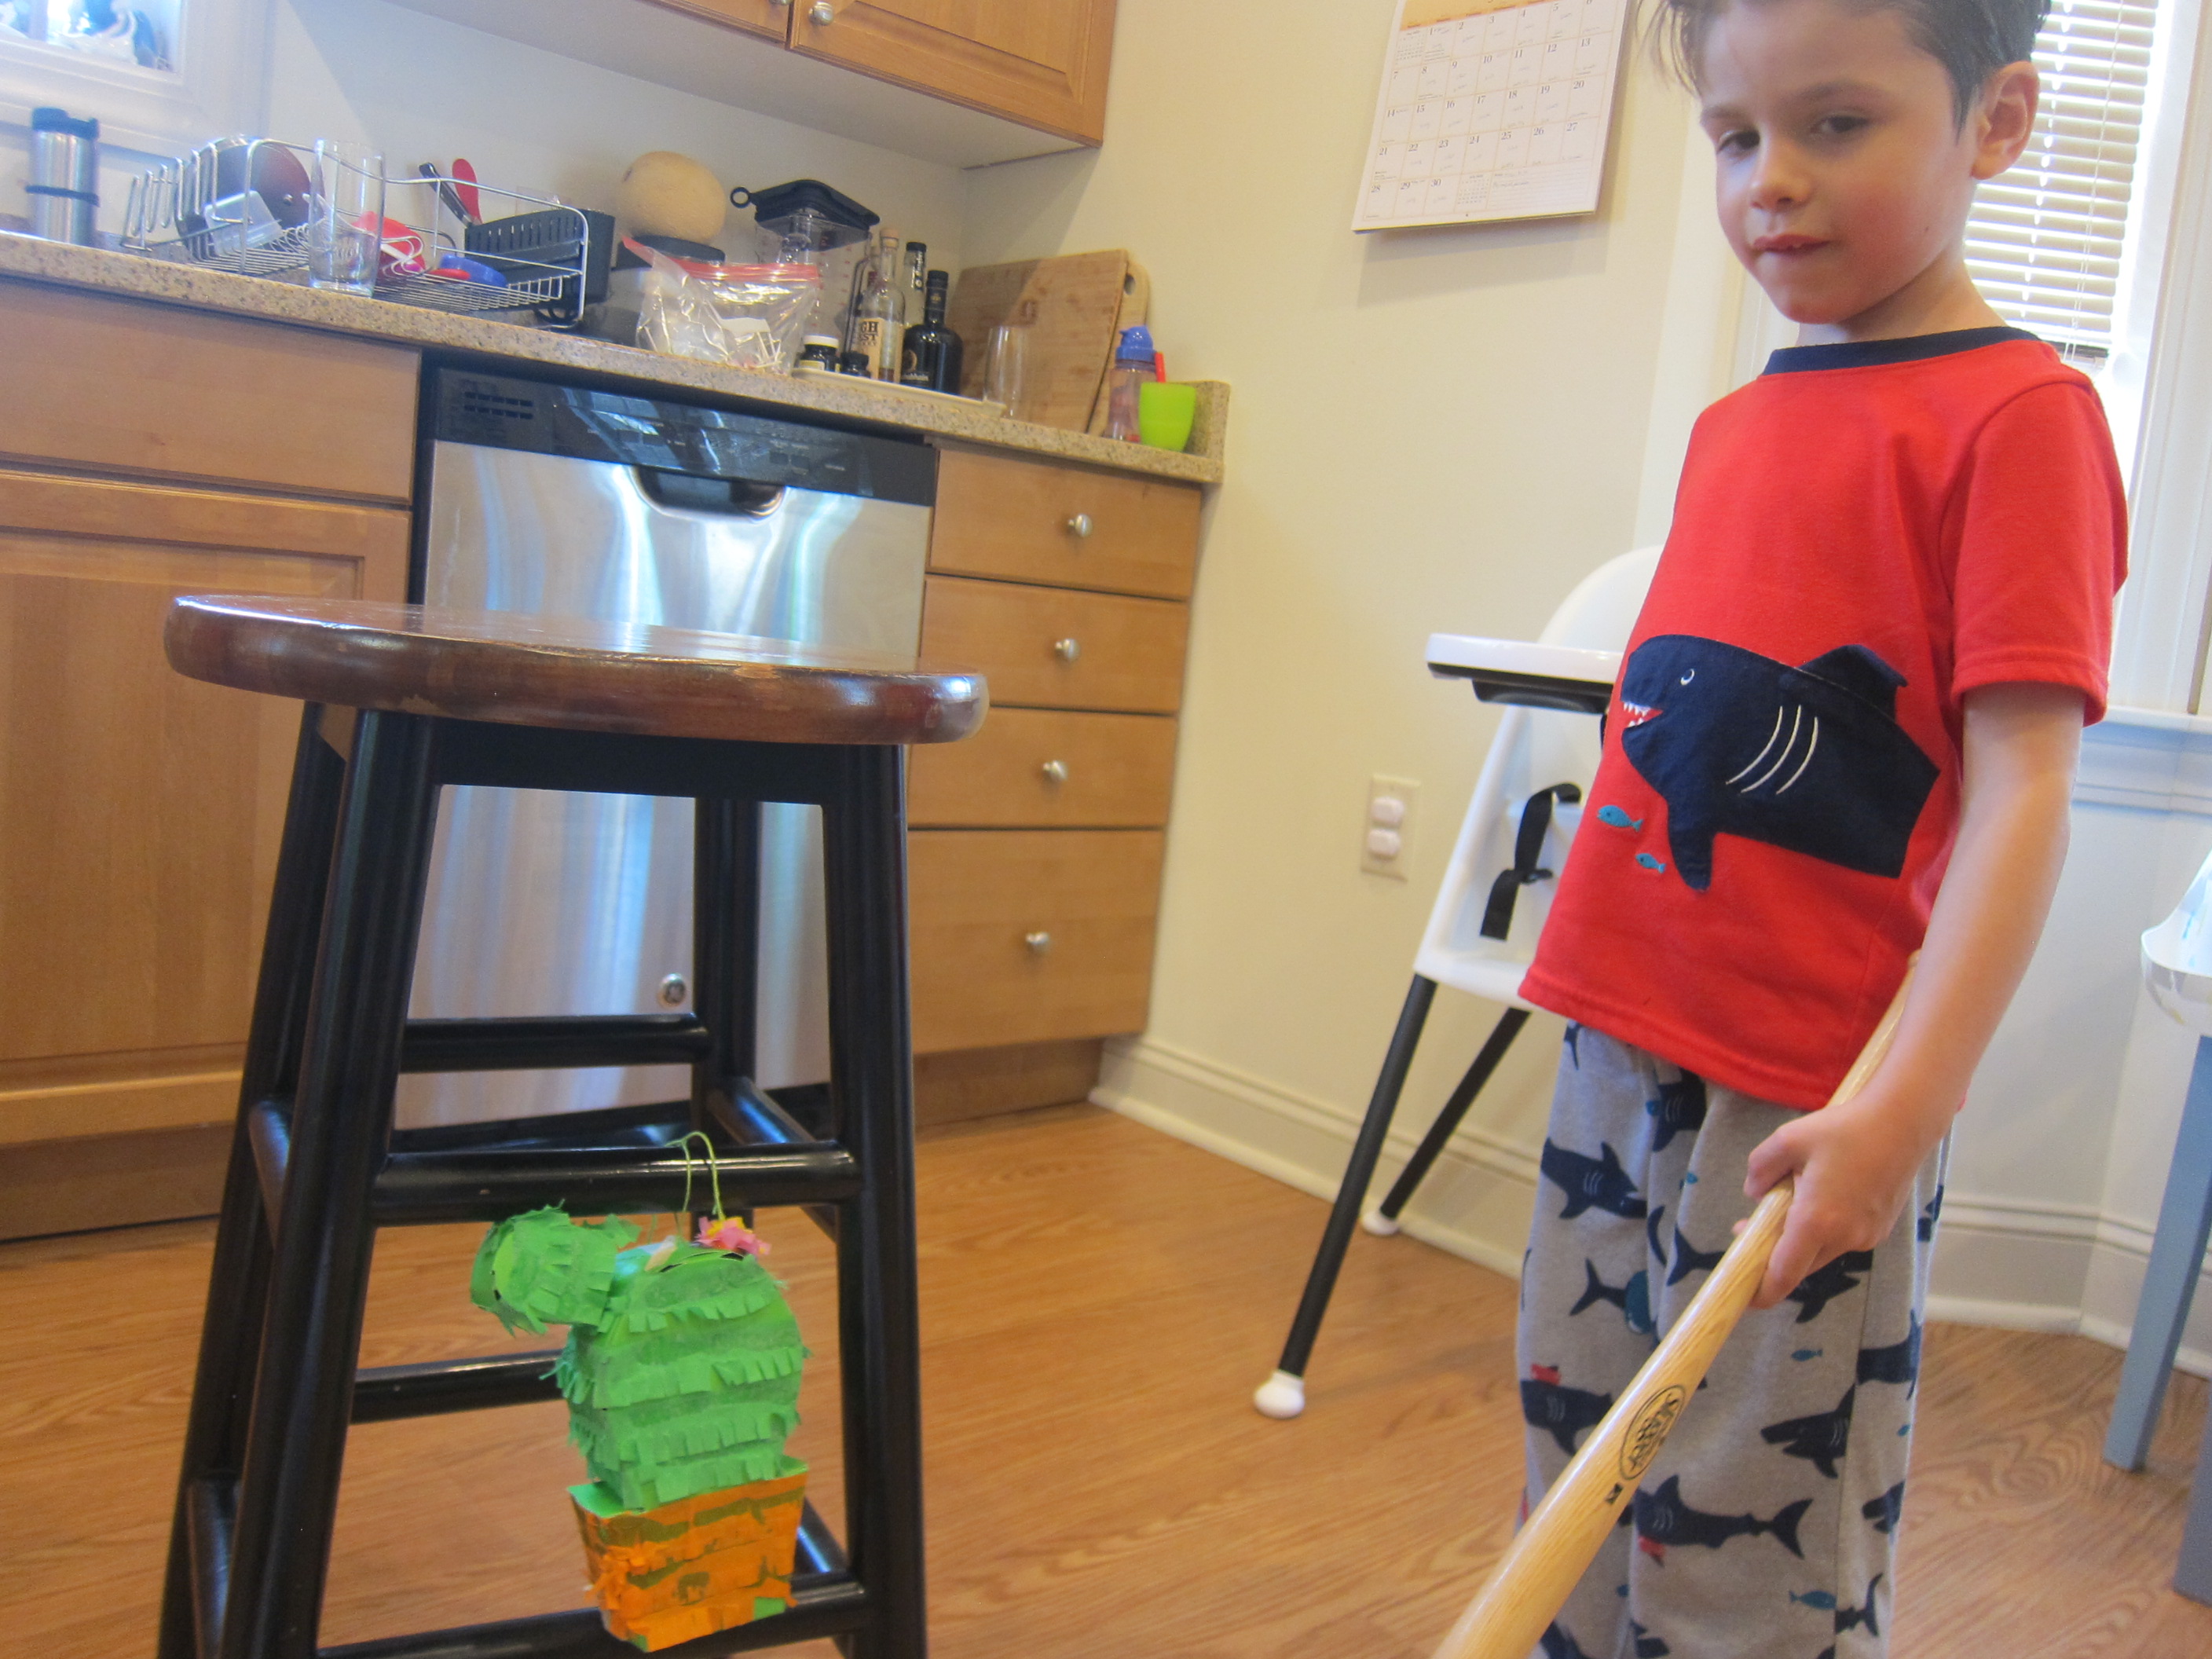
Even little sister wanted a turn taking a whack.

LP Mexico (10)

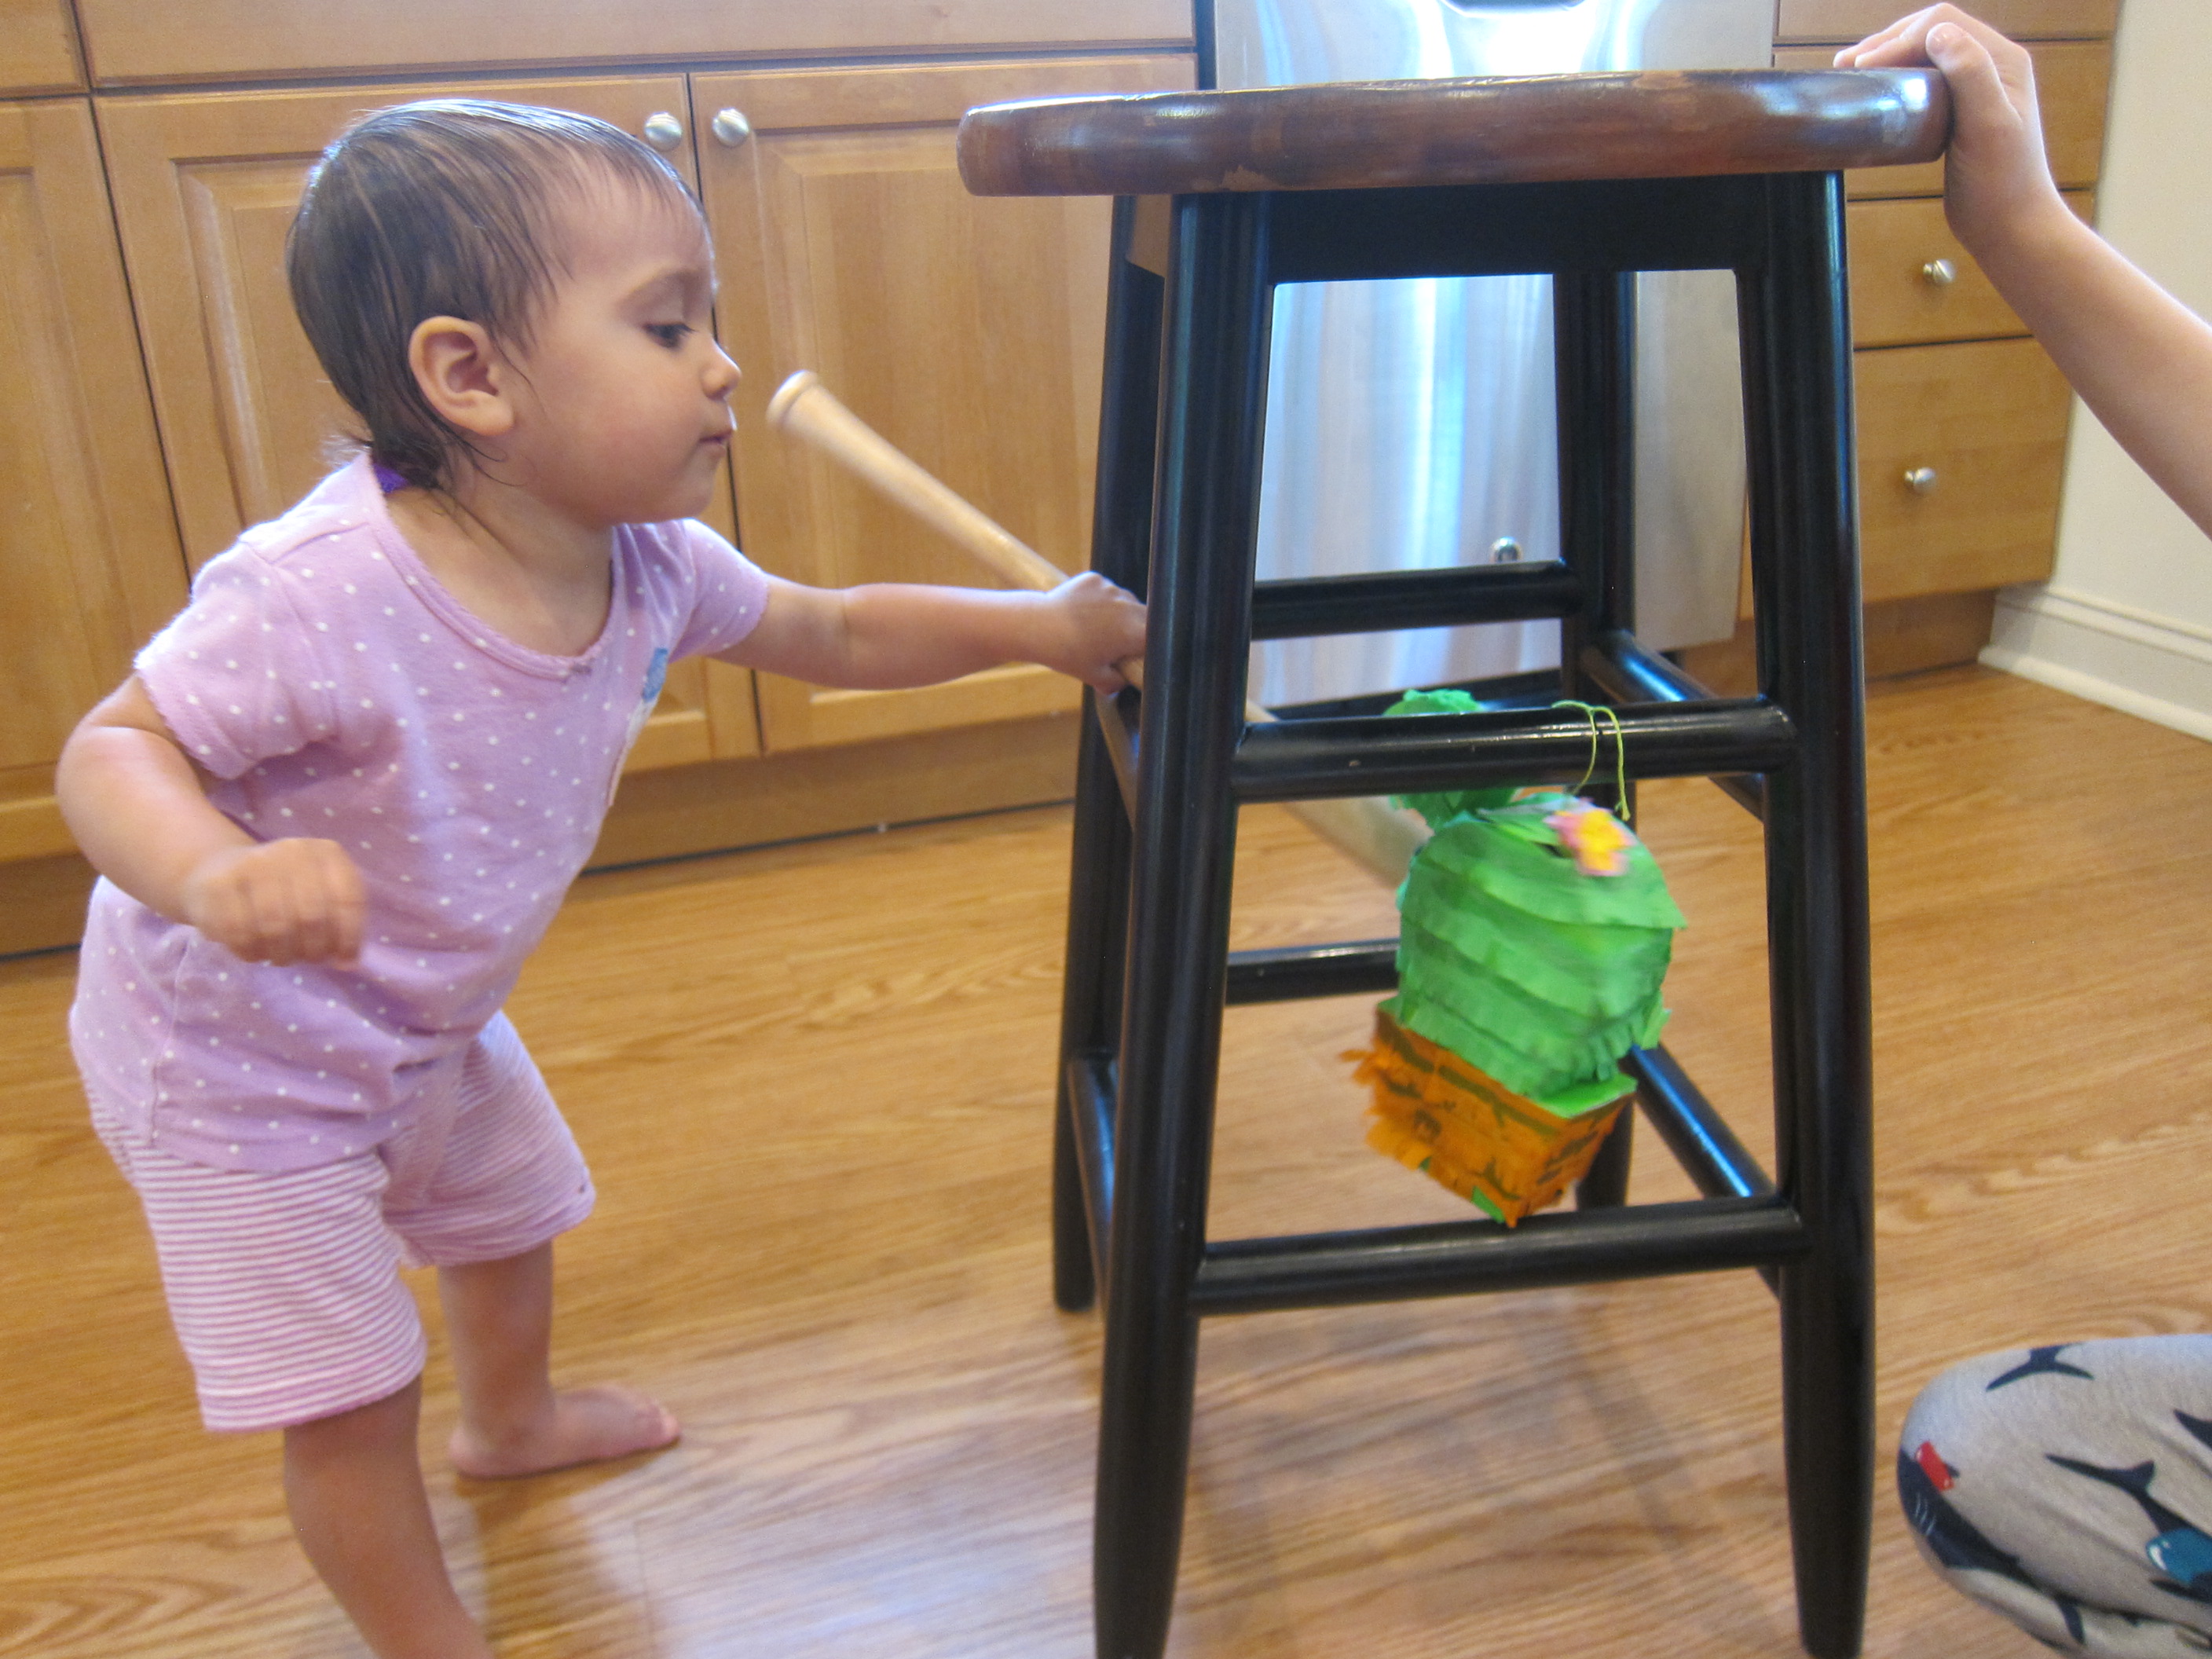
Candy! I loved that we did this on a random school night, without waiting for a special occasion, which made it feel extra fun for the kids.

LP Mexico (11)

Further Activities:

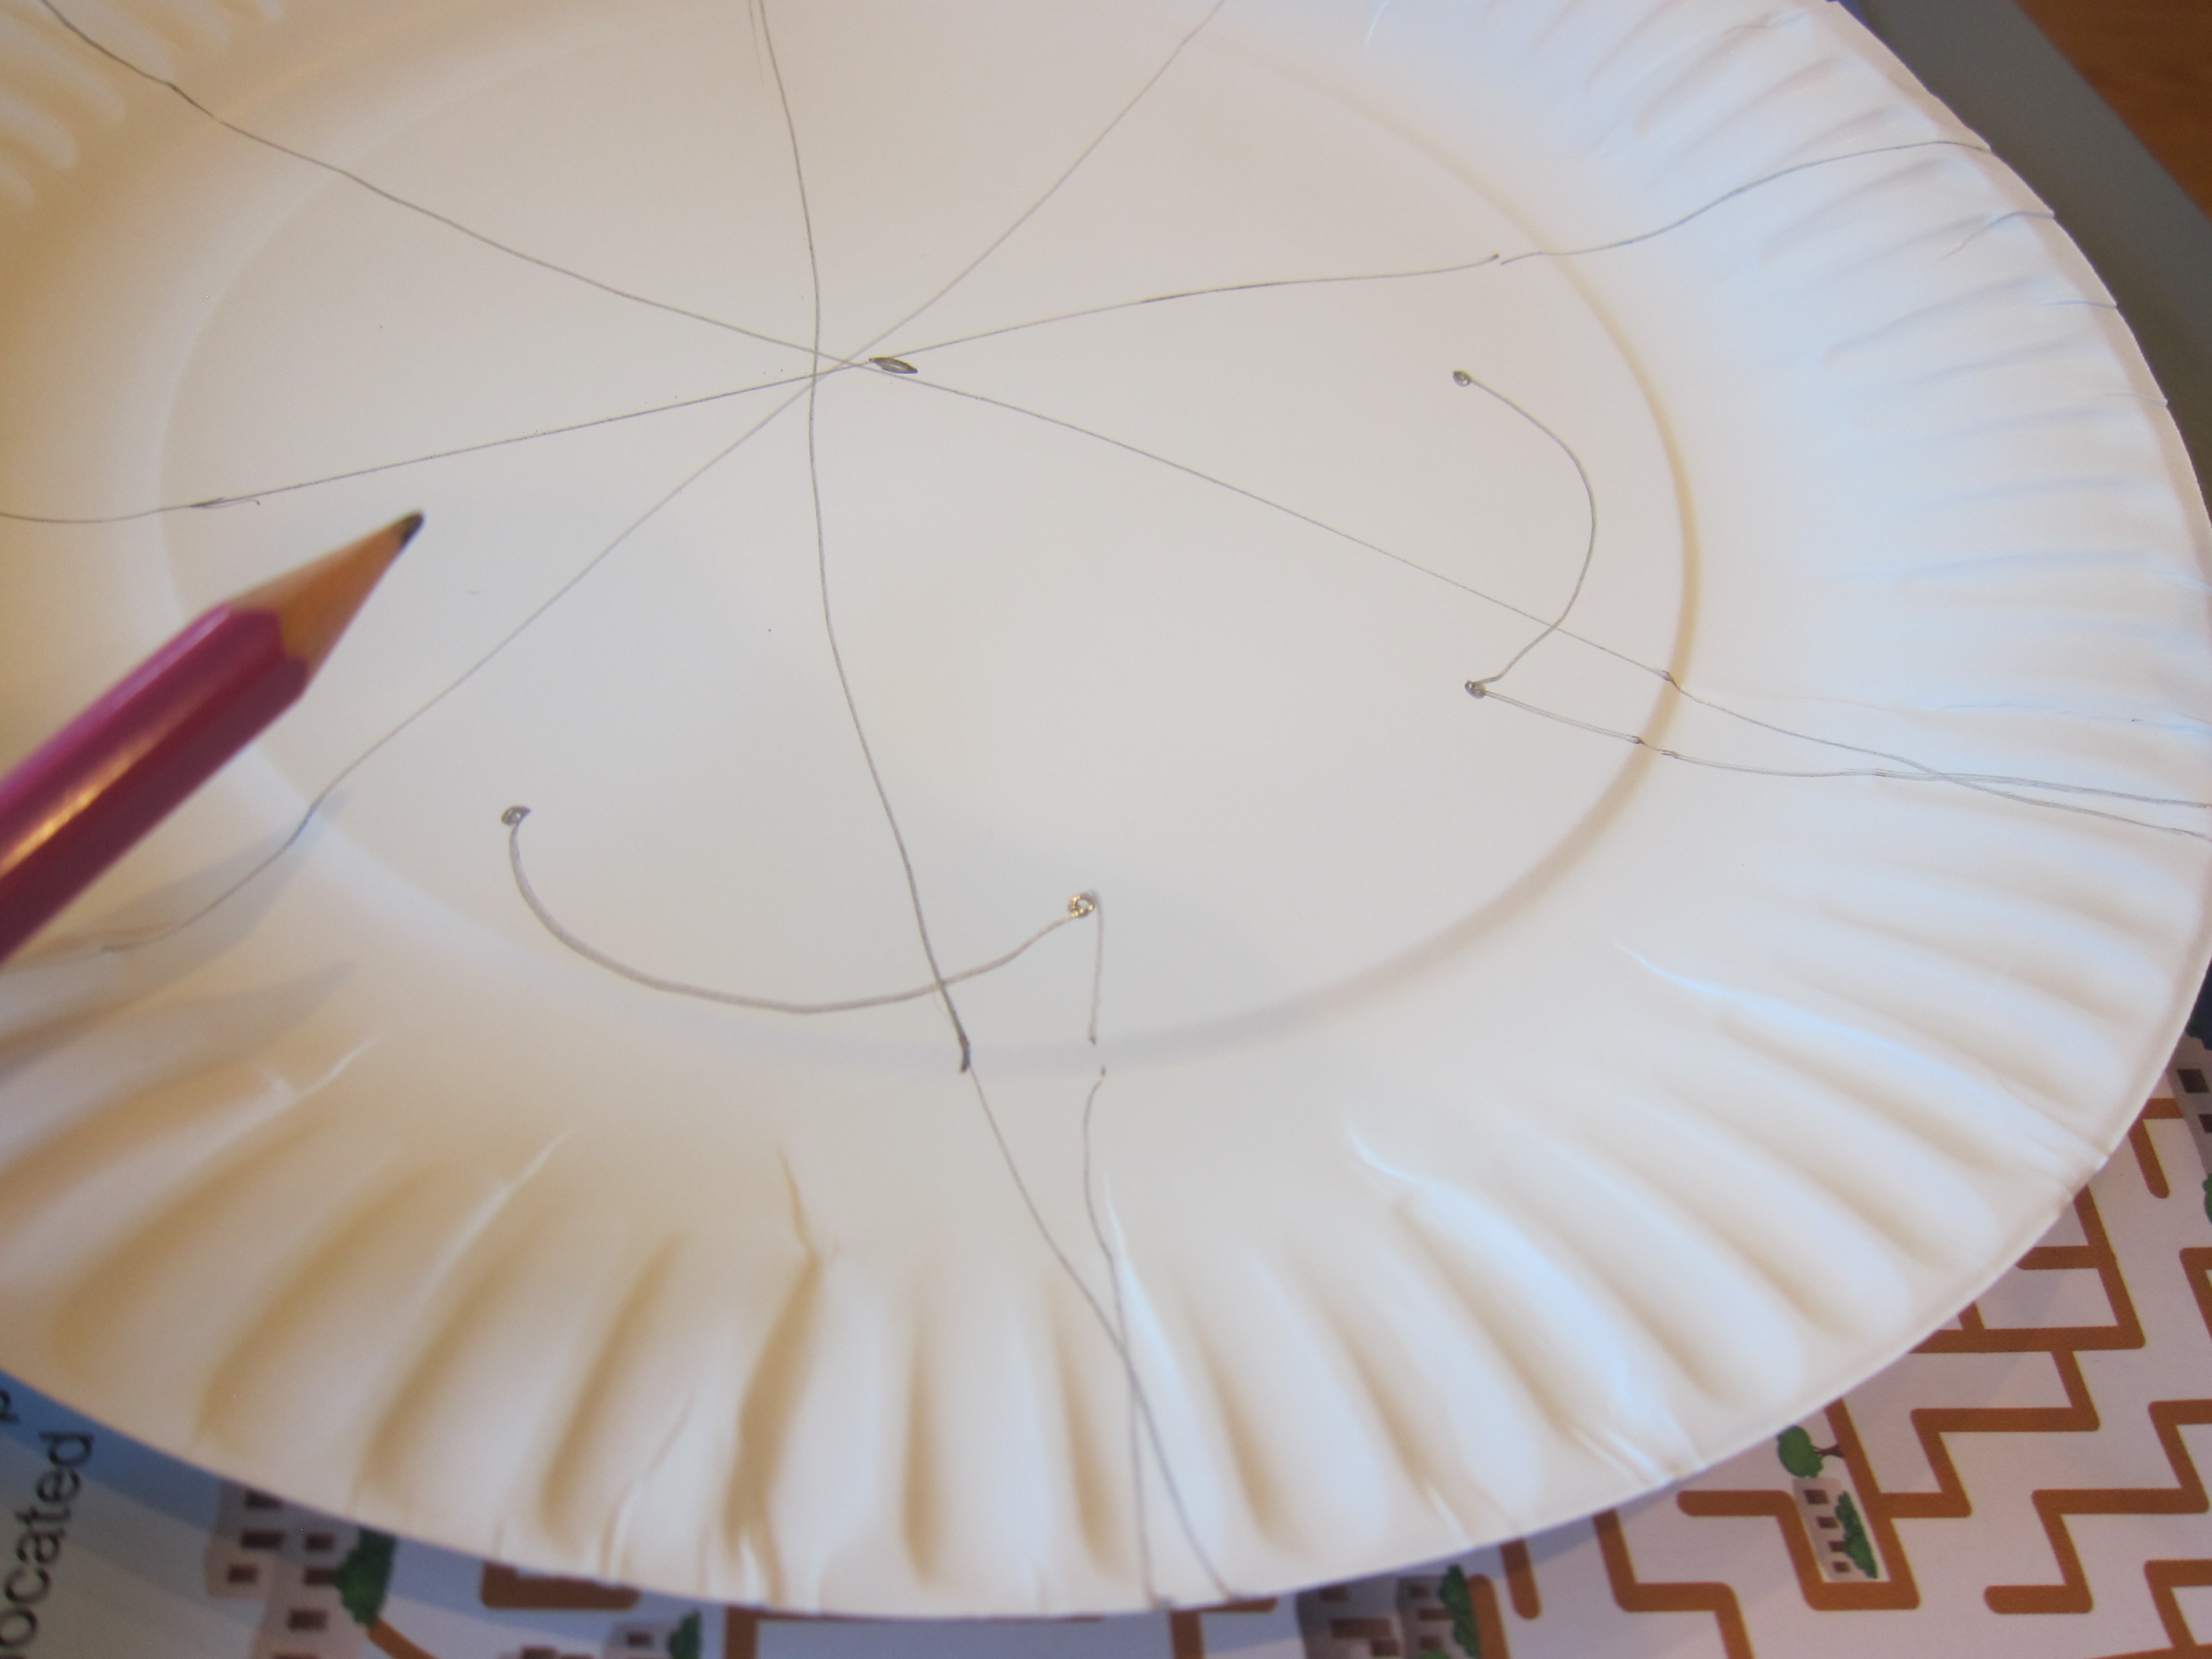
Next up we followed instructions for Day of the Dead Masks. Mark a paper plate in such a way that it forms an 8-wedged pie, then draw cheek ovals on two of those pie pieces nearest the bottom. Cut out around the inner rim of the paper plate.

LP Mexico (12)

Travis was so proud of his decorations!

LP Mexico (13)

Tape to a craft stick for an instant fiesta mask.

LP Mexico (16)

Next we headed outside for Sunshine Art, which was the bonus add-on for this country package. Arrange items on top of the provided plate and special blue-tinted paper, and then lay in the sunshine. You’ll have an image within two minutes!

LP Mexico (17)

We played around with which items worked best. I had hoped Travis would get into the idea of putting together a whole collage, but he lost interested rather quickly.

LP Mexico (19)

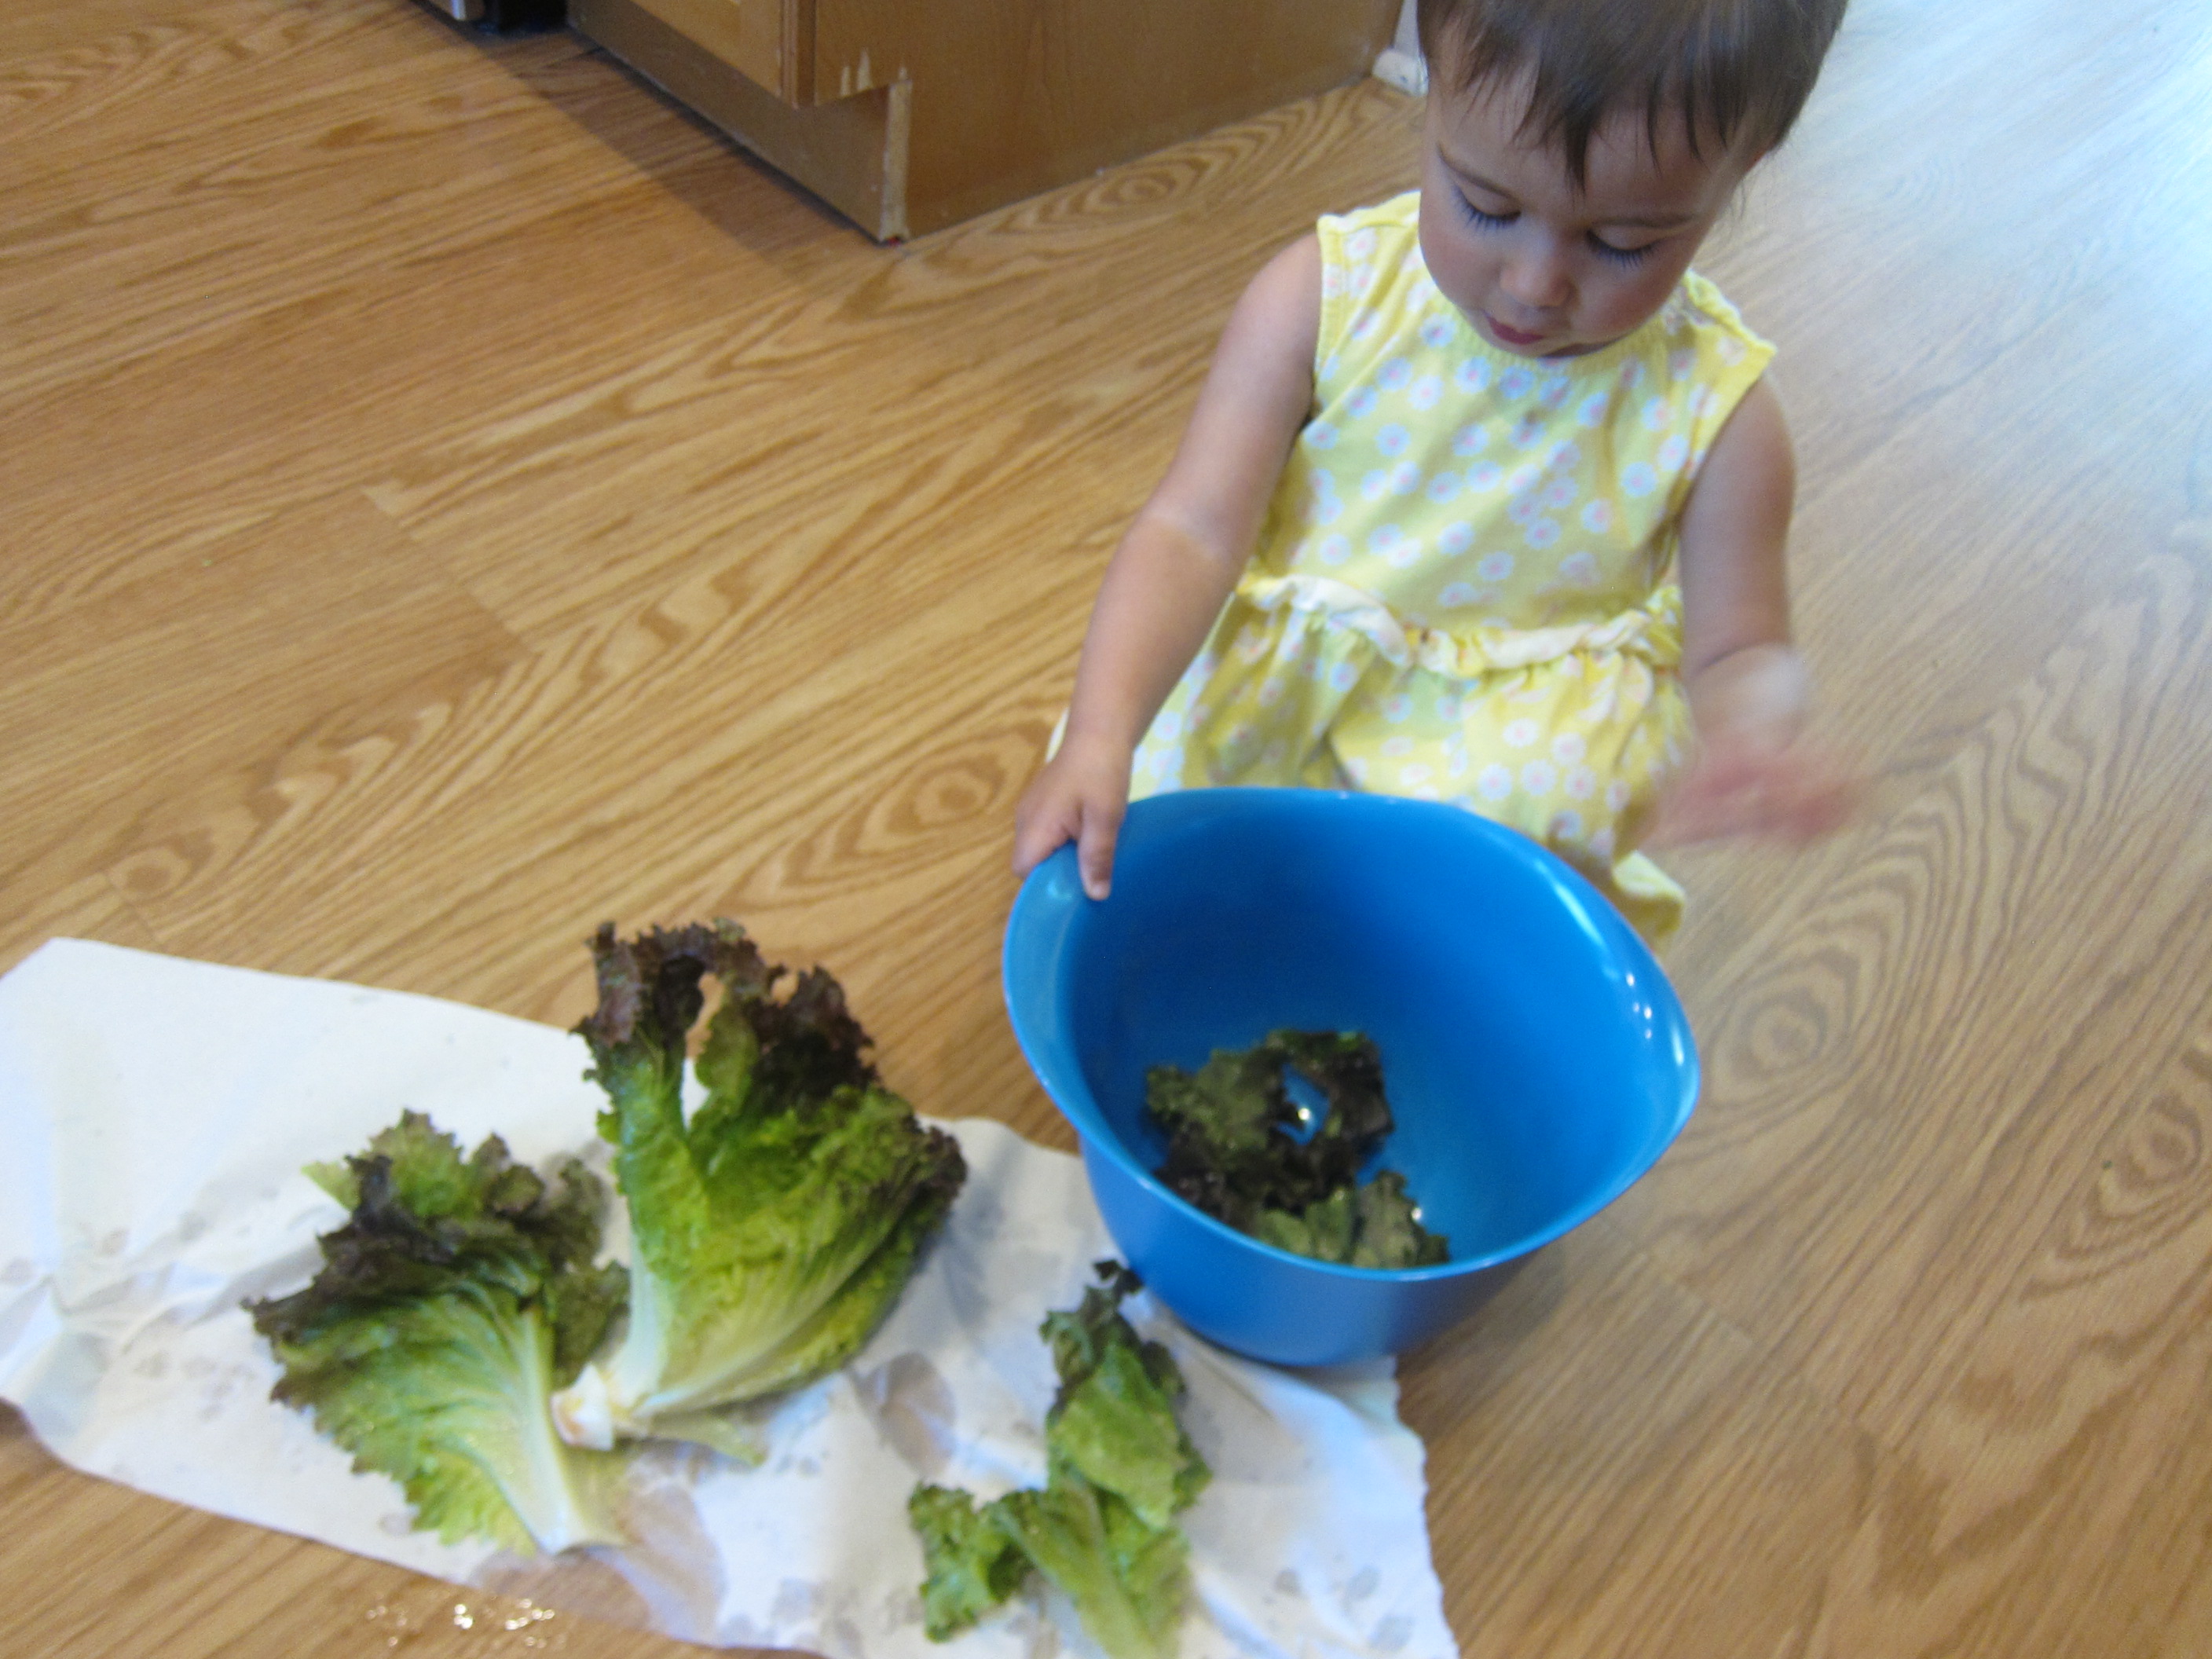
Next up was Aztec Guacamole. Travis was thrilled when I came home from the grocery store with 5 ripe avocados. We scooped the flesh into a bowl, and he was in charge of mashing!

LP Mexico (20)

Add 1 chopped tomato, 1 small finely chopped red onion, 1/4 cup minced fresh cilantro, the juice of 1 lime, and 1/2 teaspoon garlic salt. Serve with tortilla chips!

LP Mexico (21)

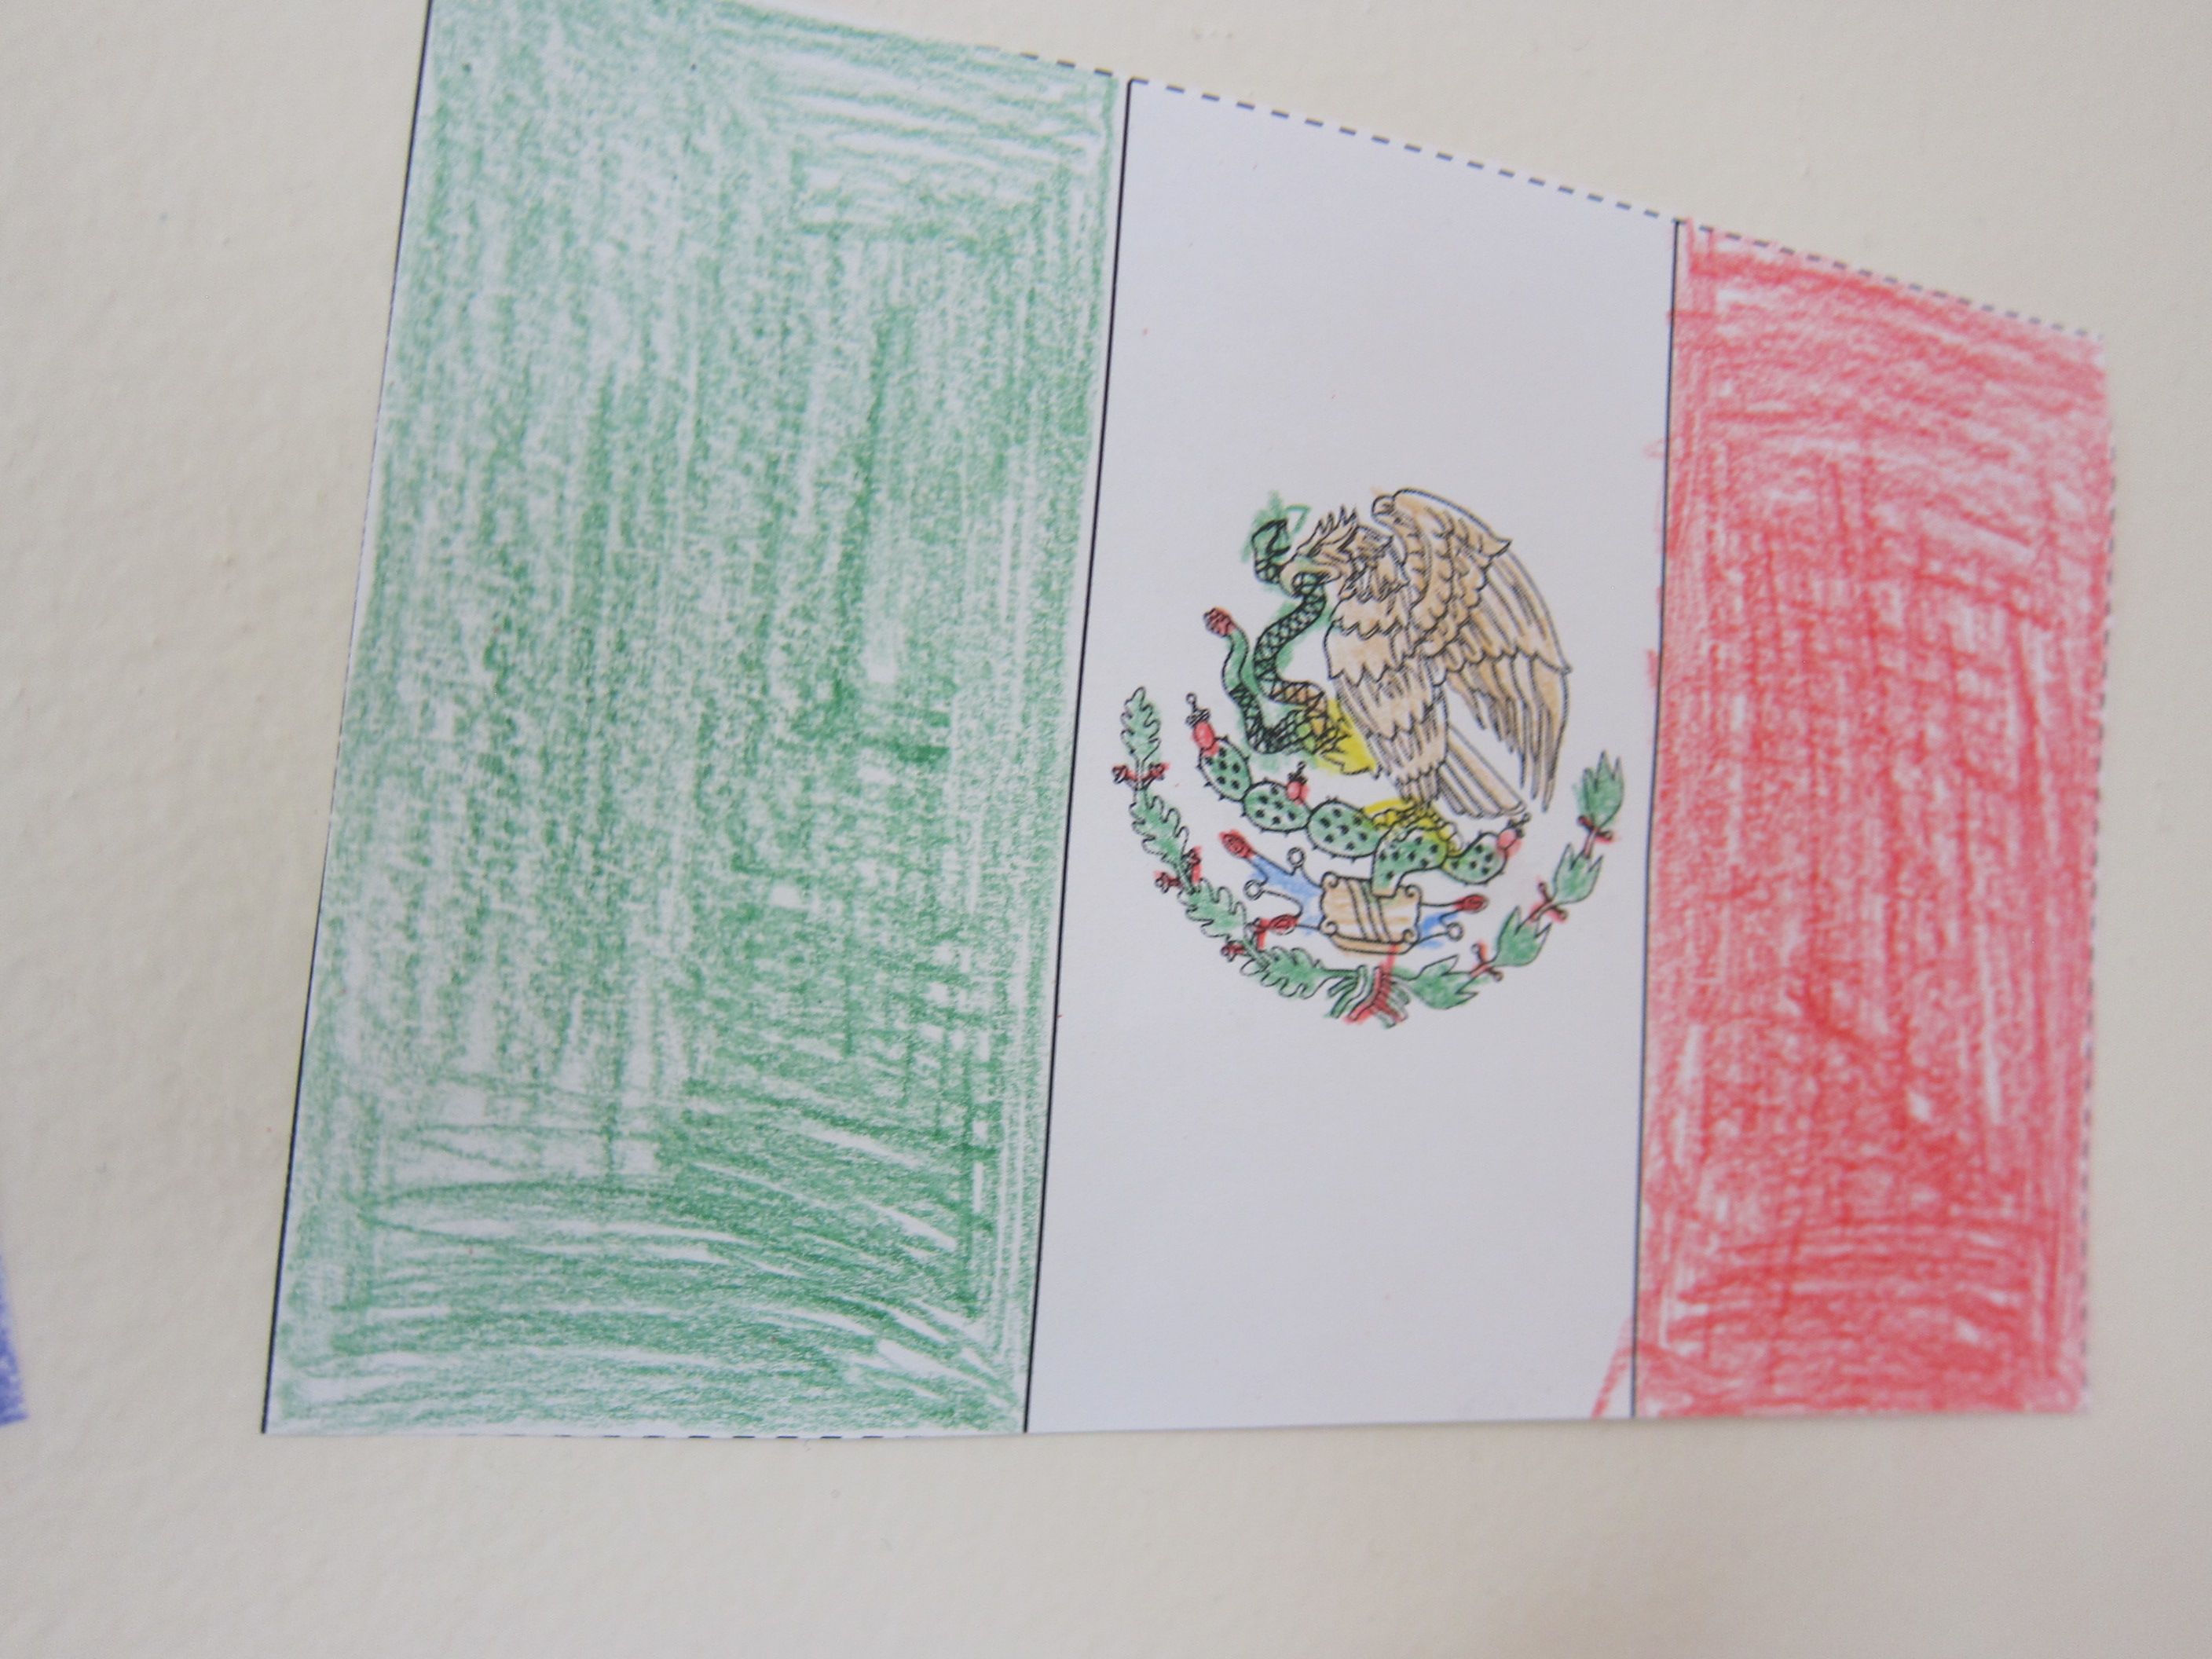
Finally, he colored in the Mexican flag for our garland; this was by far the most intricate flag to date, and he was so proud!

LP Mexico (18)

Recipe:

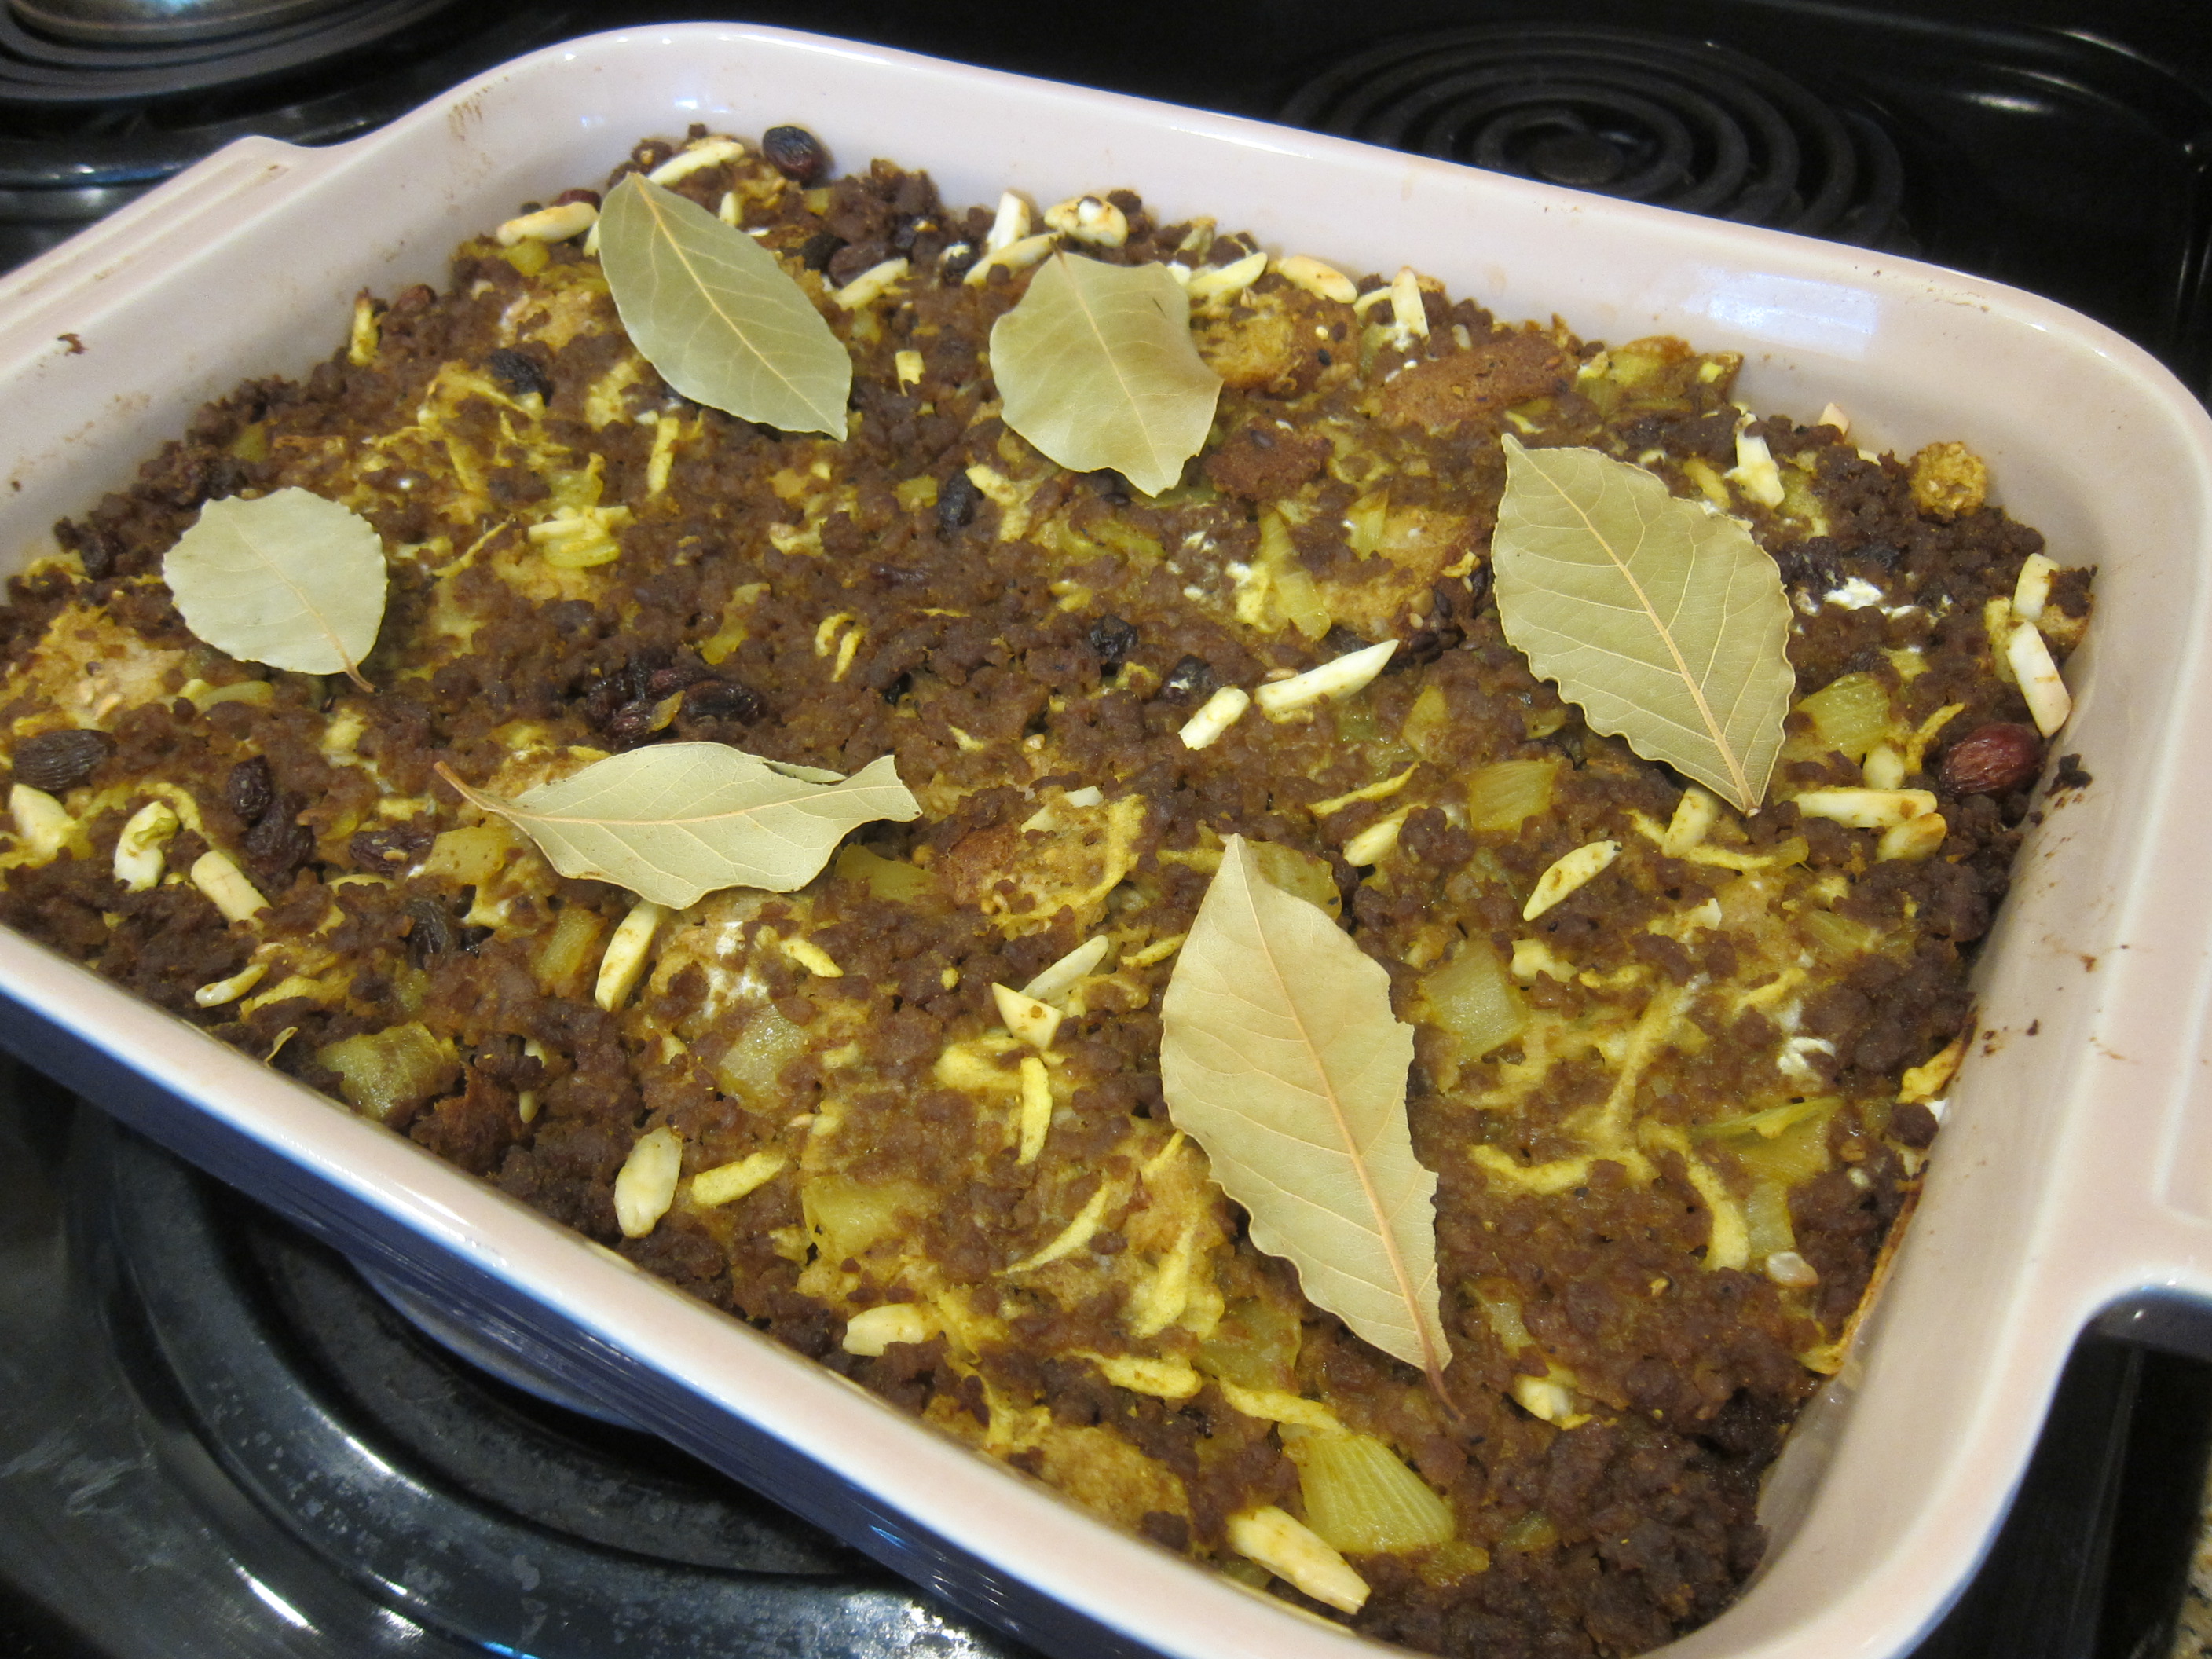
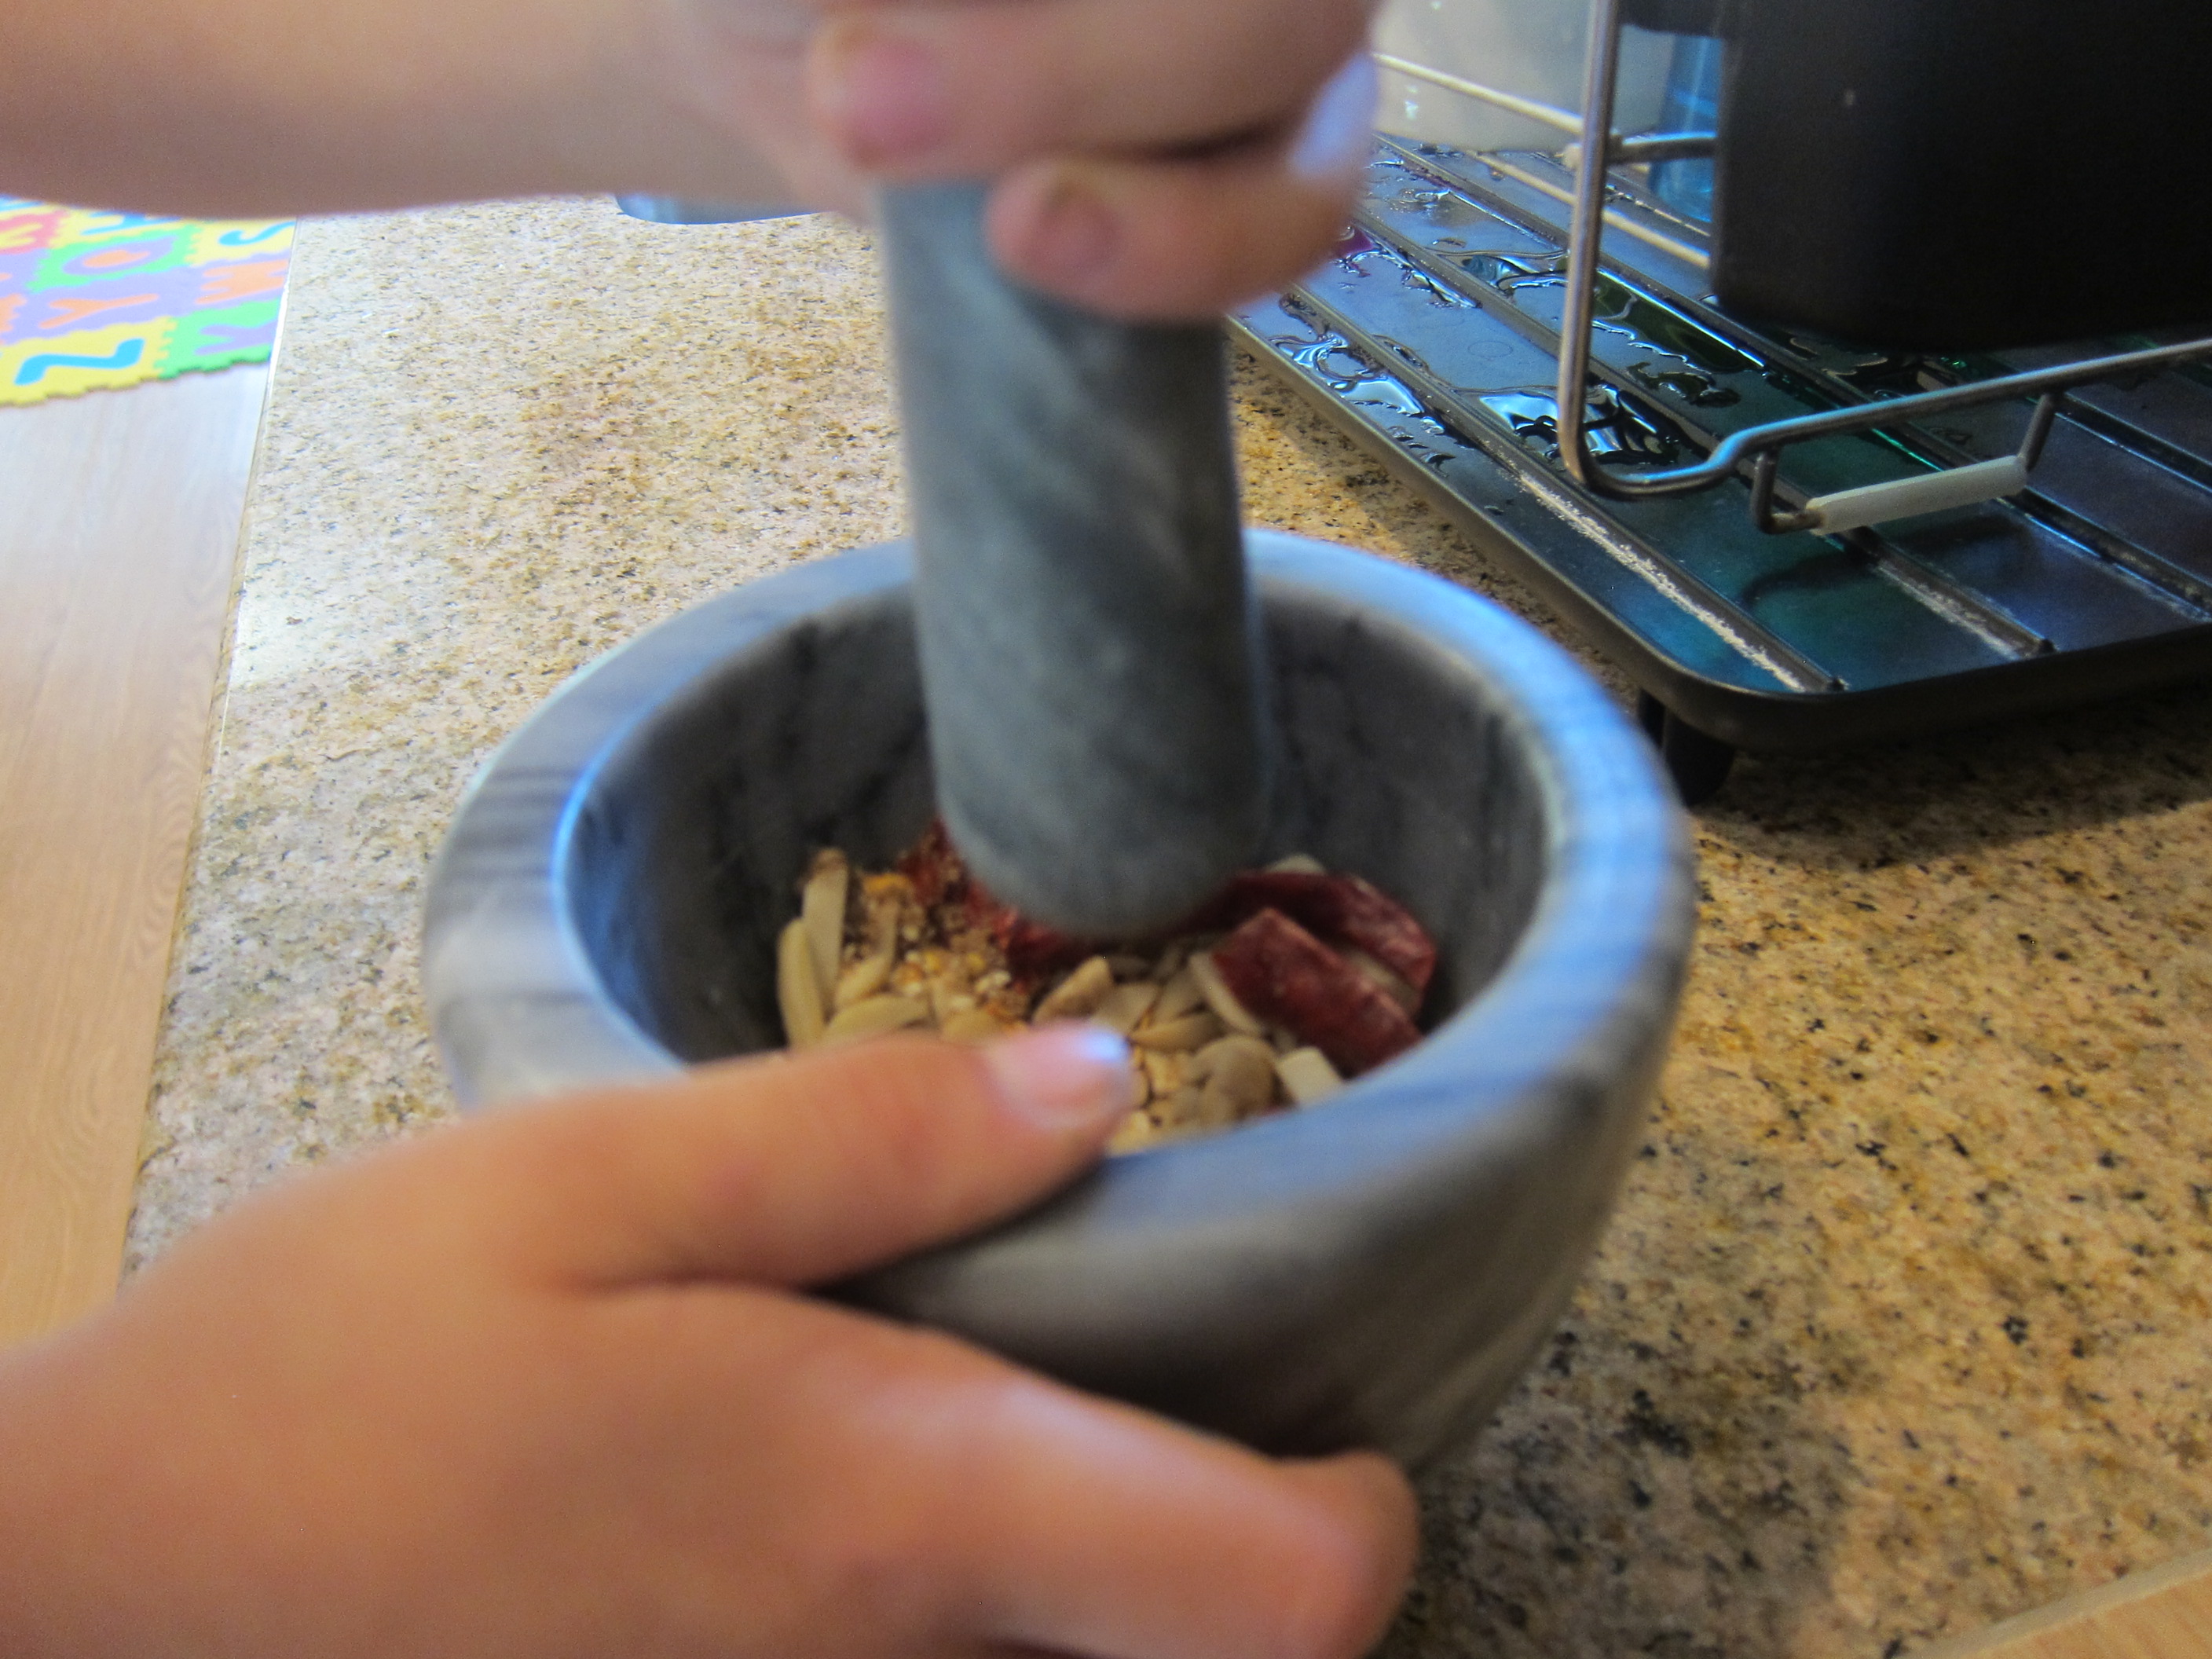
Who doesn’t love the thought of chocolate for dinner? Travis was quite excited when he learned we’d be making a chocolate sauce (mole); unfortunately we used red chilies that were very spicy. Look for mild red chilies for more kid-friendly results.

Mole Recipe (2)

Ingredients:

  • 5 red chilies
  • 2 teaspoons coriander seeds
  • 1 teaspoon sesame seeds
  • 2 tablespoons slivered almonds
  • 5 black peppercorns
  • 1 large onion, sliced
  • 3 garlic cloves, minced
  • 1 tablespoon cocoa powder
  • 2 tablespoons canola oil
  • (14-ounce) can diced tomatoes
  • 1/8 teaspoon cinnamon
  • 1 tablespoon sugar
  • 5 ounces vegetable broth
  • 1 (3-ounce) dark chocolate bar, chopped
  1. Place the chilies, coriander, sesame seeds, almonds, and peppercorns in a mortar. Crush with a pestle. Transfer the spice mixture to a small skillet over medium heat and dry-fry for 1 minute. Set aside.
  2. Meanwhile, heat the canola oil in a large skillet over medium-high heat. Add the onion, garlic, and cocoa powder; cook for 2 minutes.
  3. Add the tomatoes to the onion mixture, along with the spice mixture, cinnamon, sugar, and vegetable broth. Bring to a simmer, then continue to cook for 25 minutes.
  4. Transfer to a blender and process until smooth. Pour into a bowl and stir in the chocolate, stirring until melted. We served the sauce over vegan chick’n!

Mole Recipe (4)


Lettuce Tear

Lettuce Tear (4)

Veronika got to help make lunch today! Okay, not exactly, but here’s a fantastic way to include a toddler while the rest of the family is cooking.

I gave Veronika the extra lettuce from a head we were using, and she didn’t need any instruction about what to do: tear it of course! I provided her with a big plastic bowl, and soon she had a little salad.

Lettuce Tear (1)

Your toddler is the perfect member of the family to patiently tear salad pieces, happily keeping busy with a task that might feel mundane to bigger kids.

Lettuce Tear (2)

In fact there was something beautiful in her concentration, as she worked.

Lettuce Tear (6)

I also gave her a little jar of dressing to shake shake shake, part instrument and part sensory bottle.

Lettuce Tear (3)

Between shaking and tearing, she kept busy with this for a full half hour. What a lovely project for a late spring afternoon.

Lettuce Tear (5)