Balloon Painting

Balloon Paint (5)

When plain old paints and paintbrushes have grown a bit stale, look no further than this novel project! This time around, a balloon itself is your “brush.”

To start, blow up balloons just slightly (you want your little one’s hand to be able to grab on).

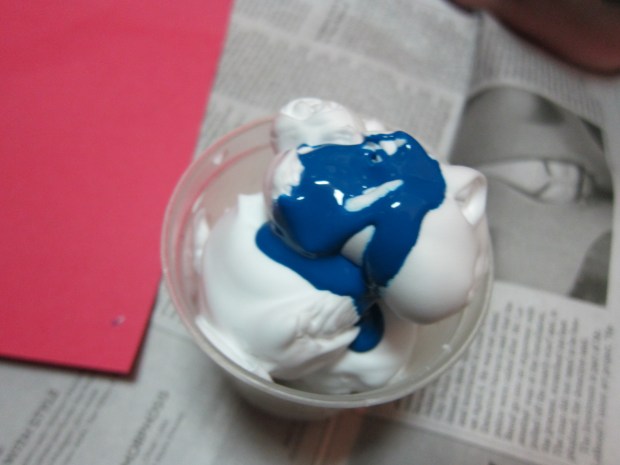
I set Travis up with the balloons and several colors of paint on a well-covered surface. You can stick to a color palate (we used various shades of green), or go wild with vibrant primary colors or any shade in between.

Balloon Paint (1)

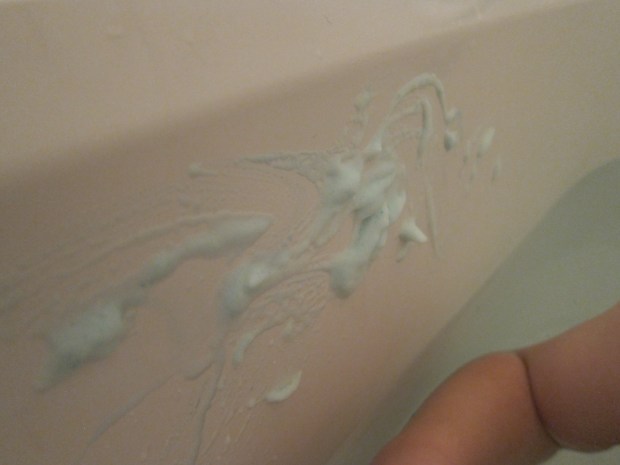
It was neat to see the different effects we could produce with the balloon as our brush, whether making big blobs by pressing or streaks from rolling.

Balloon Paint (3)

The marks almost looked feathery at times, very neat!

Balloon Paint (6)

In complete honesty, Travis decided he didn’t like the activity much, since the balloon got his hand very messy with paint. His favorite part though was looking at the dried painting afterward, and discussing how we had made it!

Balloon Paint (4)For kids who do love making a mess (and being a mess), this is sure to be a huge hit.

Balloon Paint (7)

String Roller Print

String Print (9)

You can upcycle your empty toilet paper tubes and enjoy some messy fun with this project.

To create the rollers for our prints, first squeeze glue onto a disposable plate or tray. Add pieces of string and have fun squishing the string through the glue until coated.

String Print (1)

Travis was actually a bit squeamish about this step, so my fingers got good and messy; I finally cajoled him into winding some of the gluey strings around our two empty toilet paper tubes.

String Print (2)

We set the tubes aside to dry – nap-time was the perfect pause.

String Print (3)

To make our prints, I splattered several colors of paint onto parchment paper. First we needed to swirl them together a bit with a paintbrush.

String Print (8)

Then it was time to roll through our rollers. The whole project was neat because it made me think of roll printing on fabric.

String Print (7)

Travis was a little hesitant about getting his fingers covered in paint, but soon the rollers were rolling about on a piece of poster board.

String Print (6)

He decided to add a few brushstrokes with the paintbrush to finish his creation. Overall, very Jackson Pollock-esque!

String Print (10)

Paper Plate Frog

Paper Plate Frog (9)

Travis has just started camp, and every day the teacher gathers everyone together for craft time. It has renewed his interest in simple hands-on activities – painting, gluing – which lately he seemed to have tired of when it was just mom in charge! Now he comes home and wants to play camp, so we threw together this easy frog with items we had on hand.

For the mouth, fold a paper plate in half; paint the outside green, and the inside black. Travis didn’t even want my help making sure the paint got all the way to the edges.

Paper Plate Frog (1)

For the legs and arms, I drew simple outlines on green craft foam and cut them out.

Paper Plate Frog (3)

Travis was a big helper putting on globs of glue so we could set the legs and arms in the right place once the paint was dry. A pink construction paper tongue was added as well.

Paper Plate Frog (4)

I glued on googly eyes as the final touch. When the frog was ready, Travis decided all on his own that we needed to make flies to feed it. “Let’s paint them white!” White flies? Why not!

Paper Plate Frog (7)

A hoppin’ good time.

Paper Plate Frog (8)

Rock On!

Rock On (3)

As any parent of a rock collector knows, rocks pretty much, well, rock! We’re always finding great stones to add to our collection, but I loved this project from High Five magazine because it upped the stakes a little – we needed to find flat rocks in order to make the project work.

Luckily an outdoor foray yielded just enough smooth flat ones to build a sculpture.

Rock On (8)

The first step was to paint them. I thought we’d use all three primary colors, but yellow didn’t show up very well on the dark gray rocks, so we mostly had a blue and red result.

Rock On (6)

This mama was particularly proud of a green shade she mixed, until a toddler came along and turned it brown – such is motherhood!

Rock on (9)

Let your rocks dry completely.

Rock On (1)

Once dry, we used our largest rock as the base and began gluing them together into a sculpture.

Rock On (2)

And of course what sculpture doesn’t need a healthy heaping portion of extra glue on top?

Rock On (4)

Overall, a very cute twist on rock collecting. What does your sculpture look like? Please share in the comments!

Paint with Your Feet

Paint Feet (4)

We enjoyed tactile foot play earlier in the week with foot sensory bins, and continued the theme yesterday evening. This game would no doubt be even better on a bigger piece of fabric outside on a sunny day, but we made do on a rainy day with the bathroom floor and a plain white t-shirt from the craft store!

First, Travis chose his colors, and we filled a big bin with a generous portion of each.

Paint Feet (2)

I started out painting his foot one color at a time, and then he would stamp on the white shirt.

Paint Feet (3)

After a while, he wanted to paint his feet himself – and then painted his knee as well, to which I could only shrug, ‘why not?’. Then of course he had to try standing in the paint! (Note: hold your child carefully, paint is slippery). I would lift him out and place him on the t-shirt to take a few steps each time before he climbed back in the bin.

Paint Feet (5)

In retrospect, I wish we’d done this to music so he could have danced around, but I still loved our final product.

Paint Feet (6)


Animal Bath Time

Animal Bath (4)

We were stuck inside with a late winter snow storm, so it seemed as good a time as any to get messy!

In the bathroom, I laid out several of Travis’s animal toys (definitely use ones that are plastic and washable), along with various colors of paint on a paper plate and a few paintbrushes. He seemed almost disbelieving when I said we were going to paint the animals, but then dove right in!

Animal Bath (1)

He loved choosing which colors each animal should be, including blue cows, yellow donkeys, and purple rabbits.

Animal Bath (2)

After the animals had been covered in his artwork, it was time to give them a bath! Arguable this part was even more exciting than the painting had been.

Animal Bath (5)

I had a bucket of soapy water ready to go in the tub, and Travis loved rinsing off the animals.

Animal Bath (6)

He wanted to run them under the faucet too before we declared the game all done! In sum, a super nice snow day distraction. Although on a summer’s day, you could probably play this entire game out doors with big soapy buckets!

Animal Bath (3)

Little White Duck

little-white-duck-2

Our recent play with a Farm kit from Koala Crate inspired this little craft. I always love crafts that feature handprints, turning the duck into a memento instead of just another crafty project.

To start, trace your child’s hands and one foot on paper; cut out.

little-white-duck-3

Glue the pieces down so the foot is the body of a duck and the hands are his two wings; toddlers will need help with this step to get the alignment right, but preschoolers can do so on their own!

little-white-duck-5

Now came Travis’s favorite part: ripping up toilet paper or tissue paper into small pieces to be the duck’s feathers. We dolloped glue all over our white duck, and pressed on his feathers.

little-white-duck-4

Once the feathers dried, Travis painted on two black eyes and orange “feet”, although he got a bit creative with the placement of the feet. Again, part of the charm of these projects is seeing the way kids interpret them!

little-white-duck-1

Overall, super cute and sure to adorn our fridge for a while.

Rock Box

rock-box-9

If your child likes collecting rocks, this craft not only lets you decorate with your latest finds from outside, but also gives your tot a place to store future treasures!

In the morning, I showed Travis the plain wooden box I had purchased (from Creative Hobbies) and asked him if he wanted to fill it with treasures. Of course the answer was yes!

It was a cold, gray morning, but that didn’t deter my little rock hunter. We headed out to our building’s courtyard to select some special rocks to take home.

rock-box-1

If it’s not too snowy in your area, head along a local nature path and see what treasures you find, not necessarily just rocks.

rock-box-2

Once home, we sorted our collection, and selected the smaller rocks to glue to the top of the box.

rock-box-3

As always, Travis loved squeezing glue, but pressing on the rocks was the novel part here, so much bigger than the objects we normally glue down.

rock-box-6

I left the box to dry overnight, and then pulled out the paints the next morning.

rock-box-8

We used a combination of silver and purple, giving our rock box a glittery, space age-y feel. Travis was very intrigued with how it felt to paint over the bumpy rocks, and loved covering every surface of the treasure chest.

rock-box-10

Once dry, it was time to store our remaining rocks inside! What treasures does your child like to collect? Please share in the comments.

rock-box-12

Shaving Cream Paint

shaving-cream-play-7

Travis has enjoyed making a mess painting with shaving cream before, but this time we added in a drop of paint to each cup of shaving cream to produce lovely pastel colors.

Travis had to help squirt out the shaving cream of course – he loves watching it foam! – and then helped stir in the paint we added.

shaving-cream-play-3

What a pretty blue we got!

shaving-cream-play-4

Then it was time to make a big globby mess. He wasn’t interested for as long as I thought, probably because, as mentioned, we have already done a game very similar to this.

shaving-cream-play-5

While he painted though, he told me he was drawing cupcakes. I added a nice round cupcake to our artwork bakery.

shaving-cream-play-6

For a novel spin, we brought the leftover paint into the tub at bathtime – it makes fun foamy decorations on the side of the tub!

shaving-cream-paint

Safari Tracks

koala-safari-20

We tacked on one final craft after having fun with our recent Safari crate from Koala Crate – animal stamp foot prints!

To make the stamps, you’ll need sticky foam sheets from a craft store. Draw footprints on the sheets to look like various animals – pads with toes for lion’s paws, a hoof for a zebra, a webbed foot for a crocodile, and so on.

koala-safari-15

Travis loved playing with the sticky foam while I drew the shapes, but wasn’t interested in drawing animal prints of his own.

Help your child cut out the shapes, and attach each print to cardboard squares. Voila! You have a stamp!

koala-safari-16

Paint over the stamps with a foam brush, and press onto paper for animal tracks.

koala-safari-18

Travis got very impish splattering the green paint to begin with, but soon loved the way the brush felt over the bumpy raised footprints.

koala-safari-21

Don’t forget the binoculars to explore which animals have made tracks in your home.

koala-safari-17