Drawing on Pumpkins with Markers

Super Simple Pumpkin (2)

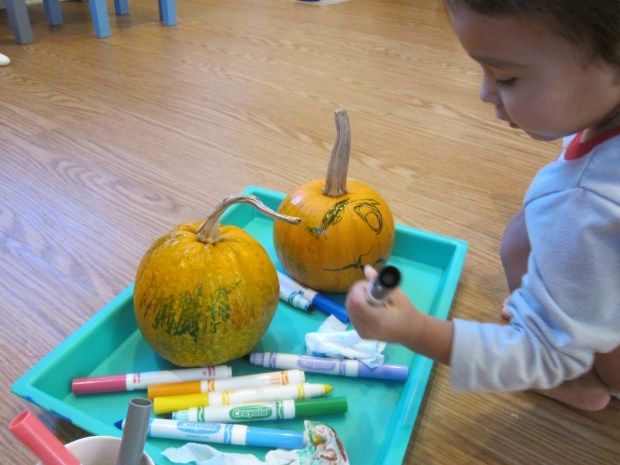
Veronika has loved decorating our pumpkins in the run-up to the big carving day, so I needed another version to keep her happy. This one has the added bonus because kids can draw, wipe clean, and then repeat the process as many times as they like!

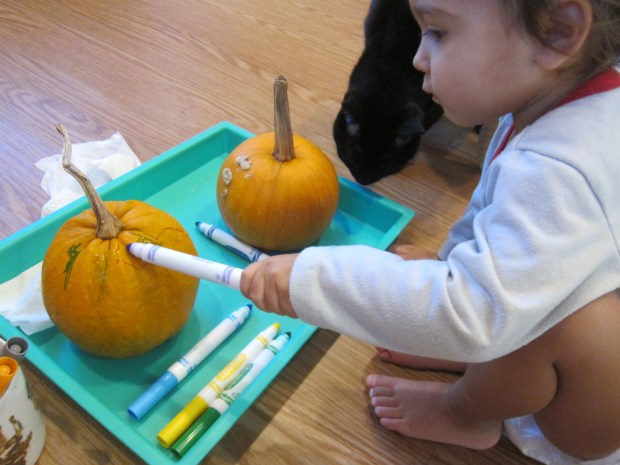
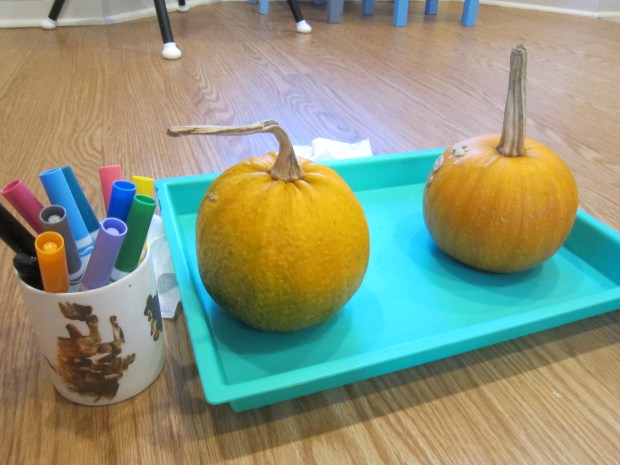
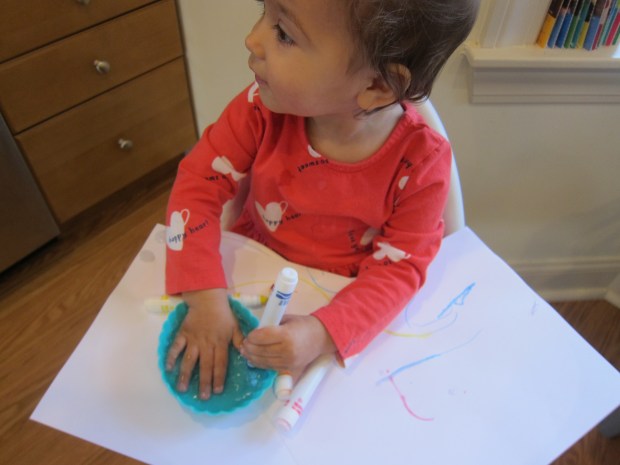
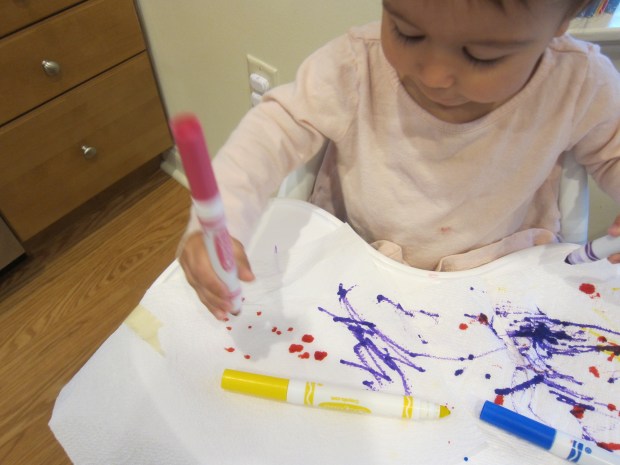
I set out two of our medium-sized pumpkins, along with lots of washable markers. The naturally waxy surface of a pumpkin is perfect for markers, so your little one can draw as easily as if it’s paper.

Super Simple Pumpkin (1)

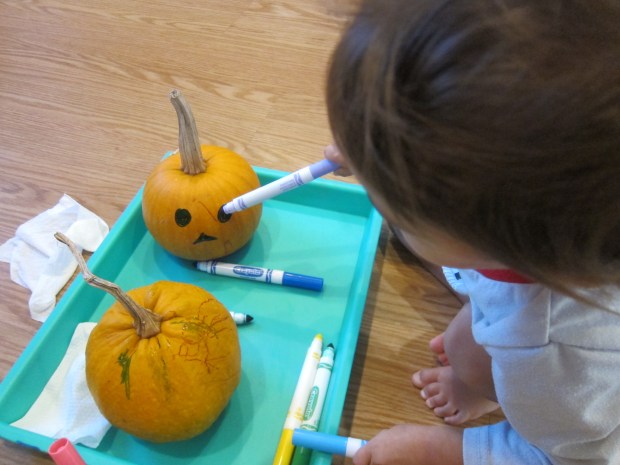
Veronika just scribbled of course, but I made a few jack o’ lantern features on the pumpkin next to her.

Super Simple Pumpkin (3)

Then I showed her the secret: one swipe of a wet wipe and her drawings were magically erased!

Super Simple Pumpkin (7)

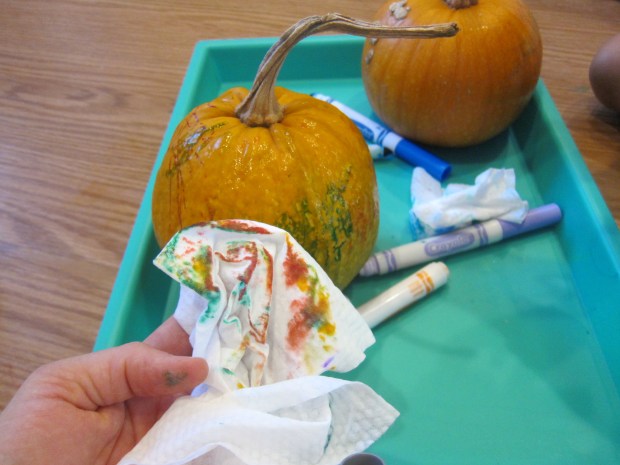
She loved giving her pumpkins a ‘bath’ in this way. “He’s all clean,” she told me proudly. And then she could start the process again.

Super Simple Pumpkin (5)

Because you don’t have to worry about a mess, this craft is also a perfect toddler solo activity while you get other things done around the house.

Super Simple Pumpkin (9)

Marker Painting or Drawing

Marker Painting (6)

We run through markers pretty quickly around here, and normally Travis’s school has a great recycling program for dried-up ones. But with school closed, I found a new use for those dried-up markers today: toddler paint brushes!

Marker Painting (3)

I simply set out paints for Veronika (using old play dough jars as paint pots), and showed her how to dip the tip of the marker in the paint. It then becomes a brush!

Marker Painting (1)

These work best as “dot marker” paints. If you have enough paint on the tip, you can get more of a smeary line, but Veronika was quite content to dot dot dot.

Marker Painting (7)

She worked so carefully, dabbing first in the paint and then on her “canvas”.

Marker Painting (6)

I also squirted some paint onto her paper so she could run a marker through it for thicker lines.

Marker Painting (5)

She eventually decided it was fun to smear all the lines together with her hands. Here’s her final masterpiece:

Marker Painting (8)

As an alternative method, turn the dried-up markers into “watercolors”. For this version, I placed a shallow dish of water on Veronika’s high chair tray, along with white paper and a few markers with very little ink left.

Marker Drawing (1)

As you dip in the water, the colors become vibrant once more, with a pretty, swirly effect very similar to watercolor paints.

Marker Drawing (4)

Veronika again loved the process of dipping…

Marker Drawing (5)

…and painting.

Marker Drawing (6)

She also discovered the little dish was wonderful for splashing her hands in, and tried to make some watery handprints on the paper.

Marker Drawing (3)

Next time I would use thicker watercolor paper for this activity, but in a pinch, regular printer paper was fine. She dumped a little of the water right out onto the paper, which really made the colors blend and swirl!

Marker Drawing (8)

You’ll know the game is done once the tip of the marker turns white, and then it’s time to recycle.

Marker Drawing (7)

Paper Towel Drawing

Paper Towel Drawing (2)

Here’s an easy art hack for toddlers, especially if you have a child who wants to get into an older sibling’s art supplies. Give them a paper towel to mark up instead! Because the paper towel has absorbency, the colors blur and bleed in fascinating ways.

I gave Veronika four different color markers and showed her how to make thick lines across the paper towel.

Paper Towel Drawing (1)

She didn’t need to be shown twice! Soon she was coloring avidly, clearly interested with how the markers felt on the slightly bumpy surface.

Paper Towel Drawing (3)

Next I showed her how to press in one spot and make a dot (almost like dot markers). “Dot dot dot!” she started saying happily as she imitated.

Paper Towel Drawing (7)

She also said the names of the colors as she drew, parroting back “pink!” or “yellow!”

Paper Towel Drawing (5)

Eventually, I taped the paper towel pieces down so she could keep going without direct supervision.

Paper Towel Drawing (6)

Even when the paper towels slipped, I didn’t have to worry since the washable markers wipe clean from her high chair tray in a pinch.

Paper Towel Drawing (8)

Note: You can also try this activity on coffee filters, which we did later in the day. They have a similar absorbency for a similar effect.

Paper Towel Drawing (9)

The Scribble

The Scribble (2)

It was bound to happen: Veronika discovered that she can color on the walls (luckily with washable crayons!). So here’s an ingenious hack to foster your toddler’s artistic impulses with a safer way to color.

I used magnets to hang a large sheet of craft paper on the fridge and sat Veronika down in front of it with a few markers. She didn’t need me to tell her to start coloring; she immediately launched into the art of the scribble.

The Scribble (1)

Aside from one mommy stick figure, this drawing was 100% Veronika’s. She loved switching up the colors.

The Scribble (3)

She also was very focused on putting cap to marker in between colors, a great chance to work those fine motor skills!

The Scribble (5)

As she drew, I talked about how the color on the paper was a “yes” (use sign language here to reinforce the idea!), but that other places were a “no”, like the floor or her hands.

The Scribble (4)

This will help a toddler start to learn that art belongs on paper, for now at least!

As for those crayon marks on the wall, here’s an ingenious trick: Heat the area with a hair dryer for about 30 seconds to melt the wax. Then scrub off the remaining streaks with soap and water. Ingenious!

The Scribble (6)

Magic Marker Color Experiment

Magic Marker Color (6).JPG

This quick illustration of water’s movement might have seemed ho-hum to Travis after a few of the more complicated activities we’ve done recently, but he loved it!

Magic Marker Color (1)

To set up, I cut a paper towel into strips, each about one inch wide and four inches long. I let Travis tear them apart along my slits, which he enjoyed.

Magic Marker Color (2)

We made a line with magic marker near the bottom of each strip.

Magic Marker Color (3)

Dangle these strips into a clear plastic cup filled with water so that the paper towel is touching the water, but not the part you’ve colored in.

Magic Marker Color (5)

The water will begin seeping up your paper towel (here’s that capillary action in action again!), and Travis loved watching it.

Magic Marker Color (4)

He wanted to experiment further in so many ways. First, we continued dipping the paper towel further into the cup. This made the marker color continue to bleed upwards, until the ink was so faint you couldn’t tell anymore.

Magic Marker Color (8)

Then we colored a wider piece of paper towel with multiple markers, and draped this all around a plastic cup. Which color would creep up the fastest? He was thrilled watching the purple and green in the middle, which outperformed the others.

Magic Marker Color alt

Plus it was fun to play with leftover soggy paper towels and cups. So this quick experiment was well worth it!

Magic Marker Color (7)

Starburst Symmetry

Starburst SYmmetry (10)

This quick project was a fantastic way to show Travis circular symmetry, slightly different from symmetry with two halves as we’ve explored late in symmetrical socks and paper doll projects. There was a lot of need for precision with this activity, so I was proud of Travis’s concentration level.

To start, fold a coffee filter in half. Then in half again, then in half again! Travis took the task of folding and making a good crease each time quite seriously. At the end, your filter will be the shape of an ice cream cone.

Starburst Symmetry (1)

Next he spritzed the filters with water until damp on each side, but not soaking.

Starburst Symmetry (2)

Use marker to make dots all over the filter, counting to three for each dot. This was a great little lesson in patience and also not scribbling (as he’d done recently for a different type of coffee filter project).

Starburst Symmetry (3)

Flip the filter over – wow! His pattern was waiting there on the other side.

Starburst Symmetry (4)

I showed him how to go over his dots again – slowly and carefully – to make the final result a little more clear.

Starburst Symmetry (5)

Now he opened it up for a big reveal. “Wow!”

Starburst Symmetry (6)

He wanted to know how the pattern had gotten there, but understood once I explained that the marker went through all 6 layers of the filter, resulting in perfect symmetry in all 6 segments.

Starburst Symmetry (8)

I loved how his pattern made a purple diamond, unintentinoally.

Starburst Symmetry (11)

These are beautiful hung on the wall or fridge once they dry!

Starburst Symmetry (9)

“Watercolor” Art

Art Straw (5)

We revisited two old art ideas today – both of them imitating watercolor painting without use of actual watercolors! – when Travis stumbled across something by accident. We were playing with his magnet set in water (yes, magnets work in water!) and he decided he wanted to dip his markers in as well.

Art Straw (7)

I pulled out watercolor paper for him, and he loved the way that the wet marker tips looked smeary on the paper – just like watercolor paints. This was an activity I first did with him as a two year old – so long ago this blog didn’t exist! Quite fun to revisit with him at an older age.

Art Straw (6)

It reminded me of a time we turned regular paint into something closer to “watercolors.” This was back in the fall, so our final product was Halloween “monsters”. This time we chose pretty spring pastels.

Mix your tempera paint with a little water, and you have a nice thin consistency that will work for this project.

Art Straw (3)

Place a straw in each color; put your finger on top of the straw to create a vacuum, then drip onto watercolor paper.

Art Straw (1)

Blow into the straw (make sure your children are old enough to blow out, not suck in!), and the paint will spread in beautiful patterns all over the paper.

Art Straw (2)

Travis tired of the straw quickly, but loved telling me which color to put where until we had a beautiful spring picture.

Art Straw (4)

We decided it looked like the tulips we’d seen in the park that day!

tulip (1)

Markers + Paper = A Long Story

Long Story (5).JPG

Snow day here! The school snow day caught me unawares (I was sure they wouldn’t cancel!) which means we had to come up with lots to do indoors and quick! Enter this easy two ingredient game, and you have endless varieties of play.

Travis was intrigued watching me set up. I laid down piece after piece after piece of white paper in a row, and taped them together, until we had a long scroll.

Long Story (1)

I told him it was for a story, and if he told me what was happening in each frame, I would draw it in. He ended up dictating a fantastic tale involving a crocodile on a boat, who likes to vacuum.

Long Story (3)

Later there were some bells with feet who come to the crocodile’s rescue.

Long Story (4)

I happily followed along with my limited art skills.

Long Story (2)

Once our scroll was filled, he immediately wanted another story. This time, I posed the challenge that he be the author and illustrator.

His story turned out to be all about bells (bells are big here, these days), who got progressively bigger, and had hair and large eyes to see bugs.

Long Story (7)

Even though the story was a bit nonsensical, I loved watching his artistic process, and seeing the way he used markers to capture what he was trying to say.

Long Story (8)

Using your same pictures, you can weave new tales with different words, or grab more paper and keep making up new stories. The only limit here is when you run out of paper or tape, whichever happens first.

Long Story (6)Happy snow day!

Paper Plate Fraction Puzzles

Plate Fractions (6)

These homemade puzzles were easy as can be, and were a huge hit! Although preschoolers might not entirely latch onto the notion of fractions, it’s an easy way to introduce the concept while having fun. Bigger kids can cut their puzzles into increasingly intricate fractions, such as sevenths or eighths.

To start, all you need to do is decorate paper plates with markers. Travis was very intent adding brown dots and brown circles around the rims of the plates.

Plate Fractions (1)

I added a few decorative elements to each plate so that there would be a recognizable image to form into a puzzle for each.

Plate Fractions (2)

For a 3 year old, I cut plates into halves, thirds, or fourths.

Plate Fractions (4)

Travis puzzled over making the four pieces of this one into a full circle for quite some time!

Plate Fractions (8)

He loved our puzzle that was in thirds, and was so delighted every time he made each paper plate whole again.

Plate Fractions (5)

A great little morning diversion.

Plate Fractions (7)