Crumbly Coconut Dough

Coconut Dough (2)

With about 2 feet of snow outside, we needed something tropical around here! This easy sensory dough was the perfect indoor amusement.

Coconut Dough (1)

In a shallow bin, combine 1 cup coconut milk with about 2 cups cornstarch. You may have to adjust the ratios slightly; at first I had something similar to ooblek, but dusting the mixture with just a bit more cornstarch made it perfect. I crumbled it between my fingers and it began to look – and smell – like tropical sand!

Coconut Dough (3)

Add any fun items that will heighten the tropical vibe. I had a few bright purple flowers, as well as some star fish from the craft store. Veronika enjoyed plucking the flowers out, and testing their texture.

Coconut Dough (4)

More than anything, she loved simply stirring at the “sand”. This was a great way to keep busy and feel warm on a winter day.

Colorful Goo Bags

Goo Bag (4)

These pint-sized sensory bags are just right for little hands, and can be played with in multiple ways.

To make the filling mixture for the bags, combine 1 cup cornstarch, 1/3 cup sugar, and 4 cups cold water in a saucepan. Cook over medium heat, whisking frequently, until the mixture starts to become clearer and thickens. It will be almost like Vaseline!

Goo Bag (1).JPG

Remove from heat and cool completely. From here, I spooned it into snack-sized zip-top bags. Add a few drops of food coloring to each. I used six bags to get the full rainbow.

Goo Bag (2)

Seal the bags and run under water to remove any mess on the outside, then squish with your hands until the color is incorporated. Now you have the perfect squishy bags for small hands!

Goo Bag (6)

Veronika was immediately enthralled with the bags. She loved picking them up and squishing in her hands.

Goo Bag (5)

She could pile them up, or lie one flat on the ground and press her hands down into it.

Goo Bag (7)

Then she had some imaginative game going on for quite some time that involved transferring them from one pile to another and flinging them behind her back. She also loved hiding them under a dish towel and then uncovering them.

Goo Bag (9)

At one point I got down at her level to talk about the colors she was holding, but for the most part, she played solo, quite happily.

Goo Bag (3)

Needless to say, these were tons of fun in a small package.

Goo Bag (8)

Mashed Potato Sculpture

Mashed Po Sculpture (2)

This is a great sensory activity… and a way to get your kid to try mashed potatoes!

Start with instant mashed potatoes as the base. Yes, you can bake and mash your own, but the instant stuff has a sticky quality that makes it better suited to this “art” project. I whipped up a batch using almond milk, Earth Balance butter, and the potato flakes, and then let it cool completely.

Mashed Po Sculpture (1)

When Veronika was finished with lunch, I spooned a huge heap of this onto her tray. She looked instantly delighted!

Mashed Po Sculpture (3)

Set out a few props to encourage the artistic process. Veronika received a measuring cup and spoon, and soon was scooping, digging, and poking holes in it.

Mashed Po Sculpture (8)

I showed her how to make a few “sculptural” elements, including round balls and little snakes.

Mashed Po Sculpture (4)

I tried for a little mashed potato snowman, but Veronika didn’t let him last long!

Mashed Po Sculpture (7)

And of course she discovered that little bites of the stuff was delicious. Eager fingers kept digging in for more, both to eat and to play!

Mashed Po Sculpture (5)


Decorating Pancakes

Decorating Pancakes (11)

Anyone who follows this blog knows I love to cook with my kids, and I firmly believe in getting kids into the kitchen from the earliest age. It’s truly never too early; today Veronika helped me decorate pancakes, and she’s not quite 13 months old!

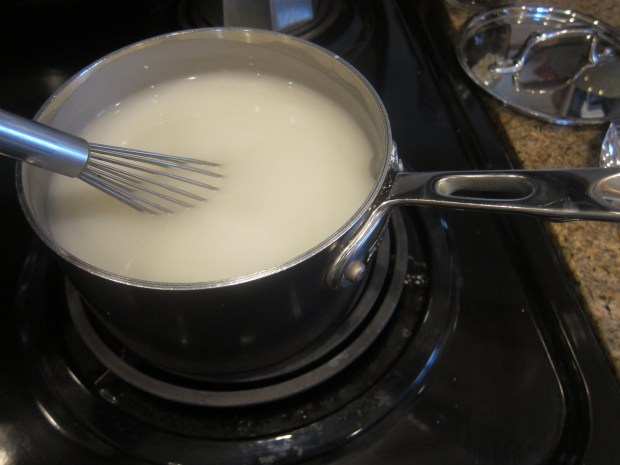
Okay, technically this was more of a sensory play activity than a real recipe, but we sure had fun. First, I whipped up a batch of pancakes. You can make some from scratch with your favorite recipe, but I took a shortcake with Cherrybrook Kitchen’s vegan and gluten-free mix. Veronika loved playing with extra measuring cups while I mixed the batter.

Decorating Pancakes (1)

For extra learning, I cooked the pancakes in heart- and star-shaped molds so I could talk about shapes with Veronika. Regular circles are just fine too, though!

Decorating Pancakes (2)

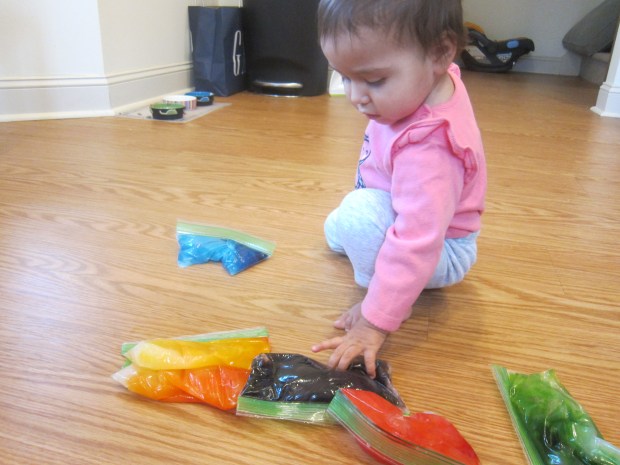
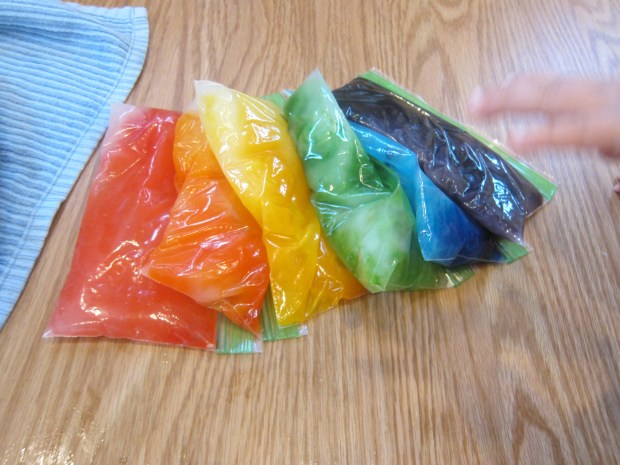
I set the pancakes down on the floor on paper plates along with a few pouches of baby food. Look for bright colors like pinks and reds for this activity.

Decorating Pancakes (4)

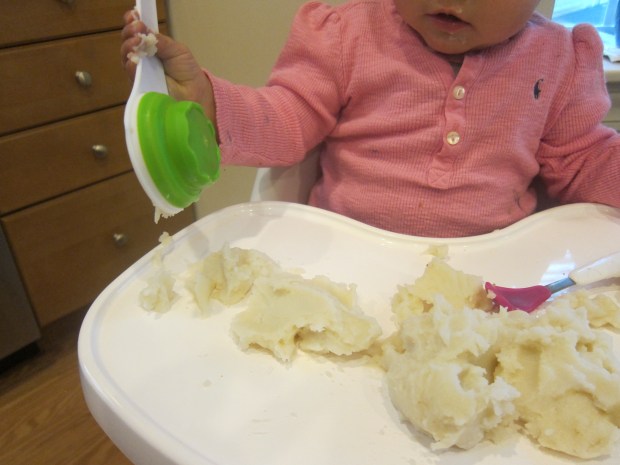
Veronika only needed me to demonstrate once before she was eagerly “decorating” her pancakes. She proudly pressed the spout of the pouch down on the pancakes, and I think even tried to say “squeeeeze” back to me.

Decorating Pancakes (6)

Of course there was the necessary tasting, too. Veronika: meet pancake.

Decorating Pancakes (5)

And the pouch itself got a sip or two.

Decorating Pancakes (10)

I had fun decorating right alongside her, creating a make-believe bakery game.

Decorating Pancakes (7)

When you’re done, you have breakfast or snack built right in to your day. Or if the pancakes get very mushy from all that baby food on top, just consider this a sensory play activity and it’s still a win-win.

Decorating Pancakes (8)

Even the wax paper we had on the floor for easy clean-up was fun!

Decorating Pancakes (12)

You’ll notice that I had Veronika do the activity without a shirt, which seemed the safest way to avoid stains. Plus, I love that little buddha belly these days!

Decorating Pancakes (9)

Board of Curiosities

Board of Curiousity (8).JPG

Although I’d never heard of them before, there is apparently a genre of Montessori busy boards featuring tactile items for toddlers to lift, open, spin, twist, turn, and otherwise manipulate, which are quite popular. These boards are not cheap (some of the more bespoke ones on Etsy run upwards of $150!) but you can purchase a relatively cheap alternative at sites like Amazon.

If you’re feeling truly crafty, make your own from upcycled items around the house – a doorbell, an old latch, a panel to lift – and attach securely to a wooden or fiberboard frame. The key is things your baby can manipulate to hone those fine motor skills.

I wasn’t feeling that crafty, so did opt for a mid-priced version from the store. And Veronika loved it! As she played, I used verb words to talk about her actions. She could spin…

Board of Curiousity (2)

…twist…

Board of Curiousity (1)

….open or unlatch…

Board of Curiousity (3)

And more! Her favorite turned out to be a little button.

Board of Curiousity (4)

Although not actually an old doorbell, every time she switched the button from one position to the other I said, “Ding dong!”

Board of Curiousity (6)

As you can tell from her smile, this was a huge hit.

Board of Curiousity (7)

The “busy” part of these boards is that they can keep your little one occupied while you do other things around the house.

Board of Curiousity (5)

A win-win!

Board of Curiousity (9)

Textured Sensory Wall

Texture Wall (6)

This sensory wall is so easy to throw together, but your baby or toddler will love it! Adjust the height accordingly; for Veronika, I placed the wall low to the ground so she could manipulate items while sitting. For older toddlers, make it chest height so they can cruise along as they practice walking!

I taped four pieces of colored construction paper in a square on the wall to begin: visual stimulation!

Texture Wall (1)

Cover the construction paper with contact paper, sticky side out, and secure with tape. Now you can cover the sticky surface with whatever you like! Large pom poms, curly ribbons, and jar lids were all items that I had on hand that worked well.

Texture Wall (2)

I showed Veronika how to pull an item off and place it back on again.

Texture Wall (3)

She took to it right away, and surprised me with the objects she gravitated towards. I thought she’d love the pom poms, but jar lids were ab igger hit.

Texture Wall (5)

Talk about all the colors with your little one, or the crinkly sounds the riibbon makes, or the different textures.

Texture Wall (4)

Later, I added a few instant camera pictures for her. She loved peeling these off from the sticky surface.

Texture Wall (8)

And even was able to stick them back on!

Texture Wall (9)

Leave the wall up over the course of a day (or more!) and let your child return to it; you might notice him or her interacting with it different ways.

Texture Wall (12)

Quick Make & Play Edible Sensory Bottle

Edible Bottle (4)

This fantastically easy sensory bottle is quite possibly my new favorite thing in the world…and Veronika’s, too!

To set up the bottle, save any clear plastic juice bottle with a wide mouth and a lid you can screw on tightly.

I gave Veronika the bottle (which of course is a toy all by itself!) and set out a few easy-to-hold snacks in front of her, including Plum Organics super puffs and Earth’s Best letter of the day cookies (both vegan!).

Edible Bottle (1)

I showed her how to drop some of the snacks into the bottle, making a nice plink sound each time. She soon was following suit, with the added fun that she could nibble as she worked.

Edible Bottle (2)

Once she paused to enjoy the puffs, I filled the bottle a little further and put on the cap.

Edible Bottle (3)

Now it was a sensory bottle to shake!

Edible Bottle (5)

The real beauty of this sensory bottle became apparent as soon as we were on the go. At the grocery store, first Veronika could just enjoy playing with it, shaking it or chewing at the cap.

Edible Bottle (8).jpg

But when she got a little fussy, I unscrewed the cap and surprised her: a snack!

Edible Bottle (9)

She kept handing me the bottle over and over, asking for little puffs with sounds and gestures. I loved watching her enjoy the toy in multiple ways during our shopping trip and I may very well always keep one of these on hand from now on.

Edible Bottle (6)

Baby-Friendly Ice Sensory Activity

Baby Ice (2)

Here’s a way your baby can cool off while fitting in sensory play on a hot day!

I took Veronika outside before the sun was too high in the sky, along with a bowl of ice cubes and a few tools.

Baby Ice (1)

First, I simply wanted to see how she would react to the ice. Some babies may want to grab it and really get in there! Veronika seemed a touch nervous about how cold it was but liked the sensation on her toes.

Baby Ice (3)

For added fun, I buried two shape toys in the ice. She loved reaching in and grabbing them out.

Baby Ice (4)

A wooden spoon added to the fun, too. She could “stir” the ice, or tap against the bowl. I put a few pieces on the hot patio and we watched together how quickly they turned to water.

Baby Ice (7)

You can also use measuring cups as scoops. These were fun for her to reach into the bowl with. Or just nibble on!

Baby Ice (5)

Don’t forget about sound! Put a few pieces of ice in one of the measuring cups and shake it for an auditory sensory experience.

Baby Ice (6)

And when you’re done, clean-up simply means dumping out the ice to melt in the grass!

Baby Ice (8)

“Cooking” with Flour

Cooking with Flour (10).JPG

Many parents I know resist flour play, saying it’s either too messy or too much of a hassle. But I love this sensory material for babies. First, it’s edible, so no worries if little fingers make it up to little mouths. Second, as long as you cover your surface, clean-up is a breeze. Set down an old shower curtain or plastic table cloth for this one, and you’ll be able to contain the mess.

I stripped Veronika down to just a onesie (go all the way to the diaper for even easier clean-up!), and gave her a few measuring spoons and cups. She was having fun already, and wondering about this interesting bag.

Cooking with Flour (1)

I sprinkled a little pile of flour in front of her. In went the hands right away!

Cooking with Flour (2)

There are so many ways to play with flour and your baby. Demonstrate how to make squiggles in it.

Cooking with Flour (7)

Use the spoons and cups to scoop and pour.

Cooking with Flour (8)

Sprinkle a little light dusting of flour over toes and hands for a tickly sensation.

Cooking with Flour (3)

And just get good and messy!

Cooking with Flour (4)

She loved wiggling her legs through the flour until her thighs were completely coated!

Cooking with Flour (9)

Basically she just had a blast, which gave me time to get a few other things done in the kitchen.

Cooking with Flour (6)

When we were done, I just plopped her right in the bath!

Cooking with Flour (5)

Mango Popsicles

Mango Popsicle (5).JPG

Popsicles aren’t just for big kids on hot days! Try this easy recipe for your baby or toddler so he or she can share in the icy cool fun, too.

Peel and chop 1 mango, and transfer to a blender. Puree until smooth.

Mango Popsicle (1)

Add the juice from 1/2 a lemon and stir to combine. Pour the mango mixture into cups. Small dixie cups would have been ideal but since I only had larger paper cups, I poured in just a small amount to each one. Add a popsicle stick to each cup and freeze until firm.

Mango Popsicle (2)

At first I thought this might be easier to enjoy on the floor with wax paper underneath Veronika to contain the mess. But it turns out the wax paper itself was a distraction!

Mango Popsicle (3).JPG

Up to the high chair we went! From here, watching Veronika figure out the popsicle was a delight. First she just wanted to feel it.

Mango Popsicle (7).JPG

The cold mango received alternating expressions of surprise, nervousness, and amusement.

When she finally figured out how to get the mango up to her lips, her look was pure delight!

Mango Popsicle (6).JPG

Truth be told, she didn’t actually eat much of this, but food is really still practice for Veronika. She did get to enjoy fantastic sensory play, banging the popsicle on her tray, sliding it around, occasionally getting a sweet taste, and smiling up a storm.

Mango Popsicle (8).JPG