
This sensory wall is so easy to throw together, but your baby or toddler will love it! Adjust the height accordingly; for Veronika, I placed the wall low to the ground so she could manipulate items while sitting. For older toddlers, make it chest height so they can cruise along as they practice walking!
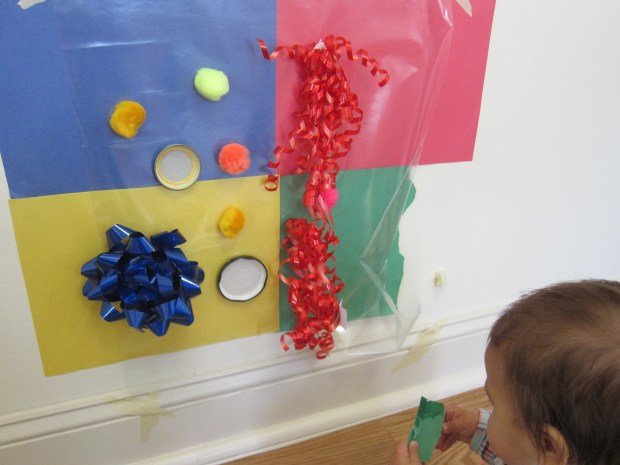
I taped four pieces of colored construction paper in a square on the wall to begin: visual stimulation!

Cover the construction paper with contact paper, sticky side out, and secure with tape. Now you can cover the sticky surface with whatever you like! Large pom poms, curly ribbons, and jar lids were all items that I had on hand that worked well.
I showed Veronika how to pull an item off and place it back on again.

She took to it right away, and surprised me with the objects she gravitated towards. I thought she’d love the pom poms, but jar lids were ab igger hit.

Talk about all the colors with your little one, or the crinkly sounds the riibbon makes, or the different textures.

Later, I added a few instant camera pictures for her. She loved peeling these off from the sticky surface.

And even was able to stick them back on!

Leave the wall up over the course of a day (or more!) and let your child return to it; you might notice him or her interacting with it different ways.

