Bubble Wrap Snowman

Bubble Wrap Snowman (7)

While we’re eagerly awaiting the next snowfall ample enough to build a real snowman, Veronika made do with this painted version today!

The novelty here was painting the snowman using only a piece of bubble wrap. Little bubble wrap pouches are better for this particular project than a sheet of bubble wrap, since they can easily slip over a hand.

Bubble Wrap Snowman (2)

First, we painted the bubble wrap in wintry shades of white and pale blue. While Veronika painted, I drew an outline of a snowman on white paper.

Bubble Wrap Snowman (1)

I slipped the bubble wrap over her hand like a mitten and showed her how to press down. She loved this, and also wanted to check out the way the painted bubble wrap felt with the other hand. I recommend having a pack of wipes handy, in case your toddler does the same!

Bubble Wrap Snowman (3)

Set your snowman aside to dry, then cut out and glue onto a blue construction paper background.

Bubble Wrap Snowman (5)

Finally, I cut out a few accessories for our snowman.

Bubble Wrap Snowman (6)

For a little vocabulary exercise, Veronika named all of these as we used a glue stick to attach them: a black top hat, red buttons, a red scarf, and an orange carrot nose!

Bubble Wrap Snowman (8)

Extra-Easy Melting Snowman

Easy Melted Snowman (3)

Veronika has enjoyed snowmen crafts lately, but since she’s too young to draw a snowman shape herself, the activities have required a lot of mommy guidance. The solution to letting her paint her own way? A melted snowman!

We made puffy paint yesterday that she loved so much I decided to use it again for this craft, although you can use regular white paint in a pinch. In a tray, I mixed up equal parts white glue and shaving cream until we had a puffy, sticky mixture.

Easy Melted Snowman (1)

She immediately started brushing it over a piece of construction paper. Anywhere at all was fine; this snowman has melted under the winter sun!

Easy Melted Snowman (2)

I made a second messy painting alongside her so we could have companion snowmen. Once the puffy paint dried, we used a glue stick to attach all of the accessories. Again, these can go anywhere on the paper that your toddler wants!

We added hats, carrot noses, and mittens cut from construction paper, and red pom poms for buttons.

Snowman Craft from Tin Cans

Snowman from Tin Cans (11)

Many years ago I tried to make a tin can wind chime with Travis that failed spectacularly because I didn’t have a proper way to string them together. This was an update on that idea for Veronika, with a winter snowman twist!

I set out three cleaned and dried cans on a tray, and told Veronika we needed to cover them with white paint. Even more fun, we used homemade puffy paint!

Snowman from Tin Cans (1)

I squirted a puddle of white glue onto our craft tray, then covered that with a layer of shaving cream. Mix it all up with a paint brush and start to paint the cans. Note: This is also a fantastic hack any time you need lots of white paint but don’t have much on hand.

Snowman from Tin Cans (2)

Veronika absolutely loved this paint and was quite serious about applying it to one of the cans while I worked on the other two.

Snowman from Tin Cans (8)

Once painted, we wanted to make them sparkly, so added some fake snowflake glitter. At this point I confess I questioned my sanity a little, because sticky puffy paint + fake snow sparkles = a spectacular mess. But she was having so much fun it was worth it!

Snowman from Tin Cans (5)

While I set the cans aside to dry, she kept playing with leftover snow sparkles, puffy paint, and a spare can on the tray for a while.

Snowman from Tin Cans (6)

I was pleasantly surprised with how fast the puffy paint dried. By the time she woke up from her nap, the cans were dry and it was time to turn them into a snowman.

Snowman from Tin Cans (4)

I used hot glue to add tidbits from our craft bin onto pieces of magnet tape. We used pom poms for eyes, black buttons for, well, buttons, and pipe cleaner pieces in red and orange for the mouth and carrot nose, respectively. You’ll need two magnets to make the red pipe cleaner piece curve into a smile.

Snowman from Tin Cans (7)

To attach the cans, I first made a hole in each with a hammer and nail. This isn’t difficult, but definitely a grown-up step.

Snowman from Tin Cans (9)

Next, I used a length of floral wire, inserting down through one can, then through a second, and then looping it so it wouldn’t come back up out of the hole. This was a touch tricky, so we decided to call it a win and have a two can snowman instead of a three can one.

Snowman from Tin Cans (10)

Now the magnet pieces will adhere right onto the tin cans, yes even through the puffy paint! As a final step, I twisted the top length of floral wire around our porch lamp outside so the tin snowman can dangle in the winter wind.

Snowman from Tin Cans (12)

Cotton Ball Snowman, Two Ways

Cotton Ball Snowman Craft (11)

A snowman made of cotton balls is a toddler classic for a reason; after all every toddler seems to love soft, puffy cotton balls, and they really do make adorable snowmen!

The first version Veronika and I made today involved more parental work than the second. I traced 3 sizes of circle cookie cutters on contact paper, then cut out. Tape down to a piece of construction paper with double-sided tape so that the sticky part of the contact paper faces up. Now have your toddler cover with cotton balls!

Cotton Ball Snowman Craft (1)

The three circles will immediately resemble the head, torso, and bottom of a snowman. This was a great opportunity to point out the relative sizes of the circles.

Cotton Ball Snowman Craft (3)

I then cut a few additional details from construction paper which Veronika could help glue on, including an orange carrot nose, a red scarf, and black circles for buttons and eyes. Make sure to have your toddler help squeeze out the glue, which is great for those little finger muscles!

Cotton Ball Snowman Craft (6)

The second version we made allowed Veronika to be more in charge. This time, we simply smeared a glue stick onto construction paper in circular motions, a big circle on the bottom and smaller on top.

Cotton Ball Snowman Craft (7)

After sticking on cotton balls for the body, I then gave Veronika pom poms to add for decorations. This was a great way to give her agency over how the snowman turned out.

Cotton Ball Snowman Craft (8)

If your child wants to add a background, use a white crayon for a snowy scene. For all that, Veronika’s favorite part of the whole activity was dumping cotton balls from one container to another, which was just fine.

Cotton Ball Snowman Craft (4)

As I said, toddlers love those fluffy little cotton balls!

Cotton Ball Snowman Craft (10)

Expanding Snowman

Expanding Snowman (12).JPG

We’ve been waiting for a snowy day around here, because snow always lends itself to exciting winter games and science experiments. With leftover Alka-Seltzer tablets on hand, I had plans for exactly how we could use the snow this time around.

First, I drew a snowman’s face for Travis on a plastic bag. Note to self: next time use a sharpie! We had some inky orange and black hands later on…

Expanding Snowman (1)

Next we needed to collect fresh-fallen snow into our bag. Make sure you fill your bag almost to capacity with snow, or this experiment won’t work. We learned by trial and error!

Expanding Snowman (2)

Now drop in two Alka-seltzer tablets and seal the bag. You may want to place it on a towel, just in case the bag bursts…

Expanding Snowman (10)

Over the course of about an hour, we checked on the bag. The tablets slowly release gas that will make your snowman puff up more and more and more.

Expanding Snowman (11)

Here’s Travis poking a bag filled mostly with gas and leftover slush by the end.

Expanding Snowman (13)

I think the process would be even better if I had left the bag outside, so the snow didn’t melt simultaneously as the gas expanded – whoops!

The whole thing takes a while, of course, because the tablets react very slowly with freezing cold water. Because he grew impatient as we waited, I filled a second bag with hot water from the tap and we dropped in a few Alka-Seltzer.

Expanding Snowman (6)

They immediately fizzed and the bag puffed up with gas, and we talked about why the reaction happened so much faster in the heat.

Expanding Snowman (7)

Can’t wait for the next snowfall and the chance for more snowy games! What do you do with your kiddos to take advantage of a snow day? Please share in the comments!

Glowing Snowman Luminary

Glowing Snowman (10)

I wanted to make these adorable glowing snowmen to light up a dark blizzard afternoon recently. It turns out Travis wasn’t at all interested in putting the craft together (hey, sometimes it happens!) but he did love the end result. The snowman is another way to add a cozy glow to winter’s dark nights.

For best results, you’ll need an empty Pom juice bottle to create a nice curvy snowman. I couldn’t find Pom at the store, but did snag a kid-sized Evian bottle that worked just as well.

Glowing Snowman (1)

Paint your curvy bottle with two coats of white paint on all sides (but not the bottom), letting dry thoroughly after each coat.

Glowing Snowman (2)

You know that pesky tendency kids’ socks have of disappearing one from each pair? Use that to your advantage here!

Glowing Snowman (3)

Cut up any old or mismatched socks to make hats and scarves. For a hat, cut the toe off a sock. Tie with a string near one end, and snip those ends into strips to make a “pom pom.”

Glowing Snowman (4)

Cut a long, thin rectangle from another spare sock, and tie around the middle of the bottle as the snowman’s scarf.

Glowing Snowman (5)

To finish the snowman, we used sticky-back felt cut into circles for eyes, a nose, and buttons (which Travis finally acquiesced to sticking on!)

Glowing Snowman (7)

What a dapper fellow!

Glowing Snowman (8)

When you’re ready to make your snowman glow, simply place him atop a battery operated tea light and illuminate the night.

Glowing Snowman (9)


Snow Paint

Snow Paint (6).JPG

This homemade paint is deliciously goopy, and as thick as snow after a blizzard, but it won’t melt away!

Place a can of foaming shaving cream and a bottle of glue in the fridge for 1 hour to chill.

Combine 3/4 cup shaving cream and 1/2 cup glue in a large bowl, mixing well. Travis was instantly enthralled with the texture.

snow-paint-1

Next we added heaps of icy blue sparkles because of course we needed sparkly snow!

snow-paint-2

Then it was time to paint a winter scene! With Travis so young, his was very abstract, but as he worked he told me he was painting first a horse, then an elephant, and so on. I loved the imagination at work.

snow-paint-4

Meanwhile, I painted a proper snowman, so Travis could enjoy the final result. He helped me press down cardboard cutouts of buttons and a hat – they will stick right to your gluey paint mixture as it dries.

snow-paint-7

We also added extra blue sparkles as the finishing touch.

Snow Crate

Koala snow (22).JPG

Just in time for the first winter storm of the season, we received our snow-themed crate from Koala Crate. Travis enjoyed some projects more than others, but overall I found this crate to be nicely educational, a timely prompt for talking about weather and winter, and featuring a diversity of projects.

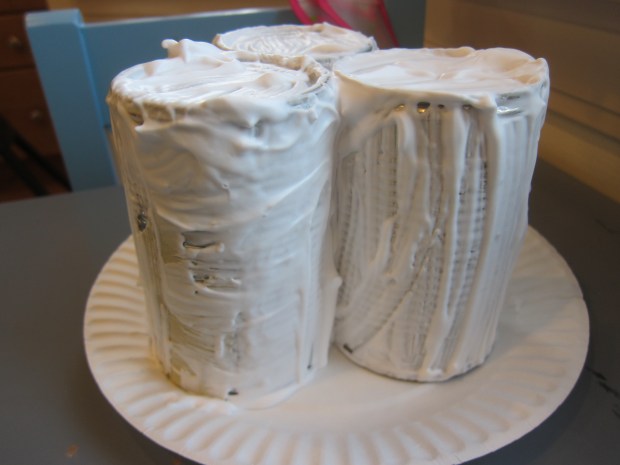
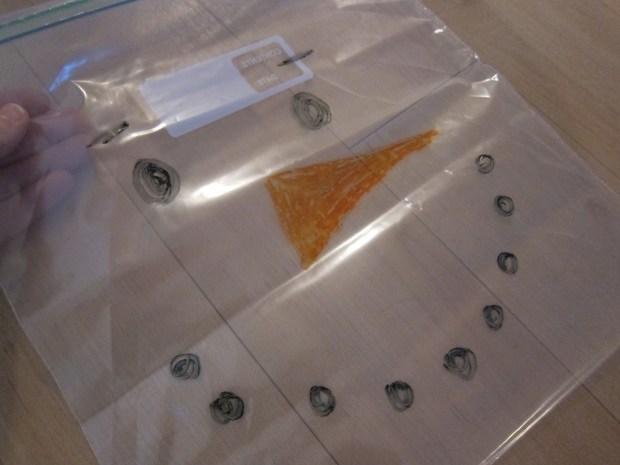
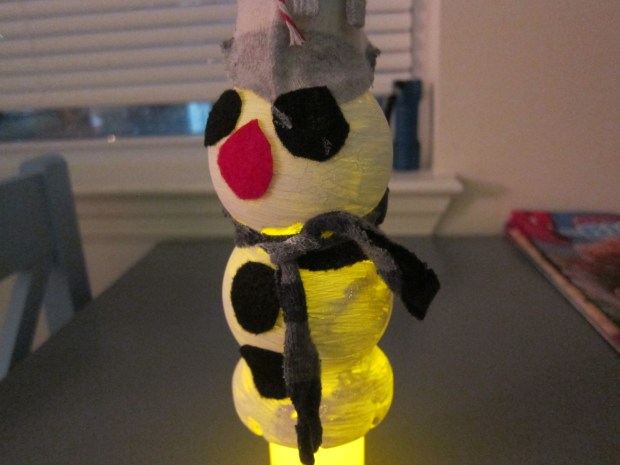
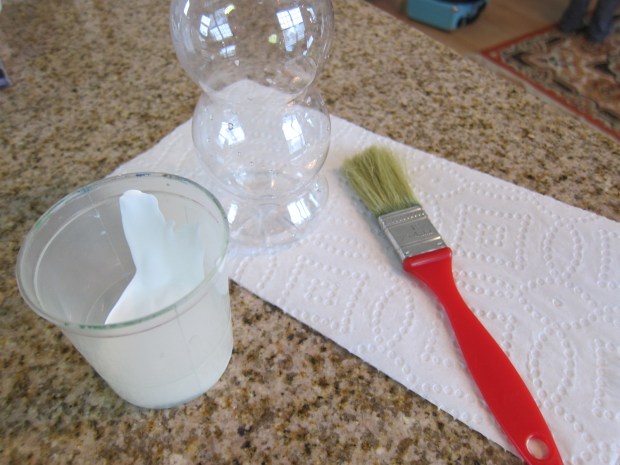
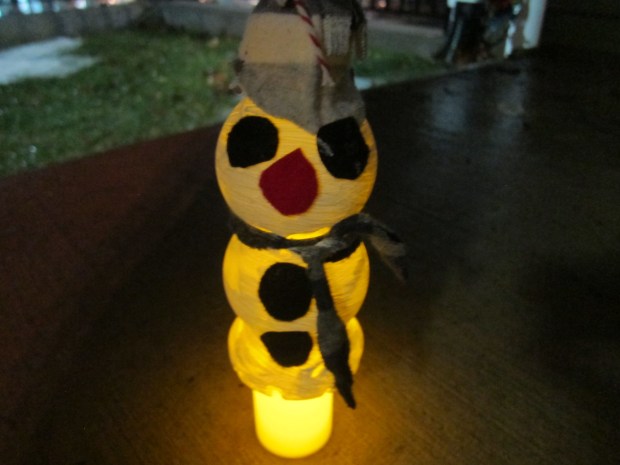
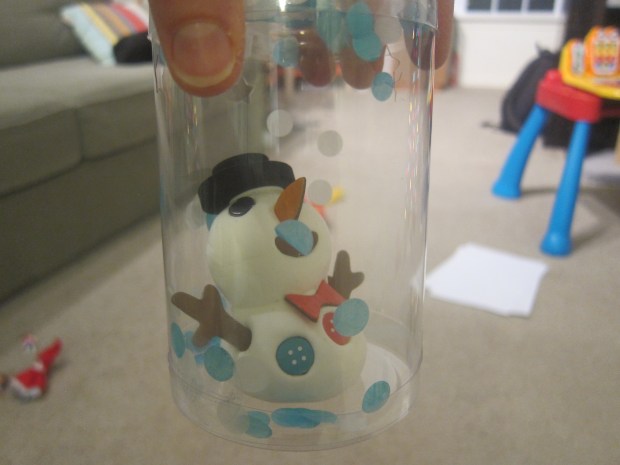
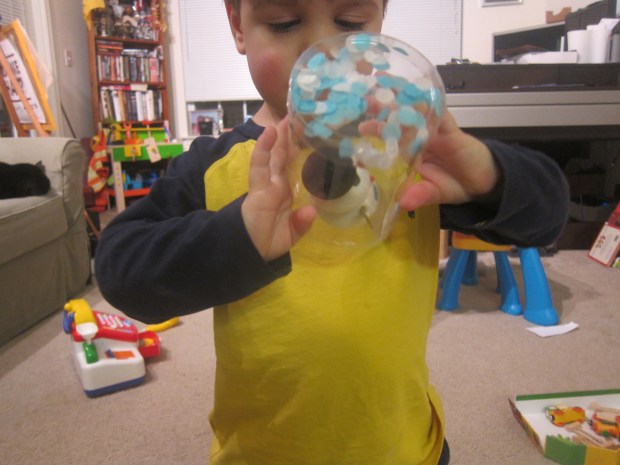
To my surprise, Travis was not interested in the first craft, a clay snowman to place inside a homemade “snow globe.” He normally loves clay, and the project was very toddler-friendly, with a plastic container instead of glass, paper confetti for the whirling snow, and convenient air-dry clay.

koala-snow-3

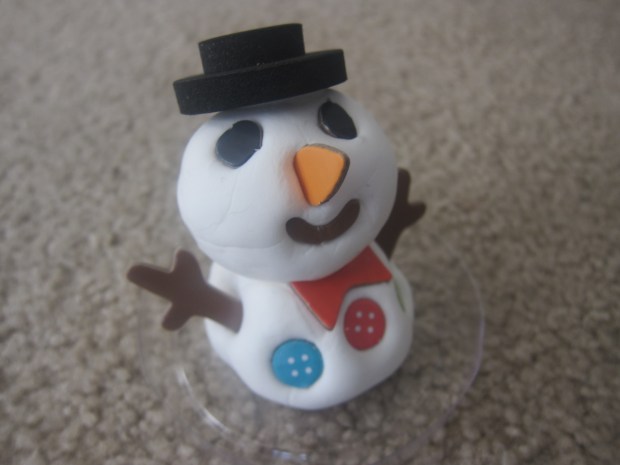
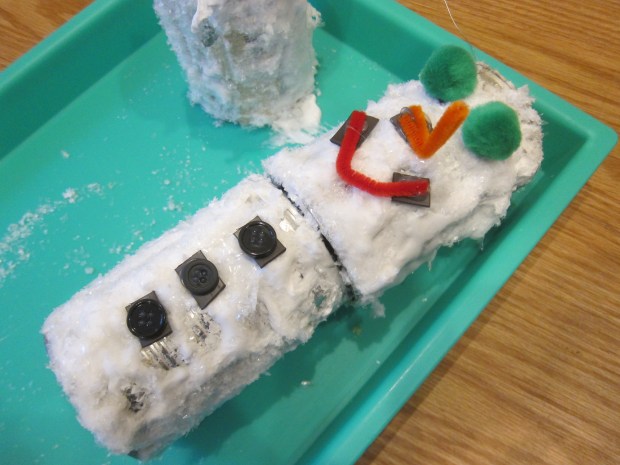
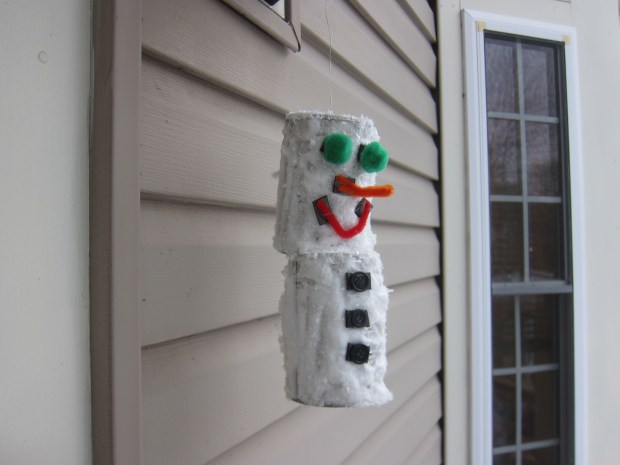
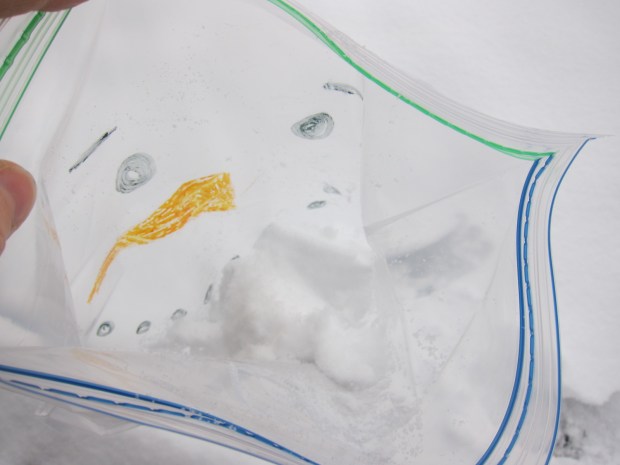
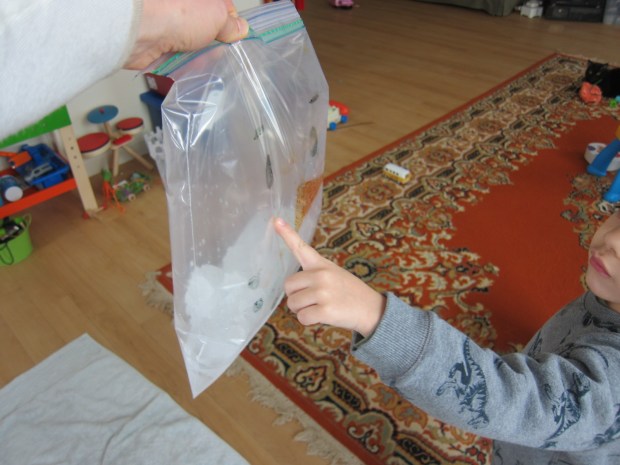
But Travis insisted that I make the snowman, so I put the craft together while he played, including cardboard decorations pressed into the clay. He only briefly helped shake the provided confetti into the snow globe, after the snowman had dried overnight.

koala-snow-17

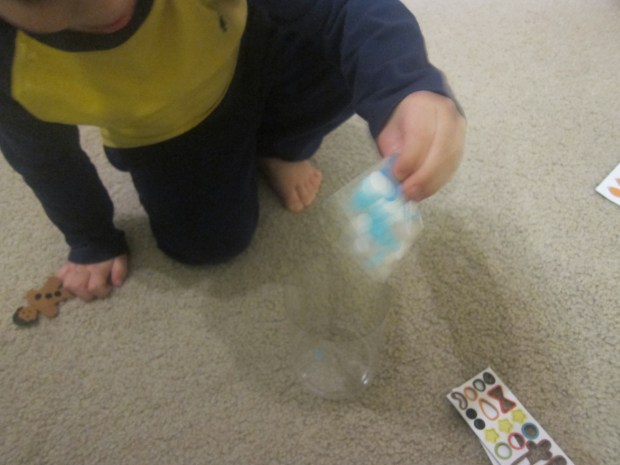
But once complete, he loved shaking the globe to make our “snow” fall down.

koala-snow-19

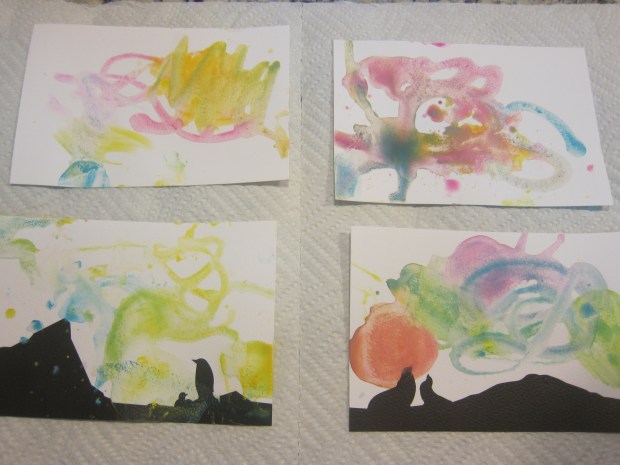
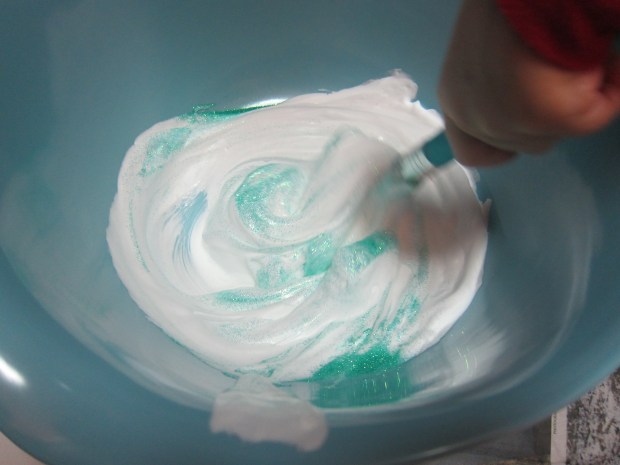
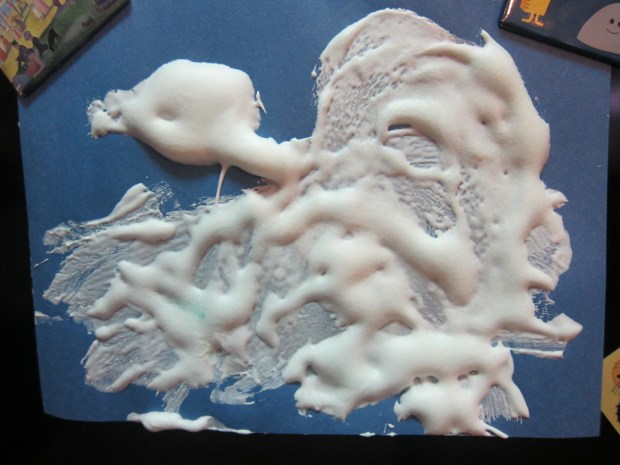
The second craft was a much bigger hit – ice painting! First we had to mix the paints, and Travis enjoyed using the provided spoon to measure powdered paint into molds. We let the paint freeze overnight.

koala-snow-16

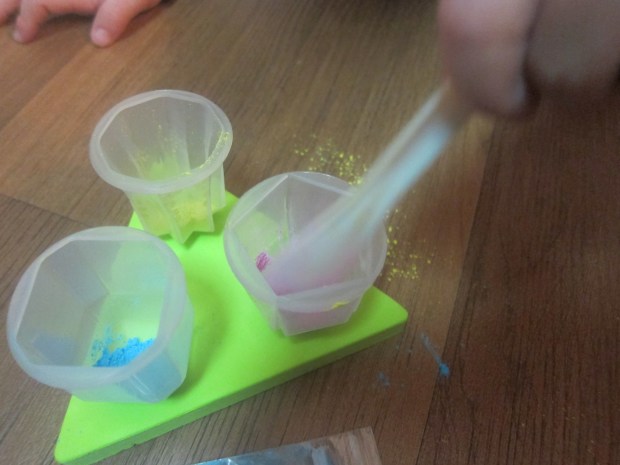
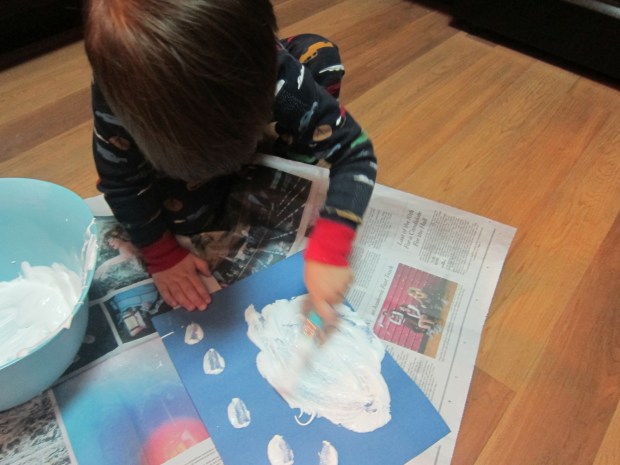
The next morning I laid out the provided “mess mat” and postcards, and Travis and I unmolded the paints – give them a few minutes to thaw or you’ll have trouble! Travis was intrigued with the way the paints popped in and out of the mold, and would re-cap each one in between uses.

koala-snow-26

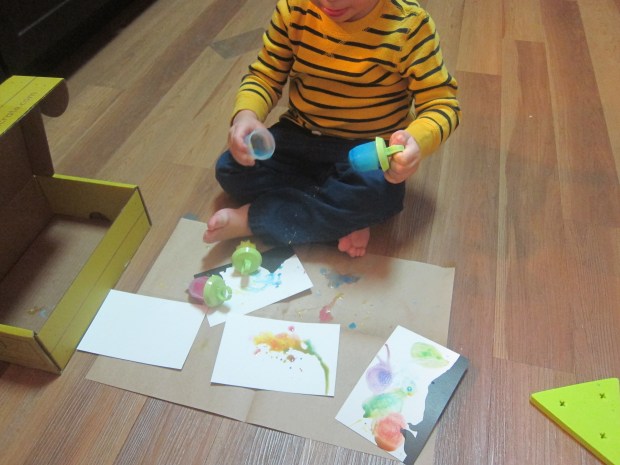
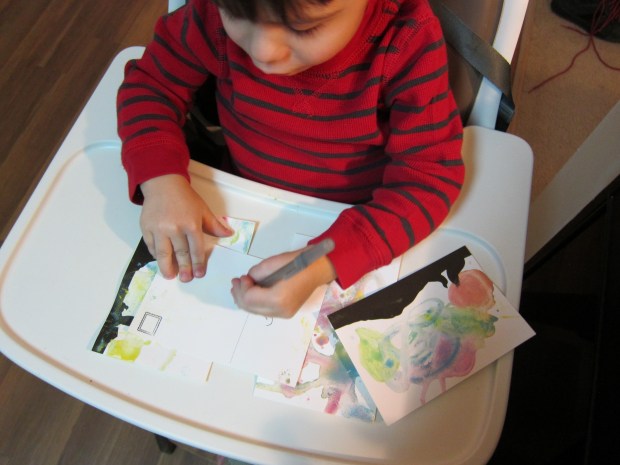
He scribbled a few paintings, liking the way the colors melted.

koala-snow-27

I showed him examples of color mixing while we were at it – the red paint + blue paint = purple, for example.

koala-snow-23

When the postcards dried, we had fun writing make-believe postcards… but you could also really send these to a friend or relative!

koala-snow-30

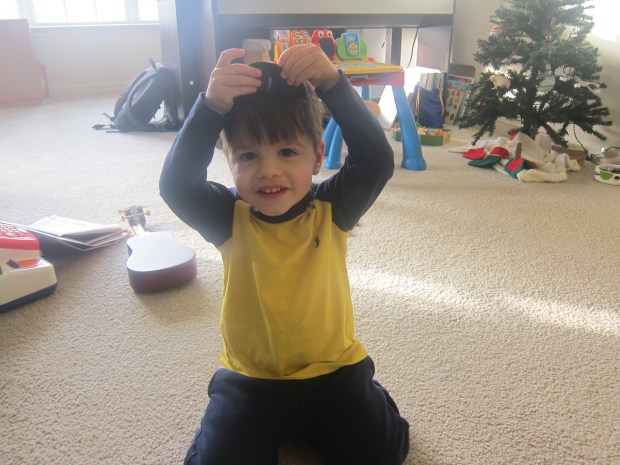
The final craft was cute and silly – penguin bowling! We slipped the provided cardboard penguins into the provided stands to make “bowling pins.” Travis loved the stands… or is that a hat?

koala-snow-6

He wasn’t as in to decorating them with the provided stickers and marker as I thought he would be; after a few scribbles, he lost interest.

koala-snow-31

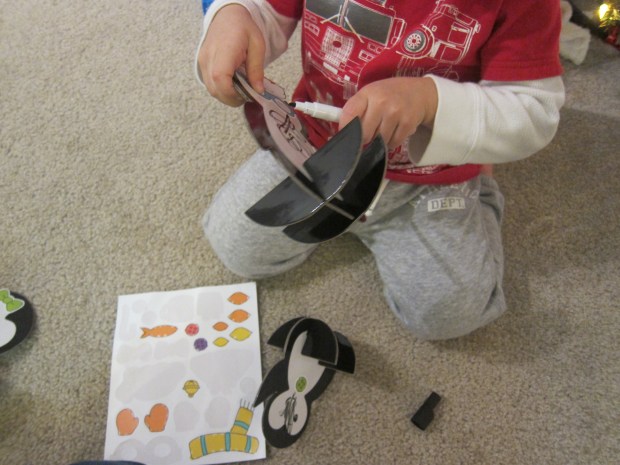
But since the stickers are reusable, I imagine he’ll have fun decking out his penguins down the line.

koala-snow-7

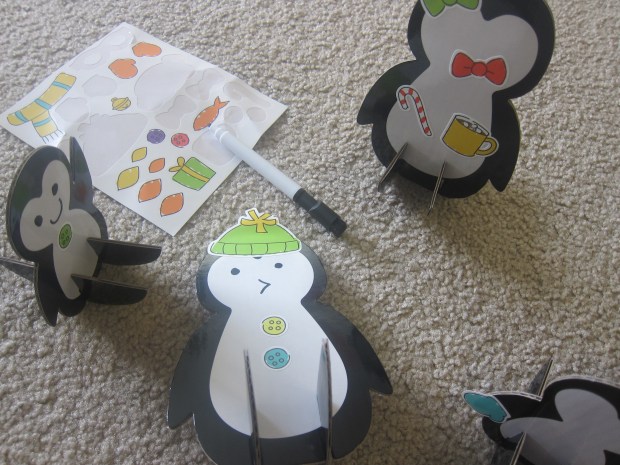
Much more fun was using the small “snowball” to knock the penguins down!

koala-snow-12

On further prompts from the kit, we also watched a video of the aurora borealis online, talked about igloos, and told silly snow jokes. Ready for my favorite?

Q: What do you call a snowman in the summer?

A: A puddle!

koala-snow-11

Wishing you a winter full of happy snow days!

koala-snow-29