Build a Mini Sprinkler

Pool Noodle Sprinkler (3)

With a gentle, less intense stream of water than most store-bought sprinklers, this DIY version is just right for toddlers!

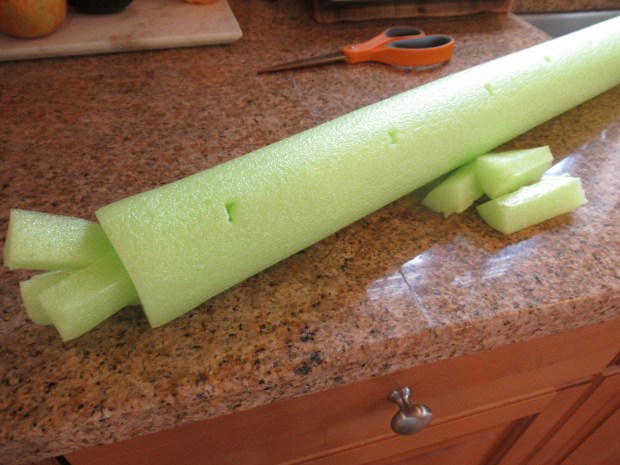
To start, I first cut a pool noodle in half (save the remaining half for another use), then cut a 2-inch section off one end. Cut this small section into 6 strips. Stuff three of the strips into one end of the pool noodle to create a very secure seal; you’ll have to wedge them in quite firmly, and can add masking tape or duct tape to hold it all together.

Pool Noodle Sprinkler (2)

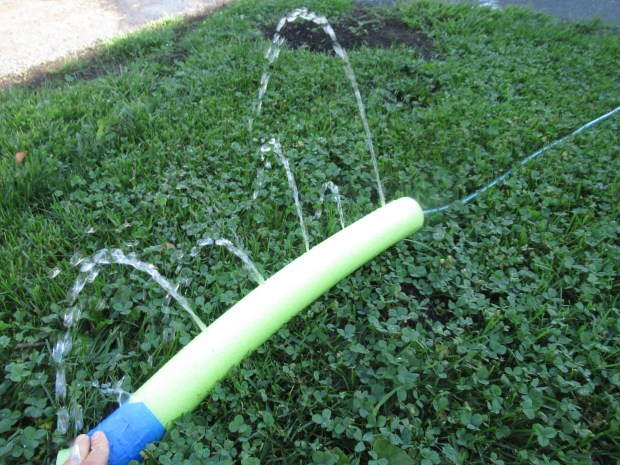
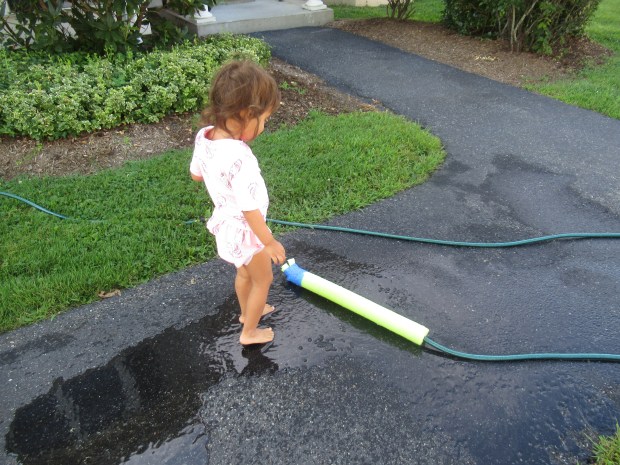
Next, poke a series of holes along the pool noodle, making sure they’re wide enough for water to shoot through. Now just head outside with bathing suits and sunshine and attach a hose to the open end of the pool noodle.

Pool Noodle Sprinkler (4)

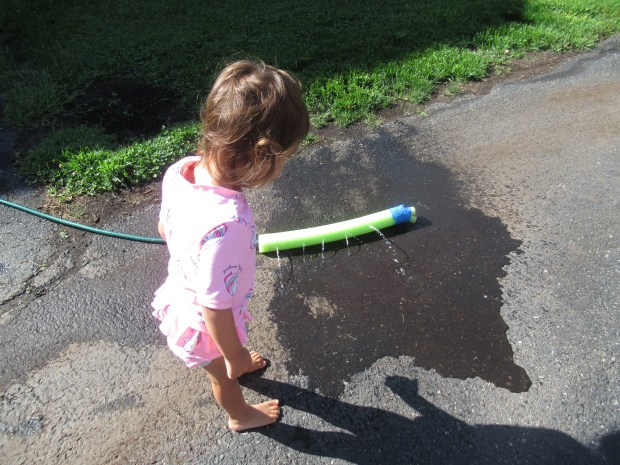
Turn on the water gently and watch the water spurt forth!

Pool Noodle Sprinkler (5)

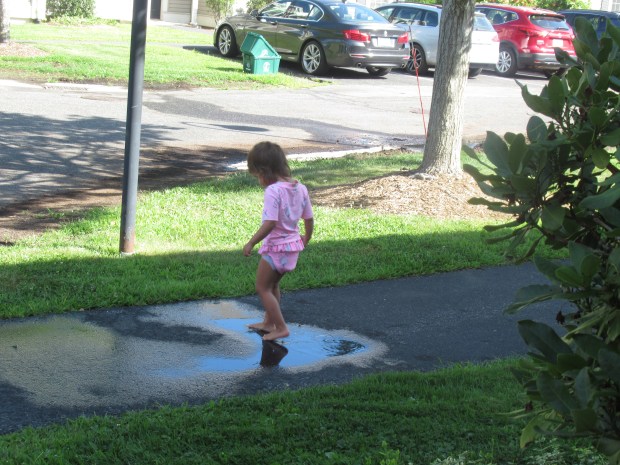
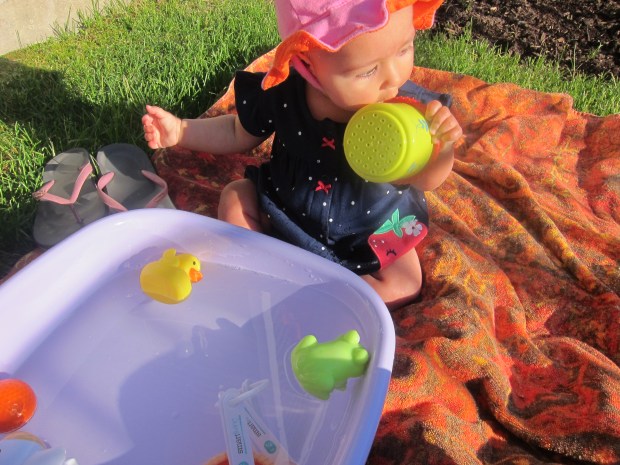
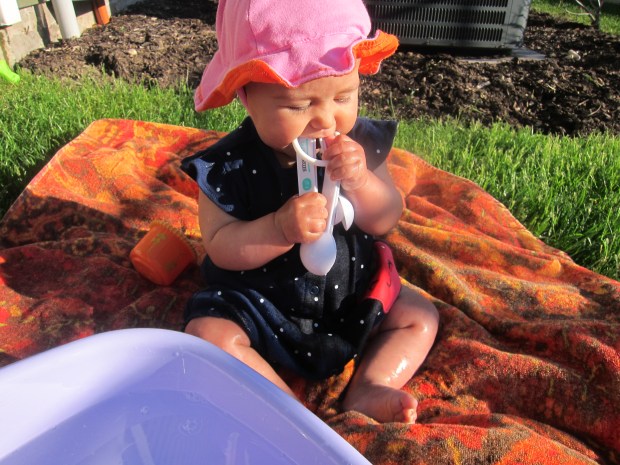
This turned out to be exactly the right gentle trickle for Veronika, who loved that she could dip her toes or fingers in and enjoy the cold spray without her whole body getting soaked.

Most likely, splashing in puddles once the hose is off will be half the fun!

Pool Noodle Sprinkler (6)

Tin Foil River with Mini Ice Boats

Tin Foil River Ice Boats (4)

With summer officially here, it’s time to get out in the backyard for water play! We have so many ideas for this summer, but I started things off with a simple game for Veronika today, an idea originally spotted at Reading Confetti.

First I needed to make the boats; freeze water in the compartments of an ice cube tray, adding food coloring if desired. When the ice has just started to set, insert a toothpick into the center of each cube to be the boat’s mast.

Tin Foil River Ice Boats (1)

Once the cubes were set, I cut triangles from construction paper, and taped these to the masts for the sails.

Tin Foil River Ice Boats (2)

Veronika immediately loved these little boats, and might have been happy just to play with them, but now we needed a river!

Tin Foil River Ice Boats (3)

Take a long piece of aluminum foil and curl up both sides to form a channel down the middle. If you want to have a constant running river, you can start the garden hose and simply set place at one end of the foil.

Tin Foil River Ice Boats (5)

Veronika loves to pour from our watering can, though, so I decided to let her play the role of Mother Nature and add more water whenever the river ran dry. I set up the foil on a slightly sloped section of lawn, so as soon as the ice boats were in the water, they slipped “downstream”.

Tin Foil River Ice Boats (6)

Veronika loved watching the boats move faster and further every time she poured in more water!

Tin Foil River Ice Boats (7)

Of course this being summer, the ice bots didn’t last long. But even once the boats had melted away, she loved adding more water and playing with leftover masts and sails in the river. Your kids might want to set nature treasures afloat, too!

Tin Foil River Ice Boats (8)

Kitchen Tool Bath

Veronika loves bathtime, but has seemed bored of her usual toys lately. So for novelty, we threw in the proverbial kitchen sink… almost literally! Because it turns out that old items from the kitchen can make fantastic bath toys.

Plastic utensils such as whisks were perfect. I also added silicone measuring cups and an old ice cream scoop. Veronika quickly switched into her bathing suit and hopped in for some fun.

The whisks were great for stirring through the water. If she whisked fast enough, it even made bubbles!

She spent some time pouring from one measuring cup to another. Then she began pouring water over other items like the whisk or ice cream scoop, and was amazed that the water trickled straight through, nothing to hold it in. The scoop was also great for ladling up a little bit of water, then pouring it over knees or elbows or toes. Be sure to name body parts as your pour over each one.

Mostly, though, I just let her splash around and have fun until the water started to get cold, and then it was time to come out.

Baby Pool Games, 3 Ways

Ball Splash (4)

It’s late in the summer but still hot outside, so it didn’t feel too late to invest in a baby wading pool. Here are three ways Veronika has loved to play in it so far!

First up was a classic toddler fishing game. I had a pack of fish-shaped sponges that were perfect for this, although you can cut normal sponges into fish shapes if you’re feeling crafty.

Ball Splash (6)

Attach a paper clip to each fish so it will be magnetic, then tie or glue a kitchen magnet onto a string and attach the string to a stick or dowel. I showed Veronika how to go angling for the little fishies!

Ball Splash (8)

It turned out that the sponges were hard to lift once saturated with water, so next time we might play this while the pool is dry.

Ball Splash (10)

After the fishing fun, it was time to make a splash! Simple grab a bouncy ball and toss it into a baby pool filled with a little water. This was fun from outside the pool…

Ball Splash (11)

…or inside it! And it was equally fun whether with a small bouncy ball or larger beach ball.

Ball Splash (1)

“Splash!” Veronika cried out happily each time.

Ball Splash (2)

For extra ball fun, we didn’t just use one ball; I poured in our whole bag of soft play balls.

Ball Splash (13)

This made for lots of extra splashing, sitting on, tossing, and otherwise playing with the balls in the pool.

Ball Splash (12)

One thing is for sure: this girl is keeping cool in the pool!

Ball Splash (14)

Nature Soup Sensory Activity

Nature Soup (10)

Here’s a beautiful activity that will engage the senses and fire up the imagination, making it accessible for multiple ages. I told the kids they were going to open a nature restaurant on the back patio and serve up nature soup. Let the excitement begin!

First we needed to gather “ingredients” from all around the yard. I armed the kids with zip-top bags to put in any treasures they found. Veronika loved little flowers and bits of grass, while big brother Travis preferred large finds like pine cones and bark.

Nature Soup (1)

We’re ready!

Nature Soup (2)

Back on the patio, I had filled a storage bin with a shallow layer of water and added plastic plates, bowls, and spoons. We dumped in all the nature treasures and it was time to cook!

Nature Soup (4)

For Veronika, this was mostly a beautiful sensory experience.

Nature Soup (3)

She loved feeling the cold water and the texture of all the nature items, as well as smelling the sweet pine scents of the pine cones and needles.

Nature Soup (9)

It was great practice for her pouring and scooping skills. She even was scooping up bits of bark with a spoon and transferring to a cup so steadily.

Nature Soup (11)

For Travis, it was much more about imaginative play. He loved making me new “drinks” to try and even provided me with a stick “straw” in each cup.

Nature Soup (5)

He was so proud of his culinary creations!

Nature Soup (7)

Meanwhile Veronika was busily splashing in the water, simultaneously keeping cool and learning.

Nature Soup (8)

I would highly recommend this activity on any warm day.

Nature Soup (12)

Foam Blocks in Water

Foam Blocks in Water (3)

Veronika has a versatile set of foam building blocks that we play with all the time, whether purely for building or more for learning. But never before have we put them in water!

As soon as I spotted this idea online, I realized what a no-brainer it was. Of course the foam floats! I filled a plastic storage bin with just enough water for the blocks to float and placed it on the floor over a towel to catch any splashing. (Note: You could just do this outside on a water table on a hot day!).

Foam Blocks in Water (2)

Veronika was thrilled to see something old look new and different. She began reaching in immediately, delighted both to fetch out the blocks (“Triangle!” she said) and to feel the splashy water all around them.

Foam Blocks in Water (5)

Mostly I just let her play, but we also sorted the blocks by color at one point.

Foam Blocks in Water (4)

There was lots of splashing and lots of excitement as the blocks floated around almost like little boats. The water also makes the blocks stick to each other, which makes it perfect for building up little towers and castles.

Foam Blocks in Water (8)

We definitely ended with water all over the floor, making this messy but worth it.

Foam Blocks in Water (9)

Create a Water Garden for a Budding Gardener

Water Garden (3).JPG

Here’s a beautiful activity for baby’s first “garden”. If you have a true garden, then by all means just head outside with your little one plus a tot-sized watering can, and he or she can help with the watering. Since we have no garden of our own, we had to improvise a little.

Water Garden (1)

First, I filled a child’s watering can and had Veronika help me pour the water over a few flowers and fronds on our patio. She was immediately intrigued both with the water coming from the spout and with the can itself!

Water Garden (2)

Next, I set up a little water garden. It included a few floating blossoms, kale leaves for “reeds” and a plastic duck and frog.

Water Garden (5)

She had so much fun reaching in and splashing about.

Water Garden (4)

In retrospect, I wish I’d used an edible flower like roses so I didn’t have to worry about her putting anything in her mouth.

Water Garden (7)

As a result, I moved the flowers out rather quickly and then didn’t have to worry if the toys or kale made their way up to curious lips.

Water Garden (9)

As you can see in the photos, this activity was so fun that big brother wanted to join in, making it an impromptu water table to cool off.

Water Garden (6)

I loved watching them play together! And much like a picnic breakfast, it’s the perfect early morning outdoor activity before the heat of the day sets in. Here’s to many gardening moments to come with my girl!

Water Garden (8)

Water Play

Water Play (10)

It hit 75 degrees today, which meant I got my little girl out in her bloomers for water play for the first time in her life.

Everything about this activity was novel for my six-month-old, from the soft towel we spread out on the grass, to the basin of toys I set out.

Water Play (1)

Fill a bin (or baby bath!) with lukewarm water even if it’s very hot out to avoid extremes in temperature, and add a few fun toys: I included bath toys, plastic spoons, and measuring cups.

Water Play (2)

Then I simply sat back and watched Veronika go! She loved reaching her hands in…

Water Play (3)

…and fishing out toys one at a time.

Water Play (6)

The spoons were a big hit.

Water Play (12)

You can add a little bit of bubble bath, too, for some foamy fun.

Water Play (5)

I also showed Veronika how to pour water from a cup, or splash her hands on the surface of the water to make splashy sounds.

Water Play (4)

Big siblings may want to get in on the fun, especially if it’s a perfect late spring day.

Water Play (9)

Needless to say, Veronika was soon soaked, but loving it!

Water Play (8)

She was having so much fun she didn’t mind one bit.

Water Play (11)

Ocean Sensory Tray

Ocean Tray (4)

What do you do on a summer day when you plan to go to the ocean, but the weather doesn’t cooperate? Bring the ocean to you of course!

Arguably the best part of this game for Travis was dyeing the water blue, so food coloring is a must. I set up a bin of water in the bathroom, and he loved dumping in the blue color, swirling it around until we had ocean water.

Ocean Tray (1)

Now it was time to add all our ocean toys!

If you have shells from a recent excursion to the shore, be sure to add those as well. Since we didn’t have any, large pasta shells worked in a pinch!

Ocean Tray (2)

Travis loved putting all our sea treasures in and out of the bin several times.

Ocean Tray (5)

He also loved filling a baster up with the ocean water and creating ocean storms and waves.

Ocean Tray (3)

Overall, this was a nice diversion indoors – and you could certainly play it outside on a hot day, too!

DIY Frog Pond

frog-pond-5

With a few rubber frog bath toys and lily pads cut from craft foam, you can turn your child’s bathtub into a magical frog pond!

I set the game up shortly before bath time, with Travis in a bathing suit just in case things got splashy!

frog-pond-1

Fill your tub with water and add the “lily pads”, frogs, and a few other fun toys that fit the theme – we also added a rubber turtle, a cup for pouring, and a net. Consider adding other pond elements you have at home, like rocks or rubber snakes!

frog-pond-3

Travis immediately grabbed the net and began fishing the frogs and lily pads from the water, which he thought was pretty much the best game ever.

frog-pond-6

He also used a beach rake to skim among the lily pads. I thought he would be more into hopping the frogs from lily pad to lily pad, but he preferred simply to catch them or swish them around in the water.

frog-pond-4

He also liked filling a plastic cup with water to rain down over the frogs.

frog-pond-8

And perhaps the biggest delight of all: after we drained the water, he lined them all up on the side of the bath and then had them jump into the empty tub – a feat we had to repeat several times!

frog-pond-9

I definitely want to try this activity again with an outdoor water table in the summer. Having access to all four sides, rather than just one side of the bathtub, would no doubt make it even more enjoyable.