Every Easter since Travis was little, I’ve wanted to dye eggs, but didn’t manage to find plastic or wooden ones in time for the holiday. This year, I was prepared! Today, Travis and I tested out three neat methods of dyeing plastic Easter eggs. Did other people know these plastic ones from Paas exist? What a find!

To be honest, none of the following three methods worked that great on the plastic – it was more about the process and the fun than the result. The colors and tricks may work better on real egg shells, if your family is not vegan.
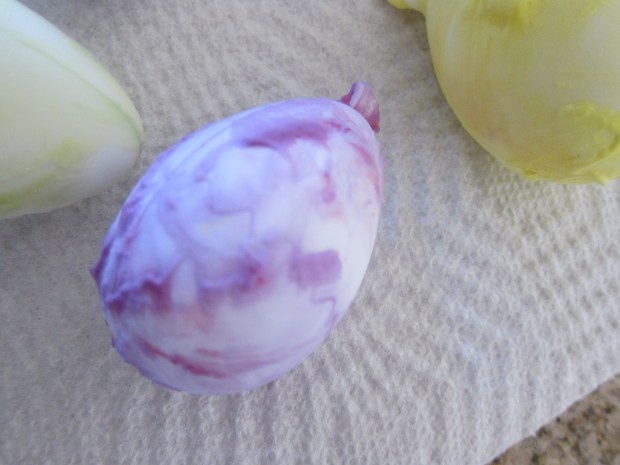
First up was a Marble Finish version. Fill a baking sheet with a generous layer of shaving cream.

Add drops of food coloring at 4 separate intervals. Swirl the color slightly into the shaving cream.

Now add 1 egg to each color, rolling around slightly.
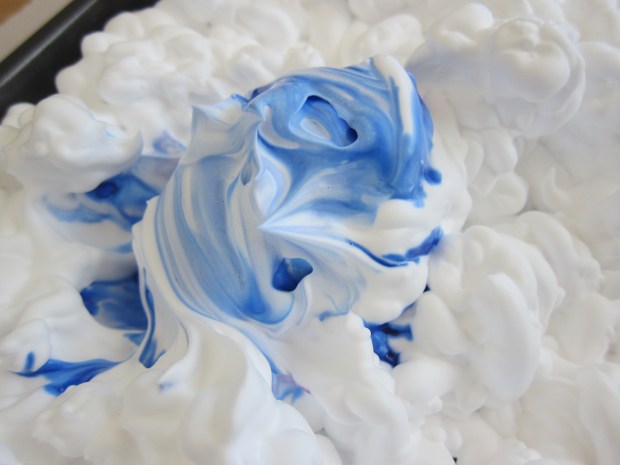
Let sit for 10 minutes. Wipe off the excess shaving cream, and you should see a neat marbled color effect.

Of all the methods we tested, this one worked best!
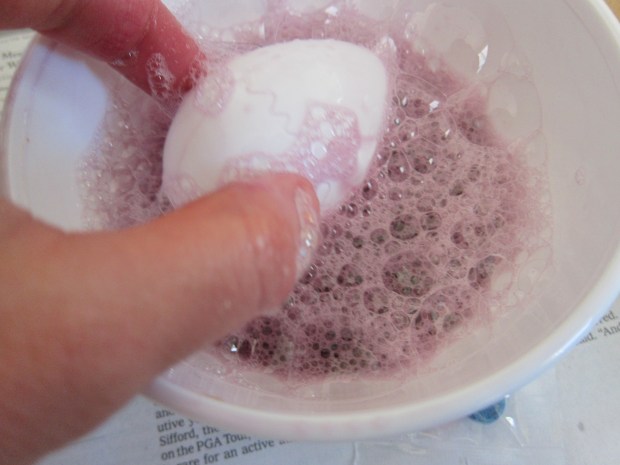
While the eggs sat in the shaving cream, we set up the second attempt: Soap Star eggs.
Fill a small bowl with 2 tablespoons dish soap, 1 teaspoon water, and 10 drops of food coloring. Use a straw to blow bubbles in the solution (they will be big bubbles), then stir quickly until you have smaller bubbles.

Dip an egg into the bubbly water, then let set until the bubbles dry.
Finally, we made Bubble Fun prints! Draw with sharpie marker (or use an ink pad) on bubble wrap.

Wrap around an egg while the ink is still wet, and press firmly. You’ll have dot marks left behind.
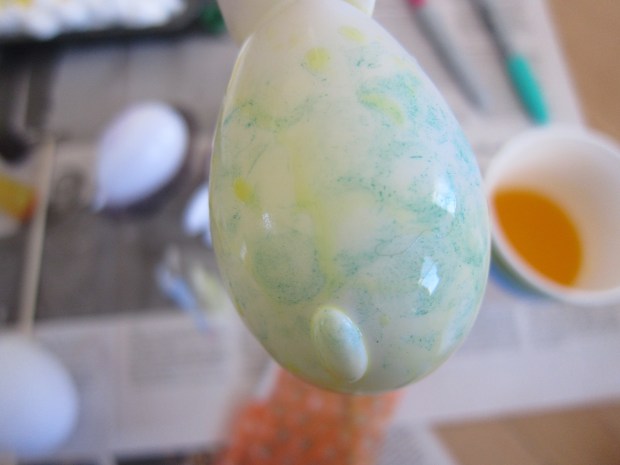
As mentioned, all of our results were faint, but I was so glad my little vegan got to join in the Easter egg fun!