Surprise Tins

Surprise Tins (9)

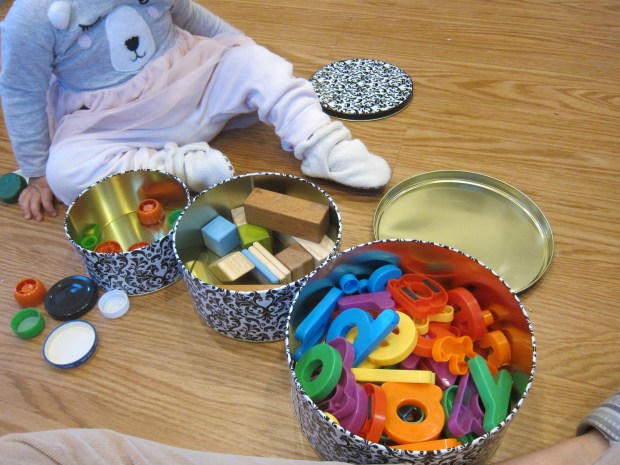
I was in a pinch to keep Veronika occupied while Travis had home school this morning. Thinking fast, I pulled out a few old cookie tins from the cupboard. I had a set of three nesting ones, which was especially great since they moved from largest to smallest and we could talk about size as she played with them.

Surprise Tins (1)

I filled the biggest one with a set of magnetic letters. I filled the medium one with wooden blocks. As a bonus, the blocks are magnetic, so they could stick to the lid or side of the cookie tin.

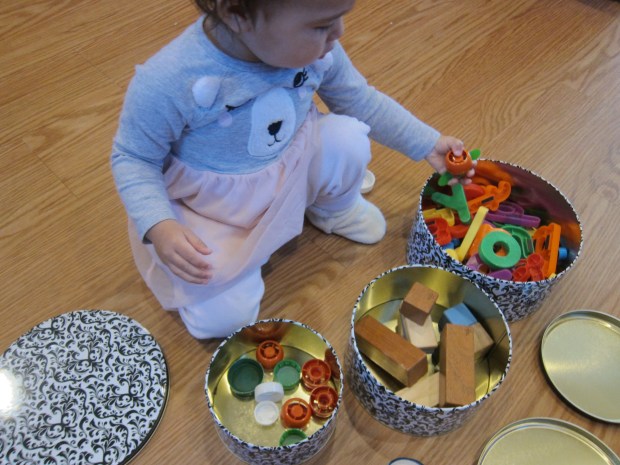
I filled the third with various bottle caps, jar lids, and applesauce pouch tops that I’ve saved up for just such an occasion. Now I gave Veronika all three tins (with the lids loose so as not to frustrate her) and set her busy hands to work.

Surprise Tins (2)

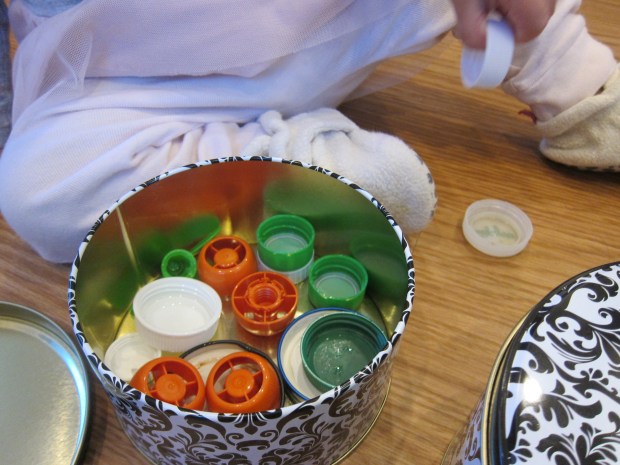
The smallest tin, with the caps, was the instant favorite. She loved going through all the different varieties, and even said, “applesauce!” when she recognized the twisty cap.

Surprise Tins (3)

She tapped them together, sorted them into and out of the tin, and of course practiced taking the lid off and on.

Surprise Tins (5)

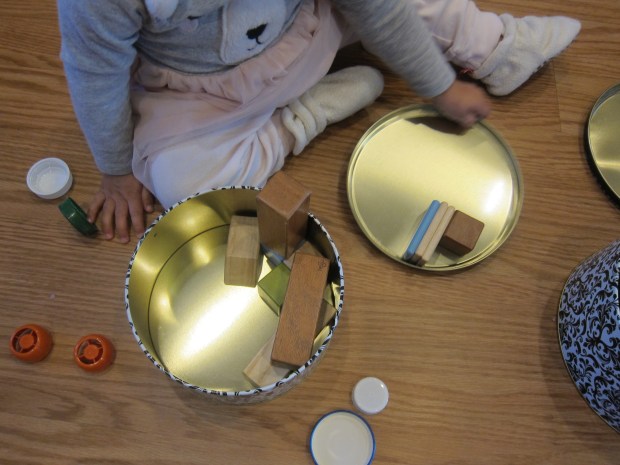
Eventually she moved over to the other tins, finding fun in the letters…

Surprise Tins (10)

…and the blocks.

Surprise Tins (8)

But those little bottle caps were definitely the favorite! When she returned to the game, that was instantly her go-to tin.

Surprise Tins (7)

I am going to keep this set tucked away in the cupboard to pull out whenever I need them. You can even mix up the items inside so the “surprise” is different each time and the game never grows old.

Surprise Tins (4)

Advertisement

Handprint Cookies

Handprint Cookies (8)

Part baking project and part bonding activity, these sibling handprint cookies are absolutely adorable. I can think of no better way to spend these cozy days of social distancing than creating strong memories for the kids, despite the scary news in the outside world.

So first things first, we needed cookie dough! I knew the dough needed to chill for a while, so whipped up a batch first thing in the morning.

Ingredients:

  • 1/2 cup coconut sugar (or brown sugar)
  • 1/2 cup Earth Balance butter
  • 2 Ener-G eggs
  • 1 teaspoon vanilla almond milk
  • 2 and 1/2 cups flour
  • 2 teaspoons baking powder
  • 1/4 teaspoon salt
  1. Cream together the sugar, butter, Ener-G eggs, and almond milk in a stand mixer. Add the flour, baking powder, and salt, mixing at low speed just until combined.
  2. Gather the dough into a ball and chill for at least 3 hours.

When it was time to make the cookies, I sat Veronika in her high chair with one portion of dough, and Travis stood at the counter to help me roll out the rest.

Handprint Cookies (2)

Press a child’s hand to the dough and trace with a butter knife.

Handprint Cookies (1)

Travis was able to hold his hand still for a realistic approximation on his cookie. I had to use a little more creative license with wiggly toddler Veronika, as expected! Then we gathered the scraps and re-rolled the dough for heart and star cookie cutter shapes.

Handprint Cookies (3)

As a sweet touch, they pressed their thumbprints into a few cookies.

Handprint Cookies (5)

Let the kids decorate them however they want!

Handprint Cookies (4)

I stepped back and let them choose, which meant our cookies had a cinnamon-sugar sprinkle and Dandies marshmallows in the center.

Handprint Cookies (6)

Bake at 375 degrees F for 8 minutes, until lightly browned.

Handprint Cookies (8)

Then half the fun is eating them of course!