Kindergarten Home School Week 6: Wednesday

Home School 28 a

We went even lighter on the school work today, halfway through “vacation week”. I think it’s safe to say this mama teacher needs a bit of a break, too! For what it’s worth…

9-9.30: ELA. Doing the V and W letter pages in his workbook received lots of protest from Travis, but he was proud to reach the end of the next level in his Lexia computer program.

9.30-10: Math. Travis worked on patterns and adding on Dreambox for about 15 minutes.

10-10.30: Field trip! We “flew” over Bryce Canyon through the National Park’s website. It’s safe to say I thought this was cooler than Travis did.

Home School 28 c

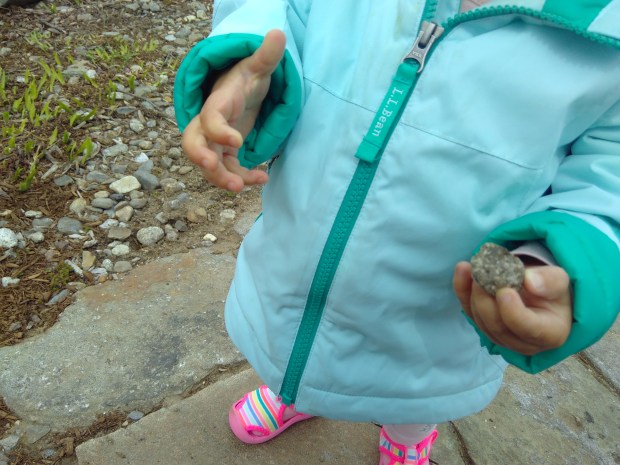
10.30-11: Art. Travis painted drip pots, which was a neat method. Baby sister was busy painting rocks.

The “school day” ended there. A long lunch sort of derailed us all. We spent the afternoon without structure, but Travis had fun building with Magna-tiles, doing a story yoga about Harry Potter, and visiting with relatives online.

Home School 28 b

Advertisement

Can Towers

Can Towers (6)

A big shipment of cat food arrived today, and before I put the cans away, I had a feeling they would make perfect toddler building blocks! Boy was I right. No sooner did I put the boxes of cans down on the ground than Veronika had her hands on them and started stacking.

Can Towers (2)

These were 3-ounce cans, which I would declare the perfect size for toddlers; I didn’t worry about them being too heavy if they fell. You can play this game with more standard 15-ounce cans, but if so I would recommend making sure your child has shoes on, in case of dropped items. Alternatively, play with larger cans that are empty, but then you’ll need to make sure you’ve duct-taped over any sharp edges.

Can Towers (3)

Meanwhile, these little cat food cans did away with any of that prep work! She loved building high, and seeing how many she could stack. And then of course she loved the kaboom of knocking her towers over.

Can Towers (4)

The game looked like so much fun that big brother Travis came over to join in. The kids had a competition to see who could stack higher of course!

Can Towers (7)

Bigger kids might get fancier with their blocks creations, too.

Can Towers (10)

After a while we even had “bulldozers” to help clean up the debris from our toppling can towers.

Can Towers (9)

In sum, little cans make great “blocks” for small hands.

Can Towers (5)

Bananas, Agave, and Wheat Germ

Bananas Wheat Germ (5)

Here’s a snack that your toddler can actually prepare for him- or herself! This cute project lets even young toddlers practice “knife” skills, proudly prepare their own food, and enjoy a yummy treat at the end.

Bananas Wheat Germ (7)

I sat Veronika down with a plate filled with agave nectar in one compartment, wheat germ in the second, and half of a banana in the third. I asked her to help me peel the banana, which toddlers always love!

Bananas Wheat Germ (1)

She was even more interested in the next step though, when I presented her with Popsicle sticks to “slice” the banana.

Bananas Wheat Germ (3)

More so than the slicing, she loved dipping the sticks into the agave and wheat germ, and then sprinkling over the banana.

Bananas Wheat Germ (4)

She took this so seriously, intent on her work. Scoop and pour. Scoop and pour. When the banana pieces were nicely coated, I showed her how to insert a Popsicle stick to hold up a piece of the snack she had created.

Bananas Wheat Germ (2)

When I cleared the plate, she got a bit more into the slicing element of the project.

Bananas Wheat Germ (8)

Once she felt brave enough, she lifted one of the banana pieces and touched it to her lips.

Bananas Wheat Germ (9)

“Yummy!” she declared.

Bananas Wheat Germ (10)

It was so neat to put her in charge of her snack this way, from start to finish. I could easily see this becoming a favorite food around here.

Rock Play

Rock Play (11)

When Travis was little, there was a fire pit in our apartment complex filled with rocks, and he could literally spend hours standing at the edge and playing with them. Sorting them, taking them out, tossing them back in again, finding favorites, you name it. I lament sometimes that Veronika doesn’t have access to the same great game! So today, we brought some rocks inside to play.

After a walk at a nearby garden, we returned home with a big bounty of rocks. Make sure that you choose ones that are too big to be a choking hazard, but not so heavy that they’ll hurt a little toe if dropped.

Rock Play (1)

First we gave our rocks a bath! Veronika loved swirling them in a little tray filled with soapy water, and helping pat them dry.

Rock Play (2)

I then gave her a few buckets that she could transfer them into. She loved taking them in and out.

Rock Play (4)

Next she started to fill her dress-up purse with the rocks…

Rock Play (5)

…and even headed off for a walk with her rocks tucked inside!

Rock Play (7)

For some artsy fun, we then pulled out paints and I showed her how to dab at the rocks with a paintbrush.

Rock Play (8)

This was good fun…

Rock Play (9)

…until she decided it was more fun to paint her hands, of course.

Rock Play (10)

I let the paint on the rocks dry and set them aside for later use, because I know we’re far from done with them. There will be lots more rock play in Veronika’s future!

Drip Pots

Drip Pots (7)

We had two teeny tiny terracotta pots here in the house, and Earth Day prompted me to think of a use for them: they’re the perfect size to grow a few windowsill herbs! Although we don’t have a garden, I loved the idea of showing Travis how we can be responsible for our own food (seasoning at least). You could use this paint method on any size clay pot, though, and plant flowers or succulents instead.

The night before, we painted the pots with a few coats of white acrylic paint and left them to dry overnight.

Drip Pots (1)

In the morning, Travis helped mix up red and blue acrylic paints with a little water. You want the mixture to look like glue.

Drip Pots (2)

Turn the pots upside down and place on a work surface. I showed Travis how to dip a brush in the paint and then hold near the rim of the pot. Let the paint drip down in rivulets. It took him a moment to get the hang of it, but then he loved this new painting method!

Drip Pots (4)

Let dry completely, then add a coat of clear sealer, if desired.

Drip Pots (5)

Then just add your planting and enjoy the greenery!


Drip Pot alt