Rolling Down Hills

Rolling Down Hills (2)

What’s childhood without the pure joy of rolling down a hill? Today I introduced Veronika to precisely that!

There’s a small hill just behind our apartment building, just right for the kids to run up and down without being intimidating.

Rolling Down Hills (4)

But today, we lay down on the grass instead! Big brother Travis paved the way, showing Veronika how to roll like a log down.

Rolling Down Hills (3)

She was a bit nervous, and I think the grass prickled her, too, so at first she just lay there without turning. So I got down with her on my belly and we log-rolled together from top to bottom. This produced squeals of delight.

Rolling Down Hills (6)

Pretty soon she was running back up to the top to start again. This activity is so simple, but captures the care-free joy of a childhood summer!

Rolling Down Hills (1)

Water Volcano in a Bottle

Water Volcano (3)

This science experiment is a splashy hit, as long as it works correctly! You’ll teach kids something about air pressure, plus create a fun way to get wet on a hot day.

First, we needed to blow up a balloon inside a bottle…but there’s a catch. Insert the balloon into an empty bottle, folding the edge of the balloon over the bottle’s rim. Huff and puff with all your might and it won’t blow up, because there’s nowhere for the air pressure to go!

Water Volcano (1)

Next, we cut a small slit in the bottom of the bottle. Now, when I huffed into the balloon, it could inflate! It’s fun to watch this inside the bottle, almost like a lung filling up.

Water Volcano (2)

The next part is a bit tricky. Keep your finger over the slit in the bottle, and ideally your balloon will stay inflated because now the pressure can’t escape. With your finger still cover the hole, fill the balloon with water.

When you release your finger, the water explodes!

It was tricky to do this solo, though, and eventually we ended up filling the balloon with water before inflating it. Then, we got a mini squirt of water when I released my finger from the slit. You can see our rather unimpressive puddle here:

Are you able to get a huge water volcano? Please share in the comments!

Kindergarten Home School Week 13: Tuesday

Home School 67 b

We had a quick half-day today, mostly focusing on Travis’s author spotlight assignments from the teacher.

9-9.30: Author Spotlight. Today’s Mo Willem story was Should I Share My Ice Cream? Travis watched a read-aloud, then filled in his own version: Should he share his… Legos!

Home School 67 a

He also created his own Elephant and Piggie cartoon, somewhat reluctantly, and then we tested out dance moves based on Elephants Can’t Dance. (Meanwhile my toddler was busy with pots and cups).

9.30-10: ELA. Travis did workbook pages on letters X and Y, and then great sight reading on Lexia.

10-10.30: Snack/recess. Baby sister had her gym class online.

10.30-11: Math. Just some quick Star Wars addition problems today. (Baby sister was learning shapes).

Home School 67 c

11-11.30: Library. We finished with a rhyming activity from Travis’s library teacher, including making up silly rhymes like a pony eating macaroni.

Then there was lots of time to play outside at the town playground after that! Hoping to squeeze in some more STEM activities tomorrow.


Traditional Potato Salad

Traditional Potato Salad

Sweet potatoes add a fun pop of color to this otherwise standard potato salad.

Ingredients:

  • 4 russet potatoes
  • 2 sweet potatoes
  • 1/2 cup fresh green peas
  • 1/2 cup vegan mayonnaise
  • 2 chopped green onions
  • 1/2 teaspoon salt
  • 1/8 teaspoon black pepper
  1. Peel and chop the russet and sweet potatoes. Place in a large pot and cover with water, then bring to a boil. Stir in the peas; reduce heat and simmer for 20 minutes until the potatoes are very tender. Drain and transfer to a large bowl.
  2. Stir in the mayonnaise, green onions, salt, and black pepper. Chill until ready to serve.

Shape Mail Carrier

Mail Carrier (8)

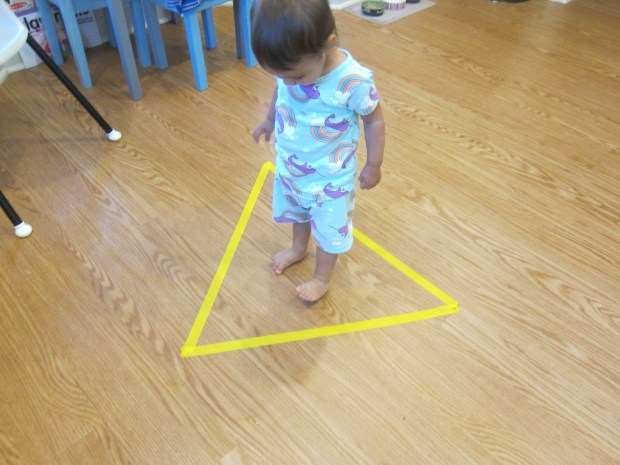
Today I made a shape matching activity for Veronika, and it turned into a game of playing a mailman who was making deliveries! She was the mail carrier and had to deliver the right shape to the corresponding “mailbox”. I loved that this game was equal parts learning and introduction to imaginative play.

To start, I covered construction paper with sticky contact paper on both sides for durability, and cut out shapes: rectangles, hearts, circles, triangles, and squares.

Shape Match (1)

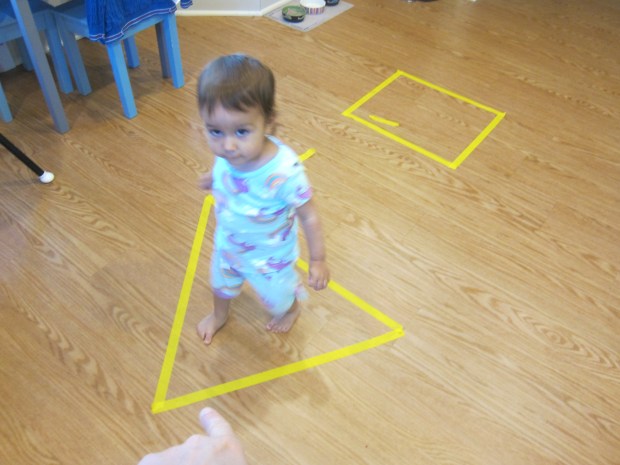
So first up was a simple game of shape matchup. If I had one of the pair, could she find the other?

Shape Match (3)

She quickly proved to be an ace at this test, not just picking up the right shape…

Shape Match (4)

…but naming them, too.

Shape Match (2)

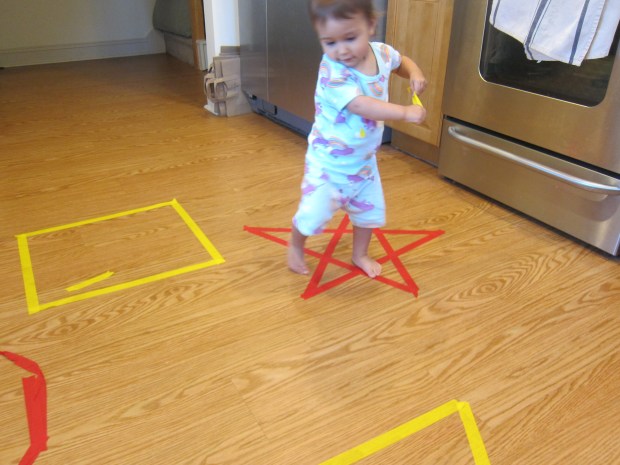
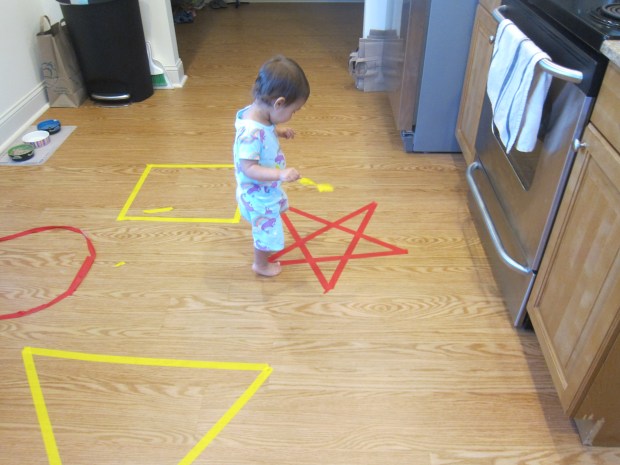
I wanted to make the game more exciting, so turned it into the mail carrier game. We have a set of toy boxes, each one a different shape with items of the same shape nested inside (i.e. a pizza wedge and watermelon wedge inside the triangle box). We scattered all the shapes on the ground, along with the construction paper set I’d just made, and I placed the empty boxes in front of her.

Mail Carrier (1)

“Special delivery!” I called. “Which mailbox should the triangle go in?”

Mail Carrier (3)

She was so proud making these deliveries!

Mail Carrier (2)

Note: If you don’t have a toy like this, simple cut out and laminate each shape from paper, then tape or glue onto an empty shoe box. These can be your mailboxes!

Mail Carrier (7)

After we’d filled the mailboxes, she decided to get a little impish. I could see the wheels in her brain turning as she deliberately placed the shapes in the wrong box, and then looked at me for a laugh.

Mail Carrier (6)

But if you think about it, this was showing her understanding of shapes on a whole new level.

Mail Carrier (5)

She thought this was hilarious and kept it up for quite some time.

Mail Carrier (9)


Measuring Cups & Pots

Measuring Cup Play (4)

With only two weeks of home school left to go, I still need quick fixes to keep Veronika busy while big brother does his lessons! Today I was reminded that sometimes simpler is better. This activity required zero preparation to set up, and zero mess to clean up!

Measuring Cup Play (1)

I just pulled out measuring cups (both the liquid kind and the dry kind) and a pot. That was it. And then I asked her to make imagination soup! My little chef soon went to town. She poured ingredients into the pot…

Measuring Cup Play (3)

…took the lid off and on and enjoyed the clang this made each time…

Measuring Cup Play( (6)

…and of course tasted!

Measuring Cup Play (5)

I loved watching her lift the measuring cups to her lips and make a slurping noise. “Is it yummy?” I asked her. “Yummy!” she replied. Those dry measuring cups are also great because they double as a nesting and stacking toy.

Measuring Cup Play (2)

She kept very busy in her kitchen while Travis did his morning school work. I wonder what she put in her imagination soup?

Kindergarten Home School Week 13: Monday

Home School 66 d

We hit the ground running for Travis’s second-to-last Monday of kindergarten, and what a fantastic day we had. Here’s a recap:

9-9.30: Travis did three pages in his summer workbook: a page about safety rules, a page on the letter V, and a geometry page identifying shapes. That last featured images of circus performers, so we watched Cirque du Soleil clips online to kick things off on a fun note.

Home School 66 b

9.30-10: Author spotlight. After watching a read-aloud of Don’t Let the Pigeon Drive the Bus, by Mo Willems, Travis wrote a sentence about the pigeon: Don’t let the pigeon watch Star Wars! He then colored in the pigeon with a thumbs up for a class vote on whether or not the pigeon can drive.

Home School 66 e

He finished with a STEM extension, designing alternate vehicles for the pigeon and building one from Legos. (Where was little sister during all this? At a play dough construction site!).

Home School 66 f

10-10.30: Snack/recess.

10.30-11: Art. We made monster straw paintings!

11-11.30: ELA. Travis did a protest-free stint on Lexia. His sight reading has come so far!

11.30-12: P.E. He chose to do about 20 minutes of Minecraft-themed yoga for some exercise.

12-1.30 – Lunch/free play.

1.30-2: Class Zoom. I was very proud of Travis sharing during show-and-tell.

2-2.30: Math: After one page in his Star Wars workbook, we played Uno. (Little sister got in her toddler math with tape shapes).

2.30-3.30: Outside. The state’s playgrounds have reopened! This meant Travis got to safely have a play date with a classmate. It made my heart do cartwheels to see children playing again. I hope you are finding a similar return to normalcy in your own hometown.

playground (2)

Chocolate Beet Bundt Cake

Beet Bundt Cake (4)

You’ll sneak a full two cups of vegetables into this cake but your kids will never notice – unless they help bake it of course! This cake is a dream: it requires only two mixing bowls, bakes up perfectly light and airy, and comes out in a fun circle shape that kids will love. (“How did you make a hole in the center?” my son asked).

For ease of preparation, I recommend making your beet puree the night before. Place 6 beets in a pot and cover with water. Bring to a boil, then continue to cook for 30 minutes, until very tender. Drain and let cool until cool enough to handle. Rub off the skins and transfer to a blender; process until very smooth. Refrigerate until ready to use.

Beet Bundt Cake (5)

Ingredients:

  • 3 cups flour
  • 3/4 cup cocoa powder
  • 1 cup sugar
  • 2 teaspoons baking soda
  • 1 and 1/2 teaspoons baking powder
  • 1 teaspoon salt
  • 2 cups beet puree
  • 1 cup warm water
  • 3/4 cup applesauce
  • 1/3 cup canola oil
  • 1 teaspoon vanilla extract
  1. In a large bowl, combine the flour, cocoa powder, sugar, baking soda, baking powder, and salt. Set aside.
  2. In a second bowl, whisk together the beet puree, water, applesauce, canola oil, and vanilla. Add the wet ingredients to the dry ingredients, stirring just until combined.
  3. Spoon the batter into a 10-inch Bundt pan coated with cooking spray. Bake at 350 degrees F for 50 minutes. Let cool in the pan for at least 20 minutes, then turn out onto a wire rack to cool completely.

Beet Bundt Cake (1)

Monster and Creature Straw Paintings

Monster Straw Art (10)

Travis recently learned to make blobs of watercolor paints turn into art with nothing more than a straw, thanks to Kiwi Crate! He loved the activity so much that today we did a repeat, this time creating a set of silly monsters.

Travis chose three colors of liquid watercolor for the first piece of paper, and we dripped on a nice blob of each. Then he proudly blew through a straw.

Monster Straw Art (1)

He loves that he can do this now, scattering the paint with no fear of inhaling it, which wasn’t the case at first.

Monster Straw Art (4)

We soon had crazy wobbly waving shapes.

Monster Straw Art (2)

We examined them carefully to see what monsters we could identify! Travis loved pointing out antennae, six-legged fiends, holes for their eyes and more.

Monster Straw Art (3)

Of course we needed to repeat with a new set of colors. “I want to make lots!” Travis declared.

Monster Straw Art (7)

For the final piece of paper, he combined two colors (blue and black) in one big blob in the center and huffed out a giant monster with his straw.

Monster Straw Art (8)

Let the paint dry completely.

Monster Straw Art (9)

Once dry, we could add details. I suggested gluing down wiggle eyes, but Travis preferred to add embellishments with a marker, including giant cyclops eyes.

Monster Straw Art (11)

And fire for this one, that reminded us of a dragon!

Monster Straw Art (12)

All in all, this was frightfully good fun.

Monster Straw Art (13)

Tape Shapes

Tape Shapes (6)

Veronika loves shapes and she literally squealed with delight when I set up this easy learning activity on the floor this morning.

Using colored masking tape, I made four giant shapes on the floor: a triangle, square, star (her favorite!), and circle. Note that the circle is a little tough to make with tape, and shapes with straight sides will be easier.

Tape Shapes (1)

Not only was this great for shape recognition, but also counted as our gross motor play for the morning. First she hopped to the triangle!

Tape Shapes (2)

Then she ran to the square.

Tape Shapes (3)

Then she twirled in the star.

Tape Shapes (7)

You get the idea! For each shape, give your toddler a new action to perform, simultaneously testing their shape recognition and their listening skills.

Tape Shapes (5)

She’s off to the circle, folks! This was so easy, but she absolutely loved it. Definitely a game we’ll repeat soon.

Tape Shapes (4)