Mixing Colors on the Window

Mix Colors Window (6)

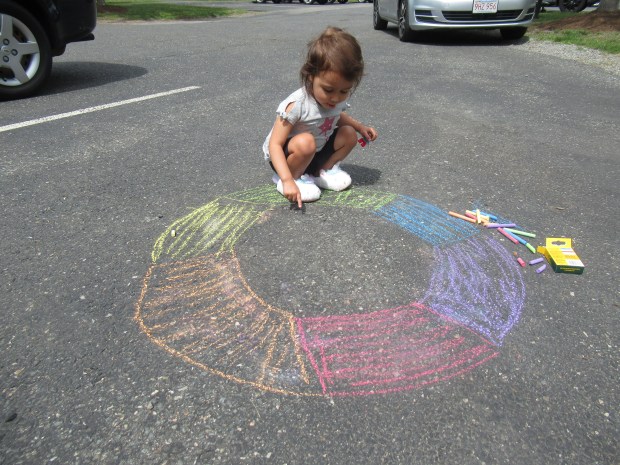
Take advantage of a sunny day for this no-mess color mixing lesson, a great idea spotted over on Hands on as We Grow!

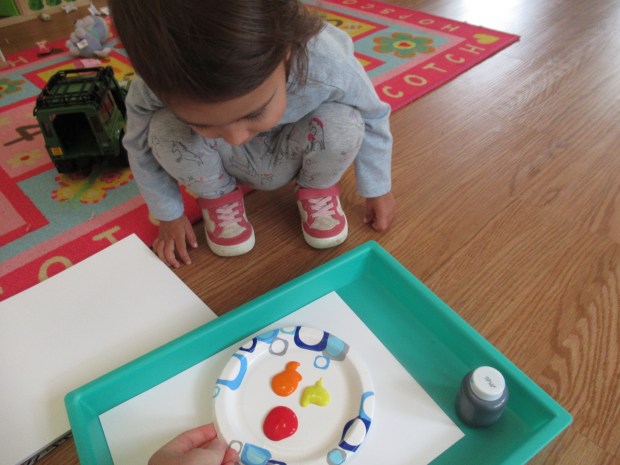
We had a new set of paints that came in silly scents – think red strawberry, yellow pineapple, and blue blueberry – so Veronika couldn’t wait to test them out.

Mix Colors Window (1)

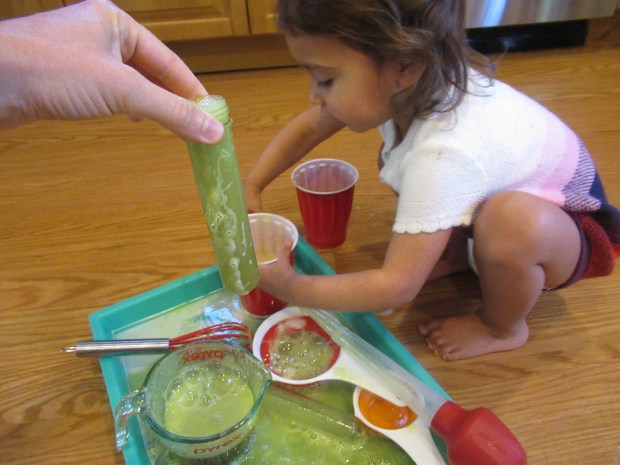
I poured each of the three primary colors into a small zip-top plastic bag and sealed tightly, then showed Veronika the magic that could happen when we held them against a sunny window. Red alone was just red…

Mix Colors Window (2)

…but if we held the yellow and red together, we saw orange!

Mix Colors Window (3)

The effect is best when the paint layers aren’t too thick, so you can see both paints and the sunlight pouring through, creating the color mixing effect. Veronika especially loved when we made her favorite color, purple!

Mix Colors Window (5)

Chances are your toddler will delight in using these as squishy bags for a while, too, which means we fit in our learning and our sensory play!

Mix Colors Window (4)

Cosmetic Wedge Stamps

If your child loves stamp art, here’s a perfect way to create stamps at home, with some shape learning thrown in! Make-up sponges often come in bulk packages, so I simply grabbed a few from the bag and set them out alongside trays of paint.

Our sponges came in triangles, and I trimmed a few so we also had small diamonds and triangles in different sizes. If you want to get fancier, cut out hearts or other shapes, too!

Veronika then surprised me, by holding the sponge by one triangle point and dipping the flat bottom of it in the paint. So her prints came out as rectangles!

You can cover a sheet of paper just for fun, or fold thick paper in half and decorate just the front, in which case this would make a lovely card for a relative or friend.

Shampoo Science Lab

Shampoo Science Lab (7)

When your bottle of baby shampoo is near the end, never fear: you have the perfect amount left to make a mad scientist lab!

To set up a mini “laboratory” for Veronika today, I first poured the remaining shampoo into a glass measuring cup, then added other tools and ingredients. Think: beakers, measuring cups, whisks, and basters, along with other ingredients like baking soda, white vinegar, and water.

Shampoo Science Lab (1)

Now it was simply time to mix and match! I demonstrated for Veronika to start ,adding some baking soda and some vinegar to the cup with the shampoo for a fizzy reaction worthy of a witch’s cauldron. But then it was up to her!

Shampoo Science Lab (3)

She loved pouring water into all the various cups and containers, especially once we tinted it green and yellow with food coloring.

Shampoo Science Lab (4)

The baster was a big hit for sucking up one potion and transferring it from container to container. Incidentally this is great for fine motor skills, too.

Shampoo Science Lab (6)

Even once we neared the end of play, and I began rinsing out the cups and spoons, she loved getting her hands soapy and tracing the leftover baking soda in the bottom of the tray.

Shampoo Science Lab (8)

What’s your little scientists favorite concoction? Please share in the comments!

Shampoo Science Lab (5)

Gross Motor Color Game

Gross Motor Color Game (2)

When it rains outside, I love to have props on hand so the kids can squeeze in their gross motor play indoors, no playground equipment required. One of the easiest items are plastic cones, and we have a set that comes in all the colors of the rainbow. That means not just gross motor skills, but color review for Veronika, too!

To start, I set up the cones in rainbow order, bringing an instant smile to her face and a pop of color to a gray morning. I encouraged her to run along the line of cones, but she had her own idea. She wanted to straddle over them! This was such fantastic gross motor work, and she repeated up and down the line several times.

Gross Motor Color Game (1)

Then we spaced them further apart so she could jump or hop from cone to cone. Then we lined them up in a tight line for more straddle practice.

Gross Motor Color Game (5)

I encouraged her to try other moves, too, like balancing with a foot atop one cone.

Gross Motor Color Game (3)

If you have older kids, consider placing the cones all over your house. Then call out directions and a color (run to red, hop to orange, tiptoe to yellow, etc.) and see who gets there fastest.

Gross Motor Color Game (4)

Meanwhile, Veronika was soon involved with the cones in an imaginative game of her own creation, which means they helped fill the whole rainy morning indoors.

Spin Art with No Spinner

Spin Art without Spinner (9)

Forget fancy spin art machines; there are so many fun ways to replicate the equipment at home, ranging from the messy to the messier. Even better, today we found a way to make “spin art” with almost no mess at all!

To start, I set out various colors of paint along with thick white paper and small paper plates. I invited Veronika to choose which colors we should use on our first plate.

Spin Art without Spinner (2)

She picked red, yellow, and orange, which I dolloped in the center of the plate. Flip over and press your hand firmly in the center, then twist your hand to rotate the colors around in a circle.

Spin Art without Spinner (3)

Lift up for the big reveal!

Spin Art without Spinner (4)

After making a few prints this way, it became clear that it was easier for Veronika’s little hands if we put the paint on the bottom of the plate, then rotated from on top. See which method your child prefers, based on age and strength.

Spin Art without Spinner (6)

You can work in some color mixing for a quick art lesson, as we did with red and yellow paint.

Spin Art without Spinner (7)

Or just add colors in a random way and make pretty designs. Either way, Veronika marveled each time that we lifted off the plate and she saw that we’d made a circle. We were definite fans of this variation on spin art!

Spin Art without Spinner (8)

Green Salad with Vegan Caesar Dressing

Silken tofu is the perfect substitute for mayonnaise as the base of this creamy, rich dressing.

Ingredients:

  • 1 (16-ounce) package silken tofu
  • 2 garlic cloves, smashed
  • 2 tablespoons Dijon mustard
  • 1/2 cup lemon juice
  • 4 cups torn green leaf lettuce
  • 1 large tomato, chopped
  • 1 (4.5-ounce) package seasoned croutons
  • Shredded vegan Parmesan, for serving
  1. Combine the tofu, garlic, Dijon, and lemon juice in a blender; process until smooth and creamy.
  2. Combine the lettuce, tomato, and croutons in a large bowl. Pour about 1/2 cup dressing over the salad; reserve the remaining dressing for another use.
  3. Divide into serving bowls and sprinkle each serving with the Parmesan, if desired.

Sidewalk Chalk Fun

Sidewalk Simon (4)

Sunny days call for sidewalk chalk! Here are two fun ways Veronika played with chalk today.

The first was a take on the old game of Simon, a handheld memory game that repeats a sequence increased by one step each time. But nix the technology and you can play Simon on the sidewalk, too!

Sidewalk Simon (1)

First, I drew a full rainbow of colors with chalk (rather than just the original Simon’s four colors), which was great for a quick ROYGBIV review. Then I had Veronika stand in the center and called out, “Stand on purple!”

Sidewalk Simon (2)

She jumped to purple, and then went back to the center. “Stand on purple, then stand on orange!” I instructed.

Sidewalk Simon (3)

At age 2, Veronika’s limit was about 3 steps (we made it through: purple, orange, green), but big kids can not only act out longer patterns, but also see who can remember the most steps!

Then we noticed our shadows behind us, short and squat and funny in the afternoon sun. I invited Veronika to trace mine (though it was a rough approximation, of course).

Sidewalk Simon (5)

Use chalk to fill out your new chalk friend with an outfit and a silly face.

Sidewalk Simon (6)

It’s also fun to trace the shadows of other objects, so next we tried her Duplo doll. Shadows were so short that this one barely showed up, but we colored in the doll’s outfit, too.

Sidewalk Simon (7)

I caught Veronika sideways, so traced her shadow this way before we added silly clothes and features.

Sidewalk Simon (8)

For older kids, consider coming back and making these sidewalk “portraits” throughout the day, watching them change from tall to short to tall again. You might also try having your child “fit” his or her body back into their shadow, almost like a puzzle piece!

Sidewalk Simon (9)

Blueberry Granita

This fresh fruit sorbet is the perfect treat on a summer day!

Ingredients:

  • 1 and 1/2 cups fresh blueberries
  • 1/2 cup lemonade
  • 2 tablespoons apple juice
  1. Combine all the ingredients in a blender and process until smooth. Pour into a freezer-safe container and freeze.
  2. Every two hours or so, scrape with a fork, then return to the freezer. Ours was the perfect consistency after about 8 hours.

My Tree Journal

Today, Travis embarked on a project that will actually be a year-long process: To find a tree to follow and document the changes and differences across the seasons. This beautiful project truly teaches children to feel the wonder of nature, connect with a living natural thing, and become observant little scientists!

It all started with a picnic lunch at our local arboretum. I let Travis lead the way to the tree he deemed worthy of our picnic in the shade, and that sealed the deal of which tree he’d be observing.

The next step was to check out the label under the tree; he’d chosen a sweet cherry! This was exciting, since not as familiar to him as a maple or oak. If you’re not at an arboretum with labeled signs, consider taking along a nature guide or check out websites to identify your child’s tree.

He immediately decided the tree’s name was Chersie and drew Chersie’s picture on the front of his journal. We also made sure to snap the first of what would be our seasonal pics, in this case Chersie verdantly green in summer.

Travis went over to the tree with wonder. “It spoke to me!” he said. I asked him what the tree had told him. “It said, ‘I love you’,” he reported seriously. My tree whisperer! We marveled at how the bark was rough in patches, but smooth in others, and at all the bugs that were making Chersie their home. Travis said he missed the tree already on the drive home.

Once home, we printed the Summer photo using our Zink printer, which he then glued into the tree journal.

I will update this post with pictures from the fall, winter, and spring, so stay tuned!

Water Color Paint and Salt

The beautiful visual effect when salt hits wet paint has some science behind it, too! Whether your child is old enough to understand the STEAM concept of this project, or young enough just to enjoy the art and sensory play, this is an easy and fun craft to do together.

To start, I set out watercolors and a cup of water for Veronika, and invited her to make big stripes of wet color on thick paper. As soon as I began narrating, “Now some blue, now some green,” she dove right in. “I’ll do blue! I’ll do green!” she said, painting over my lines.

The wetter the better, and once we had several thick streaks of color, I invited her to sprinkle salt on top. Of course for a toddler this was great sensory fun.

But the real wow is watching the salt absorb the water right away. If you then shake off the excess, it leaves a neat bubbled look in the colors.

For an alternative, we painted a second set of thick stripes, then pressed plastic wrap on top. Leave until the color dries, then lift up. The paint itself looks full of bumpy, crinkled texture.

Veronika was eager to return to the salt, and soon had dumped a whole pile of salt on the paper and painted it directly with drops of watercolor!

Then she wanted to stir the salt around with her brush, add more water, stir the salt some more, etc., all of which kept her quite busy for a while.