Cactus Toss

Cactus Toss (8).JPG

This game is sure to get laughs from your kids, and is a fun craft to boot!

Start by drawing two cactus shapes on green poster board, about 1 foot high. Older kids will have fun drawing these on their own; I did this part for Travis, who declared my cactus “clumsy”, which I thought was just about the best description in the world.

Cactus Toss (1)

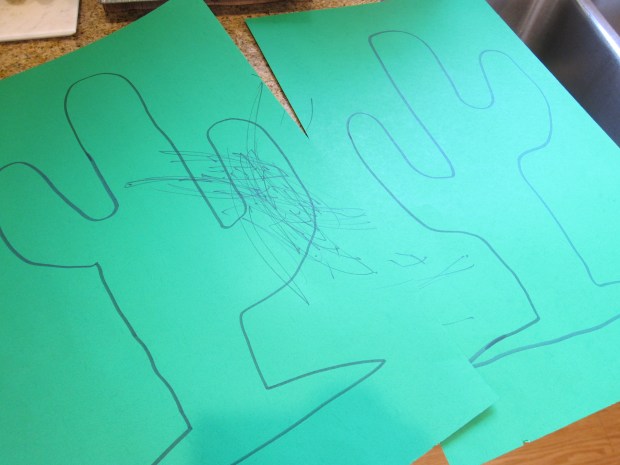
Decorate the cactus with paint markers. I helped Travis think about how we could depict spikes and thorns, with lots of crosses and slash marks.

Cactus Toss (3)

Make a slit in the bottom of one cactus half and a slit in the top of the other so they can slot together. Add point values to each arm of the cactus, and glue pom poms on top.

Cactus Toss (5)

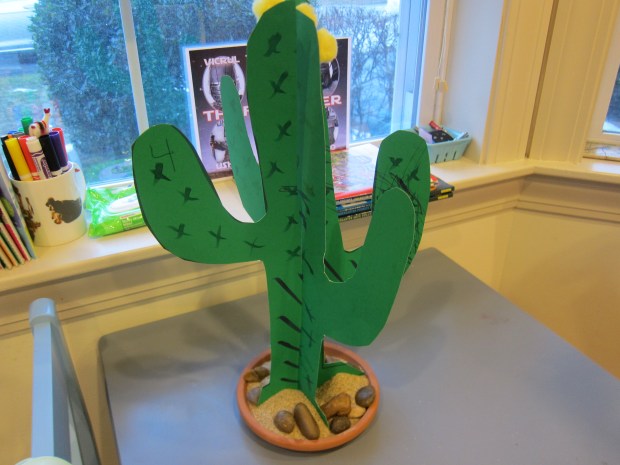
Time to play! To set up the cactus, place it in a clay dish. We added sand and rocks for desert authenticity.

Cactus Toss (6)

Twist pipe cleaners into circles for your playing pieces. I was yellow and Travis was red. Here’s the wind up…
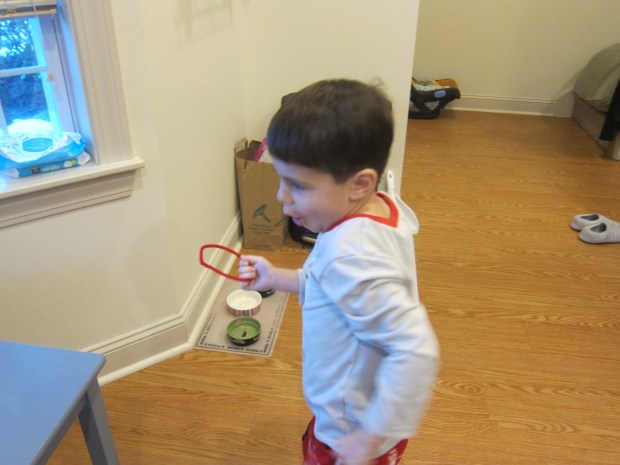
Cactus Toss (7)

…and the toss!

Cactus Toss (9)

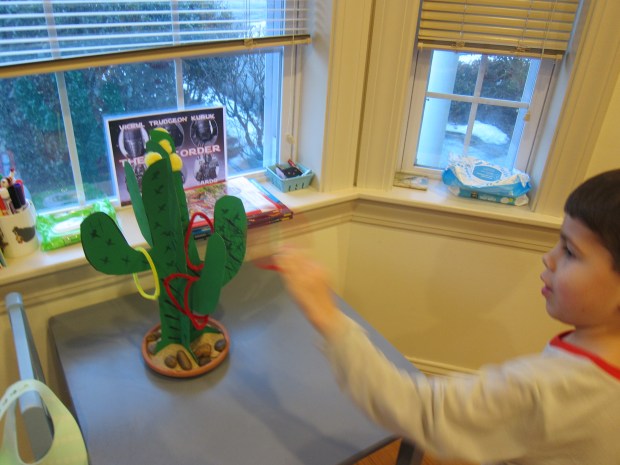
First player to 10 points wins. Travis was so proud when he hooked a 5 pointer on the top!


Sensory Play with Frozen Veggies

Edible Frozen Veggies (3)

Not only is this game great for toddler sensory fun, it doubles as a comforting way to soothe all those teeth coming in. Veronika is currently getting 8 new chompers, in addition to the 8 front ones she’s already got, which made the timing just right.

To play, I simply opened up a bag of frozen mixed vegetables and emptied them onto an pizza tray.

Edible Frozen Veggies (2)

I added a big ladle for her to scoop with, but the lip of it was too tough to get under the veggies, so soon we switched to a regular dinner spoon.

Edible Frozen Veggies (4)

She took it from there! She loved the sound that the spoon made in the pan, shoveling through the veggie pile, and of course pushing them to the floor.

Edible Frozen Veggies (5)

The small carrots, peas, and corn will thaw pretty quickly, but remain cold enough to soothe, which means she was thrilled when she lifted the spoon to her mouth and got a taste.

Edible Frozen Veggies (7)

This became an impish game, testing if mommy was going to chide her for eating her “toys”. Not this time!

If you want to throw in some quick learning, talk about the colors of the different veggies!

Edible Frozen Veggies (6)

Mostly, though, I let her play solo; the veggies kept her happy on the kitchen floor for almost a half hour, a big win in my book!


Flashcards in Envelopes

Flashcard Envelopes (7).JPG

I spotted this game online and found it a delight in so many ways. It works fine motor skills for toddlers (taking flashcards in and out of envelopes), requires no fancy materials, keeps your tot busy for ages, and doubles as a lesson on word recognition. If you don’t have a set of flashcards, consider investing in some. You can play this game now, and use them with a beginning reader far down the road.

Flashcard Envelopes (2)

To play, I simply put about 10 flashcards into empty business envelopes. If your toddler is closer to 2 years old, consider sealing them shut. For Veronika, I left them easy to open.

Flashcard Envelopes (1)

She started out sitting on my lap, as I showed her how to lift the envelope flap and remove the card inside.

Flashcard Envelopes (3)

Soon she was concentrating hard on fitting the cards back in again.

Flashcard Envelopes (4)

Once she had mastered the mechanics of this, she started to pay more attention to the pictures on the cards. I had deliberately used some that are her early words, and she happily said or signed them to me.

Flashcard Envelopes (5)

Hat! Duck! Cat!

Flashcard Envelopes (6)

Once she got tired of that, there was simply a big heap of fun envelopes and cards to play with for a while, making this activity great for self-entertainment.

Flashcard Envelopes (8)

My Beautiful Balloon

My Balloon (6)

Veronika had so much fun with a balloon recently that today I treated her to another, this time the small Mylar kind, but we turned it more into a game of cause-and-effect. These little balloons are perfect for multiple games, all of which encourage hand-eye coordination, too.

She immediately discovered that, when released from her hands, the balloon skittered away from her. This led to an excellent time giggling and chasing it around the house.

My Balloon (1)

To avoid frustration, next we tied on a string. I towed it along behind me and she gave chase on hands in knees.

My Balloon (2)

Then it was her turn to tug it along, soon her endless companion in loops around the house.

My Balloon (3)

The best fun was dropping it from a height and bopping it back in the air. She roared with laughter.

My Balloon (4)

Lie your toddler on his her or her back for the best view!

My Balloon (5)

Chocolate-Eating Game

Chocolate-Eating (2).JPG

Travis learned about this hilarious game from his latest Highlights magazine, traditionally played at birthdays in Germany. It sounded so silly and fun we had to give it a try just for an after-school snack!

If you’re playing with multiple players, you’ll need a dice. Anyone who rolls a 6 quickly puts on a hat, mittens, and scarf, and tries to unwrap a chocolate bar with a knife and fork. The next player to roll a 6 takes that first person’s turn, and if the bar is unwrapped, then whoever rolls a 6 now gets to eat the chocolate with a knife and fork. Silly, right?

Because it was just me and Travis, we took turns donning all the winter gear and working at the wrapper with the utensils.

Chocolate-Eating (1)

Mommy got us in! Time to fork into our chocolate.

Chocolate-Eating (3)

Whoever manages to eat the most chocolate wins, of course! I can see this being just delicious to play with a batch of kids at a party.

Flashlight Word Game

Flashlight Word (4)

Travis can make his way through a few early phonics books, and although I’m not quite ready to call him a “reader”, I know he’s on the cusp. This cute bedtime game can hopefully tip him towards that edge!

Flashlight Word (1)

I wrote out a list of sight words on brightly colored construction paper, and taped them in a pattern along our playroom wall. (Note: you can also make this an “upstairs” game for right before bed, but since I knew we’d want to play after baby sister was asleep, I kept the game downstairs).

Flashlight Word (2)

There are several ways we played the game, all of which boost Travis’s sight reading! In the first version, I shined the flashlight on a word and he had to read it.

Flashlight Word (5)

Then it was his turn to challenge mommy! He shined the light, and laughed if I pretended to have a hard time with a word.

Flashlight Word (4)

For extra literacy fun, have your child first read the word, then put it in a full sentence. This is great for sight words like ‘for’ and ‘four’, or ‘two’ and ‘to’.

Flashlight Word (6)

Finally, you can play a sort of reverse version, calling out a word and then having your child find it with the flashlight.

Little sibs might want to play, too, and can look for letters instead of reading full words!


Bubble Fun

Bubble Fun (3)

My new favorite thing in the world is Veronika’s first full sentence: “Bubbles, please please.” As a result, I’m constantly trying to meet this adorable demand, with bubbles in the bath or during playtime. We quickly ran through a bottle of store-bought bubbles so I tried these two recipes at home. Both are so easy, and toddler-friendly to boot.

Bubble Fun (1)

Bubbles 1:

  • 1/3 cup baby shampoo
  • 1 and 1/4 cups water
  • 2 teaspoons sugar
  • 2 drops blue food coloring

This nice mild formula blows great bubbles that you can also catch on the wand without popping them. The added bonus is that it will be tear-free if any solution gets in the eyes.

Bubble Fun (4)

Bubbles 2:

  • 1/4 cup dish soap
  • 1/4 cup glycerin
  • 3/4 cup water
  • 1 tablespoon sugar

This version makes stronger bubbles, which float high up in the air, and they will leave behind little strands of popped sugar when popped just right (you may have noticed that the sugar-based bubbles at a Gymboree class act the same).

Bubble Fun (7)

Veronika was not content to watch me blow the bubbles; she wanted to take charge, dipping the wand in and out.

Bubble Fun (5)

Older toddlers will no doubt want to practice their blowing skills, too.

Bubble Fun (6)

Needless to say, you can’t go wrong with bubbles.

Learning Things That Go

Stamps (4)

There are so many ways to teach toddlers about the various vehicles in the world, whether that means cars and trucks, or boats, or planes, or everything in between. Most obviously you can point these things out in the real world or read about them in books. But toddlers are so tactile, so consider hands-on learning with stamps or stickers that depict things that go!

First up: stickers. Veronika is currently obsessed with stickers, so we had lots of fun with a reusable sticker book from Melissa & Doug. She was a little frustrated that the big planes and trucks wouldn’t stick to her belly…

Stickers (5)

…but loved that she could lift them off the page over and over.

Stamps (5)

Next up: stamps! I purchased a stamp set with big chunky ones just right for toddler-sized hands.

Stamps (1)

We talked about the image on each stamp before I pulled out the ink pads. Of course the ink itself was more fascinating for a while!

Stamps (2)

But soon I showed her how to press a stamp down into the ink, which then appears like magic when pressed on paper. She was a little young for this activity, impishly trying to eat the stamps, so we tucked the ink pad away. But I loved that this was both a vocab lesson and an “art” activity.

Stamps (3)

One final option: felt pieces featuring things that go. Veronika loves her set with cut-outs of planes, trains, and more.

Things That Go alt

Little felt shapes like this of things that go are great for, well, when you’re on the go!

Things That Go var

Whichever medium you choose, there’s lots of hands-on learning and fun to be had!

Tomato & Orzo Soup

Tomato Orzo Soup.JPG

I love this hack for making a hearty family dinner: Start with a canned creamy soup, add a few ingredients for added nutrition, and dinner seems gourmet in minutes flat.

Ingredients:

  • 4 cups creamy tomato soup
  • 1 cup canned black beans
  • 2 cups cooked orzo
  • Plain non-dairy yogurt
  1. Heat the soup in a saucepan until warm. Add the beans and cooked pasta, stirring until combined.
  2. Ladle the soup into bowls, and top each with about 1 tablespoon yogurt.

Fruit-Filled Jigglers

Fruit Jigglers (3)

Jell-o desserts might just be the perfect sensory material for toddlers, equal parts play and edible snack! Here’s a fun twist on how Veronika has played with jell-o in the past. As always, I use the vegan jel dessert from Simply Delish.

Prepare the dessert according to package directions (we used strawberry), and pour into very shallow plates or containers as a mold.

Fruit Jigglers (1)

I added a few raspberries as “treasures” for Veronika to dig up. Any other berry or small pieces of fruit would work, too. Consider a fruit your little one hasn’t tried yet, as this game encourages taste exploration!

As I prepared dinner, I sat Veronika down in her high chair and scooped out the thin layers of jell-o. I gave her an assortment of cookie cutters, and let her go to town!

Fruit Jigglers (4)

It was fun to talk about the shapes she could make with the cookie cutters, and she did lots of poking and prodding.

Fruit Jigglers (2)

When she discovered the raspberries, she was delighted! She seemed a bit overwhelmed by the amount of jell-o on her tray, so I pared it down to one portion per cookie cutter shape.

Fruit Jigglers (5)

She grinned when she discovered the taste! This is the perfect activity to fill time while you cook.

Fruit Jigglers (6)