Color Hunt

Color Hunt (2).JPG

Here’a fun activity for the next time you walk around the house with baby: turn your exploration into a color hunt!

I painted four squares on a piece of cardboard, choosing red, blue, green, and yellow. It was easiest to strap Veronika into the Ergo carrier so my hands were free, and off we set on a search around the house.

Color Hunt (3)

When we came to an item, I paused and held it next to the appropriately colored square.

Color Hunt (5)

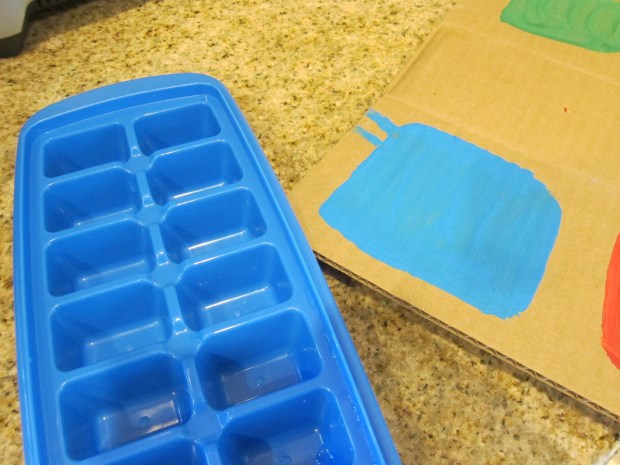
Name the color first as you point to the object, and then as you point to the square on your cardboard.

Color Hunt (6)

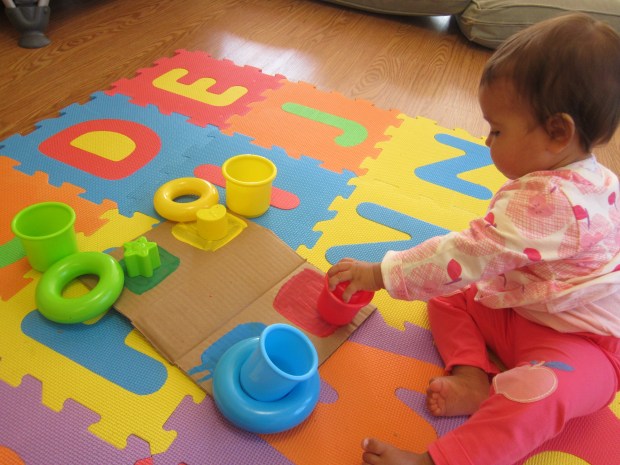
When we returned to her playroom, I set down the cardboard and made piles of toys alongside each color.

Color Hunt (7)

I stuck with similar objects – blocks, stacking cups, cars – so she would have a strong visual of the color in each pile.

Color Hunt (9)

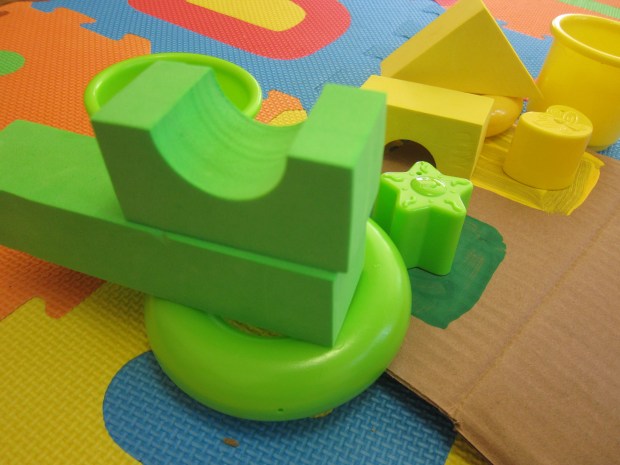
And of course she just loved playing with the items. This game is a great way to get your little one hearing the names of colors and understanding the difference between shades, so enjoy!

Color Hunt (8)


Exploring Patagonia

Patagonia (1).JPG

Here was a very different lesson plan from Raddish Kids, in conjunction with the Comida Argentina recipes Travis has been cooking up. My kindergartner got to learn social studies, all about one region of the world!

Truth be told, the unit was quite simple compared to many Raddish lessons. I showed Travis the Patagonia region on a fantastic map we have featuring elevated surfaces for mountains. He immediately picked up on how mountainous the region was, and also how close to the ocean.

We read a few fun facts about the area, including the discovery of dinosaur fossils. Then it was time for a video!

Raddish provided a worksheet for children to draw images of what they learned in the travel video. Travis immediately paused it and said, “Mom, there’s water!” His delight was infectious, pausing the clip every few seconds to draw the glaciers (“silvery mountains!”), desert, flies, or any other things that jumped out to a five-year-old boy.

Patagonia (2)

There are numerous ways to continue the lesson from here. Children are encouraged to present their knowledge while pretending to be something, be that an archaeologist, chef, journalist, or artist.

Because Travis loves YouTube clips, I suggested he be a travel blogger giving his review of Patagonia. But first, he wanted to make those glaciers! He raided the craft bin and wrapped Styrofoam balls in aluminum foil. These were glued to a sheet of shiny cardstock as “ice”. He added dowels as “desert”. All of this received lots of glue on top as snow.

Patagonia (3)

Without further ado, here’s my little travel blogger, enticing you to Patagonia!

Hummus for Babies

Hummus.JPG

This mild hummus is just right for toddlers and babies. Because you can control the amount of salt, it’s preferable to store-bought hummus.

Ingredients:

  • 1 (15-ounce) drained and rinsed can garbanzo beans
  • 3 tablespoons olive oil
  • 2 teaspoons fresh-squeezed lemon juice
  • 1/4 teaspoon cumin
  • 1 garlic clove
  • 1/8 teaspoon salt
  1. Combine the ingredients in a food processor and process until smooth.

Texture Track

Texture Track (5)

This was admittedly an ambitious game with a ten-month-old, since it involved lots of tempting materials. But Veronika loves vrooming cars on the floor (she’ll do so for ages, going “vvvvv”), so I knew she’d enjoy the game!

To set up, fold a piece of cardboard in half. Cover half in shiny aluminum foil.

Texture Track (11)

Next, I filled a shallow tray with just a thin layer of sand. Definitely keep the amount small if you’re worried your little one will spill it.

Texture Track (1)

I set up the ramp to go up and into the sand tray. With Veronika watching, first I chugged a car sloooowly up the ramp.

Texture Track (4)

Then I let it zoom (“fast!”) down the shiny side. It comes to a stop in the sand.

Texture Track (2)

There is so much to talk about as you play the game (the textures of the materials, different paces). Don’t be surprised if your baby wants to grab at the ramp or the foil!

Texture Track (6)

Soon Veronika wanted to try her own hand at zooming the cars up and over.

Texture Track (8)

The sand was her favorite part by far.

Texture Track (9)

She loved running her fingers through it, and the crunchy sound that the cars made when we simply drove them back and forth in the bin.

Texture Track (10)

Learning About Feelings

Feeling Emotions (2)

Here’s a fun way to teach your baby about feelings as he or she begins to navigate the world of emotions; bring stuffed animals in on the action!

The very first one I wanted to illustrate for Veronika was love. I said the word and gave her stuffed animal a big hug.

Feeling Emotions (1)

She wanted to copy me right away!

Next, I sat the happy stuffed animals around me for a story time, explaining that story time makes me happy. Make sure to exaggerate the emotion as you say it. For happy, that meant a high voice and big smiles. She was excited.

Feeling Emotions (7)

There are so many children’s books featuring emotions that you can read through. Our book included different scenarios and emotions on each page. After I read the text, I stopped and had her stuffed animals act it out.

The fox was sleepy.

Feeling Emotions (3)

Oh no and then worried.

Feeling Emotions (4)

And then “surprised!” Veronika copied my motions and put her hands up in a big, “Oh yay!”

Feeling Emotions (5)

And there was a happy ending of course.

Feeling Emotions (8)

Read through several books this way, so you can explore the gamut of emotions with your little one. Veronika looked concerned when the animals were worried…

Feeling Emotions (9)

…and thrilled when they were glad. She enjoyed this story time so much, and I did too!

Feeling Emotions (6)

Peace Pendant

Peace Pendant (6).JPG

There’s been a bit of discord in our home lately, not unexpected with a five year old! Kindergarten routines are new, which makes things understandably tough, and Travis is at an age where asserting oneself and independence are so important. This craft now serves as a token to make peace whenever we get caught in a clash of wills at home!

Trace two circles on craft foam, one purple, one yellow.

Peace Pendant (1)

Leave the purple circle whole and cut the yellow one into a peace symbol. The latter was tough for Travis, so I helped out. Glue the yellow to the purple, cutting to fit if needed.

Peace Pendant (2)

Travis loved adding stick-on craft gems for decoration. Groovy!

Peace Pendant (3)

Glue a piece of wide ribbon into a loop, and then adhere to the back of the purple foam.

Peace Pendant (4)

Thread a length of string or yarn through the ribbon so it can be worn as a necklace. Now whoever needs to stop and take a deep breath can pause and put on the pendant! Try it and see if it brings a little peace to your home.

Peace Pendant (5)

Stacking Rings

Stacking Rings (10).JPG

Stacking rings are such a simple and classic baby toy, but they bring such joy and fantastic learning! Your baby is problem solving as he or she figures out how to stack the rings, as well as honing fine motor skills. Because many are brightly colored and ordered in size from largest to smallest, they are also great for language development.

Today, Veronika and I mixed things up to bring new life to her standard stacking ring set! Instead of threading them onto the provided post, I gave her a wooden spoon to slot them on to (you could also try the game on your arm).

Stacking Rings (1)

She was immediately intrigued.

Stacking Rings (3)

The spoon itself was fascinating to her, and I think she believed herself to be Queen Veronika, brandishing it like a royal scepter and chatting to the spoon for quite some time.

Stacking Rings (2)

Eventually I coaxed her into adding more rings onto it.

Stacking Rings (7)

She was delighted when she saw that her spoon now had three fun rings, not two.

Stacking Rings (9)

She loved to stand up holding it, as well!

Stacking Rings (5).JPG

If you want to challenge your baby with smaller rings, try stacking on shower curtain or window curtain rings instead! How do you and your baby play with stacking rings? Please share in the comments.

Stacking Rings (4)

Floor Art

Floor Art (3)

Veronika is entering such a fun stage of development. No longer are projects and crafts simply things I make for her, but she’s old enough now to get involved in the process. To wit, today I gave her a crayon for the first time. The moment was, quite simply, beautiful.

I laid a long piece of craft paper down in the playroom, securely taping it at all four corners. If you prefer, or worry that your little one will rip up paper, use cardboard instead.

Floor Art (1)

I set out a box of jumbo crayons, the perfect first crayon for the under-age-one set. She took to it more immediately than I ever imagined, not putting the crayon in her mouth, but instead testing out a few scribbles.

Floor Art (2)

I thought I might need to guide her hand..

Floor Art (5)

…but nope! She delightedly began scribbling all over the paper, and even stayed on it instead of wandering to the floor by accident.

As she “drew”, I drew along with her, including a few simple shapes I pointed out.

Floor Art (4)

I added a few simple patterns like black, green, black, green, or square, circle, square, circle. I chatted about these shapes to her as she continued to scribble.

Then I laid her down on her back and traced her! This got giggles.

Floor Art (6)

I guided her hand to show her where eyes, a nose, and a mouth would go on the resulting outline. As I drew on a purple shirt, she happily scribbled over this first “self-portrait.”

Floor Art (7)

For additional art fun, I drew a second human outline on cardboard and cut out a few clothes from construction paper.

Floor Art (11)

I let her help me glue these down with a glue stick, a slightly sticky but delightful process. Clearly she enjoyed this first art class!

Floor Art (10)

Black Bean & Carrot Mash

Black Bean & Carrot

This mash of beans and carrot puree will thicken as it cools. Once thickened, it’s perfect to pick up by the handful for little ones who are baby led weaning!

Ingredients:

  • 1 (15-ounce) drained and rinsed can black beans
  • 4 ounces carrot puree
  1. Combine the ingredients in a saucepan and cook over medium heat for 5 minutes, until warm.
  2. Remove from heat and mash with a potato masher to desired consistency.

Yogurt Ice

Yogurt Ice (3).JPG

These easy “popsicles” will be fun for your baby to eat in the high chair, or perhaps just amusing to play with! You can puree any fresh fruit to equal 1/2 cup for the recipe; in a pinch, use a fruit pouch from the baby food aisle. Veronika’s favorite is a peach/apricot blend.

Since I didn’t want Veronika to hurt herself on long popsicle sticks, I found a great alternative; milkshake-sized straws cut to about the length of her fist. Just supervise closely at feeding time and remove the sticks if they come free from the yogurt.

Ingredients:

  • 1 (5-ounce) plain non-dairy yogurt
  • 1/2 cup fruit puree
  1. Stir together the ingredients in a small bowl.
  2. Divide evenly among the compartments of an ice cube tray, and insert the straw “sticks”. Freeze until solid.

Yogurt Ice (4)