Play Dough Sensory Bag

Playdough Bag (2).JPG

I’ve been on a recent kick of making sensory bags for Veronika, a great way to enable my little imp to play with messy materials that might otherwise end up in her mouth. Safely inside a plastic bag, even the messiest items are a go!

Normally for a ten-month-old I’d whip up homemade play dough for added security, but since it was going in the bag, I used the store-bought kind.

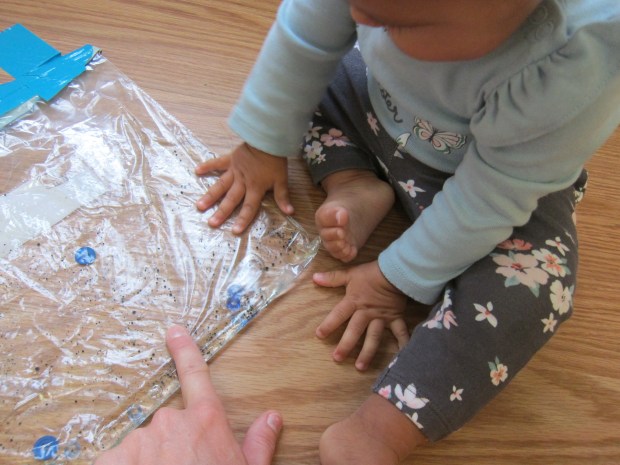
I added a few craft beads in fun flower shapes that she would be able to squish into the play dough. Now it was simply a matter of sealing and watching her squish away!

Playdough Bag (1)

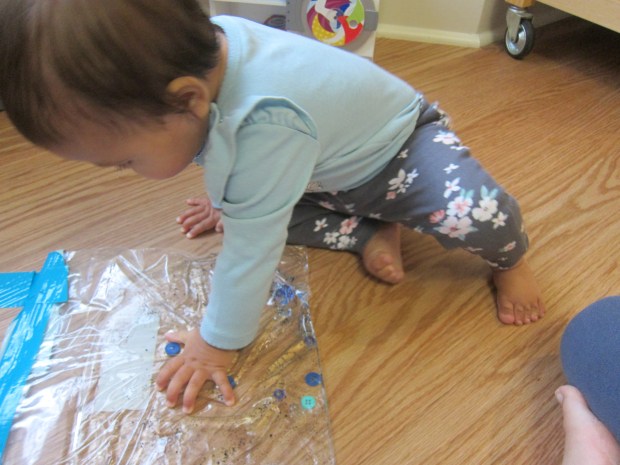
Veronika loved grabbing at the bag.

Playdough Bag (5)

I showed her how to squish the hard beads into the soft dough, talking about texture as we played. The contrast seemed to really interest her.

Playdough Bag (4)

I felt comfortable leaving this one around for her to play with since there was no liquid to spill, even in case of a slight tear.

Playdough Bag (3)

A fantastic way to keep her busy, in sum!

Leaf Canvas Craft Challenge

Leaf Craft Challenge (5).JPG

What was this month’s craft challenge from Highlights magazine? To use a leaf as the canvas for painting! You’ll want to use acrylic pants for the craft, which will hold up better than tempera paint.

No doubt there are fantastic artists who could create a whole miniature scene on their leaf. For my kindergartner, the project was more about the novelty of using nature as the canvas.

We found some giant leaves on a nature walk and knew those were the ones to use!

Leaf Craft Challenge (1)

At first, he painted along the lines of the leaf’s veins, which was great for reinforcing a recent science unit on trees and nutrition.

Leaf Craft Challenge (2)

Then he had fun blending colors and seeing how they mixed on the leaf.

Leaf Craft Challenge (3)

At the end, he liked making big blobs of paint.

Leaf Craft Challenge (4)

Whether your little Picasso makes something abstract, something highly detailed, or just has fun smearing paint, this was a simple and fun alternative to painting on paper.

Leaf Craft Challenge (6)

Memory Game

Memory Game (3).JPG

Object permanence is probably well-established now for your baby at ten-months old, but this game will help strengthen the concept that an object exists even once hidden. And your little one will love finding it!

I decided to use two foam blocks for the game, because I wanted objects that were different in some ways, but similar enough not to confuse Veronika. One block was a blue square and the other was a yellow triangle. Working with one at a time, I described the block to her: colors, shapes, texture. Let your baby feel (or mouth on!) the toy if they are interested.

Memory Game (2)

Then I hid the block behind my back. She was instantly curious where it had gone, and trotted around to find it.

Memory Game (4)

We repeated with the yellow triangle. Again, your baby won’t be acing quizzes after games like this, but it’s great way to introduce vocabulary about shapes colors and the element of hiding will keep your little one excited.

Memory Game (1)

Shoot and Splash

Shoot and Splash (4)

Following up on yesterday’s simple game of “boom!”, today I made a cause-and-effect game that was a little more sophisticated for Veronika. This game is also great for talking about words like in/out and fast/slow.

I filled a shallow plastic tub with water, and got out two small balls (golf balls or ping pong balls are about the right size) along with an empty paper towel tube.

I held the tube against the bin of water and let Veronika see me put the ball inside. “In!”

Shoot and Splash (1)

Now tilt the tube slightly and let the ball fall in with a splash. There was a great element of surprise here for Veronika, who was wondering where the ball went!

Shoot and Splash (5)

We played around with different variations for quite some time. Sometimes I let the ball fall fast from a steep angle, or sometimes held the tube nearly horizontal so it would roll slowly and build her anticipation.

Shoot and Splash (3)

Soon, she was the one wanting to put the balls in the tube, making this almost like a one-shape shape-sorter!

Shoot and Splash (6)

When we were done with the tube, the leftover balls and shallow water were a big hit.

Shoot and Splash (2)

Build-Ahead Breakfast

Build Ahead Breakfast (4)

Mornings are crazy enough without having to worry about making a hearty breakfast and packing a bagged lunch. Take one piece out of the equation with this fantastic wrap you can put together the night before. Bonus points: Kids will love helping, and can alter the ingredients until they find their favorite combo.

Build Ahead Breakfast (2)

We like these with the California burger from Amy’s Kitchen.

Ingredients:

  • 2 small flour tortillas
  • 1 veggie burger patty, cooked and chopped
  • 1/4 cup chopped fresh chives
  • 1/2 cup shredded Daiya cheddar
  • 2 tablespoons chopped sun-dried tomatoes
  1. Place the tortillas on a flat work surface. Arrange the ingredients in rows working from left to right, dividing evenly among the two tortillas.
  2. Fold up the bottom of the tortilla over the toppings, then begin rolling from the left and roll up tightly.
  3. Wrap in parchment paper and refrigerate overnight. To serve, microwave for 30 seconds.

Build Ahead Breakfast (3)

Boom!

Boom (3)

Cause-and-effect is big at ten months, and this simple game is sure to delight!

I sat down with Veronika in front of an empty plastic bin. Making sure she was watching, I tossed in a bean bag and said, “Boom!”

Boom (1)

Well she sure thought that was funny!

Boom (2)

I repeated with a ball, “Boom!” She immediately began mimicking the word. “Boo boo boo!”

Now it was her turn; I handed her a ball which she placed in rather than dropped into the bucket, but she had the idea!

Boom (7)

For some extra fun, I sprinkled flour in the bottom of the bin.

Boom (5)

The bean bags and balls made just enough of an impact for a light dusting to fly up when items landed, further enhancing the notions of cause and effect.

Boom (6)

And it was so fun that big brother wanted in on the action!

Boom (8)

Baby Oil Sensory Bag

Baby Oil Bag (4).JPG

If you’re looking for a safe way to incorporate messy materials into play with the under-one-year-old set, then gallon-sized plastic bags are your perfect solution. To wit, Veronika has “painted” in a plastic bag, and today we used baby oil for a fun sensory experience.

Pour some baby oil into the bag. Add a few blobs of food coloring.

Baby Oil Bag (2)

I went with a blue theme simply because that was what I had on hand, and added blue buttons and blue pony beads as well.

Now all she had to do was squish! The food coloring is fun, because your baby can chase the blobs around in the baby oil, much like blobs in a lava lamp.

Baby Oil Bag (3)

If your baby is as hands-on as Veronika, you’re going to want to duct tape along the sealed closure for extra security.

Baby Oil Bag (5)

It was also helpful to duct tape the bag to the floor, because this focused her play on squishing items around within the bag, instead of picking up the whole bag and smooshing it in her hands.

Baby Oil Bag (6)

What hands-on fun for a weekend morning!

Dragonfly Fishing

Dragonfly Fishing (9)

When I spotted this craft in Travis’s latest issue of Highlights, I knew it was going to be more of a mommy project. Since Highlights appeals to kids up to age 12, some of the activities inside are a bit complicated for my kindergartner. But I knew he’d love the water-powered dragonfly, which relies on hydraulics to scoop up little homemade “flies”.

To start, tint a bowl of water with blue food coloring. Use a medical oral syringe to inject water into 3 feet of air-line tubing, and then fill the syringe.

Dragonfly Fishing (1)

Remove the air from a second oral syringe, and insert these into the ends of the piping. I found it useful to duct tape around the connections for added security.

Dragonfly Fishing (2)

Use hot glue to attach two jumbo craft sticks so they overlap slightly. Glue the water-filled syringe onto one end of the craft sticks.

Dragonfly Fishing (3)

Next, glue the bottom half of a paper cup to the other end of the craft sticks. Although not necessary, we painted our cups green. Glue a second bottom half of a paper cup to the end of the syringe’s plunger; your two cup tops should touch.

Use washi tape or thin duct tape to secure the tubing to the end of the craft sticks, below the filled syringe. Tape a 1-foot dowel to the empty syringe and tubing, as shown.

Dragonfly Fishing (6)

For the finishing touch, we made a dragonfly out of cardstock, adding eyes and wings outlined in marker. Glue this onto the craft sticks above the cups.

Dragonfly Fishing (5)

For our “flies,” we decorated yellow pom poms with cardstock wings (cut a heart shape from white cardstock) and wiggle eyes.

Dragonfly Fishing (4)

Now it was time to test the hydraulics! Release the water from the first syringe. Ideally, it will power the second syringe, which powers the cup “mouth” to open.

Dragonfly Fishing (8)

See if you can scoop up your flies!

Dragonfly Fishing (7)

Apple or Banana Yogurt

Apple Yogurt (2)

If you want to introduce yogurt to your baby, adding fruit is a great way to incorporate a little sweetness without buying a sugary variety. For both of these recipes, I use almond milk yogurt.

Apple Yogurt:

  • 3 tablespoons plain non-dairy yogurt
  • 2 tablespoons applesauce
  1. Stir together until combined.

Apple Yogurt (1)

Banana Yogurt:

  • 1 ripe banana
  • 1 (5-ounce) container plain non-dairy yogurt
  1. Mash the banana with a fork until very smooth. Stir in the yogurt.

Banana Yogurt (2)

The latter recipe is best served immediately, or you can freeze it in the cubes of an ice cube tray for high chair shenanigans.

Banana Yogurt (1)