Leaf Chromatography

Leaf Chroma (9)

You can show your children a visual rainbow of molecules with this simple science experiment. It’s a great way to explore what happens to leaves in the fall!

Travis and I had been waiting to do this activity all season, but the leaves were stubbornly slow to change. Finally we spotted a landscape of vibrant reds, oranges,  and yellows, and couldn’t wait to take them home and experiment.

Leaf Chroma (1)

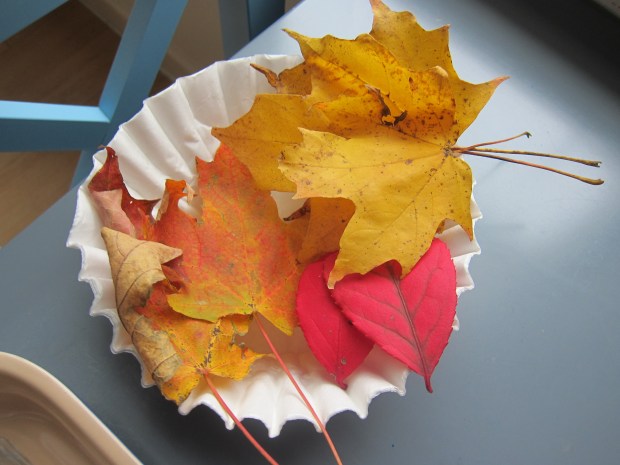
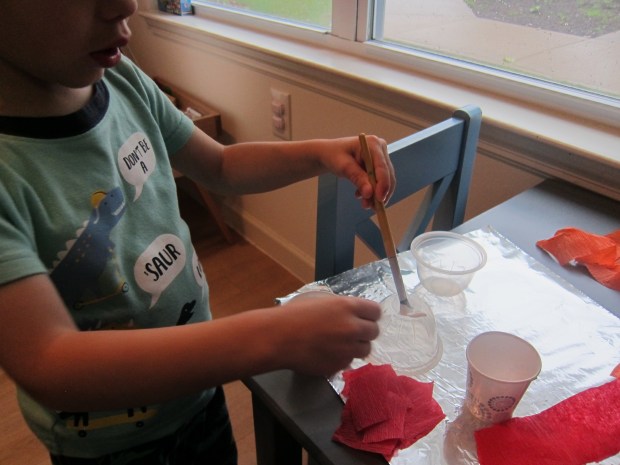
First, tear up the leaves into pieces, and divide into glass bowls, one color per bowl. Travis loved the tearing!

Leaf Chroma (3)

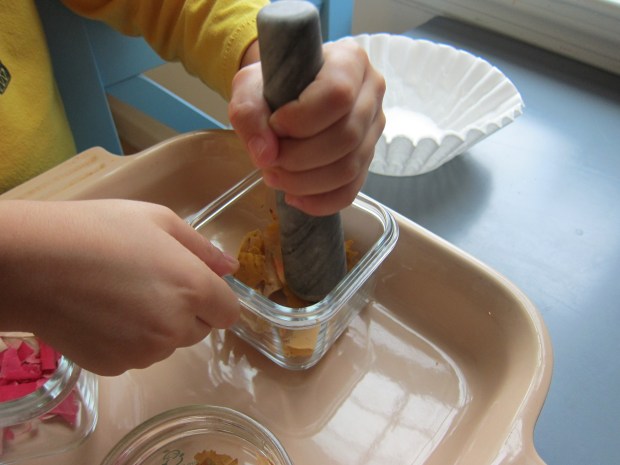
Mash the leaves slightly using a pestle or muddler.

Leaf Chroma (4)

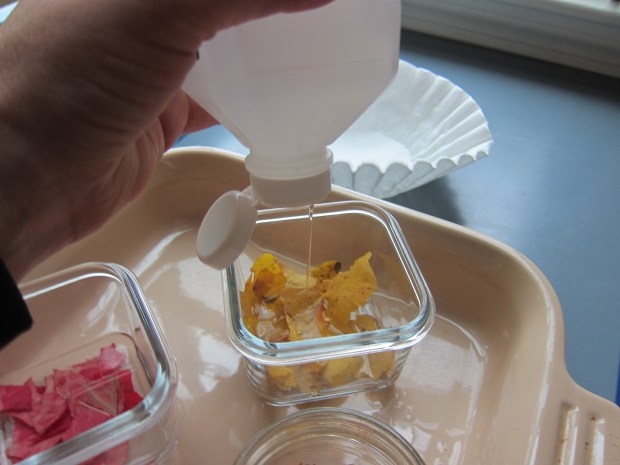
Ooh, next up was a grown-up ingredient: Rubbing alcohol. Travis very carefully helped me pour enough in each bowl just to cover the leaves. Place the bowls in a baking dish and add a few inches of hot water.

Leaf Chroma (6)

Now cut a coffee filter into strips, and drape over chopsticks (or kebab skewers, or pencils – anything long and straight), letting one side dangle down into the rubbing alcohol. Place the entire baking dish some place dark and let sit overnight.

Leaf Chroma (7)

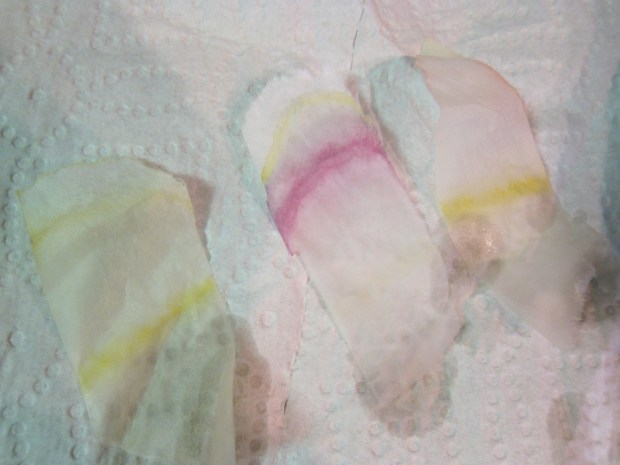
In the morning, you’ll see bands of color on each filter strip! This shows the layers of color that were in each leaf, slowly revealed as chlorophyll breaks down in cold temperatures. To be honest the yellow and orange were a bit underwhelming, but it was neat to see several layers of color exposed in our red leaves.

Leaf Chroma (8)

In sum, a neat science experiment!

Diaper Rhyme Time

Diaper Rhyme (1)

Of all the diaper-table activities we’ve tried since coming home with Veronika, this one soothes her by far the most!

Instead of focusing on the diapering itself, distract your newborn with rhymes or songs. Say or sing any that you know… Or, this is a great time to think about investing in a book of Mother Goose rhymes.

Often these are gorgeously illustrated, and they make wonderful first bedtime reading for your child – short on words, often set to a tune, and easy to read a couple each night, which sets up the habit of “storyime.”

Diaper Rhyme (2)

When you need inspiration, set the book of rhymes near the diaper table and open up to a page. To wit, I’ve been singing Baa Baa Black Sheep, Mary Had a Little Lamb, and Jack and Jill. The lilting songs and rhymes will help develop your child’s ear for language, their understanding of rhythmic beats, and more. And maybe even get a little smile on the diaper table.

Test the Grasp Reflex

Grasp REflex (6)

Babies are born with several reflexes, such as the rooting reflex (turning to follow with an open mouth if the side of the mouth is touched) and the Moro reflex (that particular, funny way in which babies startle).

But perhaps the cutest is the grasp reflex. Your little one’s tiny hand is remarkably strong, and if you stroke the palm, those mini fingers will grasp tightly.

Grasp Reflex (3)

Test your baby’s reflex at a quiet moment by placing your pointer finger in his or her palm. Almost certainly the little hand will clench shut. Snap a pic if you can, and encourage siblings to test out how strong the newest member of the family is, too! Not only are you creating a sweet memento, but you’re double-checking your baby’s healthy reflexes in the process.

Grasp Reflex (1)

Print out the photos and place in a small frame. These would be lovely to display somewhere in the nursery… Or tuck them into your newly created Memory Box!

Grasp Reflex (4)

Diaper Time Massage

Diaper 2 (3)

Following in the heels of yesterday’s suggestion to enhance diaper time with a newborn, here’s another great way to use diaper-table-time as bonding time: Gently massage the baby’s body parts, pausing if they are not too fussy or too cold to pay attention to specific areas. Feet, hands, tummies, backs, and faces are great for this game.

Little baby feet and hands come out so wrinkled and curled up, and a hand massage in particular can help unclench those little fingers.

Diaper 2 (1)

Don’t forget to point out the names of the fingers – Thumbkin and Tall Man! – or count as you touch each “little piggie.”

Diaper 2 (2)

Likewise talk about what you’re touching as you gently massage forehead, cheeks, nose, tummy, and back. Body parts are some of the first words that little ones learn, and it’s never too early to start!

Diaper 2 (4)

If your baby is just too fussy during a change, consider doing similar massages while nursing, or just cuddling.

Memory Box

Memory Box (4)

One great project for very early in your newborn’s life is putting together a memory box. This will be an ongoing collection, but it’s never too soon to start!

Before birth (if you can), select a pretty box that you’ll want to fill with mementos – this way you’re not running out to the store with a newborn! Any decorative box would work great; I love using this simple wooden box that was once given to us as a gift.

Memory Box (2)

You’ll have a few items to add the moment you return from the hospital. Think: mommy and baby ID bands; first footprints; any first hats or swaddles; and any other hospital souvenirs.

We also included notes and cards from family and friends!

Memory Box alt.JPG

This is a great project to involve big siblings – they’ll love placing the items in the box!

Memory Box (3)

What do we plan to add down the line?

  • A lock of hair
  • A first baby tooth
  • Baby booties
  • A first favorite toy
  • A first drawing
  • Baptism certificate

What else will go in your box? I’d love to hear in the comments!

Memory Box (1)

Coffee Filter Fish

Coffee Fish (9).JPG

Pretty rainbow fish are lighting up our doors and windows these days! This is an easy activity you can do with your child almost any time, requiring only coffee filters and markers.

First, be sure to cover your work surface (things will get wet!) and prep your materials. You’ll need permanent marker for this craft, not the washable kind, which made Travis feel very grown up.

Before he even started coloring our white coffee filters, he grew impish… Who doesn’t just want to spray water?

Coffee Fish (1)

He slowed down once I demonstrated how to color in a filter as completely as possible for the best results, so the colors will bleed together. Then he got to soak my marker-covered filter.

Coffee FIsh (4)

Now he had the idea!

Coffee Fish (5)

He scribbled in various color combos, declaring this one was a library fish, that one was a doctor fish, etc.

Coffee Fish (6)

We left our filters to dry completely.

To complete the fish, cut a triangle from one part of each circle as the mouth.

Coffee Fish (7)

Glue the triangle onto the opposite side of the circle – voila, a tail!

Coffee Fish (8)

Finish by drawing in eyes, and hanging the fish some place where they will catch the sunlight.

Coffee Fish (10)


Skin-to-Skin

Skin to Skin (4)

One of the first things I longed to do once home from the hospital with my daughter was nestle somewhere skin-to-skin. Or why wait, as this is an activity you could even do while still in your hospital stay, especially if there for a few days. In fact studies have shown that skin-to-skin contact can reduce hormones that lead to stress, lower a mom’s risk of postpartum mood disorders, improves a baby’s physical well-being, and promote bonding.

At home, find some place comfy and get your baby down to nothing but a diaper. Lay him or her on your bare chest, being sure to cover with a blanket if the room is chilly.

Skin to Skin (2)

You’ll be amazed at every bit of this simple activity – the way a newborn’s skin feels like velvet, the way they instantly nestle into you as if they were born understanding how to do this (hey, I guess they were!), the way both of your heart beat’s slow. Make sure both mom and dad get in on the action!

Skin to Skin (3)

It’s also a fantastic opportunity for tummy time, even before the umbilical stump falls off. Chances are you won’t want the skin-to-skin to end.

Diaper Time Language

DIaper 1 (3)

Introducing to the world… Veronika! Our daughter joined the family just a few days ago, and I’m eager to share our joyful journey together alongside the adventures with my son.

Infant “games” are simpler than those previously posted to Joyful Parenting, but no less important. To wit, don’t be disappointed it, in the first few days home with your baby, you learn that at first they are going to do three things on repeat: Eat, sleep, need a diaper change.

That means lots of time spent at the diaper table, but instead of regarding the task as drudgery (or disgusting – meconium, anyone?), use the time to your advantage.

It’s never too early to introduce language to your child, and more than just vocab words. Of course you can point out items as you use them – diaper, wipes. But even more so, talk in full sentences. Baby’s love “baby-ese” yes, but talking to them with big grown-up syntax helps, too.

Diaper 1 (1)

So as you diaper, become like a film narrator. “This is your new diaper.” “Thank you for holding still, that helps me put on your new one!” “Now we’re using a wipe.”

Infants are likely to fuss during a change, so here’s hoping that this simple “game” calms them down.

Watercolor Resist Painting

Watercolor Resist (8).JPG

Our recent Cityscape crate from Koala Crate reminded me of the beauty of resist painting, which we haven’t done in quite some time. That was the inspiration for this beautiful ocean-themed project!

No need to have strong artistic skills; I printed a template for our sea creatures and traced each one onto contact paper.

Watercolor Resist (1)

Cut out and attach each animal to a piece of watercolor paper.

Watercolor Resist (2)

We talked about ocean colors as we added watercolors, which had Travis proudly concentrating on blues, purples, and greens.

Watercolor Resist (4)

It was an interesting lesson that the watercolor wouldn’t spread across the plastic surface of the contact paper!

Watercolor Resist (3)

If your child tires of painting before the entire paper is covered, that’s fine; just be sure the watercolors reach all the edges of the animal shape.

Watercolor Resist (6)

Let dry, then peel off for the big reveal. Wow!

Watercolor Resist (7)

Snack Cup Jellyfish

Snack Jellyfish (6).JPG

Travis currently adores any animal with lots of long legs, be it the eight-legged octopus or the many tentacles of the jellyfish, so I knew he’d love this simple. fun craft. It’s the perfect way to make use of canned fruit or applesauce cups once your snack cup is empty!

Snack Jellyfish (1)

We rinsed the snack cups, and then covered with a layer of glue.

Snack Jellyfish (2)

I gave him squares of red and orange crepe paper (tissue paper would work, too), and we layered them until our jellyfish bodies were covered. Let dry.

Snack Jellyfish (3)

His favorite part was adding the tentacles, carefully applying a dot of glue on the inside of the cup where each should go, and attaching a long ribbon of crepe paper.

Snack Jellyfish (4)

Add two eyes to the body of the jellyfish, and let dry again.

Snack Jellyfish (5)

Finally – time to play with Mr. Jellyfish! These are wiggly and wonderful to “swim” around your home.

Snack Jellyfish (7)

If you prefer to use them more as decoration, poke a small hole in the top of the snack cup and thread through a string. Hang near an open window or air vent where you can watch them sway.