Sunscreen Paint

Sunscreen Paint (3)

If you’re feeling nostalgic for summer, the smell of this paint will instantly bring you back to warmer days, at least for a moment. Meanwhile toddlers will love the sensory play involved in this craft.

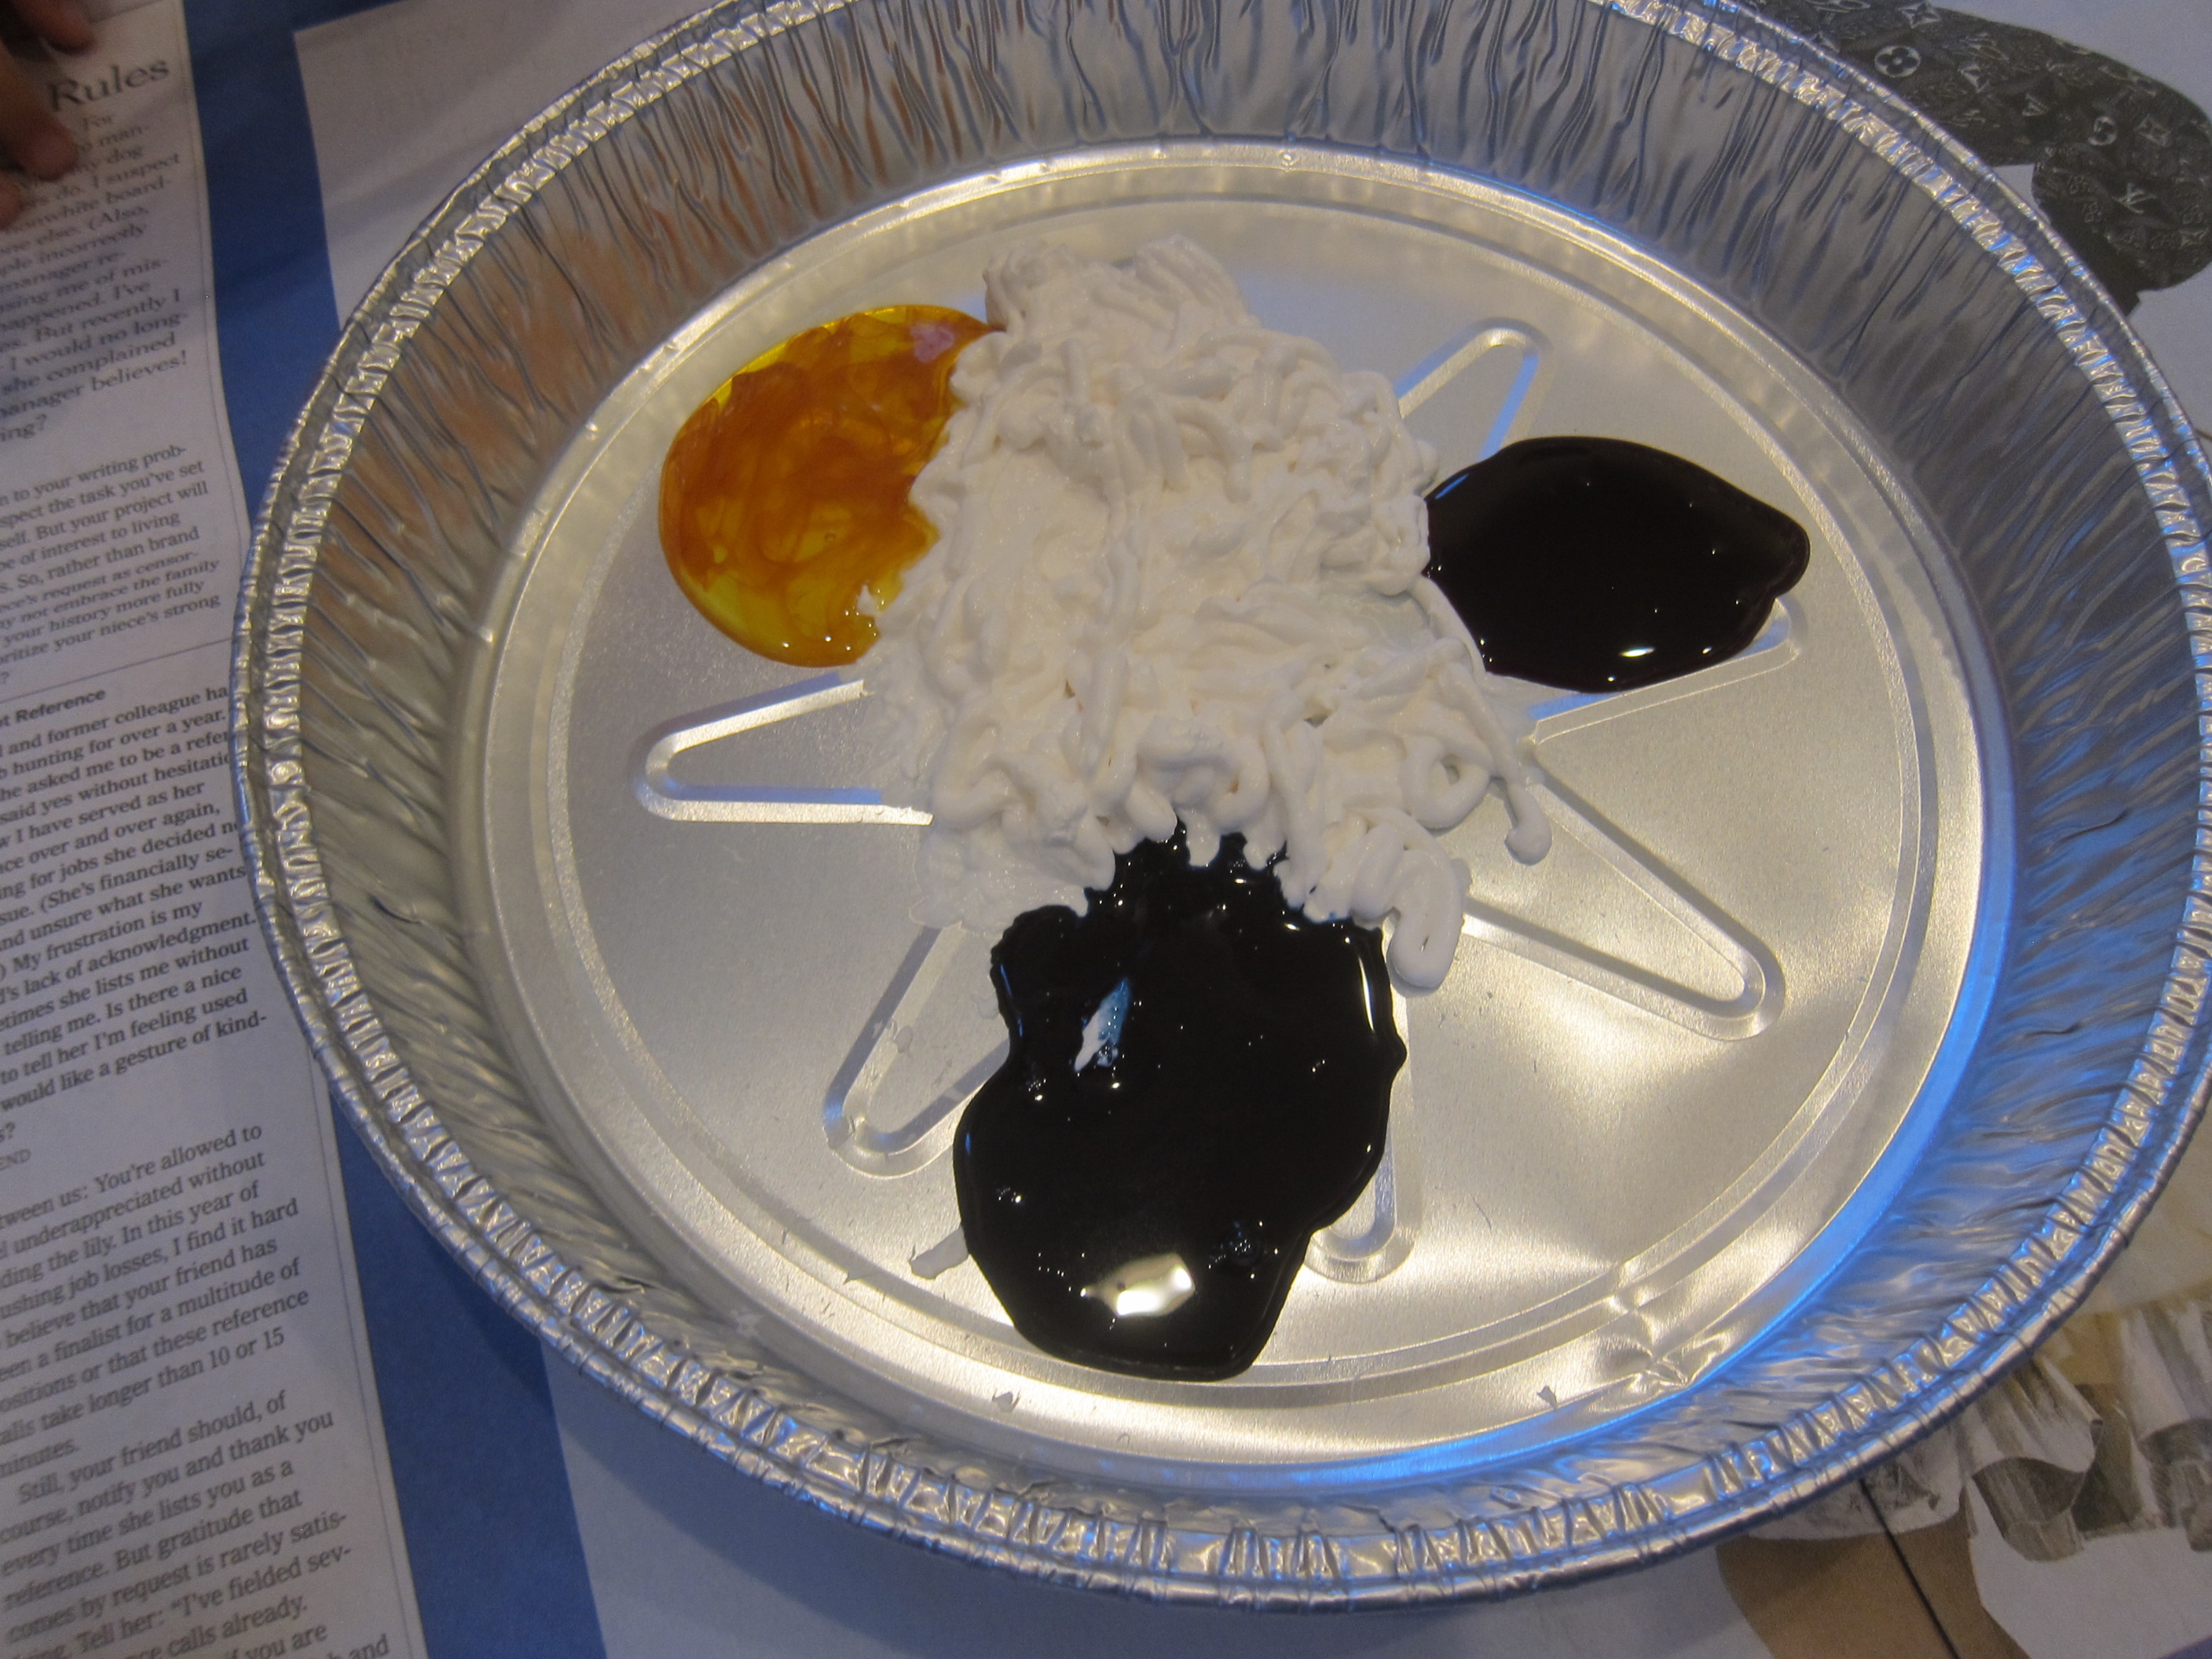
I squirted a tube of old sunscreen into a foil pan, and added three dollops of food coloring around the sides, one each for yellow, blue, and red.

Sunscreen Paint (1)

I handed over paintbrushes and it was time for Veronika to mix it all up. She loved this activity! To start, she was so into the color aspect, seeing what happened when she swirled each color individually into the lotion…

Sunscreen Paint (2)

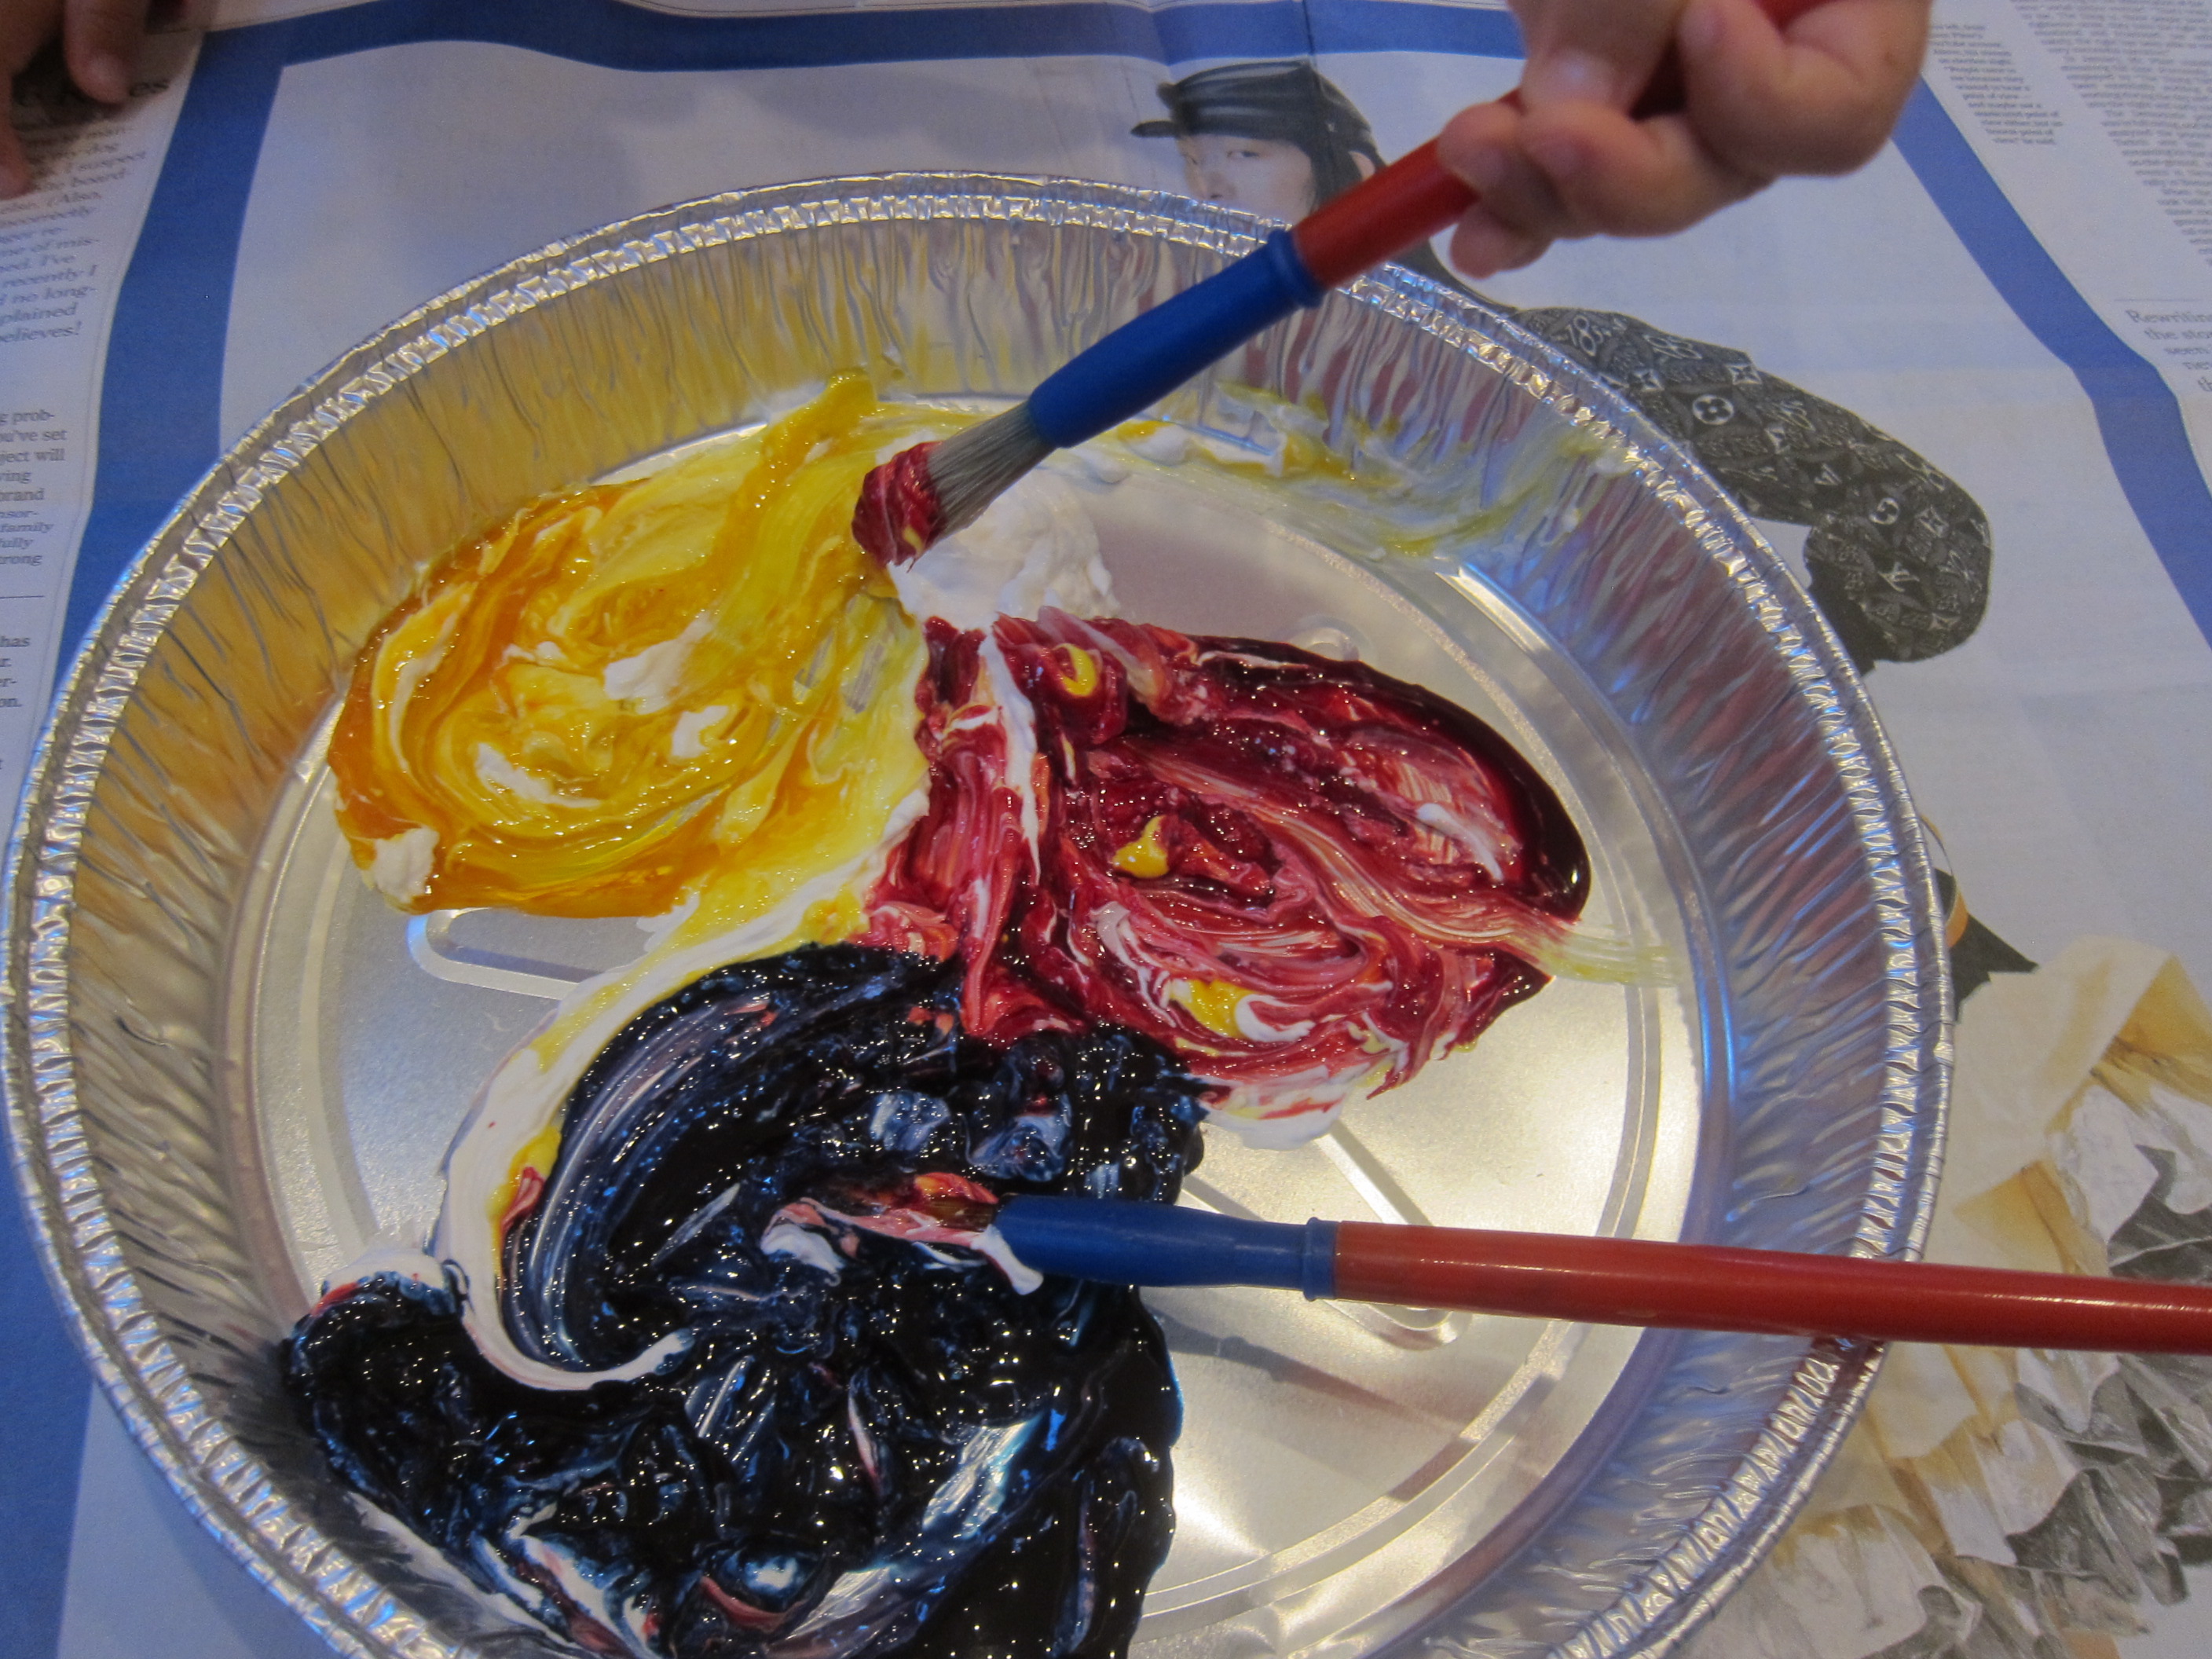
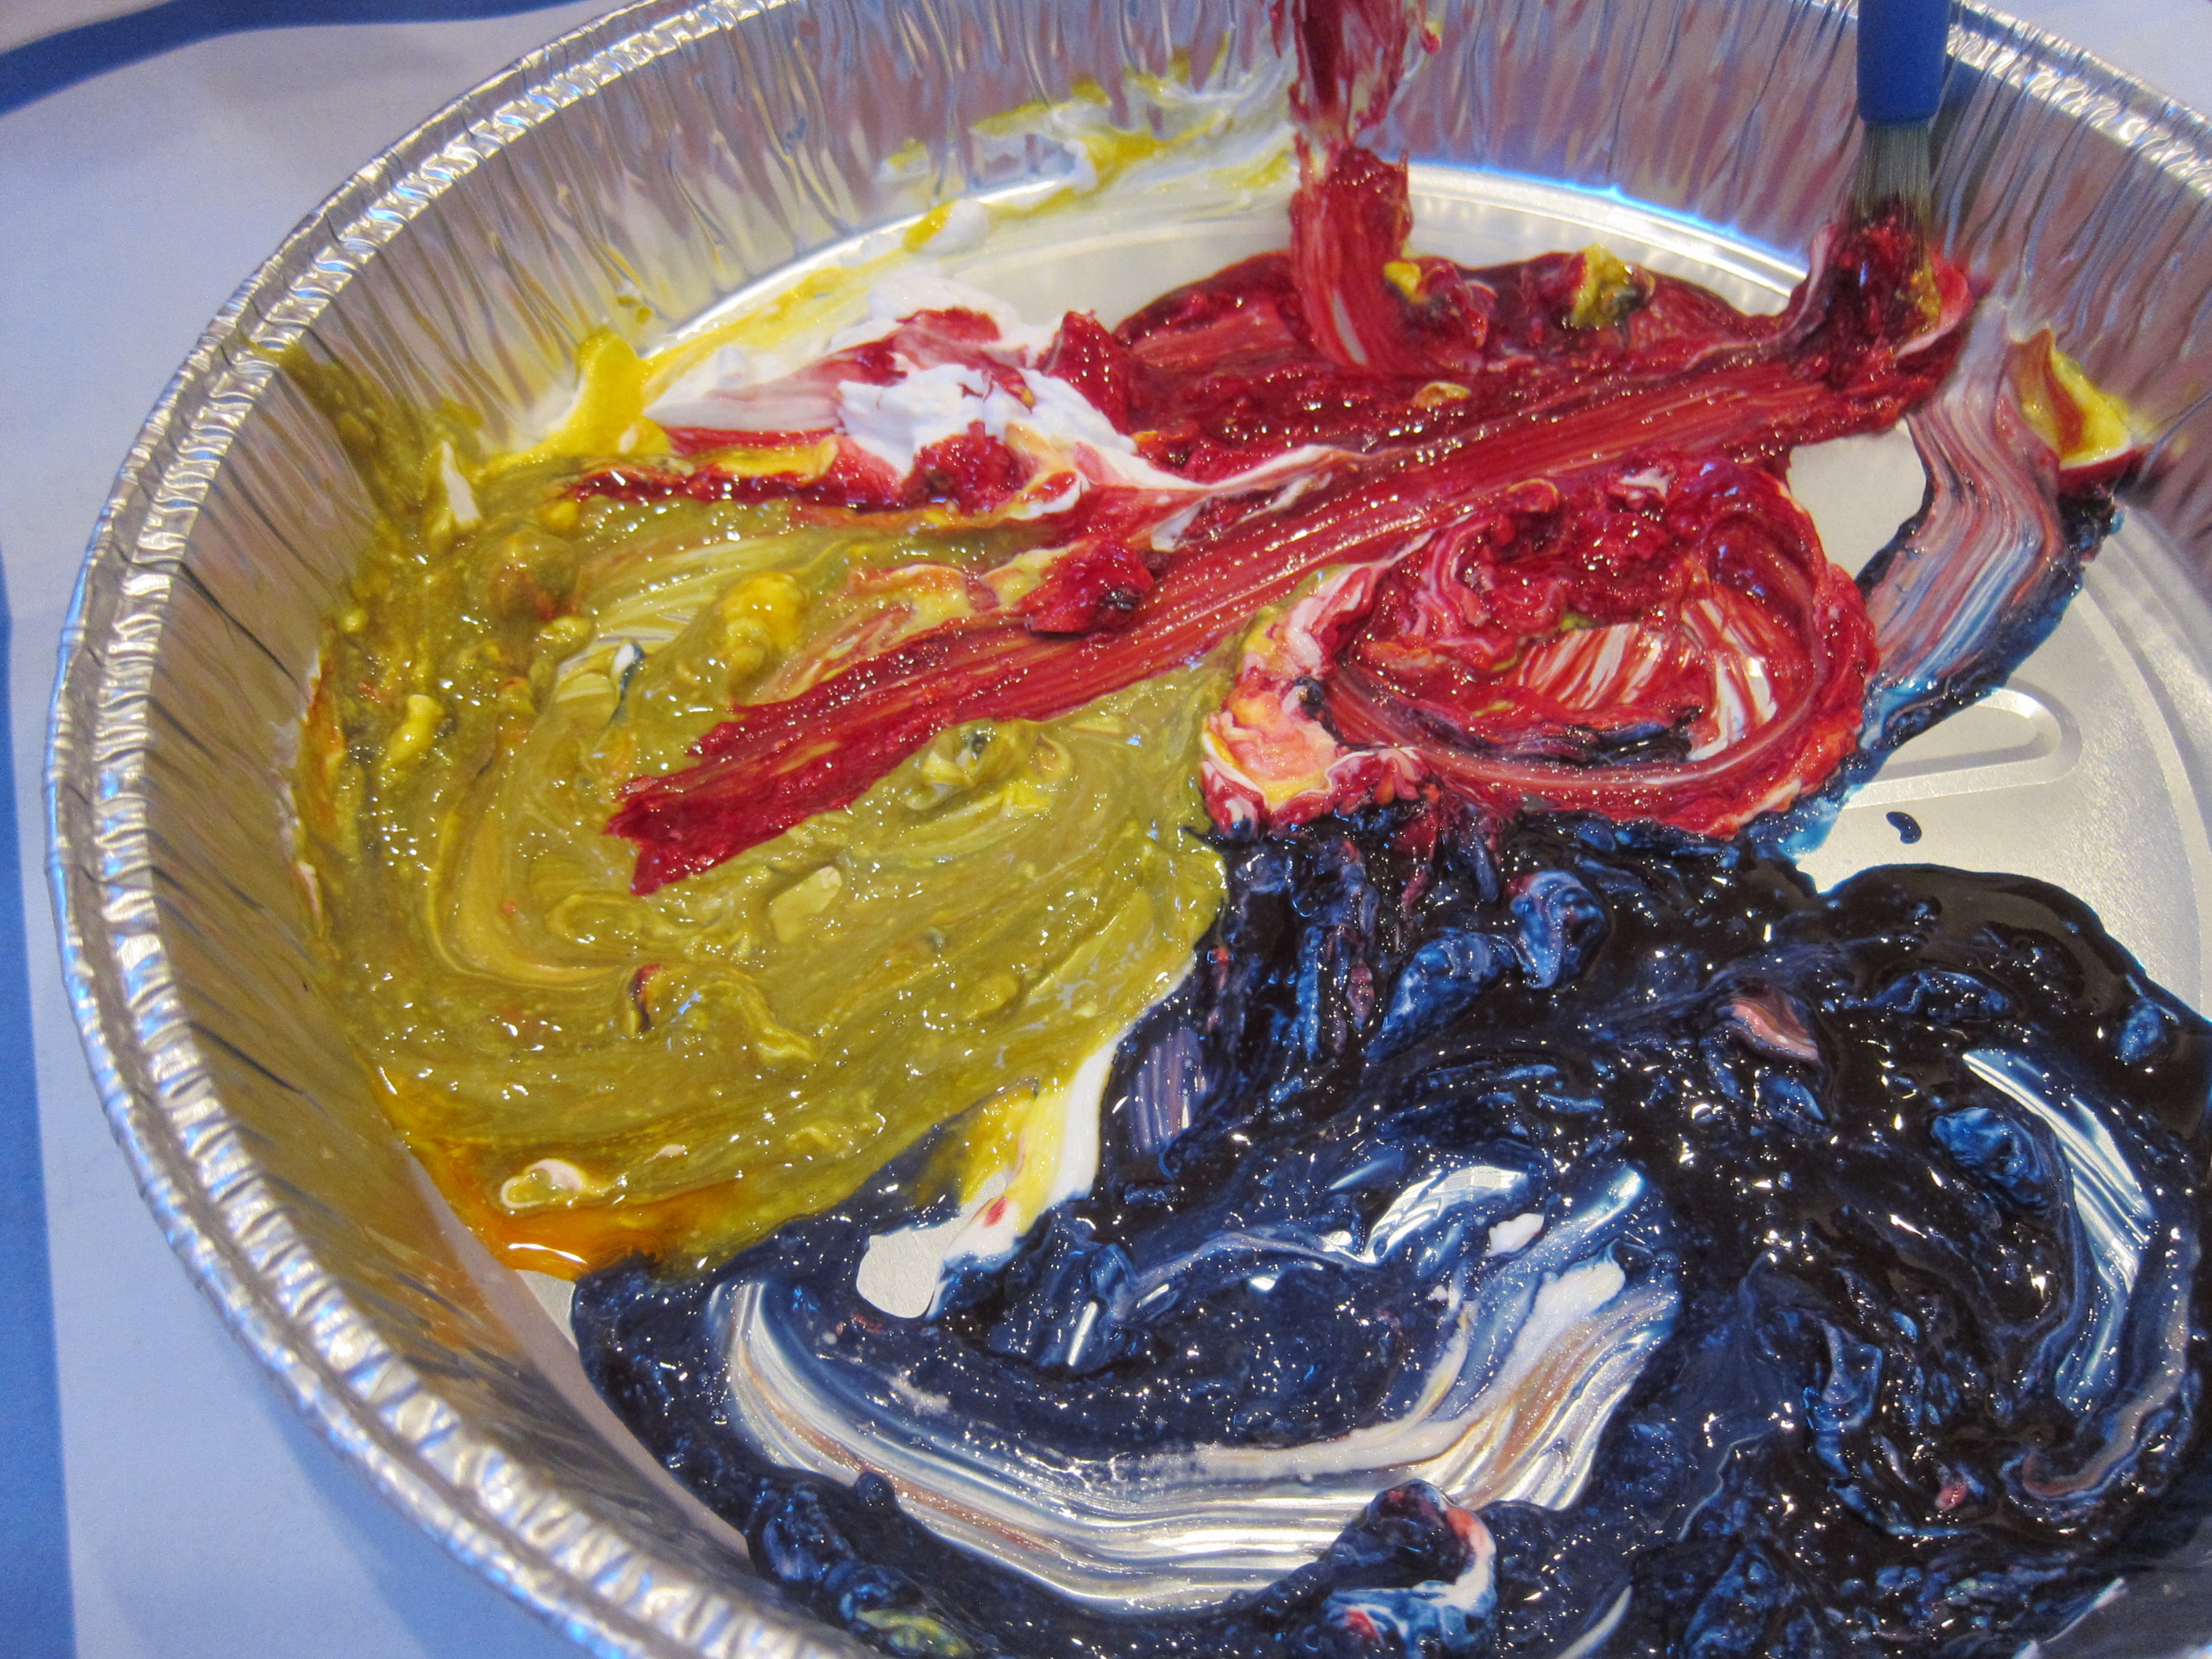
…and then what happened when they started to mix.

Sunscreen Paint (4)

Truth be told, the mixture did turn a muddy purple-brown, but that didn’t stop her. “It’s beautiful!” she said as she stirred it all around with a paintbrush.

Sunscreen Paint (5)

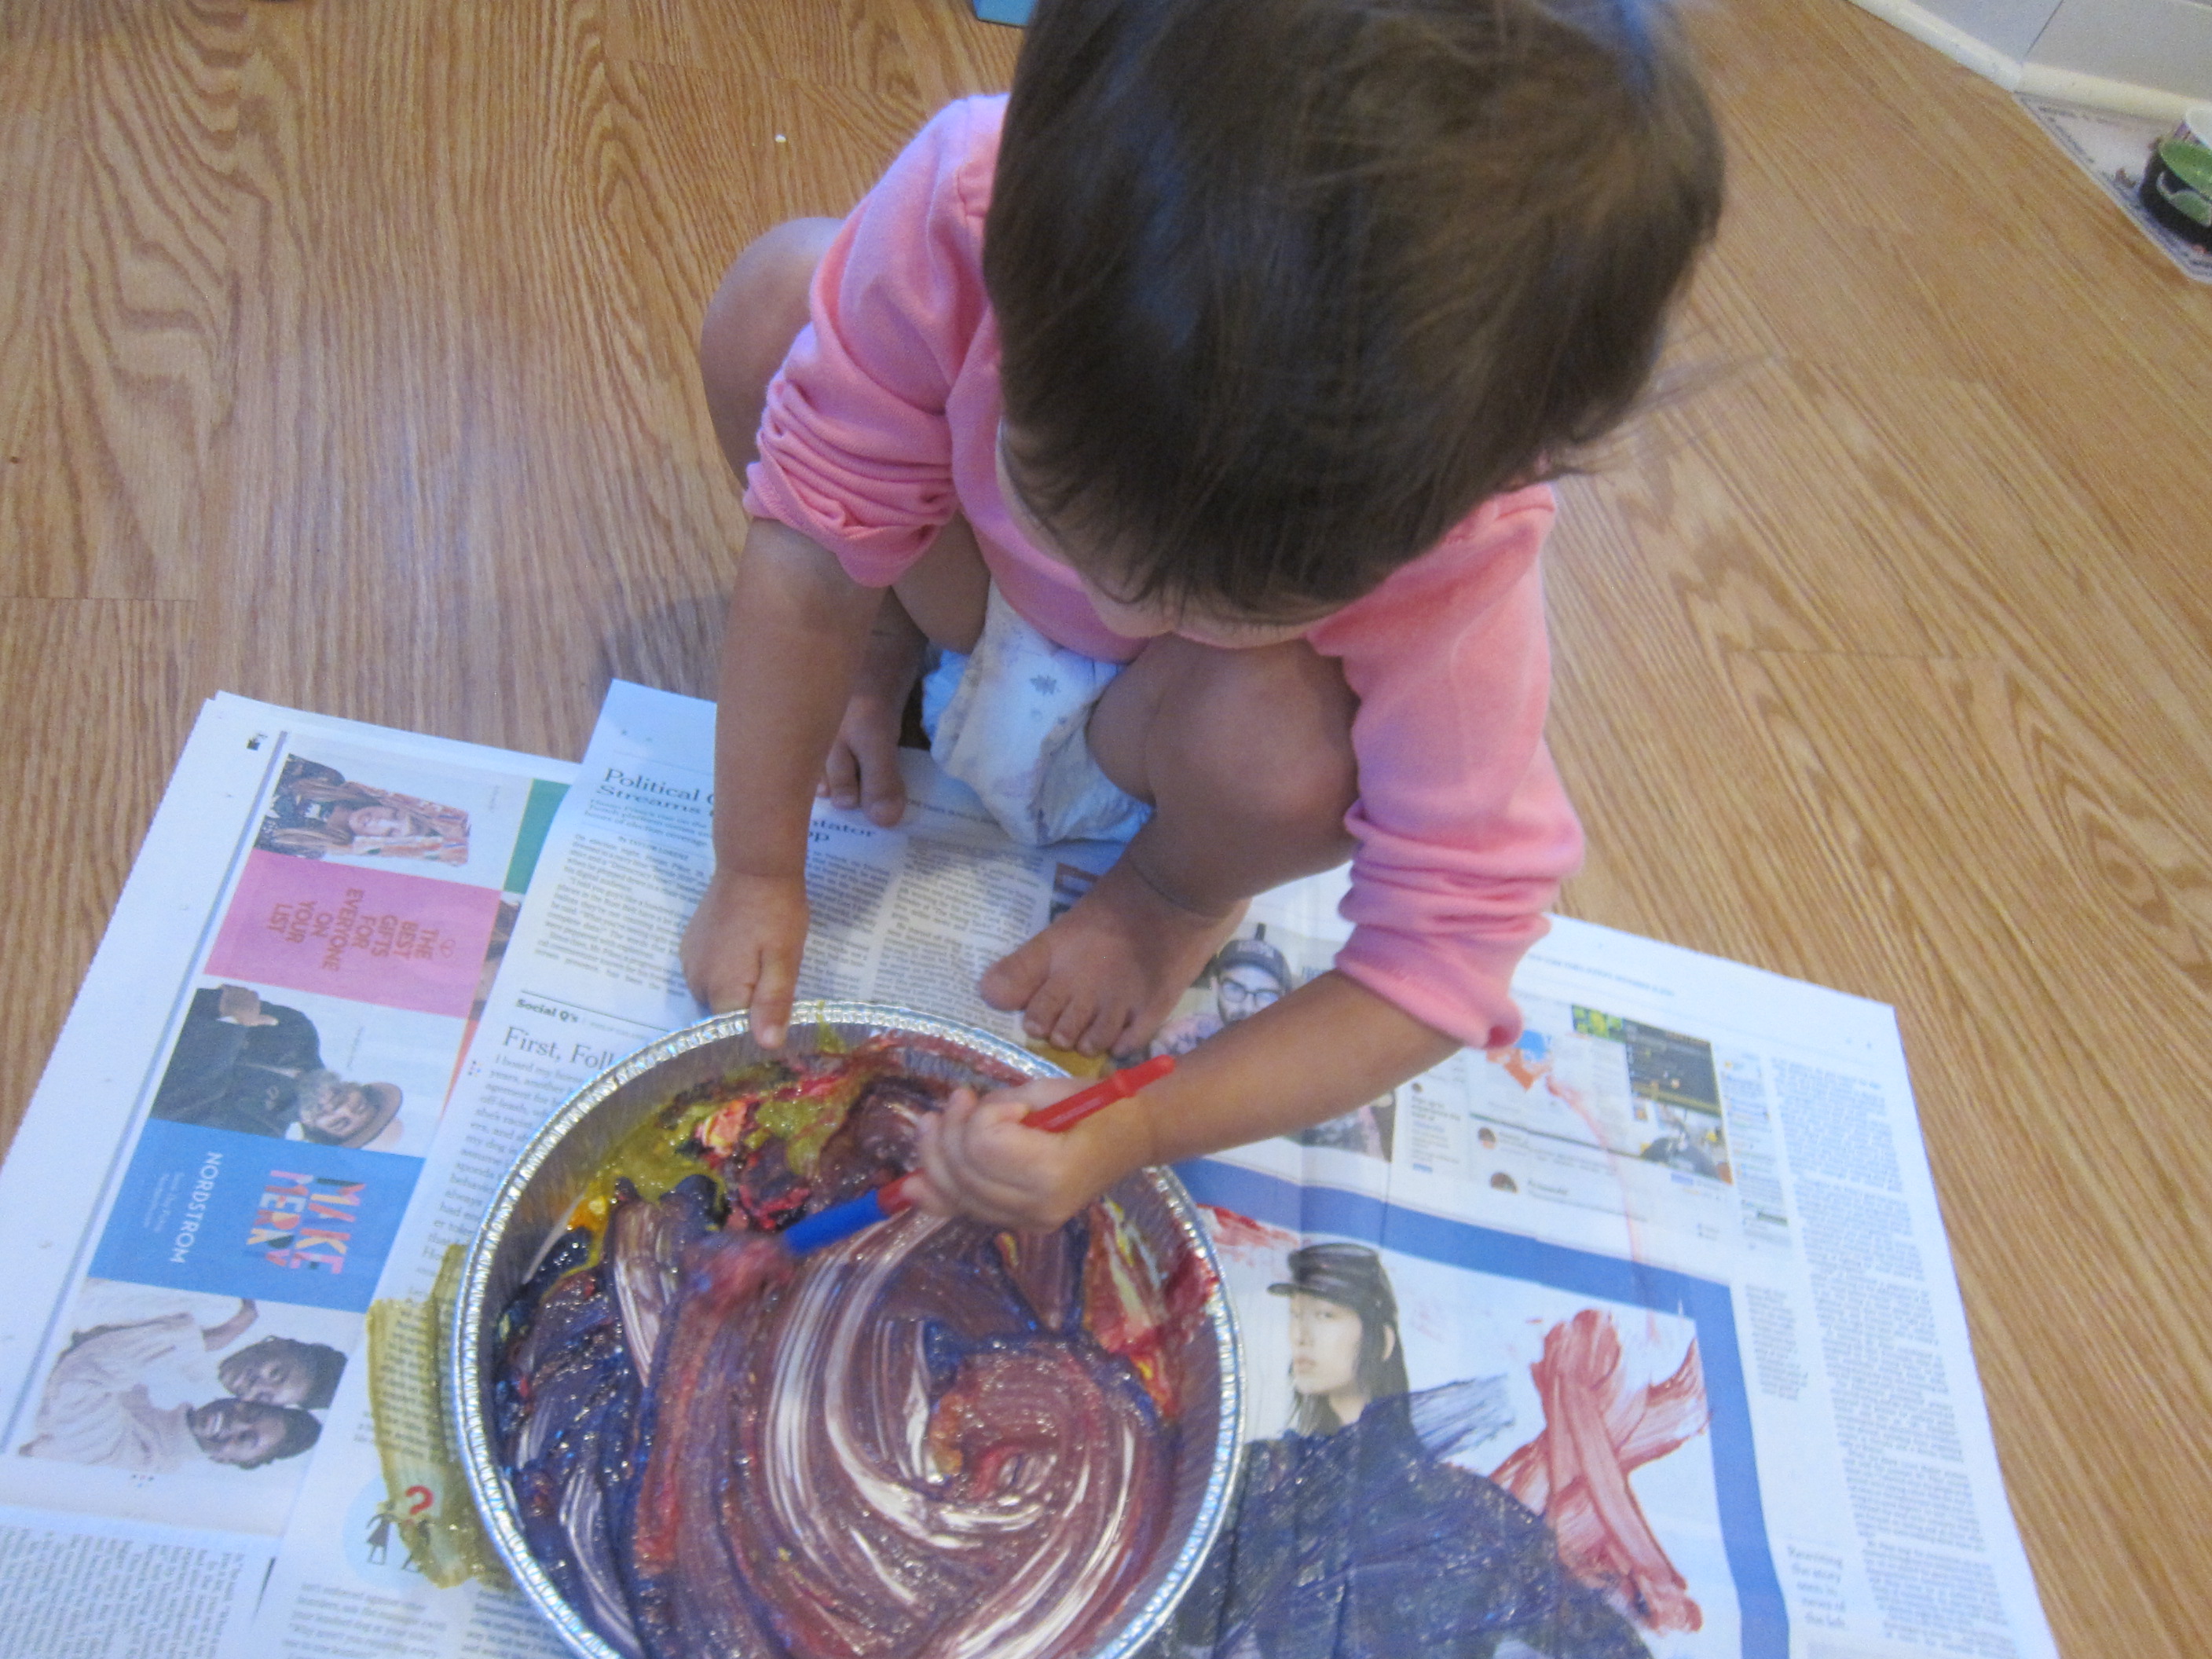
She didn’t actually do much painting, although I had laid newsprint underneath as a canvas in case she wanted to try a few swirls.

Sunscreen Paint (6)

And the best part about this “paint” is that it won’t matter a bit if your toddler decides to paint him or herself instead of paper. There’s nothing wrong with a little extra sunscreen!


Puzzling Plates

Puzzling Plates (5)

These easy one-piece puzzles are great for toddlers who are just beginning to fit pieces together.

Start by covering the center of paper plates with any easy-to-identify picture. If you have large photo prints of friends and family, those would work great. In a pinch, I cut pictures out of magazines that depicted familiar items (a house, a cat, vegetables) and glued them on.

Puzzling Plates (1)

Cut one “wedge” from each puzzle pie and scramble them. Now see if your toddler can tell which wedge goes where!

Puzzling Plates (2)

The hardest part for Veronika, more so than matching a piece to its correct puzzle, was making sure the wedge was oriented in the right direction when she slotted it back into the pie.

Puzzling Plates (3)

But once she got the hang of it, she aced the game.

Puzzling Plates (6)

You can make this activity harder as your child gets older simply by cutting multiple wedges from each puzzle pie!

Puzzling Plates (4)

Under the Sea Play Scene

Under the Sea Play (6)

Here’s a fun sticker art project that turns into a game at the end!

First, I told Travis we were simply making underwater scenes. He’s been learning about coral reefs, which made this a neat extension. We added stickers to thick white paper featuring coral, sea stars, fish, and more.

Under the Sea Play (3)

I also added a background with crayons to show sand, water, and extra seaweed. Next, fill zip-top bags with blue paint. Insert your sticker scenes, and seal tightly.

Under the Sea Play (4)

I showed Travis that now he could uncover his ocean scene beneath the waves! In addition to the cool tactile feel of this, it was fun to watch the crabs and fish appear on the “surface”.

Under the Sea Play (5)

If your child is learning to spell, the paint is great for practicing: F-i-s-h, fish!


Under the Sea Play (7)

Note: I would use a lot more blue paint next time, since I didn’t have much and ours barely covered the paper, which sort of spoiled the “reveal” of the scene beneath. But Travis still enjoyed it!

What will go in your ocean scene? Please share in the comments!

K is for Kiss

K is for Kiss (9)

Veronika loves to play with the makeup under the bathroom sink, so today I decided to let her have free reign with a tube of old lipstick. We even threw in some early letter recognition and phonics!

To start, I drew a big letter K on white paper and cut it out.

K is for Kiss (1)

Then I showed her how to apply lipstick first on mommy and then on herself. This girl loves to make herself up!

K is for Kiss (5)

Now we each gave the K a kiss, and I emphasized the beginning letter sound as I told her what we were doing. She thought this was so silly! I added lots of kiss marks so our K was covered.

K is for Kiss (6)

There was still a little lipstick left in the tube, which she could use like a paintbrush on an extra piece of paper.

K is for Kiss (4)

She also loved taking the tube cap off and on again, which was great for fine motor skills.

K is for Kiss (7)

Who knew a tube of old lipstick was a great toy for a toddler!

K is for Kiss (8)

Pipe-Cleaner Party

Pipe-Cleaner Party (7)

Here’s an old activity I used to do with Travis, and today was Veronika’s turn. Make your kitchen colander into the prettiest one in the world with pipe cleaner decorations!

I set out a big handful of pipe cleaners and showed Veronika how to poke one down into the colander’s holes.

Pipe-Cleaner Party (1)

She took over immediately!

Pipe-Cleaner Party (4)

Big brother Travis wanted in on the party, too! He liked making the pipe cleaners into loops instead of simply sticking them out straight.

Pipe-Cleaner Party (5)

I challenged the kids to see if they could fill all the holes, which they nearly achieved!

Pipe-Cleaner Party (6)

For an extra challenge at the end, I sorted the pipe cleaners around the colander by color. Could Veronika figure out where a few leftovers were supposed to go?

Pipe-Cleaner Party (8)

After a bit of prompting, she aced the test! This was a great way to play with common household items, now that colder days have us inside longer hours once more.

Pipe-Cleaner Party (9)

Toddler Treasure Box

Toddler Treasure Box (2)

It’s never too early to introduce the fun of treasure hunts and pirate play, even for toddlers who don’t understand the nuances of the make-believe. Here’s a way to let even a toddler dig for “gold”!

We have a collection of old foreign coins, which are perfect for pretend play like this. I clinked a few down in the bottom of a craft bin (making sure Veronika saw), and then buried them under “gold” crinkle paper. (Note: You can pick up the latter at any party store or craft supply store).

Toddler Treasure Box (1)

Veronika immediately began taking out big handfuls of the crinkly paper to find that treasure underneath. Not only does the crinkly paper make for fantastic tactile play, but it sounds neat, too!

Toddler Treasure Box (3)

Once she reached the bottom of the bin, I made a big deal about finding the treasure.

Toddler Treasure Box (5)

“Let’s hide it!” she said. She plinked the coins back in the bin, and this time we layered everything: some paper, a coin, some paper, a coin, and so on.

Toddler Treasure Box (7)

Time to dig it all up again!

Toddler Treasure Box (9)

My little pirate kept busy with this one for quite a while even after I stopped our joint play.

Toddler Treasure Box (10)

Craft-Stick Matching

Craft Stick Matching (7)

Here’s a great DIY puzzle for toddlers who have recently learned their shapes. Matching up the outlines of craft stick is great for fine motor skills, too!

To set up, I arranged jumbo craft sticks on plain white paper and traced the outlines. I made one page each for a triangle, square, and diamond, and decided to trace each shape with a different color just in case we wanted to add a color component to the game.

Craft Stick Matching (1)

I also then colored on the craft sticks with crayon in corresponding colors. We now had a red triangle, green square, and purple diamond.

Craft Stick Matching (3)

Now slip each shape into a zip-top plastic bag and show your toddler how to line the craft sticks up over each outline.

Craft Stick Matching (5)

Because there’s nothing to hold the craft sticks in place as in a puzzle board, Veronika’s shapes were always a little askew, but she certainly had the right idea!

Craft Stick Matching (8)

There was even a happy victory dance after she finished the triangle!

Craft Stick Matching (10)

I loved watching her puzzle through exactly where each stick should go.

Craft Stick Matching (11)

It turned out that she mixed and matched the colors, rather than placing a purple stick in a purple outline, etc., but that was just fine, too.

Craft Stick Matching (9)

Sandy Play Dough

Sandy Play Dough (10)

This sand-laced play dough requires only 4 ingredients, comes together in moments, and works just like kinetic sand!

To make the “sand”, combine 3 cups flour and 4 cups play sand in a large container. Add 1 and 1/4 cups hot water and 1/4 cup vegetable oil. Stir to mix and then knead with your hands until the mixture comes together like play dough.

Sandy Play Dough (1)

That’s it! I set out this sandy beach with lots of sea shells and let the kids go to town. We could construct sand castles…

Sandy Play Dough (8)

…which needed sea shell decorations of course!

Sandy Play Dough (9)

Veronika loved sorting through the shells and arranging them over the play dough best, even more so than working with the dough itself.

Sandy Play Dough (5)

For Travis, meanwhile, it was soon a landscape to play with Lego figures!

Sandy Play Dough (3)

The play dough molds together so easily, so we could make sea snakes or little sand structures, and so much more.

Sandy Play Dough (7)

No matter how they engaged with it, I loved watching brother and sister have fun with this hands-on bin together.

Sandy Play Dough (11)

Make Your Own Diving Fish

Diving Fish (2)

This quick STEM project was intended as an extension of recent coral reef play for Travis, but it turned out that little sister Veronika loved it even more! There’s nothing like a good reaction of baking soda and vinegar to bring smiles in the morning.

Fill a tall clear container with 2 cups water. Make sure there is still room at the top of the container to add more liquid (e.g. a flower vase might work better than a drinking glass, unless you have very tall ones).

Diving Fish (1)

Add 1 tablespoon baking soda to the glass and then pour in 1/2 cup vinegar.

Working quickly, start adding “fish”. These can be just about anything light and small from the kitchen. We used raisins, but dried beans or rice would work, too!

“They’re swimming!” Veronika exclaimed with delight. We added the vinegar in increments, so each time our little fish would be set swimming anew.

The magical work of producing carbon dioxide!

Straw-Threaded Shoestring Necklace

Straw-Beaded Necklace (6)

Veronika is just starting to love dress-up, especially adorning herself with ribbons, beaded bracelets, and other accessories. She’s also at the perfect age to hone the fine motor skills needed for threading. So this activity combined the two perfectly!

To start, I set out a tray with colorful paper straws and her safety scissors. She wasn’t strong enough to cut through the straws, but she loved trying! Meanwhile, I worked alongside her and snipped each straw into several smaller pieces.

Straw-Beaded Necklace (2)

Give your toddler a shoelace or craft lace, and show him or her how to poke the tip into each piece of straw, then pull all the way through.

Straw-Beaded Necklace (3)

Veronika was delighted when she could do this alone, working with such concentration on her face. It was harder for her to pull the lace all the way through, but a little mommy assistance did the trick.

Straw-Beaded Necklace (5)

She loved deciding which color straw piece we should add next! Once the lace was full, I tied it into a knot so she could wear it as a necklace.

Straw-Beaded Necklace (7)

My little fashionista! She had so much fun that we made a second one for mommy to wear, too.

Straw-Beaded Necklace (4)