Halloween Countdown Day 10: Haunted Snacks

Jack O Orange (5)

Halloween lends itself so easily to food play, transforming simple fruits and veggies into haunted treats with just a few tricks. To wit, today the kids enjoyed banana ghosts and jack o’ lantern clementines as part of our countdown to the big shindig.

For the “Casper Ghosts”, peel a banana and carefully cut in half lengthwise. Curvier bananas are better for this, because you’ll get that perfect curled ghost tail.

Halloween 10 Casper Banana

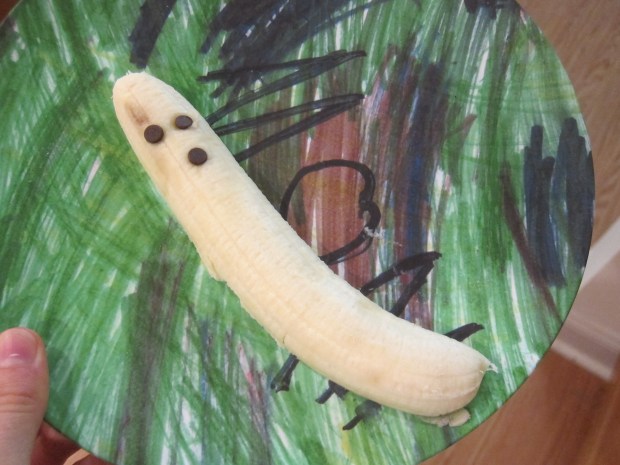
Add three chocolate chips: two for eyes, and one for the round O of a mouth.

Halloween 10 Casper Banana (2)

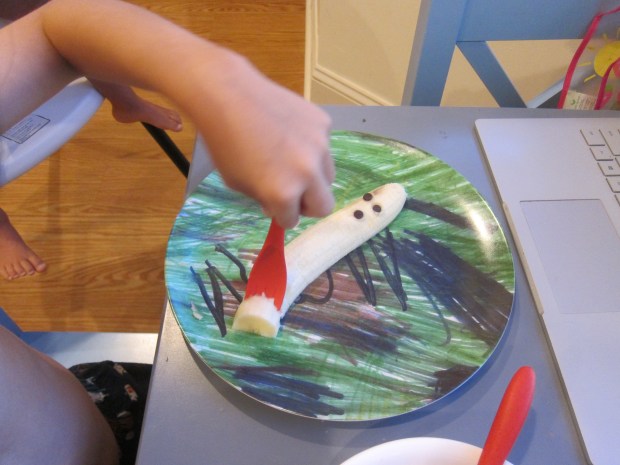
Now it was the kids’ job to make the ghosts “disappear”, a task they were happily up to. Starting with the eyes of course!

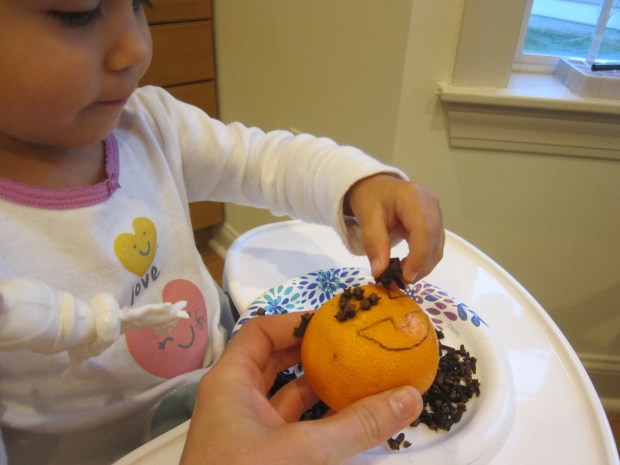
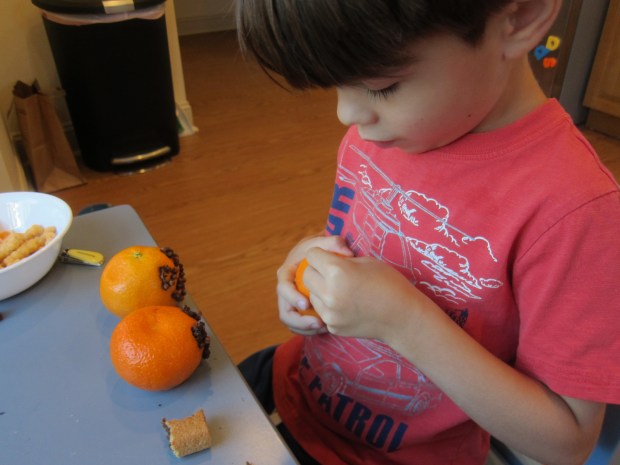
For a Jack-o’-Orange, first draw jack o’ lantern features on the skin of a clementine. Show your kids how to poke whole cloves in along the lines.

Jack O Orange (1)

This was tricky for Veronika, but I helped her poke cloves straight in, or she simply enjoyed sprinkling them on top as I worked.

Jack O Orange (2)

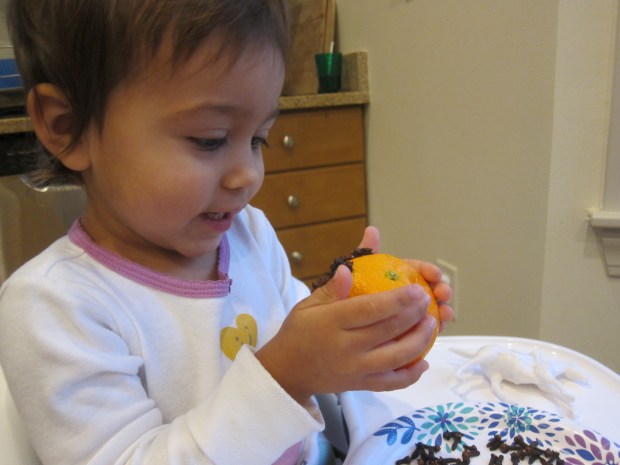
She was delighted by her end result!

Jack O Orange (4)

Travis, meanwhile, took the task so seriously and concentrated hard as he worked his way around the lines I’d drawn.

Jack O Orange (6)

He loved it so much he wanted to make another as a present for his great-grandmother!

Jack O Orange (8)

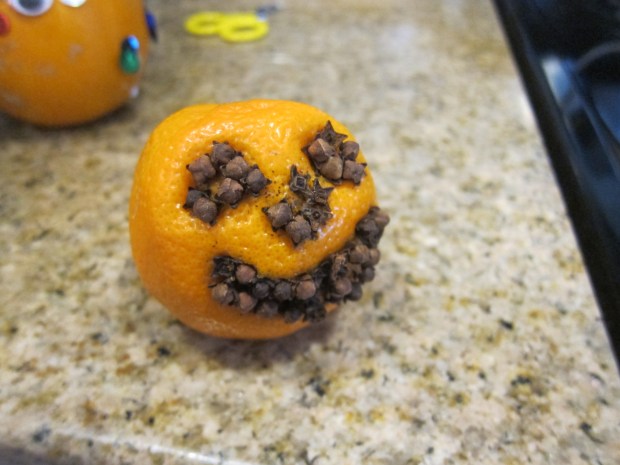
These oranges really are more potpourri decor than a snack (they’ll make your kitchen smell amazing!), so make sure there are extra clementines on hand to satisfy your little beasties.

Jack O Orange (3)

Spaghetti Mobiles

Spaghetti Mobile (11)

We started the day with some messy food fun! This activity makes for great sensory play, plus nets you a cool piece of artwork at the end.

I cooked up a big batch of spaghetti (although in retrospect I didn’t need a full package), and set it out in front of Veronika. She was immediately thrilled to dip her hands in.

Spaghetti Mobile (1)

She was even more excited when I set out three paper plates and poured a little glue in each. We tinted them red, blue, and green with all-natural food coloring.

Spaghetti Mobile (2)

I showed her how to dip a few strands of the spaghetti in one of the colors, then transfer to a foam tray (like the kind some vegetables are sold in at the supermarket).

Spaghetti Mobile (3)

Continue to dip and layer, helping your artist “arrange” the strands of spaghetti. Veronika loved talking about the colors as she worked!

Spaghetti Mobile (4)

When she started tossing big piles of spaghetti that weren’t covered in colored glue on top, I knew it was time to set the mobile safely aside to dry. But she wasn’t done yet!

Spaghetti Mobile (5)

She loved picking up big handfuls of the spaghetti and making them go “splat!” At one point I saw her trotting off toward the playroom with a huge handful, and quickly redirected her to the kitchen.

Spaghetti Mobile (7)

We were out of glue, but we could still add more food coloring to the spaghetti on each paper plate. “It’s pink-y! It’s blue-y!” she said of each pile with delight.

Spaghetti Mobile (9)

Meanwhile, back to the glued spaghetti:

Spaghetti Mobile (10)

As long as your child hasn’t piled it on too thickly to dry properly, you’ll be able to stretch it up off the tray once the glue has dried, thread yarn through, and suspend it from a hook. A rather novel piece of modern art!

Pesto Penne Salad

Penne Pasta Salad
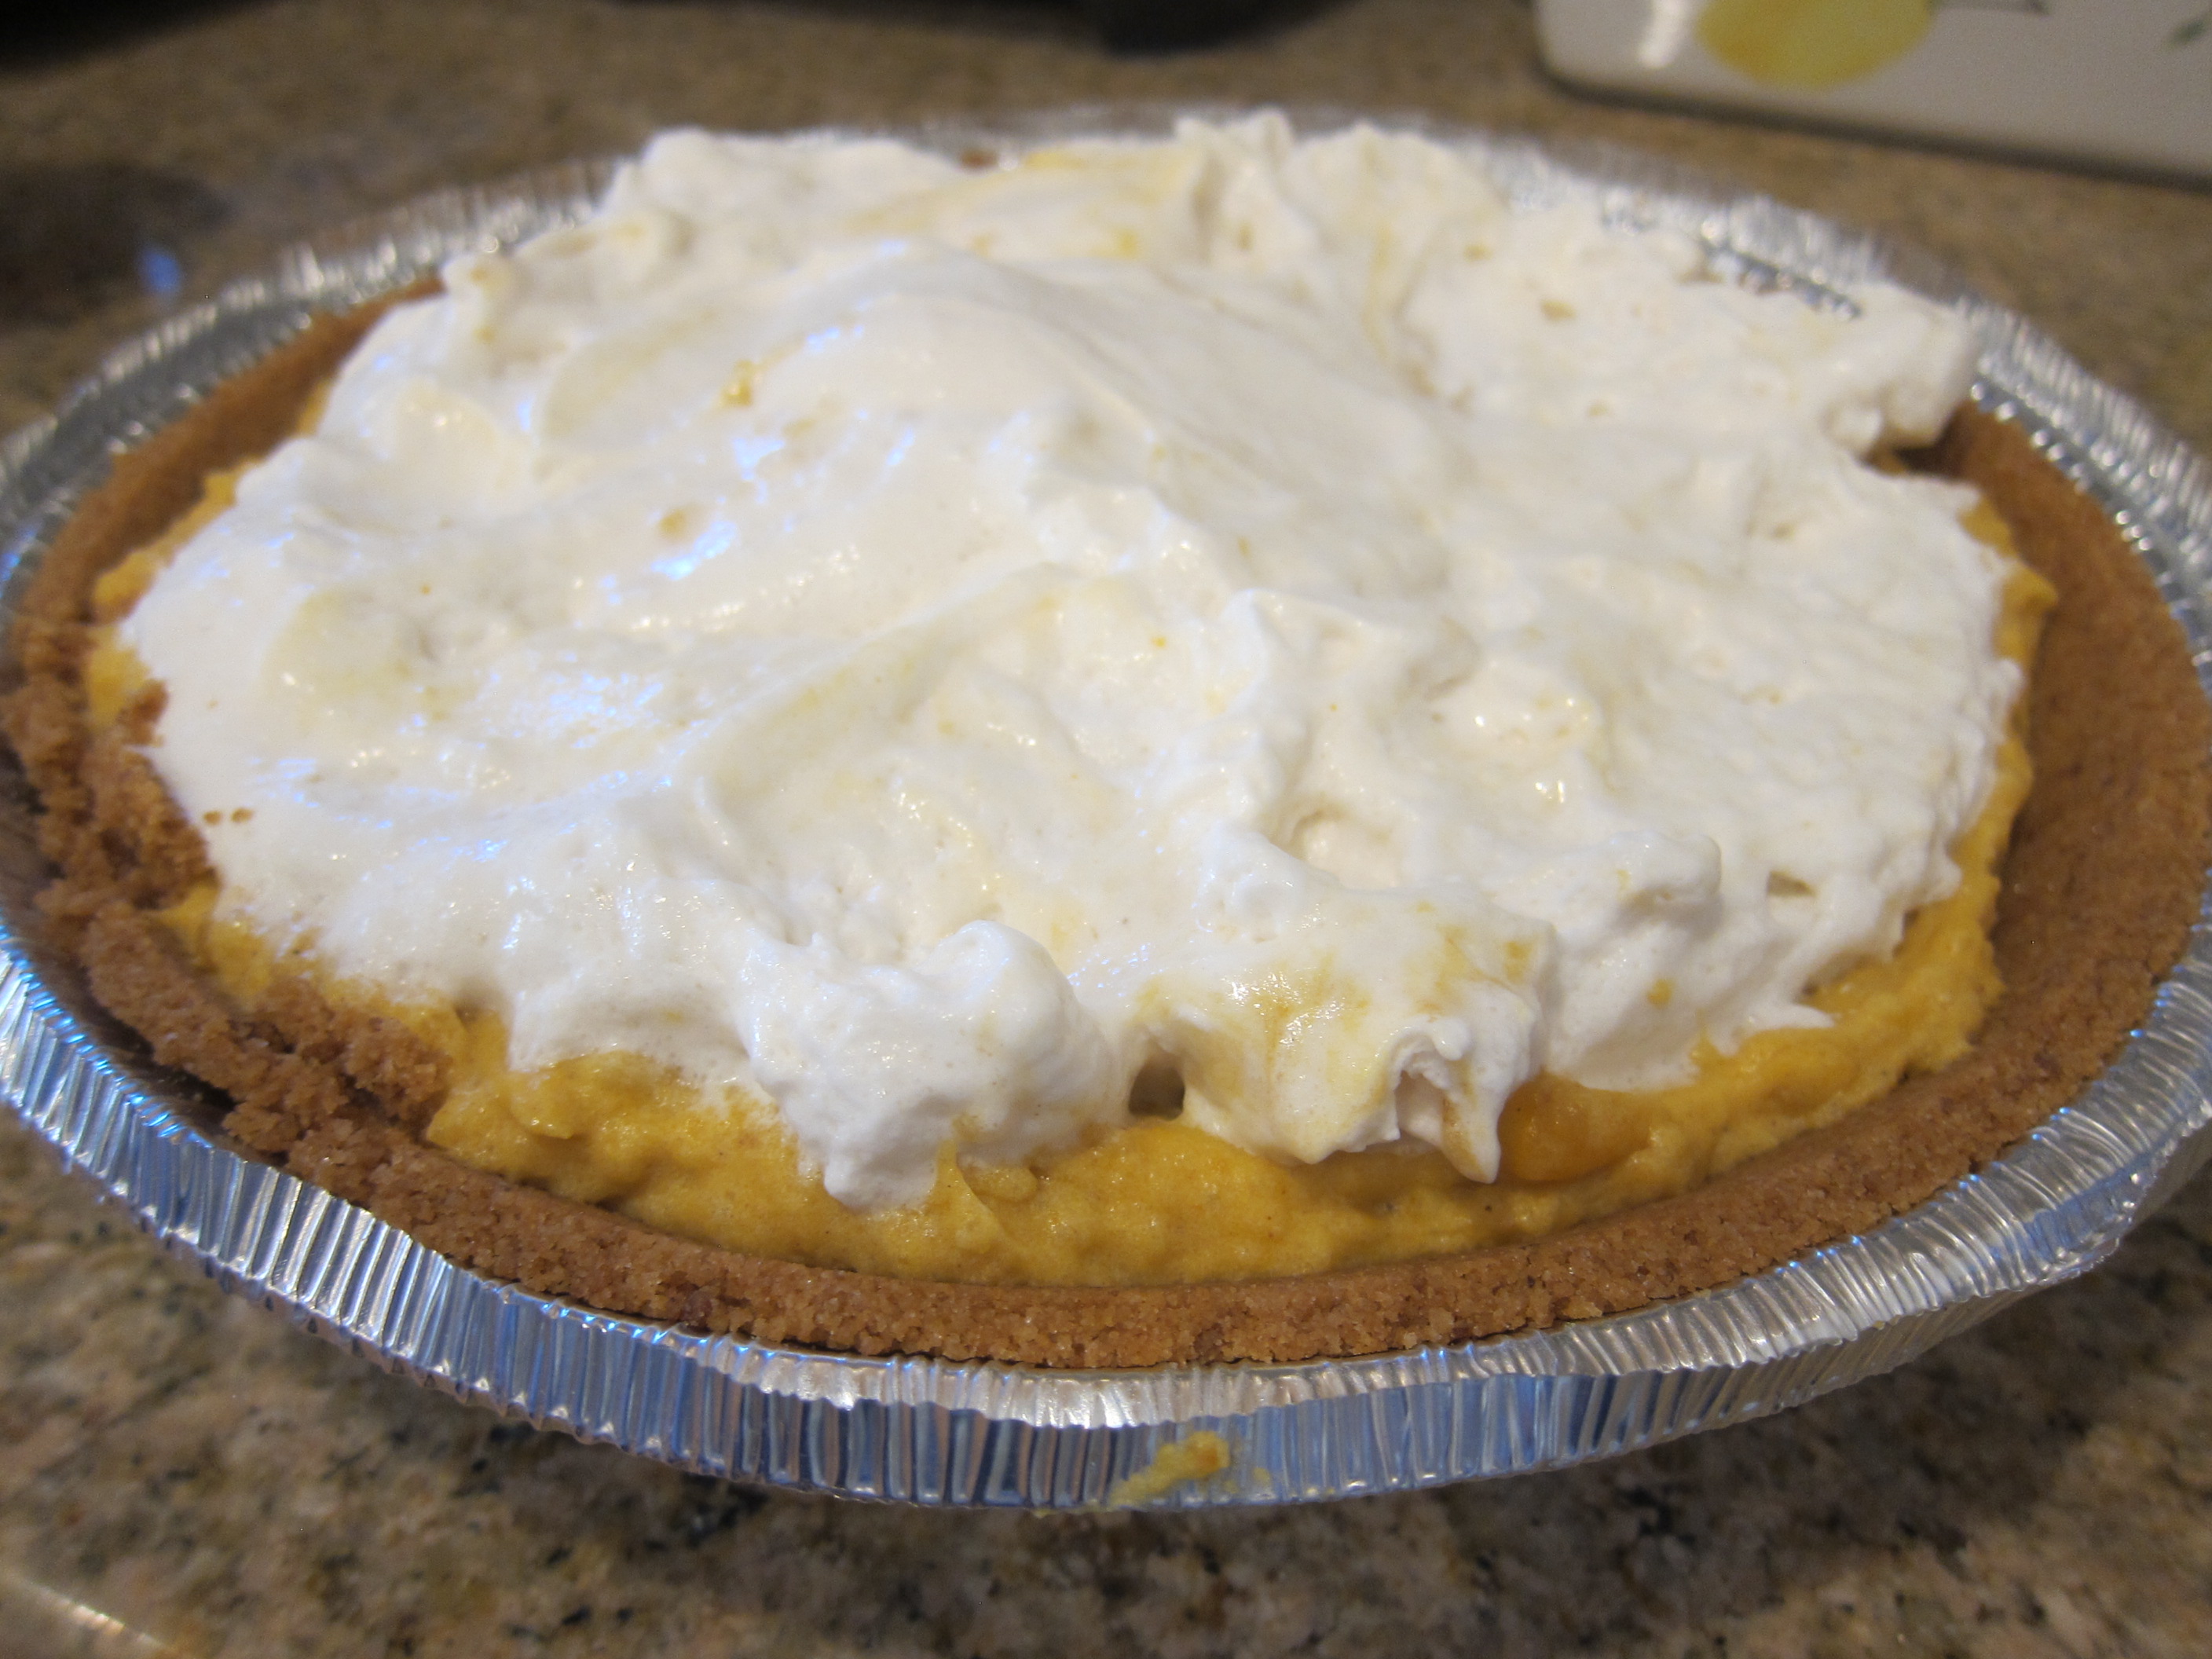
File this recipe under quick and easy. It’s equally delicious served warm, cold, or at room temperature!

Ingredients:

  • 8 ounces penne pasta
  • 1 pint cherry tomatoes
  • 1 (12-ounce) can chickpeas, drained
  • 1/3 cup vegan pesto
  1. Cook the pasta according to package directions; drain and transfer to a large bowl.
  2. Stir in the tomatoes, chickpeas, and pesto, tossing to coat.

Halloween Countdown Day 9: Go Batty

Halloween 9 Get Batty (3)

Today we got silly with our Halloween countdown with an activity that was equal parts imagination and learning. Halloween decor features so many creatures that we think of as scary, but that have fascinating science behind them. Think spiders, black cats, and in this case… bats!

To set the scene, we first watched a Wild Kratt’s bat episode. The kids thought they were just watching a cartoon, but there was lots to learn about echolocation! We also checked out a quick nature clip about the sounds that bats make to echolocate (navigate by bouncing sounds off the walls).

Halloween 9 Get Batty (7)

Now the question was, could the kids do it?

We dressed up in black gear (capes and hats!) and they closed their eyes in the middle of the living room.

Halloween 9 Get Batty (6)

I encouraged lots of chirpy baby bat noises. For Veronika, this was just silly fun, but Travis was so proud that he really could make it through our first floor without bumping into any walls.

Halloween 9 Get Batty (8)

For extra batty fun, I traced a bat template onto black construction paper, then cut these out and taped to craft sticks. Now each kid had a bat to fly around!

Halloween 9 Get Batty (2)

Travis loved hanging the bats upside down on walls and windows, and it led to lots more play throughout their evening.

Halloween 9 Get Batty alt

Now Halloween bats won’t seem quite so spooky!

No Carve Nature Pumpkins

No-Carve Nature Pumpkins (10)

It was a brisk fall morning, perfect for one of our nature walks to collect treasures. This time, I specifically kept my eyes open for items that we would be able to later glue onto pumpkins. We came home with sticks, leaves, pine cones, and acorns. I had hoped to spot some maple keys, but didn’t see any.

No Carve Nature Pumpkin (1)

I arranged all of our treasures onto a craft tray, and Veronika loved sorting through the items.

No-Carve Nature Pumpkins (3)

As she simply explored with all her senses, I arranged the items with more purpose to see what would work where on each pumpkin as facial features.

No-Carve Nature Pumpkins (4)

Our first orange fellow soon had acorn eyes, a stick nose, a leaf mouth, and a big branch of multiple leaves for hair.

No-Carve Nature Pumpkins (6)

He was soon joined by a second orange friend, this one with acorns for eyes and nose, leaves for mouth and ears, and a fun little pine cone headdress. I tucked a few leaves behind the pine cone so it almost looked like one of those fancy fascinator hats!

No-Carve Nature Pumpkins (11)

Veronika was clearly delighted when she saw that our pumpkins now had eyes, noses, and more.

No-Carve Nature Pumpkins (7)

They look quite jolly and happy on our patio. As with our recent pumpkin mask craft, this is a great way to decorate pumpkins a ways out from Halloween, since they won’t rot before the big night.

No-Carve Nature Pumpkins (9)

Mars Rover Kiwi Crate

Kiwi Mars (9)

Travis has long had a fascination with Mars and the NASA rovers, so he was thrilled to discover this month’s crate from Kiwi Co. A chance to make his own rover! He wanted to know if it could really go to Mars, and although the answer was sadly no, there was lots of fun to be had.

We jumped right in to making the Mars Rover: Travis enjoyed helping with the axles, one featuring square holes and one round so kids can tell them apart.

Kiwi Mars (1)

The base of the rover is made from a wood frame, but Travis grew frustrated with the following step to thread through string that attaches the spring.

Kiwi Mars (3)

The tension of this spring is what makes the rover move forward, similar to a pull-back car toy. With a little grown-up assistance, the rover was complete.

Kiwi Mars (4)

He loved the second part of the project: Make the Flag. Using the wooden flagpole as a scratching tool, kids can scratch off the black surface of the flag to reveal rainbow paper underneath.

Kiwi Mars (5)

The sky’s the limit for what design to put on the flag, but Travis just loved revealing the color underneath and spent such careful time on this.

Kiwi Mars (6)

Once my artist declared his flag done, we threaded it onto the wooden flagpole. Insert the flagpole into the stand on the rover, and then i’s time to wind up and give it a test.

Alas, I can’t say any of us were wowed by the results. Yes, the rover moves forward, but neither very fast nor very far. Perhaps our strings or spring weren’t taut enough?

Still, we forged ahead to make the Crater Course. Layers of cardboard are piled up and put on a felt “Mars” surface. Send your rover over them and see if it can make it across the bumpy ground.

Kiwi Mars (7)

There were lots of suggested ways to vary the course: Space the craters further apart, arrange them in different ways, or pile them on top of each other.

Kiwi Mars (8)

After that, there was still more experimentation to try! We turned to the crate’s suggestion of rubbing cooking oil over the strings, to see if this resulted in a faster rover. Well, no, but the kids thought it was funny!

Kiwi Mars (10)

Then we set up a little course for the rover, with a piece of cardboard angled off two books. Could the rover make it up?

Kiwi Mars (11)

Alas, still no, even when we added other items (a paper towel, a fluffy towel) to give it more traction. Well, at least it could zoom down!

Kiwi Mars (12)

As a final experiment, it was time to make our own Mars sand. We filched some from the playground, then poured it into the Kiwi box.

Mars Sand (2)

Add a little bit of water, along with a steel-wool scrubber. Ideally we’ll see the sand take on a reddish hue in a few days as it turns rusty from the iron, just like the sand on the Red Planet!

Mars Sand (3)

Pumpkin Halloween Masks

Pumpkin Halloween Masks (6)

We made a quick paper bag mask for Veronika today, which prompted the idea to make masks for our pumpkins, too! This is, incidentally, a great craft if your kids are constantly asking if it’s time to carve the pumpkins into jack o’ lanterns yet (ahem, like mine are). Adorn them with these mask faces now, and everyone is happy until carving day!

First, Travis helped me design a few masks for our biggest pumpkins. The lights were out from a storm (spooky!) so we drew by flashlight, which perfectly fit the mood. Let your kids design however they like, or provide examples like silly cheeks and big toothy grins.

Pumpkin Halloween Masks (1)

I repeated the activity with Veronika once the lights were on the next morning, drawing a brightly-colored jack o’ lantern face against an orange background while she scribbled on another piece of paper.

Pumpkin Halloween Masks (2)

She loved helping punch holes in the sides of each paper when we were done.

Pumpkin Halloween Masks (4)

I threaded bright yarn through the holes and then tied securely around each pumpkin.

Pumpkin Halloween Masks (5)

Our pumpkins have faces, and there’s no risk of rotting!

Halloween Countdown Day 8: No-Bake Pumpkin Pie

Halloween 8 No Bake Pumpkin Pie (7)

What better way to wait out the anticipation before you can carve your pumpkins… than to eat them! This pie should successfully tide everybody over until jack o’ lantern time. Bonus points: the recipe is easy enough that even my two-year-old can help!

First, combine 1/2 cup non-dairy milk and 1 packet instant vanilla pudding mix in a container with a lid. Seal and shake. Fun!

Halloween 8 No Bake Pumpkin Pie (1)

Pour the pudding mixture into a large bowl. Stir in 1 cup canned pumpkin pie filling. Fold in half a container of non-dairy whipped topping (such as So Delicious Coco Whip).

Halloween 8 No Bake Pumpkin Pie (3)

Spoon the mixture into a prepared graham cracker crust (such as Mi-Del), then spread the remaining whipped topping on top. Veronika was eager to hold the spatula and help smooth out the top!

Halloween 8 No Bake Pumpkin Pie (4)

But mostly, she wanted to taste-test every step of the way. She earns an A plus for making sure every step of the recipe was delicious.

Halloween 8 No Bake Pumpkin Pie (2)

Pop the pie in the freezer for at least 2 hours and voila, a pie that never needs to bake.

Halloween 8 No Bake Pumpkin Pie (6)

Your kids might think it’s Halloween magic!

Halloween 8 No Bake Pumpkin Pie (9)

Paper Bag Faces

Paper Bag Faces (6)

We had a few extra paper bags from the grocery store lying around, so today Veronika and I had fun with them in two ways. You can turn a paper bag into a face… or be the face inside one!

Similar to a recent game with paper bag “blocks”, first I stuffed a medium-sized bag with crumpled up pages from an old magazine.

Paper Bag Faces (2)

Fill nearly to the top, then gather together the extra material and secure with a rubber band.

Paper Bag Faces (3)

I invited Veronika to come help draw a face on the bag. We added cheerful eyes and a big silly smile so the bag wouldn’t scare her.

Paper Bag Faces (7)

Kids will love saying hello to this new friend, or might want to pick it up and carry it around. Veronika almost seemed to think it was alive, asking it to sing songs with her!

Paper Bag Faces (8)

Now that she had a new friend, what would she think if she was the face inside the bag?

Paper Bag Faces (4)

After she scribbled on a second bag with marker, I cut out two big eye holes, then popped it briefly over her head.

Paper Bag Faces (5)

Boo! She thought it was silly for a few minutes, but then tired of it.

Paper Bag Faces (9)

But there’s no better season than Halloween to scare up some fun with an activity like this.

Barbecue Chick’n Pizza

Barbecue Chicken Pizza (1)

This recipe makes for a loaded pizza topping! Marinara sauce is spiked with barbecue sauce for a zesty update over standard pizza night.

Ingredients:

  • 1 pizza crust (homemade or store-bought)
  • 1/2 cup marinara sauce
  • 3 tablespoons barbecue sauce
  • 1 (10-ounce) package Gardein chick’n strips, cooked and chopped
  • 1/3 cup thinly sliced red onion
  • 3/4 cup shredded vegan cheddar
  • 3/4 cup shredded vegan mozzarella
  • 2 tablespoons minced fresh cilantro
  1. Place your pizza crust on a baking sheet; set aside.
  2. In a small bowl, whisk together the marinara and barbecue sauce and spread evenly over the pizza crust.
  3. Top evenly with the cooked chick’n, red onion, and cheese.
  4. Bake at 425 degrees F for 10 minutes. Sprinkle with cilantro before cutting into slices to serve.

Barbecue Chicken Pizza (2)