Sidewalk Chalk Fun

Sidewalk Simon (4)

Sunny days call for sidewalk chalk! Here are two fun ways Veronika played with chalk today.

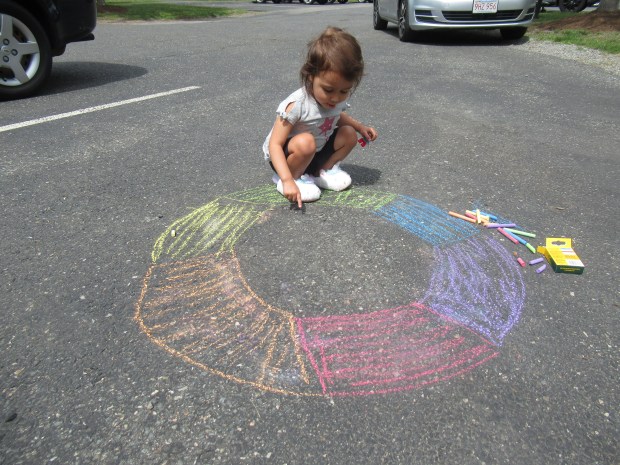
The first was a take on the old game of Simon, a handheld memory game that repeats a sequence increased by one step each time. But nix the technology and you can play Simon on the sidewalk, too!

Sidewalk Simon (1)

First, I drew a full rainbow of colors with chalk (rather than just the original Simon’s four colors), which was great for a quick ROYGBIV review. Then I had Veronika stand in the center and called out, “Stand on purple!”

Sidewalk Simon (2)

She jumped to purple, and then went back to the center. “Stand on purple, then stand on orange!” I instructed.

Sidewalk Simon (3)

At age 2, Veronika’s limit was about 3 steps (we made it through: purple, orange, green), but big kids can not only act out longer patterns, but also see who can remember the most steps!

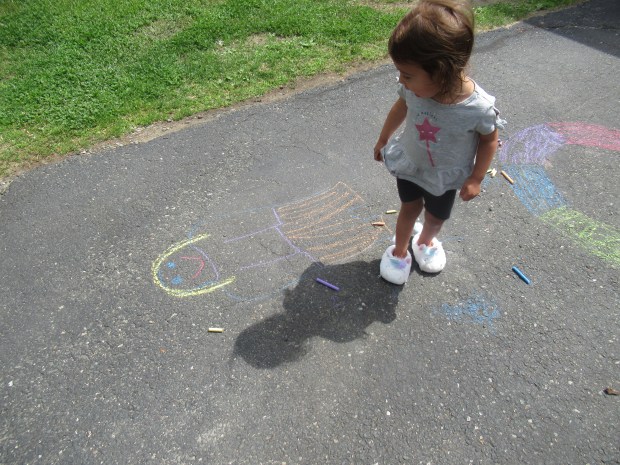
Then we noticed our shadows behind us, short and squat and funny in the afternoon sun. I invited Veronika to trace mine (though it was a rough approximation, of course).

Sidewalk Simon (5)

Use chalk to fill out your new chalk friend with an outfit and a silly face.

Sidewalk Simon (6)

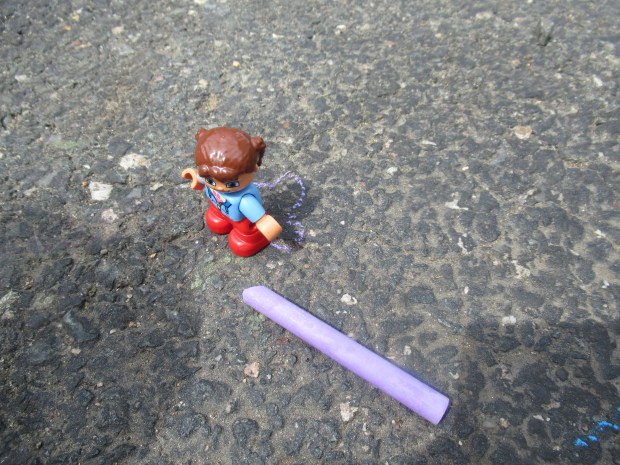
It’s also fun to trace the shadows of other objects, so next we tried her Duplo doll. Shadows were so short that this one barely showed up, but we colored in the doll’s outfit, too.

Sidewalk Simon (7)

I caught Veronika sideways, so traced her shadow this way before we added silly clothes and features.

Sidewalk Simon (8)

For older kids, consider coming back and making these sidewalk “portraits” throughout the day, watching them change from tall to short to tall again. You might also try having your child “fit” his or her body back into their shadow, almost like a puzzle piece!

Sidewalk Simon (9)

Water Color Paint and Salt

The beautiful visual effect when salt hits wet paint has some science behind it, too! Whether your child is old enough to understand the STEAM concept of this project, or young enough just to enjoy the art and sensory play, this is an easy and fun craft to do together.

To start, I set out watercolors and a cup of water for Veronika, and invited her to make big stripes of wet color on thick paper. As soon as I began narrating, “Now some blue, now some green,” she dove right in. “I’ll do blue! I’ll do green!” she said, painting over my lines.

The wetter the better, and once we had several thick streaks of color, I invited her to sprinkle salt on top. Of course for a toddler this was great sensory fun.

But the real wow is watching the salt absorb the water right away. If you then shake off the excess, it leaves a neat bubbled look in the colors.

For an alternative, we painted a second set of thick stripes, then pressed plastic wrap on top. Leave until the color dries, then lift up. The paint itself looks full of bumpy, crinkled texture.

Veronika was eager to return to the salt, and soon had dumped a whole pile of salt on the paper and painted it directly with drops of watercolor!

Then she wanted to stir the salt around with her brush, add more water, stir the salt some more, etc., all of which kept her quite busy for a while.

Fun Ways to Play with Sticks

There’s a fantastic nature playground near our home, where the only “structures” are those found in nature (think balance beam tree trunks, stepping stones made of rocks, a pebble sandbox, and more). I love the space because here, imagination is king! To wit, today Veronika and I set out to see how many different ways we could play with sticks we found in the area.

First, she designed a little hut for her toy kitty cat. Depending on what your child loves, the tiny house could be for a fairy or a gnome, instead!

Keeping up the whimsical theme, I tied a scarf around one stick and it became a streamer that she could wave through the air.

Or perhaps it was a magical wand in my big fairy’s hand.

The sticks were also great for drumming (on tree stump drums, naturally), leading to an impromptu jam session!

Of course sticks are great for learning, too. Collect a few and then sort them by some attribute, whether length, color, or another feature. We then decided to take a few favorite sticks home, where they were perfect for arts & crafts!

Veronika loved painting directly on the sticks with silver and gold. She decided another should be black with pink spots.

There are so many tried-and-true sticks games that we didn’t even get to today, like drawing in the dirt, forming alphabet letters, stacking sticks into towers, and stirring up some nature soup. As long as you’re careful, sticks can even be used for a quick game of Jedi lightsaber battling.

What’s your child’s favorite way to play with sticks? Please share in the comments!

Mixed Media Collage

We spent the morning tucked inside from a heatwave, and a simple art collage felt like the perfect way to pass the time. This activity relies on items already in your craft bin, especially any scraps left over from other art projects.

To start, I set out a tray of materials, including torn pieces of paper. I chose hot oranges, reds, and yellows to fit our 90 degree day! I also added blue sequins, a tube of glitter glue, and regular white glue.

Veronika immediately wanted to stick the sequins on the page, but we needed something else to make them stick – the glue! Together we squirted white glue pretty much all over the page so that wherever she placed an item, it now would be sure to stick. First she pressed on pieces of the paper. Once we had a layer of paper, we added a second layer of glue.

Now she could sprinkle down handfuls of sequins. (Note: Just tilt the paper to shake off any excess).

Next she wanted to try squeezing out the red glitter glue and was so proud she could do this all by herself. And then of course she needed to squeeze out more white glue.

Pretty soon we had a vibrant summertime collage. She had so much fun that we immediately filled up a second sheet of paper!

What materials will go on your child’s collage? Please share in the comments!

Tin Foil Constellations

Children love the glow of the stars, and here’s a beautiful way to bring that glow inside! This activity doubles as a quick lesson on constellations and a D.I.Y. nightlight.

To start, I set out a sheet of tin foil and showed Veronika how to prick it with a toothpick to make dots. We did this step over a yoga mat, so the toothpicks wouldn’t scratch a tabletop or other surface; you could also place a sheet of felt underneath.

While she made holes at random, I made more deliberate constellation shapes, such as the Big Dipper. Older kids can follow along with pictures of real constellations, too. For a toddler, this was a great first chance to talk with Veronika about how some of the stars make shapes in the sky.

Next, we fit the dotted sheet of foil inside a mason jar. This was trickier than I thought, with the foil crumpling on the first round, so we quickly made a second sheet and inserted it more smoothly. It helps to make the holes a bit wider than the point of the toothpick, too, so they show up better.

Finally, we needed to light up the night sky! Veronika helped turn on a tea light, which we then inserted into the jar.

She marveled at the twinkle as soon as we were in a darkened room! Even better, the stars will twinkle in her bedroom all night long.

Fun Flower Garden Containers

Flower Garden (3)

I’ve long wanted to get the kids into gardening (beyond the plastic cup seeds we’ve planted!) but I hesitate to buy planters since I have no green thumb myself. Enter this adorable upcycling idea for garden containers, made from empty soy milk cartons. They’re just right for kids to plant flowers or herbs, with no commitment.

To start, I cut one side flap off each of two empty soy milk cartons, then thoroughly washed with soap and water and let dry.

We headed outside with our containers on a hot morning. I had a new set of garden toys for the kids, to add to the fun, including a mini wheelbarrow, gardening tools, and even pretend flower pots. These will be fun to mime garden play even when we’re not actually planting!

Flower Garden (10)

But now to set up our real containers, Veronika helped scoop potting soil into each of the cleaned out cartons.

Flower Garden (1)

Pat down the dirt and then water until moist. Our elephant watering can is always a big hit.

Flower Garden (2)

Next, we made small holes in the dirt with our fingers to about 1/4-inch deep, and dropped in seeds. Big brother Travis loved this part! We used one carton for flowers (you could even plant homemade paper seed bombs)…

Flower Garden (4)

… and the second carton for herbs.

Flower Garden (6)

Of course we’ll have to wait a while to see the fruits of our labor, but for this morning, the kids weren’t done yet! First there was fun to be had planting the fake flowers in real dirt.

Flower Garden (7)

Then they wanted to water the grass and clover in the yard.

Flower Garden (5)

Gardening is such a beautiful way to get kids outside and interacting with nature, even when it’s as simple as beginner gardening like this.

Flower Garden (8)

Update: We have growth! It’s been just over two weeks since we planted the herbs, and now they are just starting to pop up. Travis in particular is so excited for when the plants are large enough to snip off some and use in our kitchen.

Planter var

Condiments Smell Test

Condiment Smell (6)

The next time you clean out the fridge, getting down to the bottom of all those old condiment jars, you have the perfect opportunity for… a smell test! So many condiments have strong, sharp scents that are just right for olfactory sensory play.

Condiment Smell (2)

To start, I dipped a cotton ball into each item we would be testing and placed them in the compartments of an ice cube tray. We had the following:

White vinegar

Salad dressing

Mustard

Ketchup

Soy sauce

Lemon juice

Sweet relish

Now it was time to smell and discuss! Veronika recoiled back from the lemon juice immediately, no surprise there!

Condiment Smell (3)

When concentrated on a cotton ball, the rich tomato notes of the ketchup and the sugary sweetness of the relish really came through.

Condiment Smell (4)

The opportunity is rife here for great vocab worlds. Beyond just asking whether she liked a scent or not, I encouraged Veronika to explain what she smelled.

Condiment Smell (5)

Vinegar was sharp, soy sauce was pungent and earthy, mustard smelled spicy, and more!

Water Play: Structured and Unstructured

Water Play (1)

Water play is always fun for kids, and often when I set out cups, bowls and utensils for water, I have some goal in mind (think: flotation or density experiments, absorption, color changing, and more).

Today, I simply wanted to see what Veronika would do with water! I set out two bowls filled with water, an empty container in the middle, and various utensils that she could use, including a ladle and measuring spoons. I then tinted one container red and the other blue, meaning if she mixed them in the middle she’d see purple.

Water Play (3)

Let the scooping begin! Giving no instructions, she quickly had a game going. Mostly, she wanted to use the measuring spoons to move water from one container to the other. She briefly remarked on the colors, but was more interested in testing out the various sizes of measuring spoon.

Water Play (6)

Whoops, don’t drink the water, cat!

Water Play (5)

When she tired of this free play about 15 minutes later, I then rearranged the set-up for an experiment with a little more direction.

Water Measure (@)

If we had one container filled with water, how many times would we have to fill various measuring instruments to transfer the water to an empty container? In this way, she learned that she could move “a little” (a teaspoon) or a lot (a baby bottle). Preschoolers can be much more precise and even take note of the liquid measurement lines, making for a great early lesson on volume.

Water Measure (1)

But then we were quickly back to unstructured play. Now, Veronika wanted to give Duplo figures a little bath in the bowls, alternating between drying them off and then pouring water on them again.

Water Play (8)

Super Spaceship

Make a Rocket (3)

Zoom zoom zoom, we’re going to the moon.

This little ditty about rocketships is one of Veronika’s favorites, so today we crafted a rocket for her to zoom around as we say the words, thanks to this cute craft spotted in her High Five magazine.

To start, cover an empty paper towel tube with construction paper. We taped on blue paper that was decorated with black marker windows. You can tell from the perfect circles that there was some mommy help involved, but your toddler can also scribble or add stickers or decorate any which way!

Make a Rocket (1)

Next, I cut two right triangles and a circle from orange construction paper. Veronika loved naming each shape for me!

Make a Rocket (2)

Fold the triangles along one edge slightly and tape to the bottom of the rocket as the fins. Cut a wedge from the circle, then wrap around itself to form a cone and tape shut; tape to the top of the tube.

For flames, I layered orange and yellow tissue paper, then twisted at the top and snipped into fringe at the bottom. Insert in the bottom of the rocket and secure with tape.

Make a Rocket (4)

Blast off!

Build a Fort!

We haven’t built a fort with pillows since the winter, so it felt like time! Today, I simply told Veronika we were going to turn our couch pillows into a fort, and let her take it from there.

She was immediately interested in lying down on the cozy blanket we brought from her room, so that became the centerpiece of the fort. She loved pretending to sleep, nestled in her cozy cave of pillow walls.

Then we made the structure a bit more involved by adding multiple “rooms”, each blocked off by a separate blanket and pillows.

OF course this was the perfect place to invite in some animal friends.

She loved playing in this space that was just the right size for one little girl. In fact, the first time I put the fort away, she demanded we make it again!

The beauty of building forts is to let your child imagine how it will take shape, and what will happen inside. Stand back and let your kids take over with this one!