Early Explorers Ocean

LP Oceans.JPG

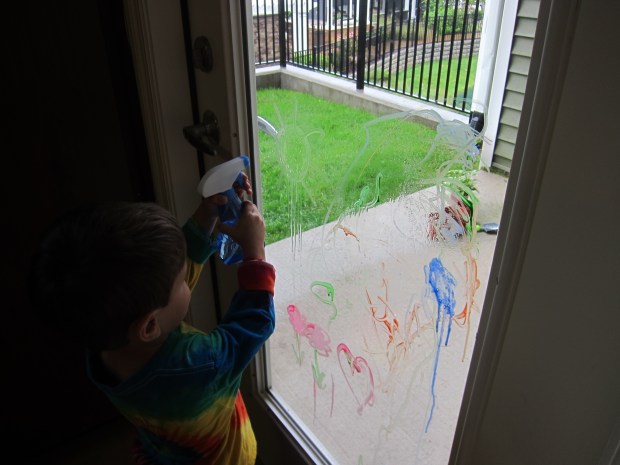
Anyone who has followed along on our Koala Crate adventures knows that I love subscription boxes. We’ve just begun a new subscription, now that Travis is old enough to try out Little Passport’s Little Explorers set, aimed at ages 3 to 5. And of course I have to document our adventures!

Little Explorers presents a theme about our planet/geography each month to kids with “materials that encourage creativity through play.” Unlike Koala Crate, which supplies all your materials, Little Explorers is more of a guide, which took a little getting used to. We’ve discovered, though, that this leaves lots of room for exploration – appropriate for a company that is all about, well, travel and exploration!

LP Oceans (1)

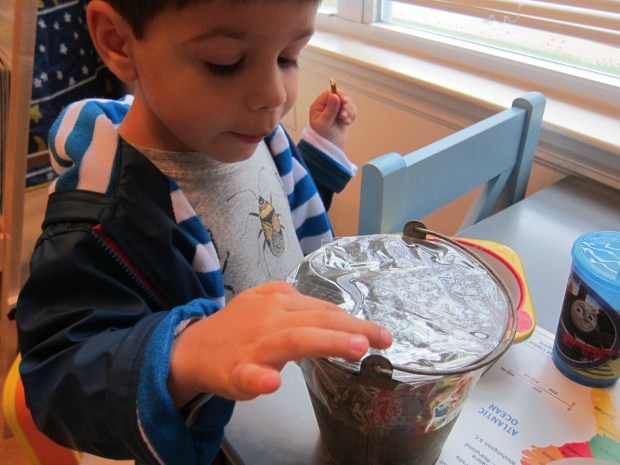
Each month comes with a luggage tag to affix to your child’s suitcase, stickers for a wall map, an activity booklet, a postcard, a game or keepsake, and lots of suggestions for further learning. The activity booklet has been fantastic for things like simple mazes, matching games, dot-to-dots, colors etc., all great preschool activities. Our map stickers this month had us talking about icebergs, orca whales, penguins, lobsters, and more!

Ocean Craft:

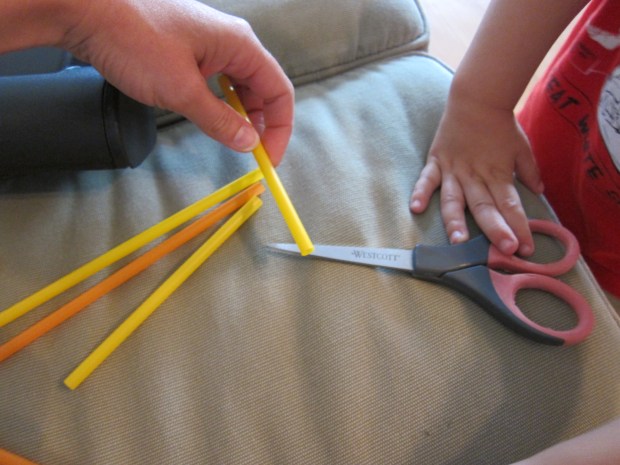
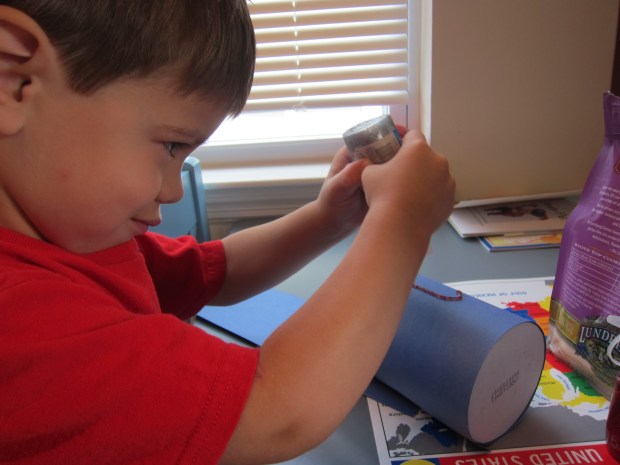
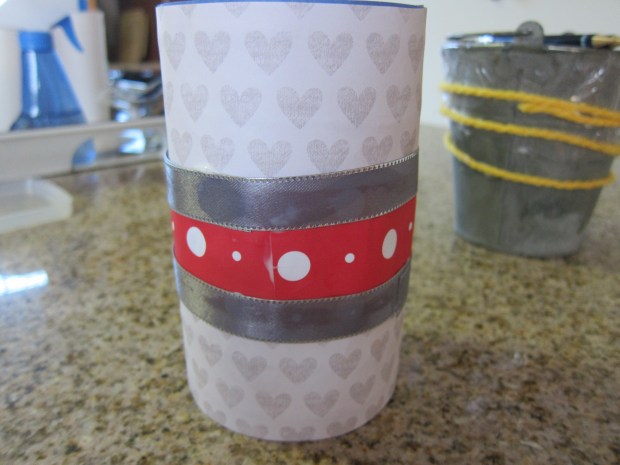
The suggested craft this month was for a homemade jellyfish. We’ve tried to make this creature a few times before but the instructions from Little Passports are by far the best I’ve come across. First we needed to paint a paper plate. Travis chose green and pink for his jellyfish.

LP Oceans (3)

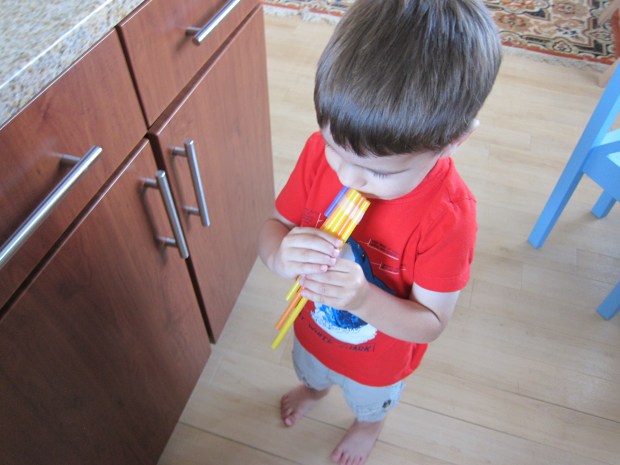
After the paint dried, we glued on 15 yarn “tentacles.”

LP Oceans (6)

Travis had fun with leftover yarn pretending to be a wiggly jiggly creature while we waited for the glue to set.

LP Oceans (5)

I added tape across the tentacles for extra reinforcement. We glued on two googly eyes as the final touch, and then it was time swim around him around. Travis insisted that the jellyfish have a smile.

LP Oceans (14)

You can also make handprint jellyfish! Travis didn’t want to get his hands messy, but loved watching me create the wriggly creatures by dipping my hand in paint – palm-shaped bodies, and little finger tentacles.

LP Oceans (15)

Perhaps you could make handprint anemone this way as well. These crafts later prompted us to do some jellyfish research online – did you know sea nettle jellyfish grow from the size of a grain of rice to over sixteen feet long?!

Ocean Science:

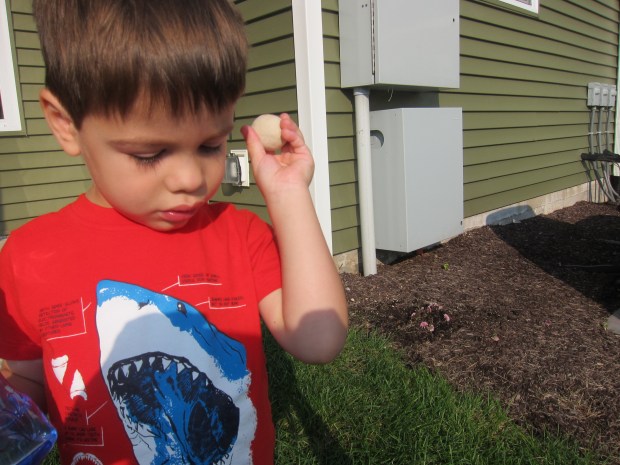
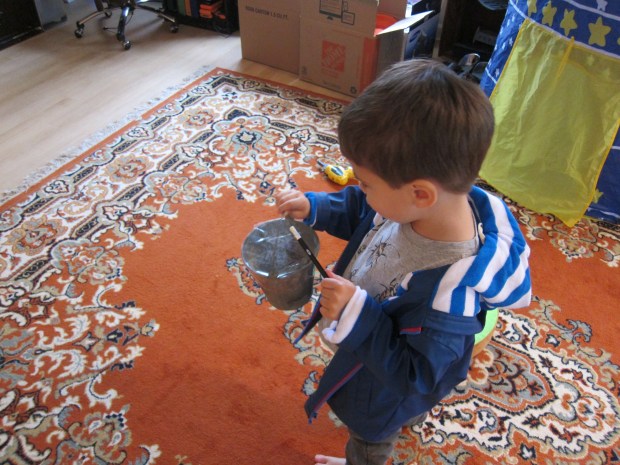
Next up was some ocean science. Travis and I have examined the way salt makes objects float before, but I have to confess that Little Passport’s suggestion worked even better. Though I normally wouldn’t advocate any activity involving eggs, my non-vegan husband had some in the fridge and I suppose you could say we “upcycled” them for this game.

LP Oceans (7)

Pour ¾ cup water into each of 2 clear glasses. Add an egg to the first glass and you’ll see it sink immediately. Now stir ¼ cup salt into the second glass – Travis marveled at how cloudy it looked.

LP Oceans (8)

We added the second egg and – boink! – it floated back to the top! A very clear illustration of how salt makes objects more buoyant.
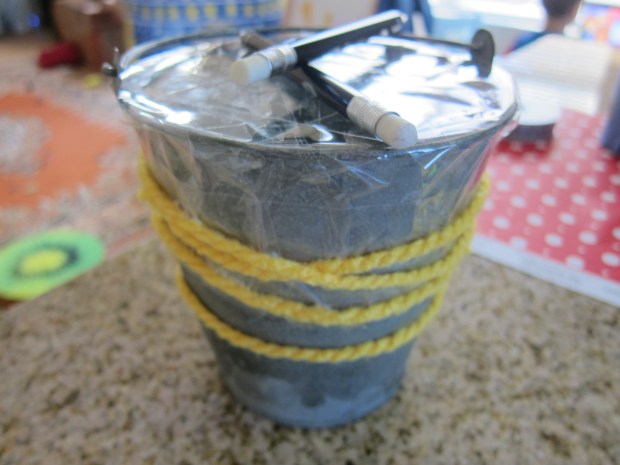
LP Oceans (9)

Ocean Keepsake:

The provided game in our package this month was not a hit: a “fishing” game with wooden animals to catch on a rod. The trick of getting the rod into the circle of each animal was very hard for Travis, who mostly just got frustrated. A magnet would have been much easier for little hands! This is one he’ll have to grow into.

LP Oceans

Ocean Field Trip:

On the activity booklet’s suggestion, we headed to our nearest aquarium. Using our Ocean flashcards from “Max and Mia” (Little Explorer’s guides), we hunted out a few things in particular: the coral reef exhibit;

LP Oceans (16)

penguins;

LP Oceans (18)

and a humpback whale. (This last was a fountain statue of a whale; I do not recommend visiting aquariums that house large cetaceans).

Ocean Further Activities:

We added a visit to our local library and found a neat series with one volume for each of the world’s 5 oceans. The subject material was a bit advanced for Travis, but he liked looking at the pictures of sea animals around the world.

LP Oceans (20)

Older kids can have fun drawing their favorite ocean animals. Since Travis’s artwork is still a bit, er, abstract, I printed out a page for him to color instead.

LP Oceans (19)

We hit up a local beach to look for shells on a pretty walk. We even found a horseshoe crab!

LP Oceans (23)

A perfect end-of-summer pause.

LP Oceans (21)

This then prompted us to research seashells and coral online. We made discoveries both interesting and silly. In the interesting category, did you know that 9 out of 10 shells open up to the right? So shells tend to be “right-handed” just like people. This was a neat factoid for my little lefty. In the silly category, we discovered a beach in Australia with whole shells instead of sand – in a pile that runs 32 feet deep! To this Travis loved looking at the pictures and saying, “Ouch!”

In sum, tons of fun and learning was sparked by our first installment of Little Explorers. What else can you think of to learn and play and do with regards to the ocean? Please share in the comments!

LP Oceans (22)


Dancing Salt

Dancing Salt (5).JPG

Did you know that salt likes to dance along to music? Neither did we until we tried this cool experiment! Sound waves might be invisible, but because they create vibrations, the dancing salt allows kids to see sound in action!

You don’t need to dye your salt with food coloring for this experiment, but it will make it easier to see as it moves.

Dancing Salt (1)

Besides, Travis enjoyed smooshing the color into the salt. We placed 3 portions of salt in zip-top plastic bags and added blue, green, and red.

Dancing Salt (2).JPG

Next you’ll need a bluetooth speaker to make this experiment work. Tape 6 popsicle sticks around the speaker at intervals to create a frame, then top with plastic wrap. Place on a flat surface.

Dancing Salt (3)

Now sprinkle on the salt and watch it shimmy and shake! We found that loading too much salt on the plastic wrap made the action harder to see. Even the amount below was too heavy:

Dancing Salt (4)

So a light sprinkle was the most interesting. Here is our salt grooving to the Beatles – who knew salt had good taste in music?

Definitely a fun one!

Clay Charms

Clay Charms (10).JPG

With a big batch of clay in the house, we decided to shape some into charm necklaces – they’ll make the perfect gift for the upcoming September birthdays of several relatives!

You can shape your charms in one of two ways. First we tried a butter knife to cut out simple squares or rectangles. This was definitely Travis’s preferred method.

Clay Charms (2)

Alternatively, you can use cookie cutters to fashion your charms into circles.

Clay Charms (3)

We found a bunch of old buttons in our craft box, which made perfect imprints into the clay, like flowers or hearts.

Clay Charms (5)

Once you’re happy with your designs, let the clay set. If you have oven-dry clay, bake according to package instructions. Ours was air-dry clay, so we left it out overnight. While the clay is still soft, poke a hole through each with a toothpick or wooden skewer so you can string it onto a thread later on.

The next day it was time to paint! Watercolor works very well on clay, but you could also use acrylic paint.

Clay Charms (6)

After a swipe or two with a paintbrush, Travis decided it would be much more fun to do watercolors by hand. I laughed and decided why not! The results were surprisingly beautiful.

Clay Charms (7)

Let the charms dry again, then thread twine through the hole in each charm. Voila! A charm necklace.

Clay Charms (9)

Music Sheet Banner

Music Sheet (9).JPG

As we continue to decorate Travis’s room in our new home, this upcycled craft was the perfect idea for a kid who loves music. The banner would also make a fantastic party decoration, if you cut out enough triangles to spell a larger message like HAPPY BIRTHDAY.

I have lots of piano sheet music at home, which made ripping up a few old songs a simple matter. Otherwise, look for second-hand sheet music at a garage sale or music store – no matter what song you pick, musical notes and clefs will be a pretty backdrop!

Music Sheet (1)

Travis loved helping cut the music sheets into triangles…

Music Sheet (3)

As well as ripping the scraps into ever smaller pieces for quite some time afterwards.

Music Sheet (2)

He can’t write his name on his own yet, but he and I did hold a marker together to form T-R-A-V-I-S. He was so proud!

Music Sheet (6)

For final assembly, I simply attached the triangles to a piece of twine with a little bit of scotch tape, and that was it!

Music Sheet (7)

A new banner over his new big boy bed.

Music Sheet (8)

Making Moon Craters

Moon Crater (5).JPG

Some games are educational, some games are artistic – but for this one I confess we basically just wanted to take advantage of our new backyard and have some messy fun!

That said, the moon has been on our mind since the eclipse, so I asked Travis if he wanted to see an example of how asteroids and comets made craters on the moon. That was the extent of our “science lesson”, but older kids doing this project might want to look at videos of the moon or research craters a little further.

For our moon surface, I filled a bin with about 2 inches of white flour. A little cocoa powder sprinkled on top added contrast.

Moon Crater (1).JPG

Three “asteroids” of dried clay made the perfect asteroids. Hold them at about chin level, then drop down onto your moon surface.

Moon Crater (6)

There was a very satisfying puff of flour and cocoa with each impact!

Moon Crater (3)

And very neat holes left behind.

Moon Crater (4)

Because this activity was so action-based, here’s a quick video!


Straw Flute

Straw Flute (4).JPG

We’re on a musical instrument kick lately, and realized we needed to add some woodwinds (er, plasticwinds) to our collection, which was heavy on percussion! This “flute” won’t really make separate notes, but it is adorable and fun to put together.

Perhaps even better than playing with the final product, Travis loved helping select which color straws we should use. We counted out six, although you could make your flute larger or smaller.

Straw Flute (1)

Next, we snipped the straws into varying lengths, about 1 inch shorter each time. Great scissor practice, before preschool starts tomorrow!

Straw Flute (2)

I arranged the straws in height order and taped them together before handing the instrument over to my little fifer, who soon was tooting away a melody.

Straw Flute (3)

The flute practically begged for an Irish jig to dance along to!

Bucket + Tape = Drum

Bucket Drum (6).JPG

If your child needs a toy drum to bang on and quick – no time for drying glue or paint here! – then this is the craft for you.

All you need is packing tape and any old bucket (we had the perfect tin one from a trip to feed animals at a sanctuary).

Travis was very intrigued as I started taping over the top of the bucket.

Bucket Drum (1)

And thrilled when the hole on top was completely covered (I recommend two layers of tape), and realized that the bucket now had a drum head.

Bucket Drum (3)

That’s it, a drum is born! Pencils make the perfect, no-crafting-required sticks, though if you want to get fancier, you might try rubber ball drum sticks.

Travis loved that he could start drumming right away. I took advantage of a later nap to glue on ribbon as embellishment.

Bucket Drum (4)

In no time at all, we had a drum circle!

Bucket Drum (7)


Salt Shaker Noise Maker

Salt Shaker (9).JPG

After an evening out at a kids’ music concert, Travis began the next day making believe he was a drummer in the band – at 6.30 in the morning. Needless to say, this didn’t go over well with a sleeping daddy… and likely the neighbors as well!

The solution? Throw together an instrument for your child that is (slightly) quiet! I was lucky enough to have an empty salt shaker on hand, and some dried rice as well. If you don’t have dried rice, dried beans or even unpopped popcorn kernels would work well.

Salt Shaker (2)

Travis enjoyed the challenge of fitting the rice into the salt shaker, little by little. Once we decided it made just the right shake-a-shake-a-shake-a sound, I taped down the spout of the container to prevent spillage.

Salt Shaker (1)

Travis gave it a few shakes without waiting for any decoration at all!

Salt Shaker (3)

For a simple decoration, cover with colored construction paper and then adorn with markers or glitter paint.

Salt Shaker (4)

For something a little more elegant, we tried one covered in scrapbook paper and ribbon.

Salt Shaker (8)

This is a great instrument for all – fun for the kids, and sanity-saving for the adults!


Rainy Day Window Painting

Rainy Window (5)

If you’re having a gray and rainy Labor Day weekend like we are, turn any frowns upside down with the slightly-taboo feel of this project… indoor painting on the windows!

Grown-ups, don’t cringe; I promise the paint is going to wash off your windows really easily. The secret? Dish soap!

In the cubes of an ice cube tray, mix equal parts dish detergent and washable paint for each color. Provide your child with q-tips as the paint brushes.

Rainy Window (4)

Travis couldn’t believe I was letting him use the window as his canvas. He jumped right in drawing “clouds” and squiggles.

Rainy Window (1)

His expression here pretty much says it all!

Rainy Window (3)

The beautiful, slightly shiny colors were the perfect antidote to the gray day outside our windows.

Rainy Window (2)

Travis may or may not have discovered it was equally as fun to rub a paint-smeared q-tip over his bare legs. I may or may not have been feeling so lenient of this cozy Snday afternoon that I let him paint away and followed up with a bath…

Rainy Window (6)

Ready for the best #momhack of all about this game? Clean-up is half the fun! After Travis was paint-free, I set him loose with a spritz bottle on the window.

Rainy Window (7)

The glass was sparkly and shiny and paint-free in no time.

Rainy Window (8)

Stomp with Dino Feet

Stomp Dino (6)

What’s more fun for a preschool tot than stomping around the house? Stomping around with dinosaur feet of course! Get out some sillies with this cute idea from High Five magazine.

To start, adults will need to trace a dinosaur foot shape on a large piece of craft foam. I really have no idea what a dinosaur footprint looks like, but a three-toed creature seemed to fit the bill!

Stomp Dino (1)

Cut an X into the foam with scissors near the ankle of each foot – this is how your child will wear the dino feet.

Stomp Dino (2)

Travis loves practicing with kid-safe scissors, so although cutting the dino foot was beyond his skill, he helped me snip out a few triangles that we would need later on. “Dinosaurs need lots of triangles!” he told me very seriously.

First though, we had to paint our dino feet! Travis smeared on some pink, and I added a few orange dots for contrast.

Stomp Dino (3)

Let the paint dry, then add the final adornment with the smaller pieces of foam you cut out.

Stomp Dino (5)

And now it’s time to stomp!

Stomp Dino (7)