Wright-Inspired Flyer

Wright Glider (8).JPG

After reading an informative article about the Wright brothers and the first flight, Travis was inspired to test out a poster board plane craft!

You’ll need a large piece of poster board for this project; ideally use two colors, but since I only had yellow, ours was a single-colored plane.

You’ll need to cut out five pieces: one that is 11 inches x 4 inches, two that are 9 inches x 1 inch, and two that are 4 inches x 1 inch. This was great measuring practice.

Wright Glider (1)

Travis loved drawing straight lines along the ruler!

Wright Glider (3)

Glue the 11 inch rectangle in the middle of one of the 9 inch rectangles. Glue one of the small rectangles at the top, as the nose of the plane. Let dry.

Wright Glider (4)

Glue the second 9 inch rectangle on top, so that the 11 inch rectangle is now sandwiched between them, as the wings.

Wright Glider (5)

Glue a craft stick lengthwise starting at the nose of the plane and add a large paper clip. Let dry.

Wright Glider (6)

Cut a notch in the tail-end of the plane; glue in the final small rectangle, upright, as the rudder.

Wright Glider (7)

Let dry completely. When it’s time to take flight, put a finger on either side of the craft stick, and launch!

Wright Glider (9)

Collagraph Prints

Collagraph Prints (11)

Collagraphy (not to be confused with calligraphy!) is a print-making technique that uses textured elements applied to a rigid surface to make a picture. It’s a fun art process that will engage your preschooler with texture in new ways.

Before school, Travis and I glued various items from our craft bin onto a piece of cardboard. Sponges can be cut into smaller sizes and applied.

Collagraph Prints (2)

We also added craft sticks, foam pieces, and buttons.

Collagraph Prints (1)

Corrugated cardboard works especially well; try using the reverse side of a coffee cup sleeve for this!

Collagraph Prints (5)

I asked Travis what kind of scene we should make, and he decided a spring garden. We glued down all our elements to make flowers, a tree, a fence, and “pebbles” on the ground (these were the buttons).

Collagraph Prints (3)

By the time he was home from school, the glue was dry and it was time to paint! I set out cups with different colors. For the first round, we stayed true to nature: a yellow sun, green flower stems, red blossoms, etc.

Collagraph Prints (6)

Press a piece of white paper over the print, making sure to press down hard on all your 3-D elements.

Collagraph Prints (7)

We lifted up the paper for the big reveal. Travis was astonished and loved it!

Collagraph Prints (8)

He immediately wanted to make a second version, but with different colors to see how it turned out.

Collagraph Prints (9)

We’d run out of yellow for the sun and sky, so instead painted these parts black. As we lifted off the paper, I said it looked like a black rain cloud. But Travis said, “It’s a turtle with a smile!” Talk about glass half-full, what a wonderful answer!

Collagraph Prints (12)

Then he decided it would be silly to make an all-black print, very Rorschach test of him.

Collagraph Prints (10)

In sum, this was a a fantastic art project and we would definitely do it again.


Early Explorers Space

LP Space alt.JPG

Travis’s penultimate package from his Early Explorers subscription was all about space and – forgive me for saying it – he had a blast with this one!

LP Space (9)

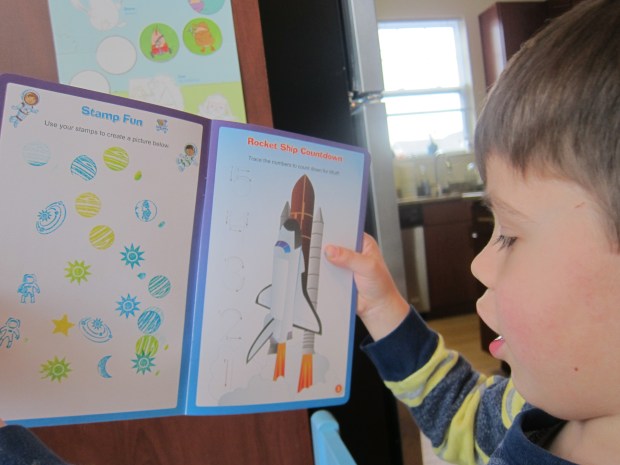
The activity booklet this month was heavy on tracing (letters, shapes, names of planets), but I considered that a good thing, since it reinforces lessons Travis is getting in preschool. We might have liked to see a more detailed space craft or science project, though, since the topic lends itself so easily to both.

LP Space (7)

Space Craft:

The craft was actually playing with the included keepsake this month (see below), a set of space-themed stamps and ink pads. The activity booklet included a blank page simply for “stamp fun.” Travis was thrilled seeing the images, including Jupiter, an astronaut, a solar system model, and more.

LP Space (1)

Once that page was filled, he needed more paper!

LP Space (2)

I loved watching his creativity as he stamped and then cut some of them out to play with.

LP Space (25)

Space Science:

As mentioned, it was a bit of a disappointment that the booklet didn’t feature a scientific experiment. But for “science,” we headed out to look at constellations. We also headed out one night to glimpse the International Space Station, You can check out when it will be in your area here. Travis got to stay up late (a treat!) so we could catch an 8.34 fly by. Looking, looking…

space station (1)

We think we saw it!

space station (2)

Space Keepsake:

These were the space stamps, of course! See my notes above in the craft section.
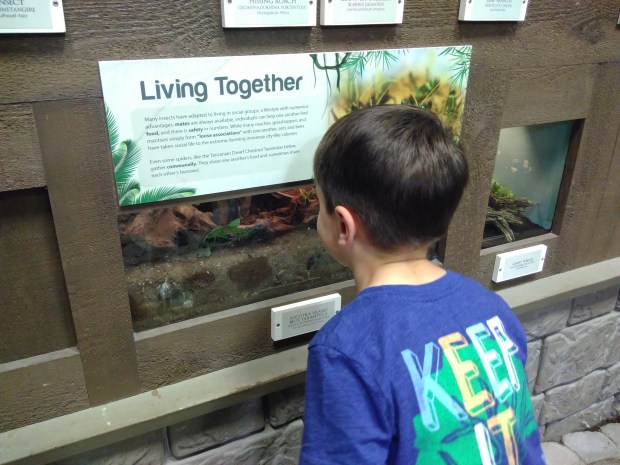
Space Field Trip:

Although not recommended as a further activity, it seems only natural to visit a planetarium near you during this unit. Since Travis had done so recently on a school field trip, though, we headed to a fantastic local museum all about aviation, and focused on the final stretch of the museum: space travel.

LP Space (11)

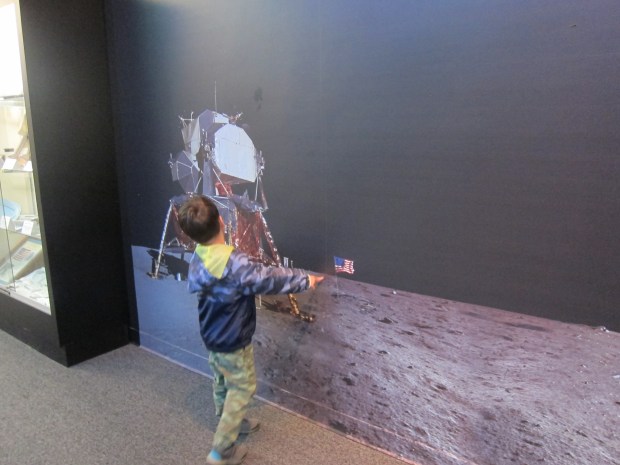
Travis has never shown much interest in this section before, but now he was enthralled. He got to simulate landing a space shuttle, see a real moon lander, explore a model of a future space station on Mars, and more.

LP Space (17)

Space Further Activities:

First, we checked out NASA’s website to see what astronauts are currently up to. Travis is captivated by the rovers on Mars!

LP Space (26)

Then, we found a blog post on Little Passport’s website about World Space Week. First we made a comet: attach aluminum foil around the tip of a craft stick to form a ball.

LP Space (18)

Cut metallic-colored ribbon into pieces about 6 inches long; attach to the stick.

LP Space (20)

Travis loved making his comet soar!

LP Space (24)

Then we designed an alien. Let your kid’s imagination run wild here!

LP Space (5)

Travis’s alien was green; he started with its belly, and said it had a belly ache which made it a mean alien – oh no!

LP Space (6)

I took him in front of his Little Passport’s map and had him close his eyes and point (you could also do this with a spinning globe). His finger landed on Africa, and his challenge was to describe Africa to an alien who’d never been to Earth. This might be easier for younger kids if you default to having them describe their hometown.

LP Space (8)

You can also bring space into your home with fun decorations. We traced stars and moons using a cookie cutter on construction paper, and also added glow-in-the-dark stars.

LP Space (22)

I sent a secret loving message on one section of wall. Travis made a “comet” and the “big dipper” in his area!

LP Space (23)

For some final learning, we went to the library for a books about space (he loved one about Mars, and another about the gas giants), and also found links online to learn more about comets and meteors, including this kid-friendly video.

LP Space (21)

As I said, what a blast!

LP Space (3)

Button Toss

Button Toss (6).JPG

This fun game (another winner from Highlights magazine) involves crafting on the front end and then becomes a sport with some math involved by the end!

To put it together, you’ll need 3 boxes, ideally of different sizes and heights. Paint each box a different color, for the best contrast.

Button Toss (1)

We also squirted on some puffy paint because, puffy paint.

Button Toss (2)

Note: If you don’t have paint, you can wrap them with wrapping paper instead. Glue the boxes together in any configuration and let dry.

Button Toss (3)

To play, I cut out paper circles and marked each with a different score for each box. The easiest was worth a 1, the second was a 2, and the hard one was a 5. (Note: Big kids can skip count by 5s, labeling the boxes 5, 10, and 15).

Button Toss (5)

In an empty egg carton, add paper circles numbered 1 through 12 (or 5 through 60, if skip-counting).

Button Toss (4)

Each player now needs 2 buttons – one to toss and one as a score piece.

Travis took his first toss – a lucky 5!

Button Toss (8)

I helped him count his button five spaces forward through our scoreboard.

Button Toss (7)

He loved the challenge of the game, and the challenge of counting his score each time.

Button Toss (12)

The first person to 12 (or 60) wins!

Button Toss (11)


Maraca Craft Challenge

Maraca Challenge (2)

Last month, Travis’s Highlights magazine challenged him to make robots with only a few simple items. This month, the challenge was maracas!

I laid out: empty plastic water bottles, dried beans, tape, and craft sticks. “How would you make these into a maraca?” I asked him.

“Let’s add beans first,” he decided right away.

Maraca Challenge (1)

He began dropping in the beans one-by-one. When I added a few faster to a second bottle, he admonished, “No, copy the way I do!” My teacher for the day!

Next, he needed to figure out how to use the craft sticks. He requested a piece of tape and soon had a handle.

Maraca Challenge (3)

Then he decided a double-handle in the shape of an X was sturdier.

Maraca Challenge (5)

Finally, the caps were reattached, and we could shake up a storm! I loved watching him puzzle through this challenge. What does your child’s maraca look like? Please share in the comments!

Maraca Challenge (4)

Super Healthy Cookie

Healthy Cookie (5)

Much like the Oatmeal Energy Balls we made a few weeks ago, these cookies are designed to give your kids a boost! They’re perfect for after school or after sports practice.

Healthy Cookie (1)

Ingredients:

  • 3 ripe bananas
  • 1/4 cup melted coconut oil
  • 2 cups rolled oats
  • 2/3 cup flaxseed
  • 1 cup shredded coconut
  • 1/2 teaspoon cinnamon
  • 1/4 teaspoon salt
  • 1 teaspoon baking powder
  • 1 (6-ounce) bar dark chocolate
  1. First comes the fun part: place the bananas in a bowl and mash with a potato masher until very smooth.
  2. Add the coconut oil, oats, flaxseed, shredded coconut, cinnamon, salt, and baking powder.
  3. Chop the chocolate bar into pieces, and stir in.
  4. Drop the dough by tablespoons onto baking sheets. Bake at 350 degrees F for 20 minutes, until lightly browned on the bottom.

Healthy Cookie (4)


Play with a Pile of Pennies

Pile of Pennies (9).JPG

If you’re traveling with a preschooler, look no further than the pennies in your wallet for heaps of entertainment. Travis and I had fun with a few variations on penny games over a recent weekend away!

For the first, place a plastic bowl on the floor. Challenge your child to see if they can get all the pennies in the bowl dropping them from a height.

Pile of Pennies (2)

We liked seeing how high we could go – from all the way over our head?

Pile of Pennies (1)

Travis decided it worked best from forehead height!

Pile of Pennies (3)

Next we placed a penny under a piece of paper, and traced over it to reveal Abraham Lincoln.

Pile of Pennies (4)

Get silly and add a little hat and body!

Pile of Pennies (5)

Finally, we played a guessing game: If we tossed our whole handful of pennies, would there be more heads or tails?

Pile of Pennies (6)

This was Travis’s favorite of the games. We played a few rounds and counted them up each time. If you want to be more statistcal about it, make a chart and see how many times you’re right out of 10 tosses (or more!)

Pile of Pennies (7)

How else could you play with pennies on a trip? Please share in the comments!

Rubber Band Launchers, Two Ways

Spider Launcher (13).JPG

Ok, we’ve launched marshmallows from cups and rockets from straws, so now it was time for Travis to play around with how he could launch things with rubber bands!

First up, thanks to a renewed fascination with bugs, was a Spider Launcher. This project was a little tricky; we had to redo it twice before we got the elastics right!

First, cover a sturdy cardboard tube (such as an empty roll of packing tape) with construction paper.

Spider Launcher (1)

We chose orange because, well, spiders and Halloween and all that, but any color would work. Glue or tape the paper on.

Glue 4 lollipop sticks around the tube so that they form a square.

Spider Launcher (2)

Leave these to dry for at least 2 hours, so your structure is sturdy. Full disclosure: we did have one pop off, and I duct-taped it back on.

To make your “web,” slip an elastic over all 4 posts. Loop it around each post, then push down to the bottom of the sticks.

Spider Launcher  (4).JPG

Slip a second elastic over the post. Completely lift the first one up and over the second elastic (so only your second elastic is now looped on the lollipop sticks, if that makes sense).

Spider Launcher (6)

Repeat with a third elastic, slipping it around the post, and then lifting the second elastic completely up and over it.

Repeat with a fourth elastic, slipping the third elastic completely up and over it. Confused yet? I hope the visual helps!

Spider Launcher (12)

Now place a toy spider in the middle. Pull back on the tautest, center of your web. Snap the elastic back, and spider flies!

Spider Launcher (10)

This was tricky for my four year old, but he could do it with help for bigger launches, and by himself for shorter launches.

Spider Launcher (9)

Even better, his bug toys now had a web to call home, so overall it was a success!

Since this turned out to be so complicated, I also asked him if he wanted to make a much simpler rubber band launcher, using just with a couple of elastics and a cup. Here, then, is the Rubber Band-Powered Cup Launcher.

Rubber Band Rocket (5)

Put two rubber bands on a sturdy paper cup so they form a cross.

Rubber Band Rocket (1)

(Note: It may help to stretch your rubber bands out a few times to loosen them, or your paper cups will crumple).

Rubber Band Rocket (2)

Place a third rubber band around the cup to hold the other two in place.

Rubber Band Rocket (3)

Press this cup down over a second paper cup. The elastics will go taut, and when you release… Boing!

Rubber Band Rocket (4)

This one is simple enough to do with a crowd of kids, and would be a fun one outdoors, perhaps for any upcoming Memorial Day barbecues!

Bubbling Bath Fizzies

Bath Fizzies (6).JPG

If you’re still wondering what to make for grandmas, moms, aunts, or any other special mother-figure this mother’s day, Travis and I have got you covered with this treat for the toes from Highlights magazine. The gift is equal parts craft and science, which makes it a fantastic way to engage kids in the spirit of gift-giving.

Bath Fizzies (2)

In a large craft bin, Travis mixed up the following ingredients:

1 cup baking soda

1/2 cup citric acid

1/2 cup Epsom salts

3/4 cup corn starch

Make sure to tell your child that the mixture isn’t edible, even though most of the ingredients are, especially if you’re used to cooking together!

Bath Fizzies (1)

In a small bowl, we whisked together 2 tablespoons olive oil and 1 tablespoon water. Add the liquids to the mixture slowly, stirring until combined. Kids will want to wear goggles (or sunglasses, in a pinch!) to protect their eyes, since it will bubble as you stir.

We also added blue food coloring for a pretty tint and a few drops of vanilla extract for a nice smell. The downside was that this made our mixture a little too liquidy (you want it to be slightly dry and crumbly). It seemed all right at first, but as our bath bombs dried, they puffed out. Note Travis in his too-cool-for-school sunglasses, ha!

Bath Fizzies (3)

Use an ice cream scoop to scoop out each portion, and pack down tightly. Gently release onto a paper towel and let dry for a full 24 hours.

Bath Fizzies (4)

Package the bath bombs in any pretty tissue paper or parchment paper.

Bath Fizzies (7)

We also added a little gift tag with instructions for treating those tootsies!

Bath Fizzies (8)

And of course we saved one to test out at home! Travis loved watching it fizz, before putting his feet in to soak. Don’t forget to give a quick explanation of why it all fizzes up – the baking soda and citric acid reacting together once in water, of course, which releases CO2 gas (ergo, bubbles).

Bath Fizzies (9)


Gallant Challenge: Bugged

Bugged (7).jpg

Last month, Travis took on his first Gallant Challenge from Highlights magazine: to spread kindness to neighbors!

This month’s column was about a girl who loved bugs but was bullied by friends at school about her interest. After her mom wrote of her plight, entomologists from all over reached out and encouraged her not to give up her dream of working with bugs.

This article was a great jumping-off point to talk about bullying. I asked Travis if he ever saw similar behavior at his school, to which he (thankfully!) replied now. But we talked about what to do if anyone ever bullies him or he witnesses bullying. Highlights encouraged kids to write in their own stories of being bugged about an interest, but we left that bit to older readers!

And then to make the lesson fun, we headed off to see just how cool bugs were, in support of the girl in the article.

A museum near us has a fantastic bug exhibit, and we spent the whole afternoon marveling.

Bugged (8)

This was the biggest cricket we’d ever seen!

Bugged (3)

We got to marvel at butterflies just emerging from the chrysalis.

Bugged (2)

This rhinoceros beetle was almost as big as Travis’s arm!

Bugged (5)

Travis introduced the little toy centipede he bought in the gift shop to a real centipede.

Bugged (4)

Exposing your child to something new or different can be a great way to combat bullying, or following along a crowd that bullies another child; after all, so much of bullying stems from ignorance or not understanding another person’s viewpoint. Needless to say, Travis was captivated by bugs the entire outing. Hey, these ants seem to have the right message!

Bugged (1)