Old English Crackers

Christmas Crackers (6).JPG

Every year at Christmas dinner, we pull about old-fashioned Christmas crackers. If you don’t know what these are, it’s a British holiday tradition, featuring a cardboard tube wrapped in shiny paper. When pulled apart, it makes a loud “crack!” (hence the name) and the recipient finds a joke or toy inside.

This year, Travis and I made a homemade version! I bought a few trinkets at the toy shop that could fit inside toilet paper tubes. Mini tins of putty, mood rings, and jingle bell necklaces were all perfect!

Christmas Crackers (1)

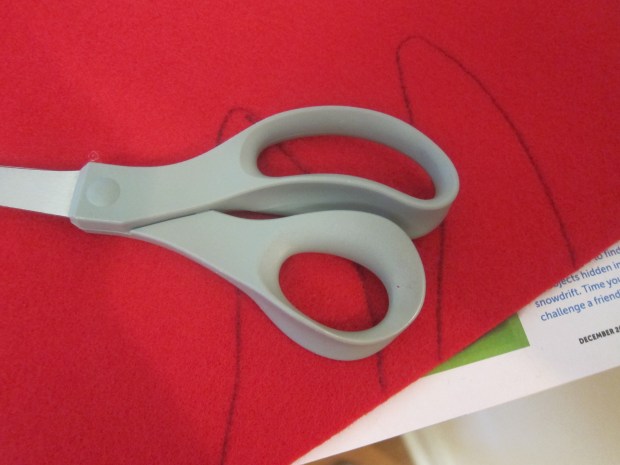
Cut a 12-inch square of holiday wrapping paper, and wrap around the empty toilet paper tube. Twist the edges and secure with pretty ribbon.

Christmas Crackers (2)

Now cut the tube in half. Travis helped place a toy inside each tube, as well as a joke from his Raddish Kids Holiday Traditions crate; you can also write your own jokes on cardstock. Tape the two halves of the tube back together.

Christmas Crackers (4)

Cut a second piece of wrapping paper, this time measuring 12 inches by 4 inches. Wrap around the tube to conceal that you’ve cut it in half. Your cracker is now ready to pop!

Christmas Crackers (5)

We repeated 6 times so everyone at Christmas dinner will receive one… But Travis already stole one mood ring because he loved it so much, which means one unlucky Christmas Goose is going to receive an empty cracker! Chances are that’s going to be mommy.

Christmas Crackers (3)

History Behind Hanukkah Traditions

Shining Menorrah Hanukkah (7).JPG

Hanukkah begins tonight, and although it’s not a holiday we celebrate, Travis’s latest Raddish kit contained a yummy traditional recipe (latkes) as well as an interesting lesson plan about the holiday. So we were intrigued to delve into it!

As background, we read a quick poem about Hanukkah and enjoyed the suggested video on the history of the holiday.

Shining Menorrah Hanukkah (2)

There were several suggested ways to craft a menorah, thereafter. We tried a very simple version made simply with painted clothespins clipped to craft paper or folded paper plates…

Shining Menorrah Hanukkah (8)

…but then also copied the method we used earlier this month for advent candles. This time, I cut toilet paper tubes in half for shorter candles and we wrapped them in blue cardstock with blue ribbon.

Shining Menorrah Hanukkah (1)

Wrap a taller candle in white cardstock for the center shammash. Add a felt-wrapped tea light to each candle. I brought this menorah to the table for Travis and I to discuss. We counted the candles, and talked about how each one represented one night of the miracle.

Shining Menorrah Hanukkah (5)

Time to light it, making sure to work our way right to left!

Shining Menorrah Hanukkah (3)

To add to our discussion, we waited until dark and then turned out all the lights except the candles. Travis helped brainstorm a list of other light sources, including flashlights, light bulbs, and the sun.

Shining Menorrah Hanukkah (11)

We discussed the differences among them, and he completed the sentence: “Light is important in my life because…” citing the ways it helps him see and focus and feel unafraid.

Shining Menorrah Hanukkah (10)

I was glad this lesson offered the chance to learn about another culture and customs. For bonus fun, don’t forget to play a game of dreidel with chocolate gelt for a reward.


Play Tourist in Your Town

Tourist in Town (6).JPG

I love playing “tourist” in our home town with the kids, finding new ways to appreciate and discover the same place. One perfect way to do this is to head out in search of holiday decorations in December, when the same-old same-old houses suddenly look new again decked in holiday lights. Acting on a tip for the best neighborhood in town, we headed out to play tourist!

We made it special by getting everyone in pajamas first. And Travis got a candy cane!

Tourist in Town (1)

Don’t forget to set the radio to the holiday station!

Tourist in Town (2)

Travis knew we had a particular neighborhood as our destination, but that didn’t stop us from ogling every house along the way, rating the ones we liked best.

Tourist in Town (3)

The recommended neighborhood did not disappoint. There were flying Santa’s sleighs, giant penguins in doorways, sparkling candy canes, and more.

Tourist in Town (5)

Travis took it all in with wonder!

Tourist in Town (4).JPG

This was such a fun way to appreciate our town anew.

Snowdrift Detective Game

Snowdrift Tec (3).JPG

There’s no need for real snow in order to play this game – although we have plenty of that out the door. Instead, fill a container with kosher salt and pretend to unearth the treasures that have been buried in the “snow”.

Travis helped me select a few small items from around the house, including a playing dice, rubber bands, clothespin, key, and coin.

Snowdrift Tec (1)

I wrote down all the words in a list and we glued this to the top of a mason jar lid, so we wouldn’t forget what we “buried”!

Snowdrift Tec (4)

Glue a colorful ribbon around the lid to make the jar feel festive. Now alternate adding kosher salt and the items until nearly full, leaving a bit of room at the top.

Snowdrift Tec (2)

Travis and I took turns shaking the jar and finding everything on the list. What detectives we were!

Snowdrift Tec (5)

Here’s hoping we don’t lose anything in a real snowdrift this winter.

Snowdrift Tec (6)

Snowman Craft Challenge

Snowman Craft Challenge (6)

Travis had lots of laughter tackling this month’s craft challenge from Highlights magazine: to make a snowman using anything except cotton balls. This very open-ended project had Travis raiding the craft bin for anything that seemed snowman-like: think white and fluffy. We also thought about accessories: orange for carrot noses, pom poms for buttons, etc.

On his suggestion, I cut out two circles from white felt to be the snowman’s body. From there, Travis veered in a decidedly nontraditional direction!

Snowman Craft Challenge (1)

First we used old thread and wiggle eyes for the face. Travis glued on a piece of string upside down to make it a sad snowman – oh no!

Snowman Craft Challenge (2)

Then he decided it was sad Santa (because no one believed in him!), and added red pom poms buttons and a “belt,”

Snowman Craft Challenge (3).JPG

The snowman got sillier and sillier from there, briefly adorned with holiday-patterned cupcake liners, and then soon denuded of its items.

Snowman Craft Challenge (5)

Travis thought ripping things off the felt was almost as fun as crafting them on. I guess snowmen do melt!

Snowman Craft Challenge (4)

Peppermint Candy Box

Peppermint Candy Box (5).JPG

It was all about holiday gifts in our home over the weekend. When we spotted these decorated cookie tins in Travis’s Highlights magazine, we knew we’d found the perfect gift for his kindergarten teachers!

Wrap a store-bought cookie tin in white felt.

Peppermint Candy Box (1)

Use hot glue or tacky glue to adhere securely. We wrapped only the lids, since the bottom of our tins were already printed in holiday pictures, but you can wrap the whole box if desired. Cut out red pieces of felt to mimic the red swirls of a peppermint candy and glue these to the lid.

Peppermint Candy Box (2)

Fill the tin with your favorite holiday cookies or other treats, of course!

Peppermint Candy Box (3)

To finish the presentation, wrap in plastic wrap (or clear cellophane) and secure with green ribbon on each side so it looks like a peppermint candy waiting to be twisted open.

Peppermint Candy Box (4)

Crystal Chemistry Tree Crate

Crystal Tree (5)

Of all the holiday projects from Kiwi Co this year, this was by far Travis’s favorite. You can follow along on this project with materials from the craft store and drugstore; do supervise very closely, as chemicals (ammonia in particular) are involved. But the result is stunning!

To start, we needed to prepare the planting pot. Insert a plastic cup into a silver cup, and decorate with the provided red ribbon for a festive touch. The tree is two pieces of cardboard that slot together. Travis “planted” this firmly.

Crystal Tree (1)

He loved the felt ornaments to hang on the tree!

Crystal Tree (2)

As a final decoration, twist together three silver pipe cleaners, and arrange as a star on top.

Crystal Tree (3)

Now it was time for some science. I poured the bluing solution into the plastic cup first. A bluing solution is potassium nitrite and sodium hydroxide dissolved in water. Travis was a good sport listening to all the safety cautions about handling these chemicals

Next I poured in the provided ammonia. He was not a fan of the smell! Finally, we poured the provided salt packet evenly around the tree.

Crystal Tree (4)

Use the provided pipette to drip the solution over the tree branches until saturated.

Only an hour later, I noticed that already a few little sparkles had appeared. Travis went to bed full of wonder at how it might look in the morning.

To be perfectly honest, I’d forgotten about it when we came down for breakfast. “Mom, look!” he called out. I, too, was stunned with the white frosty crystals blooming all over the branches.

Crystal Tree (6)

One note of caution: the crystals are very delicate and will fall off at even the tiniest budge, so have your tree some place up high where it won’t get jostled.

Over breakfast, read about what happened. The cardboard soaks up the solution (so a plastic tree, for example, wouldn’t work here), but the liquids evaporate overnight as gases. The salt can’t do this, so it is left behind. Ammonia is present because it helps the evaporation happen faster. And voila – a chemis-tree!

Crystal Tree (7)

LED Holiday Luminary

LED Xmas Tree (6)

This little holiday project actually falls under Kiwi Co’s Tinker Crate designation (for ages 9 and up!) but I knew it would be feasible for my gadget-loving kindergartner with some grown-up assistance.

The very first step is to put the batteries in the provided battery pack. Travis has had practice in this area, but use your judgement based on your child’s age and experience with batteries.

LED Xmas Tree (1)

Next we slipped the provided LED light into the wooden base. Kids can choose between a green one or white one, and Travis chose green! I did the actual attaching of wires for him. We tested our battery – success! – before switching off the switch for now.

LED Xmas Tree (2)

Time to decorate the tree: rub sandpaper over the provided plastic tree shape briefly, which will give it the look of “branches”.

LED Xmas Tree (3)

Travis loved decorating the tree with the provided stickers, including ornaments, candy canes, holly berries, and more.

LED Xmas Tree (4)

When he declared it done, we used sticky dots to secure the tree to the provided wooden frame. This is then inserted over the battery and secured into the stand with sticky foam dots.

It was time to turn the battery to “on”. What a beautiful addition to our holiday display!

LED Xmas Tree (5)

I Spy an Ornament

I Spy Ornament (2)

Here’s a fun variation on “I Spy” to play around the Christmas tree after the sun goes down!

Turn off all the lights in the room so that the only illumination left comes from the tree lights. Take turns playing classic “I Spy” (“I spy something green”, “I spy something gold”,) and have the other family members guess which ornament it is.

I Spy Ornament (3)

Travis loved being in charge of shining a flashlight on the guessed ornament if it was correct. Because he’s young, his clues are sometimes hilarious. “I spy something at the top of the tree with wings.” Our angel!

I Spy Ornament (4)

This can also be a fun way to talk about family ornaments, for example explaining the significance behind homemade ones, family heirlooms, or those purchased on vacation.

I Spy Ornament (5)

Travis loved the game so much we might just play every night until the tree comes down!

I Spy Ornament (1)

Watch the Same Holiday Movie

Holiday Movie (9)

Holidays are rife with tradition and I love building these up with my children every year, sometimes continuing traditions from my own childhood, and sometimes creating new ones. One classic is to share a holiday film as a family and make it something special you only watch this time of year.

In our household, that means two Christmas movies in particular. The first is the wordless Snowman, with its stunning visuals and rich orchestral score. If you don’t know it, it tells the tale of a boy who makes a snowman that takes him on a magical flight to the North Pole. Spoiler alert: the sun comes out the next morning and you can guess the Snowman’s fate. It didn’t make me cry as a child, but it sure makes me do so when my kids watch!

For more fun, last year Travis watched Home Alone on repeat – literally – when he was sick just before Christmas. This year, we returned to it in better health, and now it’s linked with this special time of year.

Holiday Movie (8)

Chances are this one might get you a little teary as a grown up, too!

Of course it’s always fun to see new holiday movies. This year the extended family watched Elf.

Holiday Movie (5)

It sure got big laughs, plus had everyone gathered around one cozy TV set. Try out a few films and see which will become your holiday favorite. Next year, we even plan to serve movie-themed snacks!

Holiday Movie (4)

What’s your kids’ favorite holiday film? Please share in the comments!