Seasons in the Hemispheres

Hemispheres (4).JPG

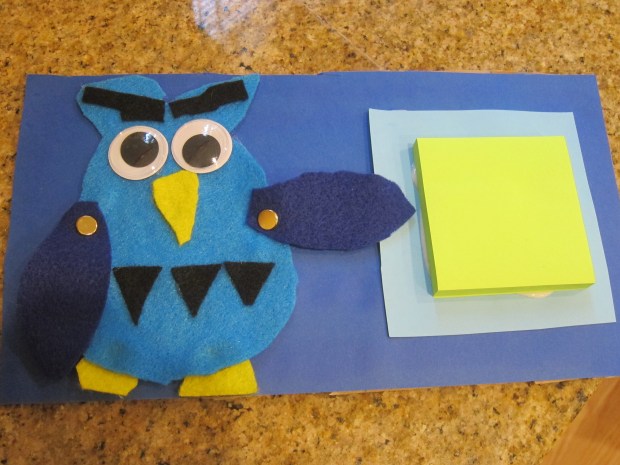
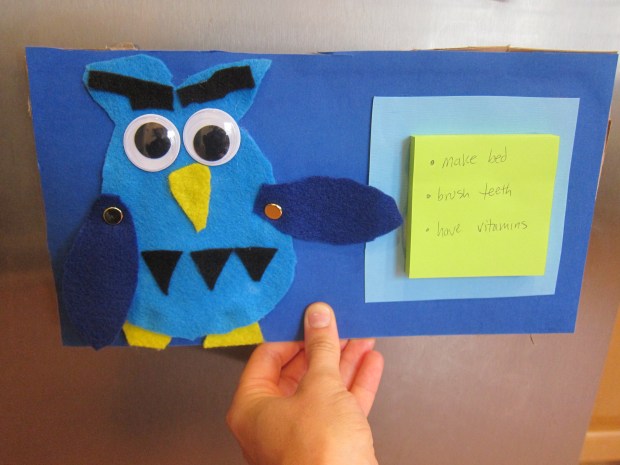
This very simply lesson from Raddish Kids was informative, though it lacked the “wow” factor of other lessons from the company. Still, Travis was intrigued and stuck with it from start to finish.

First, I asked him to name the four seasons. Chart your child’s answers, and then make a list of different aspects of the seasons. Travis came up with things like: cold versus hot; snow versus sun; and different colors, like white versus green.

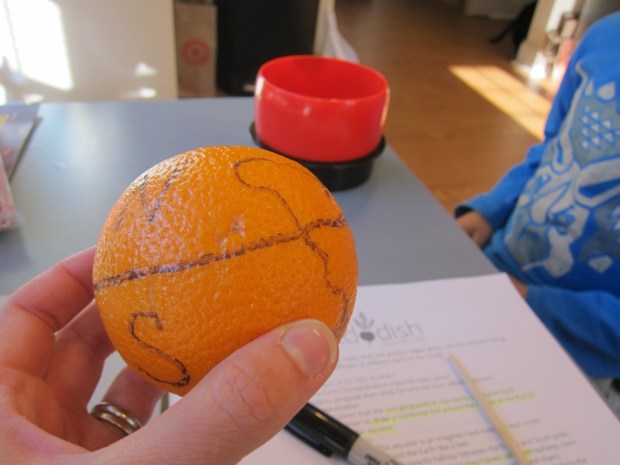
Now time for a little lesson; the world is divided into northern and southern hemispheres, separated by an imaginary line called the Equator. When it it is summer in the north, it is winter in the south, and vice versa.

Hemispheres (1)

To illustrate this point in a tangible way, draw a line around an orange. We labeled the top N and the bottom S. I had him point out where we lived, and we drew a simple outline for North America. An outline of Argentina, where our recipes came from, went into the south.

Hemispheres (2)

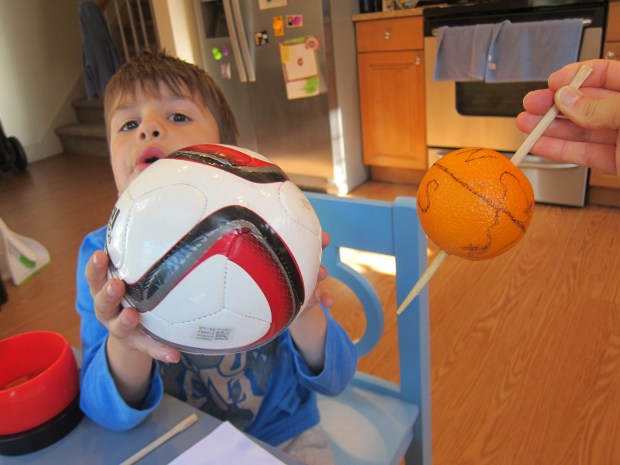
Spear the orange with a chopstick from “north pole to south pole” to show Earth’s axis. Now hold up a soccer ball as your sun. As you rotate the “Earth” around at a slight tilt (fun fact, Earth’s axis is tilted 23.5 degrees), your child will start to see why sometimes it is summer and sometimes winter.

Hemispheres (3)

We watched two suggested videos for a slightly more in depth explanation.

Hemispheres (5)

Now it was time for Travis to plan his winter birthday party! As a summer baby, I had him imagine what it would be like to live in a southern continent. He decided it would be an ice party, where everyone drank hot cocoa and came in snow boots.

Hemispheres (7)

If you really wanted to go all out for this lesson plan, you could recreate a mini birthday celebration of opposite seasons for your kids! At the very least, celebrate with some dulce de leche cookies.

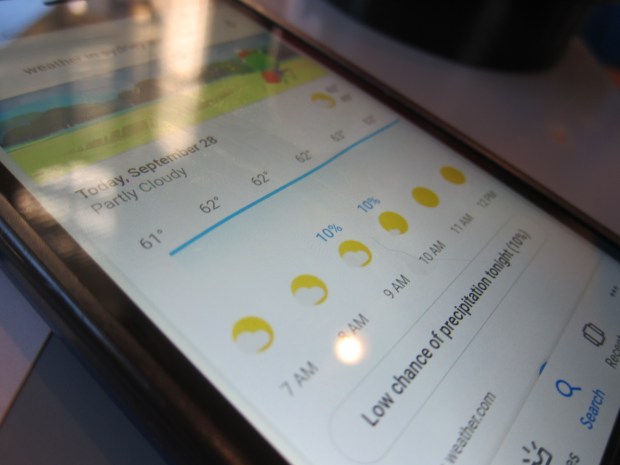
Finally, we checked out the difference in temperature in the hemispheres today. Because it is fall/spring, the difference wasn’t thrillingly obvious. Older kids may want to pick a city in the opposite hemisphere and chart the differences in temp over a whole week.

Hemispheres (8)

Gallant Challenge: Endangered Animal Art

Endangered Animal (2)

Travis is inspired every time he reads the profile on Gallant Kids in his Highlights magazine. This month’s read was about a girl who paints pictures of endangered animals and sends the proceeds from her sales to charities that aid animals. We loved the idea, and immediately decided to make some pictures of our own.

Because Travis loves snakes, we looked up which species have populations that are decreasing or at risk.

Endangered Animal (1)

First, Travis drew a pit viper.

Endangered Animal (3)

He was so proud of the colors he blended together and immediately wanted to draw more snakes.

Endangered Animal (4)

Pretty soon, he had an “art gallery” wall filled with a snake pictures, featuring everything from a yellow-horned lancehead snake…

Endangered Animal (5)

…to mom and baby tropical forest snakes.

Endangered Animal (6)

Obviously Travis won’t be making money from these little drawings, but I loved how proud he was, how the activity got him thinking about conservation and protecting animals, and how it challenged his artistic skills as he thought hard about how a snake’s body and head should appear on the page.


Snack Animals

Snack Animals (8).JPG

Independence is so crucial to kindergartners, and I have loved watching Travis’s confidence grow since school began only a month ago. Now, he wants to do all the little steps himself each day, from buttoning shirts to buckling his backpack. Being able to serve themselves drinks and snacks is also key for kids’ independence at this age, so we created this adorable snack animal to keep easy snacks at hand!

To start, remove the lid from an empty oatmeal canister, and trace twice on cardboard. Note: I found an old cereal box easier than stiffer cardboard packaging for tracing and cutting out. That said, it means your final animal won’t be quite as sturdy and might sit on your counter instead of standing!

Draw legs below each circle and cut out; these will be the front and back of your animal.

Snack Animals (1)

Travis decided we should turn ours into a cow, but really any animal will work! Highlights magazine also suggested a pig or a deer.

Snack Animals (3)

For the cow, we painted the legs white with black spots.

Snack Animals (2)

I cut an additional shape to be the cow’s head, which we glued to one of the circles.

Snack Animals (4)

Don’t forget to paint the canister, too, which received its own coat of white paint and black dots.

Snack Animals (5)

Once the paint dries, glue the head piece to the lid of the canister. Glue the back legs to the back of the canister.

Snack Animals (6)

Let the glue dry, then stuff with treats! You can also add yarn for a tail, depending which animal you choose. Pink would have been cute on the pig version!

Snack Animals (7)

As noted, our cow kneels down a bit, but Travis loves that he can help himself to an afternoon treat.

Snack Animals (9)

Exploring Patagonia

Patagonia (1).JPG

Here was a very different lesson plan from Raddish Kids, in conjunction with the Comida Argentina recipes Travis has been cooking up. My kindergartner got to learn social studies, all about one region of the world!

Truth be told, the unit was quite simple compared to many Raddish lessons. I showed Travis the Patagonia region on a fantastic map we have featuring elevated surfaces for mountains. He immediately picked up on how mountainous the region was, and also how close to the ocean.

We read a few fun facts about the area, including the discovery of dinosaur fossils. Then it was time for a video!

Raddish provided a worksheet for children to draw images of what they learned in the travel video. Travis immediately paused it and said, “Mom, there’s water!” His delight was infectious, pausing the clip every few seconds to draw the glaciers (“silvery mountains!”), desert, flies, or any other things that jumped out to a five-year-old boy.

Patagonia (2)

There are numerous ways to continue the lesson from here. Children are encouraged to present their knowledge while pretending to be something, be that an archaeologist, chef, journalist, or artist.

Because Travis loves YouTube clips, I suggested he be a travel blogger giving his review of Patagonia. But first, he wanted to make those glaciers! He raided the craft bin and wrapped Styrofoam balls in aluminum foil. These were glued to a sheet of shiny cardstock as “ice”. He added dowels as “desert”. All of this received lots of glue on top as snow.

Patagonia (3)

Without further ado, here’s my little travel blogger, enticing you to Patagonia!

Peace Pendant

Peace Pendant (6).JPG

There’s been a bit of discord in our home lately, not unexpected with a five year old! Kindergarten routines are new, which makes things understandably tough, and Travis is at an age where asserting oneself and independence are so important. This craft now serves as a token to make peace whenever we get caught in a clash of wills at home!

Trace two circles on craft foam, one purple, one yellow.

Peace Pendant (1)

Leave the purple circle whole and cut the yellow one into a peace symbol. The latter was tough for Travis, so I helped out. Glue the yellow to the purple, cutting to fit if needed.

Peace Pendant (2)

Travis loved adding stick-on craft gems for decoration. Groovy!

Peace Pendant (3)

Glue a piece of wide ribbon into a loop, and then adhere to the back of the purple foam.

Peace Pendant (4)

Thread a length of string or yarn through the ribbon so it can be worn as a necklace. Now whoever needs to stop and take a deep breath can pause and put on the pendant! Try it and see if it brings a little peace to your home.

Peace Pendant (5)

Leaf Canvas Craft Challenge

Leaf Craft Challenge (5).JPG

What was this month’s craft challenge from Highlights magazine? To use a leaf as the canvas for painting! You’ll want to use acrylic pants for the craft, which will hold up better than tempera paint.

No doubt there are fantastic artists who could create a whole miniature scene on their leaf. For my kindergartner, the project was more about the novelty of using nature as the canvas.

We found some giant leaves on a nature walk and knew those were the ones to use!

Leaf Craft Challenge (1)

At first, he painted along the lines of the leaf’s veins, which was great for reinforcing a recent science unit on trees and nutrition.

Leaf Craft Challenge (2)

Then he had fun blending colors and seeing how they mixed on the leaf.

Leaf Craft Challenge (3)

At the end, he liked making big blobs of paint.

Leaf Craft Challenge (4)

Whether your little Picasso makes something abstract, something highly detailed, or just has fun smearing paint, this was a simple and fun alternative to painting on paper.

Leaf Craft Challenge (6)

Build-Ahead Breakfast

Build Ahead Breakfast (4)

Mornings are crazy enough without having to worry about making a hearty breakfast and packing a bagged lunch. Take one piece out of the equation with this fantastic wrap you can put together the night before. Bonus points: Kids will love helping, and can alter the ingredients until they find their favorite combo.

Build Ahead Breakfast (2)

We like these with the California burger from Amy’s Kitchen.

Ingredients:

  • 2 small flour tortillas
  • 1 veggie burger patty, cooked and chopped
  • 1/4 cup chopped fresh chives
  • 1/2 cup shredded Daiya cheddar
  • 2 tablespoons chopped sun-dried tomatoes
  1. Place the tortillas on a flat work surface. Arrange the ingredients in rows working from left to right, dividing evenly among the two tortillas.
  2. Fold up the bottom of the tortilla over the toppings, then begin rolling from the left and roll up tightly.
  3. Wrap in parchment paper and refrigerate overnight. To serve, microwave for 30 seconds.

Build Ahead Breakfast (3)

Dragonfly Fishing

Dragonfly Fishing (9)

When I spotted this craft in Travis’s latest issue of Highlights, I knew it was going to be more of a mommy project. Since Highlights appeals to kids up to age 12, some of the activities inside are a bit complicated for my kindergartner. But I knew he’d love the water-powered dragonfly, which relies on hydraulics to scoop up little homemade “flies”.

To start, tint a bowl of water with blue food coloring. Use a medical oral syringe to inject water into 3 feet of air-line tubing, and then fill the syringe.

Dragonfly Fishing (1)

Remove the air from a second oral syringe, and insert these into the ends of the piping. I found it useful to duct tape around the connections for added security.

Dragonfly Fishing (2)

Use hot glue to attach two jumbo craft sticks so they overlap slightly. Glue the water-filled syringe onto one end of the craft sticks.

Dragonfly Fishing (3)

Next, glue the bottom half of a paper cup to the other end of the craft sticks. Although not necessary, we painted our cups green. Glue a second bottom half of a paper cup to the end of the syringe’s plunger; your two cup tops should touch.

Use washi tape or thin duct tape to secure the tubing to the end of the craft sticks, below the filled syringe. Tape a 1-foot dowel to the empty syringe and tubing, as shown.

Dragonfly Fishing (6)

For the finishing touch, we made a dragonfly out of cardstock, adding eyes and wings outlined in marker. Glue this onto the craft sticks above the cups.

Dragonfly Fishing (5)

For our “flies,” we decorated yellow pom poms with cardstock wings (cut a heart shape from white cardstock) and wiggle eyes.

Dragonfly Fishing (4)

Now it was time to test the hydraulics! Release the water from the first syringe. Ideally, it will power the second syringe, which powers the cup “mouth” to open.

Dragonfly Fishing (8)

See if you can scoop up your flies!

Dragonfly Fishing (7)

Magical Realism

Magical Realism (3).JPG

This lesson on a popular Latin American genre was meant to accompany the chimichurri sandwiches in Travis’s Raddish Kids crate. It was a bit advanced for a kindergartner, but Travis got into it!

First I taped a large piece of craft paper to the wall with two columns and labeled them “real” and “magical”. I asked Travis to name real items first. The list he came up with certainly isn’t the one I would have, but that was part of the lesson’s charm!

Magical Realism (1)

I thought “magical” might be harder for him but he was familiar with concepts from favorite stories, including “magic wand” and “the Force.” I pointed out to him the key to the magical realism genre: a story that takes place in a real setting, but that has magical elements that the characters accept to be real.

With that definition in place, we followed up with concrete examples: a book and a movie. First he watched James and the Giant Peach, a great example because it starts out with live actors and then transforms to animation once the magic sets in.

Next was a read-aloud of Where the Wild Things Are and Travis pointed out the magical components of the story as we came to them.

As a final task, we made up our own magical realism story. You can run through the elements of a story with your kids first, namely:

Characters

Setting

Problem

Solution

Travis’s tale was a bit simplified, but it centered around a vortex that opened up (magical!) while he was playing with his friend on the school playground (real!) where an alien came to meet them.

Magical Realism (4)

The alien had 14 eyes and 34 legs. What creativity! There wasn’t exactly a problem or solution to his tale, but for a kindergarten, it was a great first intro to this genre.

“Owl Do It” List

Owl Do It (6)

Fall is here, and with it a return to routines and responsibilities. If your child is having a hard time adjusting to the steps involved for school or sports or around the house, then you can put together this adorable chore reminder list.

To make the chart, I cut owl pieces from felt, using light blue for the body, dark blue for wings, yellow for beak and feet, and black for feathers and eyebrows. I used hot glue to affix all these owl parts, minus the wings, and then glued on wiggle eyes.

Owl Do It (1)

For the wings, poke a hole in the felt and use a brad to attach them to the body. Now the wings can move up and down!

Owl Do It (2)

Glue a piece of dark blue cardstock onto a cardboard rectangle. Add a smaller square of light blue cardstock on one half; glue the owl to the other half. Glue a post-it notepad on top of the light blue square.

Owl Do It (3)

Now write in chores, reminders, or anything else that’s helpful for your child! Travis felt proud crossing off steps in the morning.

Owl Do it (4)

If you like, glue a felt loop near the bottom and slide in a pen. That way your child will never have to go searching for one. You can also glue a magnet onto the back of the cardboard so the list hangs up on the fridge.

Owl Do It (5)

Hopefully soon you’re hearing, “Owl do it myself!”