Holiday Card Circuits

Holiday Card (4)

Need to celebrate a birthday with someone from afar during COVID-19? Or planning on sending cards for Passover or Easter (or whatever the closest holiday might be?). In this age of social distancing, here’s a card that will literally shine through, even over Zoom!

This card works on the exact same circuit principle as the graphite circuit Travis made recently. But first we needed to make a pretty card! Since ours was a birthday card, we chose heart-print scrapbook paper and glued a felt heart to the front. Make sure you cut a hole where your LED light will shine through.

Holiday Card (1)

Of course you could go in so many directions with this card, whether one for Easter (a light-up chick or egg?) or just a fun theme to say hello like a UFO beam or fire truck siren. You can use stickers or cardstock cut-outs for the decorations.

Inside, make a rectangle from three strips of aluminum foil and tape down, leaving one corner that still flaps open. Also leave a gap at the top where the LED light will go. Tape down the legs of the LED, one to each side, making note of where the positive and negative sides are (Hint: the positive leg is longer).

Holiday Card (2)

Now tape down a 3V battery in the corner where you’ve left the foil loose. When the flap of aluminum foil folds down, the circuit is complete and the card lights up!

Holiday Card (3)

Here’s mom’s amazement, even if it was a little old-hat for Travis.

Handprint Cookies

Handprint Cookies (8)

Part baking project and part bonding activity, these sibling handprint cookies are absolutely adorable. I can think of no better way to spend these cozy days of social distancing than creating strong memories for the kids, despite the scary news in the outside world.

So first things first, we needed cookie dough! I knew the dough needed to chill for a while, so whipped up a batch first thing in the morning.

Ingredients:

  • 1/2 cup coconut sugar (or brown sugar)
  • 1/2 cup Earth Balance butter
  • 2 Ener-G eggs
  • 1 teaspoon vanilla almond milk
  • 2 and 1/2 cups flour
  • 2 teaspoons baking powder
  • 1/4 teaspoon salt
  1. Cream together the sugar, butter, Ener-G eggs, and almond milk in a stand mixer. Add the flour, baking powder, and salt, mixing at low speed just until combined.
  2. Gather the dough into a ball and chill for at least 3 hours.

When it was time to make the cookies, I sat Veronika in her high chair with one portion of dough, and Travis stood at the counter to help me roll out the rest.

Handprint Cookies (2)

Press a child’s hand to the dough and trace with a butter knife.

Handprint Cookies (1)

Travis was able to hold his hand still for a realistic approximation on his cookie. I had to use a little more creative license with wiggly toddler Veronika, as expected! Then we gathered the scraps and re-rolled the dough for heart and star cookie cutter shapes.

Handprint Cookies (3)

As a sweet touch, they pressed their thumbprints into a few cookies.

Handprint Cookies (5)

Let the kids decorate them however they want!

Handprint Cookies (4)

I stepped back and let them choose, which meant our cookies had a cinnamon-sugar sprinkle and Dandies marshmallows in the center.

Handprint Cookies (6)

Bake at 375 degrees F for 8 minutes, until lightly browned.

Handprint Cookies (8)

Then half the fun is eating them of course!

National Crayon Day

National Crayon Day (14)

Happy National Crayon Day! Travis, Veronika, and I celebrated this fun “holiday” with two projects, plus the perfect crayon book: Harold and the Purple Crayon.

While the kids were busy, I made a batch of purple crayon play dough. For this you’ll need:

3 cups flour

1 and 1/2 cups salt

2 tablespoons cream of tartar

2 tablespoons olive oil

1 jumbo purple crayon

2 cups water

Combine the flour, salt, and cream of tartar in a bowl. Heat the olive oil in a large pot over medium heat. Remove the paper lining from the crayon and chop into pieces. Add to the oil and stir until melted. Slowly stir in the water, then add the dry ingredients. Continue to cook for a minute or two, until the play dough pulls away from the sides of the pot.

National Crayon Day (1)

Turn the dough out onto a cutting board. Let cool slightly, then knead a few times. It makes a fantastic dough, and it’s now ready for play!

National Crayon Day (3)

We read Harold and the Purple Crayon to set the stage, then got our hands messy with the purple play dough!

National Crayon Day (5)

I suggested recreating a few of the drawings from the book like the apple tree or a house with a window.

National Crayon Day (6)

Travis just loved making purple worms, which soon led to a very elaborate game in his head!

National Crayon Day (9)

Veronika loved pulling up bits of the dough.

National Crayon Day (8)

Oh no, she grabbed the “ocean” from under Harold’s boat!

National Crayon Day (10)

In other words, the kids had a blast. I thought they might play with it all afternoon.

National Crayon Day (7)

But we had one more crayon project to go. There was a collection of rocks on our patio thanks to a family walk on the beach last weekend, and I set a few of them in the oven at 300 degrees for 15 minutes. (Note: I’m told you don’t want to heat them much longer than that, or they may explode, although that could just be urban legend).

National Crayon Day (12)

Remove one rock at a time with tongs and place on foil or parchment paper on a table. Using jumbo crayons with the liners removed, I showed Travis how to press one against the hot rock. It instantly melts!

National Crayon Day (11)

This had big wow factor, and made for fun art.

National Crayon Day (13)

Travis loved watching big runnels of color drip over the rocks, although I showed him how to get a little more artistic and deliberate with his colors, too.

National Crayon Day (14)

These would look so pretty in a garden! Happy National Crayon Day.

National Crayon Day (15)

Mini Bots

Mini Bot (6)

Travis built a robot today! Armed with a few specially ordered items, even younger elementary kids can do this project. My kindergartner needed adult hands for a lot of the steps, but could understand the process behind creating a simple circuit.

To start, we used sandpaper to smooth one side of a cork so it would sit flat once the robot was complete.

Mini Bot (1)

Using an Xacto knife, I made a slit in one end of the cork; this was for a 3V battery to slot into. Initially I made the slit such that the battery would sit horizontally, but we later changed it to vertical for ease of attaching the wires.

Mini Bot (3)

On the opposite side of the cork from the battery slit, I cut a square large enough to fit a pager motor. Hot glue the motor in place for security.

Mini Bot (2)

Attach two wires (about 3 inches long), one on either side of the pager motor. Secure with masking tape. I used a thin floral wire for this step.

Now poke both ends of an LED light into the cork, taking note of the longer (anode) side and shorter (cathode) side. Wrap the wires that extend from the pager motor around each leg of the LED, and continue along until they reach the 3V battery. Tape it all securely in place with masking tape.

Mini Bot (5)

Every time you touch both wires firmly to the battery, it will kick into action. The light lights up and the motor starts whirring! If you have trouble, go back and check that all your + sides are aligned, as well as all your – ones.

Mini Bot (4)

Your child may want to decorate their mini bot with wiggle eyes or pipe cleaners for personality, but Travis loved it just like this! Here it is in action:

Let’s Build a Flashlight

Build a Flashlight (4)

Kids will feel like real electricians with this easy project! All you need is a cheap flashlight, the kind you’ve probably picked up at a drugstore or dollar store check-out in the past and have lying around.

I disassembled the flashlight into all of its components and arranged them on a tray so it felt very official, then called Travis over.

Build a Flashlight (1)

He was so excited when I challenged him to put it together again! At first he was twisting together just the body and the screw cap, without a thought for coils or batteries or other pieces that might need to go inside.

Build a Flashlight (2)

Hmm… it wouldn’t turn on. What was missing? Now he worked hard to figure out where the coils should go.

Build a Flashlight (3)

Being allowed to handle the batteries all by himself was super thrilling!

Build a Flashlight (5)

It took a few tries before he had everything arranged in the right direction.

Build a Flashlight (6)

He was so proud once a push of the button turned it on!

Build a Flashlight (8)

This is a great introduction to battery power that even young children can grasp.

Build a Flashlight (7)

Big Brother and Little Sister Shirts


Brother Sister Shirts (10)

It’s such an exciting development for my kids that now they can do projects together, as was the case with these brother-and-sister shirts. Obviously you can tailor the shirts to fit your family, whether that means two brothers, three sisters, or even mommy & me shirts!

Brother Sister Shirts (1)

I purchased blank white tees at the craft store in the kids’ sizes, and first wrote on the front “I am the little sister” and “I am the big brother” with fabric pens. Note: This is harder than it looks, because the fabric kept pulling!

We then wanted to put Veronika’s footprint on Travis’s shirt. I squirted a little fabric paint onto a sponge and pressed it to her foot, then pressed her foot to the fabric. It didn’t come out completely clear, but Travis loved knowing it’s there! If your big kids want to, have them put handprints on the little sibling’s shirt in the same manner.

Brother Sister Shirts (3)

Then the kids loved dabbing the sponge all over the shirts, squirting it first with different colors.

Brother Sister Shirts (5)

The fabric markers were running low on ink, but they discovered that they could squirt a little fabric paint onto a shirt and use the tip of the markers as the “paintbrush”.

Brother Sister Shirts (4)

They had so much fun making these!

Brother Sister Shirts (6)

And they looked adorable wearing them.

Brother Sister Shirts (8)

Paper Finger Boomerang

Paper Boomerang (3)

Having recently tried out a real boomerang, Travis and I brought this little paper version to our home school “recess” today!

To make the boomerang, you’ll need a perfect square. Either measure with a ruler, or cut a piece of paper, fold it in half to form two triangles and then open back up again. Trace onto thin cardboard and cut out.

Paper Boomerang (1)

Cut out a boomerang shape, making sure to measure the same distance in from each side of the square. Travis decorated with crayons, rounded the corners, and then we were ready to flick!

Paper Boomerang (2)

We were surprised since we struggled with our store-bought toy, but this little one really does circle back to you! Because it’s so lightweight, you could even use it indoors on a rainy day. Note: We made the holder simply by cutting an additional strip of thin cardboard and folding in half.

Paper Boomerang (4)

Line Dancing Fun

Line Dance (1)

Travis is growing tired of class videos we’ve used to get our afternoon wiggles out during home school, so today I turned to Raddish Kids for inspiration. With a musical theme this month, one of the lessons was all about line dancing!

We kept the “lesson” part of it short, since really I just needed to get Travis moving. Big kids can delve further and talk about the genre of Country and any singers or song titles they know. You can also give some history of the genre. Instead, I just focused on common instruments (banjo, fiddle) and explained that line dancing allows dancers to move as a group, instead of with a partner. In other words, it’s meant to be shared!

To get our toes tapping, we listened to clips of the Boot Scottin’ Boogie and Watermelon Crawl. A few quick tutorials from YouTube showed us basic steps like the heel stomp and grapevine. Travis was a little skeptical but then we watched a quick how-to for an Achy Breaky Heart line dance.

Line Dance (2)

We cranked up the music and danced! Of course, it’s totally fine if your kids make up their own moves.

Line Dance (3)

For giggles, we finished with a clip of a line dance from Ice Age.

Little Passports: Japan

LP Japan (23)

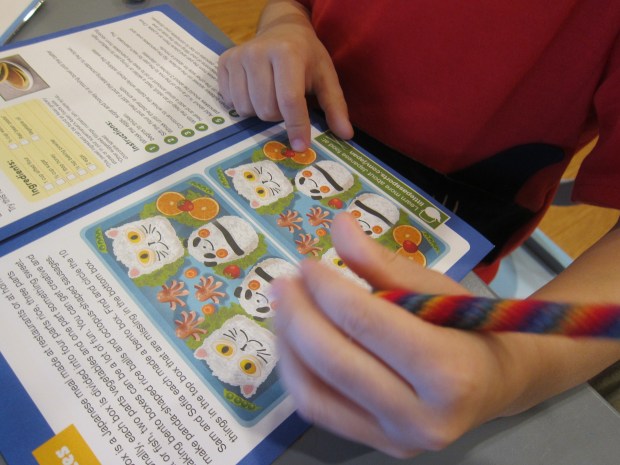
Travis’s envelope this month from Little Passports took him to… Japan! There was lots to learn and great hands-on activities in this particular kit. First up was the booklet, full of inventive activities like how to write a Haiku (spoiler: Travis’s was about eating a cookie), and a pictorial three-in-a-row search that was a fantastic alternative to a word search for non-readers.

LP Japan (2)

Of course there was also a country coin for his coin chart, a stamp for his passport, and a push pin for his world map. Bonus features online included gorgeous photos of Japan, audio recordings of common Japanese words, and a Q&A with a Japanese “pen pal”.

Souvenir:

The adorable sushi erasers that came with the package were a big hit, particularly the fact that they could be disassembled and reassembled. Travis became a mini sushi chef!

LP Japan (3)

Activities:

The most involved project with this kit was to make a koinobari, a kite in the shape of a carp fish traditionally hung on homes during Japan’s Children’s Day holiday (which falls in May).

LP Japan (5)

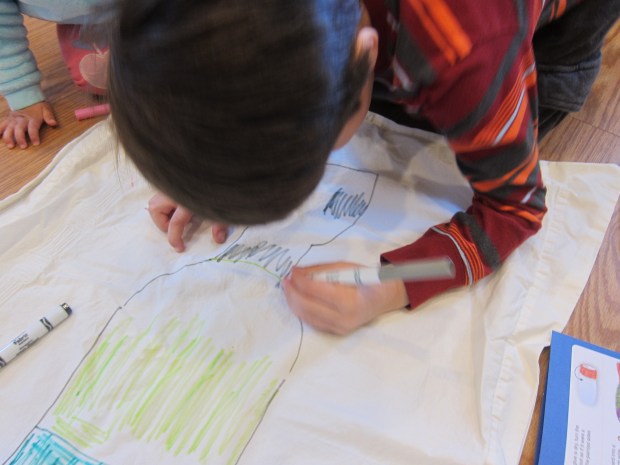
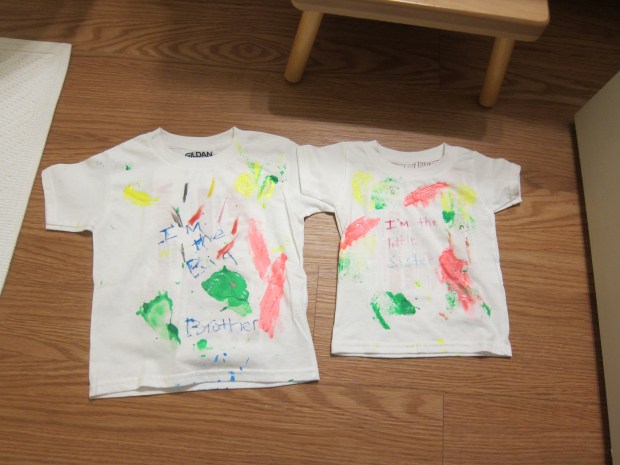
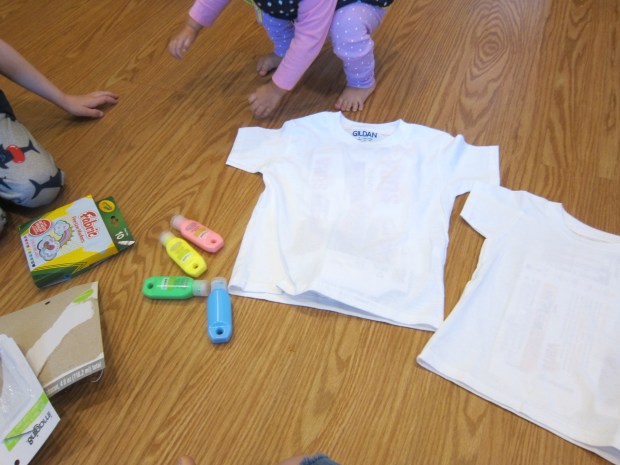
Rather than use the suggested fabric pants, which I worried would be messy, I had Travis use fabric markers.

LP Japan (6)

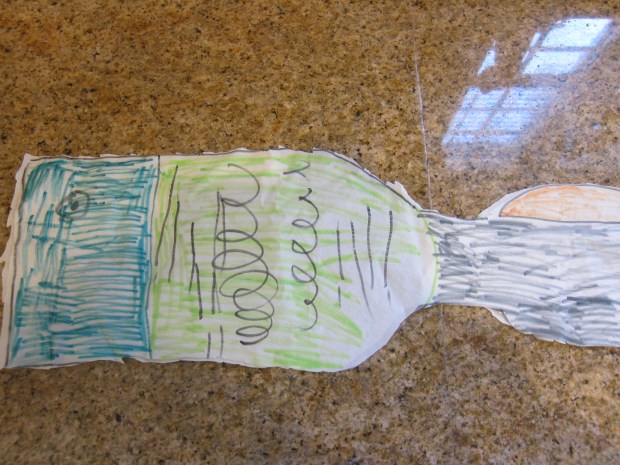
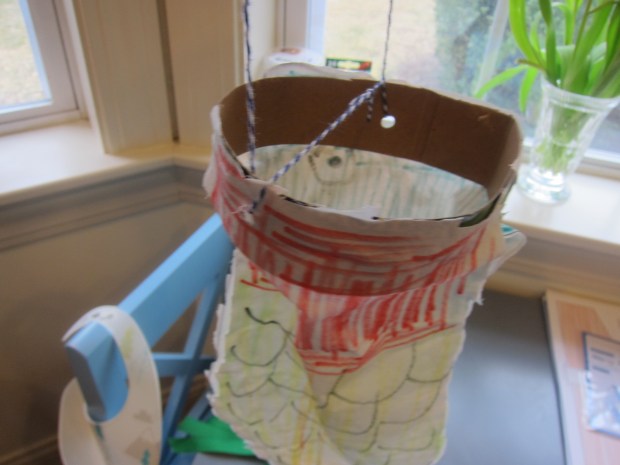
We first drew two fish outlines on an old pillow case and colored with the markers, after which I cut them out and hot-glued together on three sides, leaving the top open (alternatively, use fabric glue).

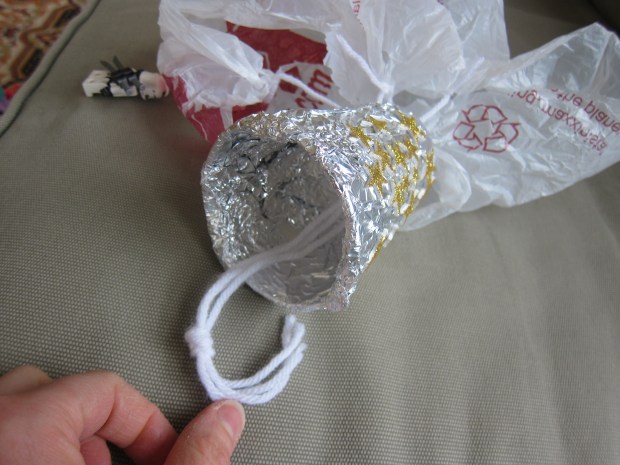
Cut a piece of cardboard from an old cereal box and glue into a loop; attach this at the mouth of the fish with more glue. Punch two holes through the pillow and cardboard, and loop a string through.

LP Japan (8)

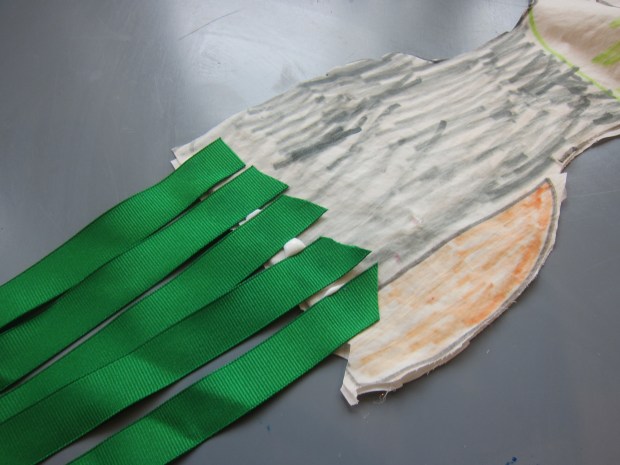
Finally, we glued on ribbons as tail streamers.

LP Japan (7)

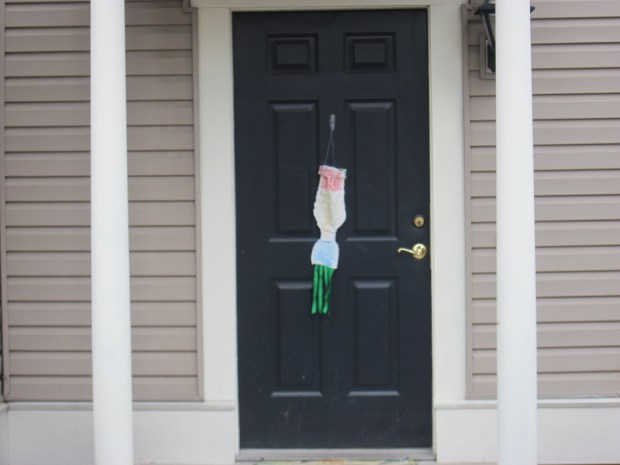
It looked beautiful on our front door.

LP Japan (9)

Next up was to write in ema wishes on the provided template.

LP Japan (10)

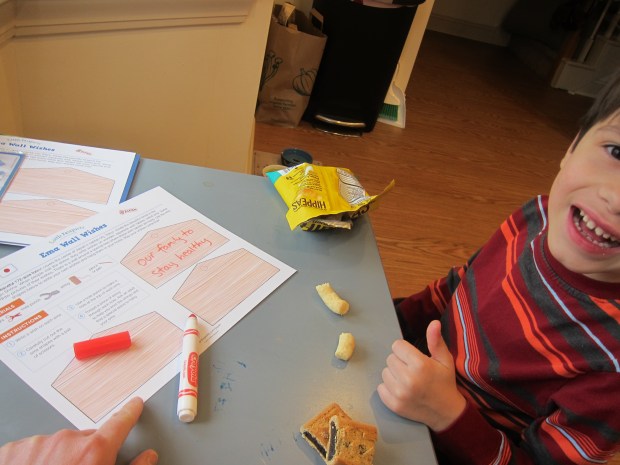
These wooden tablets, traditionally hung at a Japanese shrine, came just in time for our new era COVID-19. We strung them up along our kitchen window for good luck!

LP Japan (17)

Of course we had to make origami, too. The package included fun instructions for penguins and jumping frogs.

LP Japan (12)

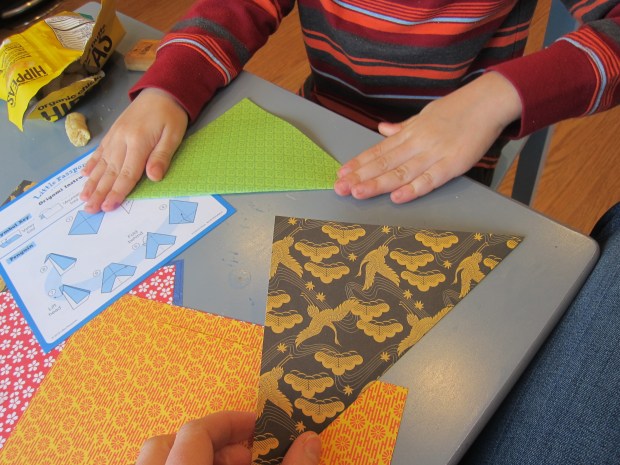
The frog could really jump!

LP Japan (15)

Travis wanted to make a whole army of penguins.

LP Japan (14)

Finally, he did a cute food match-up game which highlighted all four islands of Japan, and he colored in the flag for the garland begun with his Brazil package.

LP Japan (11)

Recipe:

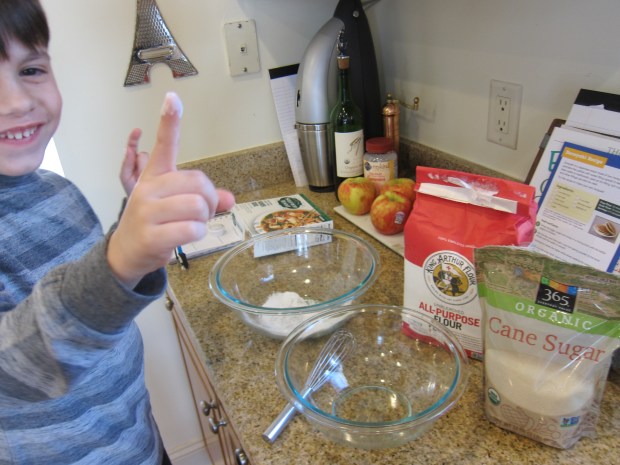
The journey is never complete without a recipe, of course. Travis got to make dorayaki, a sweet Japanese pancake.

Ingredients:

  • 2 Ener-G eggs
  • 1/2 cup sugar
  • 1 tablespoon agave nectar
  • 1 cup sifted flour
  • 1/2 teaspoon baking powder
  • 1/2 cup water
  • Canola oil
  • Red bean paste
  • Jam
  1. To start, whisk together the Ener-G eggs, sugar, and agave in a bowl.LP Japan (18)
  2. Add the flour and baking powder to the bowl, stirring until smooth. Continue to stir while adding the water slowly.LP Japan (19)
  3. Heat a large skillet coated with a little canola oil over medium-high heat. Spoon 1/8 cup batter into the skillet per pancake and cook for about 2 minutes, until bubbles cover the tops. Flip and cook for an additional minute. Transfer cooked pancakes to a plate and repeat with the remaining batter.
  4. To serve, spread bean paste between two pancakes and eat sandwich-style! If the bean paste isn’t to your kids’ liking, try jam instead.

LP Japan (22)

Travis loved eating the dorayaki with a ramen noodle bowl, for a full Japanese meal.

LP Japan (21)

Outer Space Parachute

Space Parachute (5)

Last summer and fall, Travis and I experimented with a few different ways to make a parachute. For home school “science” today we tried once more, but this time made it outer space-y with a coating of aluminum foil. Travis thought it looked just like the gear used to ease the landing of Mars rovers!

To start, wrap a paper cup in aluminum foil. Travis enjoyed decorating all over with star stickers (in keeping with the theme of course).

Space Parachute (2)
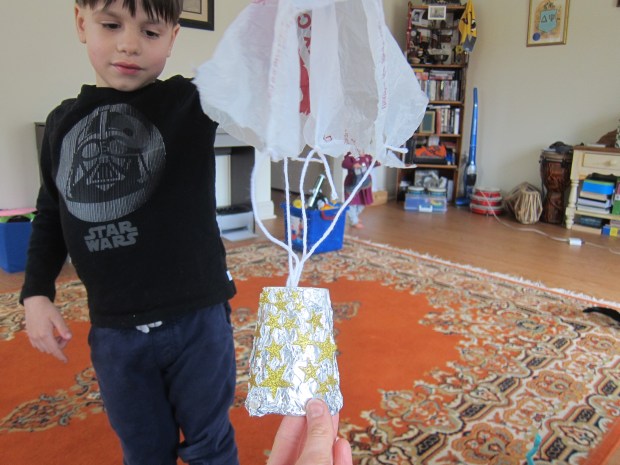
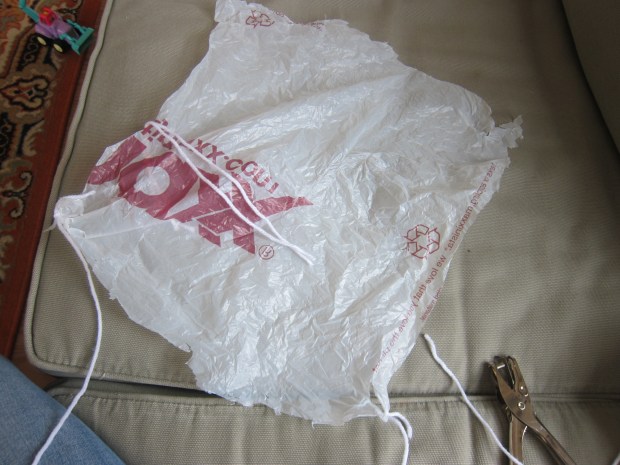
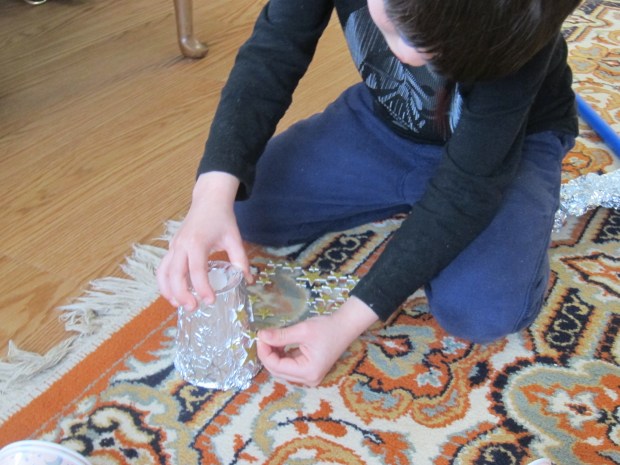
Cut a square from a plastic shopping bag, and then use a hole punch to make a hole in each of the four corners (you may need to rip the bag a little bit, too, to help the hole punch through).

Space Parachute (3)

Cut four equal lengths of yarn and tie one to each corner with a knot. Gather these four strands together and push down through a hole in the top of the cup. Make a fat knot so they won’t slip back out.

Space Parachute (4)

Time to launch! My intrepid explorer bravely climbed the stairs.

Space Parachute (6)

Then it was 3, 2, 1: Blast off!