Bow and Arrow


Bow and Arrow (4)

I’ve tried to make this simple bow and arrow with Travis before, but every time we try I realize I don’t have the right size dowel! The first time, our dowels were too thick. Today, they were honestly too thin, but we managed to make it work. Ideally, look for craft dowels that are 3/16 of an inch. Don’t have any dowels? You might try this craft stick version instead.

In addition to being very thin, the dowel we had on hand was very long, so we only needed one piece. If you’re using craft dowels, secure two together tightly with duct tape, overlapping the ends a bit.

Use additional tape to wrap near each edge, winding until it’s about a 1/2-inch thick. Travis loved the challenge of this step! We used Washi tape, but duct tape would work, too.

Bow and Arrow (1)

Cut a string that is a bit longer than the dowel(s). Secure with a knot just above the tape on one end, then pull tight against the dowel and secure at the other end. This is your bowstring.

Bow and Arrow (3)

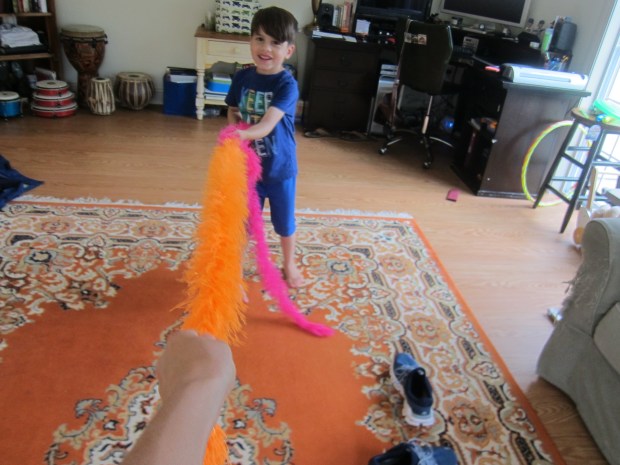
For harmless arrows, we used straws. Cut a notch in one end so you can hook it onto the bowstring. Travis wanted to add a marshmallow to the front of each arrow. Here at Camp Mom, why not!

Bow and Arrow (7)

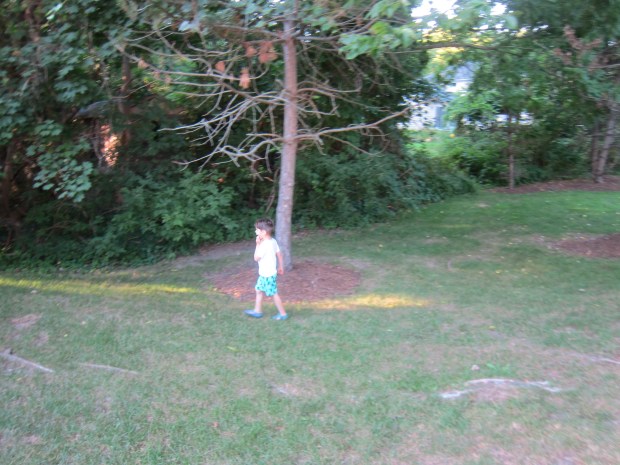
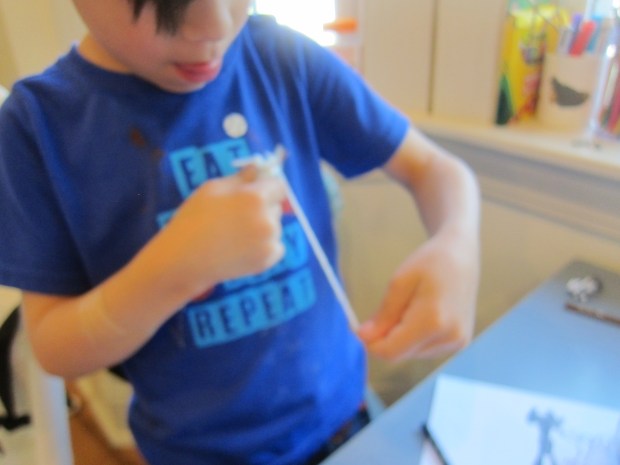
It took a few tries before Travis was able to make the arrow fly forward, but he was so proud once he was successful.

Bow and Arrow (6)

This is a great craft for a summer day at home.


Easy Elevator

Easy Elevator (9)

Travis extended some recent science fun about the notions of push and pull with this cute elevator craft. Use a leftover Kiwi Crate (or any similar shoebox) as the shaft of the elevator. Cut two strips from the lid of the box, one wider and one narrower. Bend them so there are flaps at either end and then glue together so the narrower strip nests above the wider strip; this will be your elevator car.

Easy Elevator (2)

Now punch holes in the top of the car with a pen, near each edge. Cut a piece of string that is twice as long as the shoebox and loop it through the holes; secure with a knot at the top.

Use a pen to punch two holes in the shoebox, near the top as it is standing upright. Insert a dowel.

Easy Elevator (4)

Tape the string on the elevator car to the dowel. Your elevator is ready to rise! Now when you twist one way, the elevator goes up. Simply twist the other way for descent!

Easy Elevator (6)

Of course Travis immediately needed to add little figures for some play. He wanted to make pom pom people, so we hot-glued wiggle eyes onto tiny pom poms.

Easy Elevator (3)

And of course his Lego people needed to go for a ride!

Easy Elevator (8)

That meant this was not only a great STEM craft, but also a great prop for imaginative play.

Easy Elevator (7)

Tension Kiwi Crate


Kiwi Tension final

This month’s crate for Travis from Kiwi Co was all about push and pull. Between puppets to push and turtles to pull, there was lots of hands-on fun in this one.

First up were the Push Puppets. Travis helped rig together a base that relies on tension, meaning lots of wooden pieces held together by rubber bands, nuts, and bolts.

Kiwi Tension (4)

To assemble the puppets, thread one end of the provided elastic through a hole in the wood base, and then layer on three wooden beads. These look like little people: a body, a head, and a hat!

Kiwi Tension (5)

Two sticky wiggle eyes complete each person. Pushing on the wooden lever now releases the tension on the elastic, and the puppets fall flat.

Kiwi Tension (7)

Needless to say, Travis thought this was a riot! We could add the provided backdrops for little puppet shows that took place at the beach or in the moonlight.

Kiwi Tension (8)

He colored his own background of a big hairy spider on the blank sheet of paper. Oh no, the puppets fell down in fear!

Kiwi Tension (9)

Next up were Woven Turtles. This was the crafty Art part of STEAM for this crate, with a turtle shell to weave from yarn on a wood frame. This project came right on the heels of several other weaving activities we’ve done this summer, so Travis is becoming more dexterous at the motion.

Kiwi Tension (1)

It was a lot of yarn, though, so he still needed me to take over! The fully woven shell is then adhered to a foam cut-out of a turtle, with a nut and bolt to fasten things in place.


Kiwi Tension (3)

Travis added wiggle eyes and a little straw in the turtle’s nose. We made two because now it was time for… a Turtle Race! Use the provided blue tape to attach a piece of straw to the edge of your Kiwi crate (or any similar box).

Kiwi Tension (11)

Tie the provided string to a table leg, making sure it’s at the same height as your prepared turtle.

Kiwi Tension (12)

Thread the string through the straw on the turtle’s nose, and then through the one on the box. Add a wooden bead at the other end of the string, securing with a double knot.

Kiwi Tension (13)

When you give the string quick tugs, your turtle moves from the table leg to the box. Here he goes:

What’s more fun than watching one little turtle scoot along? Making it a race of course!

Kiwi Tension (15)

Mommy’s turtle won by a nose!

Kiwi Tension (14)

In addition, Explore magazine had fun facts about ways people use ropes and tension in everyday life, whether the cables of an elevator, the strings of a guitar, or a game of tug-of-war. So of course we needed to play the latter!

Tug of War (2)

Finish with a read of the following:

  • Give It a Push, Give It a Pull, by Jennifer Boothroyd
  • Cece Loves Science: Push and Pull, by Kimberly Derting

Kiwi Tension books


Upper and Lowercase Letters on ABC Road

ABC Mat Upper Case Match (7)

Our alphabet mat has been taking new forms lately, and while it was stretched out more like a road, we turned it into a quick summer review of upper and lowercase letters!

While Travis was at camp, I set up all his toy cars, each with a post-it note containing a lowercase letter on top.

ABC Mat Upper Case Match (1)

This car army was ready and waiting for him when he got home!

ABC Mat Upper Case Match (2)

The challenge was to drive each lowercase car to its uppercase “garage”. Travis was up for the task!

ABC Mat Upper Case Match (3)

He loved starting each one at the same spot on the “road” and deciding if it had a long drive or short drive to get home. As an extra challenge, I didn’t have the letters in alphabetical order, so he had to search each time!

ABC Mat Upper Case Match (6)

By the end, he was justifiably tired, but our little lowercase cars had all found their uppercase “parents”.

ABC Mat Upper Case Match (8)

This was a great refresher to avoid the summer slide.

ABC Mat Upper Case Match (9)

Pita Faces

Eggy Faces (3)

Even young chefs will dig putting this lunch together because they can do the slicing all by themselves. The secret? Don’t hand them a knife, but a piece of dental floss instead! Make sure you’re using unwaxed and unflavored floss for this activity, or you might wind up with a mint-flavored sandwich.

First, I showed Travis how he could slice easily through a few items, if he held the string of dental floss taut enough. It slid easily through tofu…

Eggy Faces (1)

…and a wheel of Miyoko’s soft cheese!

Eggy Faces (2)

Once he had slices, I let him decide how he was going to decorate a face for lunch. We toasted a pita, then added the following:

  • circles of the cheese for eyes
  • an avocado smile
  • a cucumber slice for a nose
  • celery for eyebrows
  • shredded carrots for hair

If your family eats eggs, the dental floss trick will work on those, too, and those would make fun eyes on the pita. What else goes on your Pita Face? Please share in the comments!

National Mustard Day

Mustard Day (1)

Sometimes it’s fun to celebrate the simplest things around us for a day, which is why I love learning about silly “national holidays”. Today (August 1) it was mustard’s turn!

After telling Travis about this “holiday”, I spooned two varieties of mustard into jars for him: yellow mustard and classic Dijon mustard. I asked him to describe any differences or similarities he noticed, the most obvious being the “dots” in the Dijon. Travis thought it was wild that these were really the mustard seeds.

Mustard Day (2)

Then it was time for a blind taste test! The coarse texture of the mustard seeds was the giveaway, so he could easily tell which was which. You can have fun with this and add lots more varieties, especially if your kids are older.

Mustard Day (3)

Now of course we were hungry, so the lunch menu was grilled Beyond Sausages served with yellow mustard down one side and Dijon down the other. Travis loved spooning the mustard on by himself!

Mustard Day (4)

Extend the celebrationany way you like! Watch a video on how mustard is made, or see who can tell the best mustard joke. I’ll leave you with this:

Q: What do you give a dog with a fever?
A: Mustard, it’s the best thing for a hot dog.

Summer Gross Motor Skills

Hula Hoop Workshop (6)

In these last few days before Travis starts summer camp, we’ve been doing lots of gross motor skills here at “Camp Mom“. Here are a few great ways to get moving in the heat!

Hula-Hoop Workshop:

Forgot traditional twirls around the waist; hula hoops are a fantastic summer boredom buster even if your kids haven’t mastered the hip swirling yet.

Hula Hoop Workshop (2)

To wit, today the kids decided to pretend they were the rings of Saturn with hula hoops!

Hula Hoop Workshop (7)

Simply put a hula hoop around your waist and spin!

Hula Hoop Workshop (1)

You can also practice rolling a hula hoop along the ground. Or jumping from one to the other. Hula hoops are fun any way you spin it!

Hula Hoop Workshop (4)

Jumping Bee:

Even if your child doesn’t know how to skip rope yet, you can turn it into a prop for a spelling bee. We laid the rope down on the ground and I had Travis think back to some of his kindergarten sight words. For each letter in a word, he jumped back and forth across the rope.

Jumping Bee (4)

He was so proud recalling sight words. “There is a sight word of the day and the sight word is ‘the’,” he sang to the tune of BINGO. T!

Jumping Bee (1)

H!

Jumping Bee (2)

E!

Jumping Bee (3)

After we’d gone through sight words, little sister Veronika started shouting out silly words for him to spell. Bigger kids, of course, can do this activity with longer words and while truly honing their jump rope skills. Last person still spelling without getting tangled in his or her rope wins!

Jumping Bee (5)

Dribbling King:

Some cheap bouncy balls from the grocery store were the perfect prompt to work on Travis’s dribbling skills. Take this activity to your nearest park and hop on the basketball court (or just outline a large area with chalk) and show your kids how to dribble.

Dribbling Queen (1)

If you want to make it a competition, have the kids dribble with one hand while trying to knock away an opponent’s ball with the other.

Dribbling Queen (2)

Travis got very protective of his ball when we played this wat though, and preferred to hone his new skills solo.

Play “Spud”:

If you need a reminder on this classic, here are the rules: The player who is IT tosses a ball in the air and shouts out a number. Other players can take that many steps away.

Spud (1)

Now, IT tries to hit another player with the ball (choose a relatively soft one). If IT misses, he or she gets an S.

Spud (3)

If IT makes the shot, the other player gets the S and is now IT. Play continues until someone spells out S-P-U-D.

Spud (4)

I hope these ideas get you moving!

Start a Tree

Start a Tree (6)

Unlike a tree sapling we planted earlier in the summer, today Travis conducted more of a science experiment; could he start a tree sapling from seeds we collected outside?

After dinner, we headed off on a pajama walk (one of the best parts of these long summer nights!) in hunt of seeds. You’ll want ones that you can easily plant in a cup, so think maple keys, acorns, or walnut seeds.

Start a Tree (1)

Once home, we investigated all of our finds, talking about their similarities and differences. Travis was especially fascinated by the black walnut pod we brought home, and then cracking it open to get to the seeds inside!

Start a Tree (2)

We then spooned a little potting soil into each of 3 foam cups, and added our tree seeds. Cover with a little more soil and water.

Start a Tree (3)

We labeled the cups and Travis sat down to begin a nature notebook, jotting down how the seed pods had looked on Day 1. The goal is to continue until we see little saplings grow!

Start a Tree (4)

To conclude the project, be sure to talk about the various ways that seeds can move to a new place. Travis laughed imagining seeds that could get up and walk, but then we reviewed some of the real methods (like wind, rain, or hitchhiking on animals!).

Flying Saucers

Flying Discs (6)

Travis is just learning to toss a Frisbee, so today we played this quick take on H-O-R-S-E. I suspended a hoop from a tree (which was actually a play tunnel folded up, but it worked in a pinch), and then handed Travis the Frisbee.

Flying Discs (1)

Each player takes a turn tossing. If the disc goes through, the other player must make the shot from the same spot, else he or she earns a D. Continue play until somebody spells out D-I-S-C, and the other person wins!

Flying Discs (5)

The spelling element meant this game was not just physical activity, but also a quick learning activity!

Flying Discs (4)

Meanwhile Travis enjoyed honing his Frisbee skills. We’ll be playing this one again soon!

Flying Discs (3)

God’s-Eye Key Chains

Gods Eye Keychain (6)

The god’s eye symbol is a traditional votive object from Mexico. But minus the religious symbolism, the pattern is an excellent early weaving technique for grade schoolers, and a classic camp-style craft for a morning here at Camp Mom.

To start, I hot-glued pairs of toothpicks together so they crossed in the middle, and made several sets so we could weave multiple key chains. You can use regular glue if you prefer, but if so you may want to do it the night before so the glue is dry by morning.

Gods Eye Keychain (1)

I showed Travis how to wrap yarn around the center to secure, then to start weaving around the toothpicks in a circle, wrapping the yarn around each toothpick before moving on to the next. The mechanics of this were a bit complicated for him, but I was so proud that he stuck with it in his own way.

Gods Eye Keychain (2)

“Look, I’m wrapping!” he declared. When he had achieved the look he wanted, he decided it was finished.

Gods Eye Keychain (4)

Meanwhile, I wrapped one in a more exact fashion to achieve the god’s eye look.

Gods Eye Keychain (3)

You can then finish these with fun details, whether pom poms or beads. My craft bin is low on supplies but I had a few wooden beads which looked lovely glued to each toothpick point. Be sure to thread one of the beads through a final piece of yarn (use a needle, if needed), and tie this yarn securely to a key ring.

Gods Eye Keychain (5)

These key chains would also make excellent gifts!