Craft Stick Dolls

Craft Stick Dolls (12)

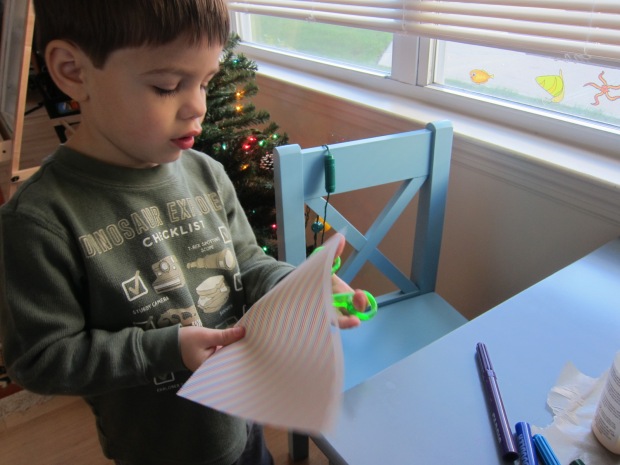
Travis attends an art class where one of the free-play toys is a set of fabric swatches and wooden doll figures to dress up in different patterns. It’s a huge hit with kids in the class, so we recreated it at home!

Instead of fabric, I purchased a pad of decorative craft paper, in dozens of different patterns. For the dolls, we simply used wooden craft sticks!

If your child would like to, they can color in the craft sticks first with marker. I colored a few, but Travis decided he wanted the rest left plain.

Craft Dolls (6)

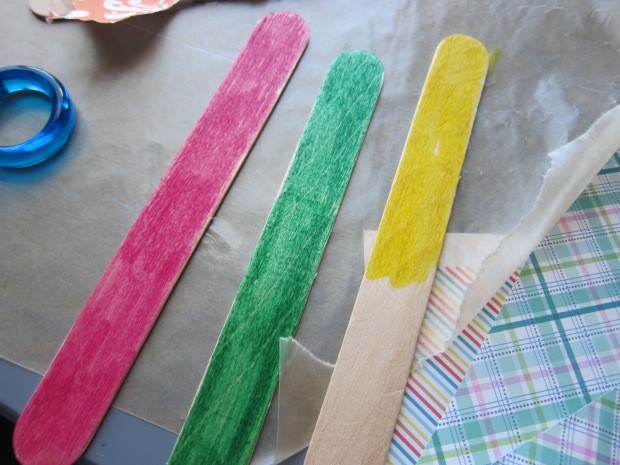
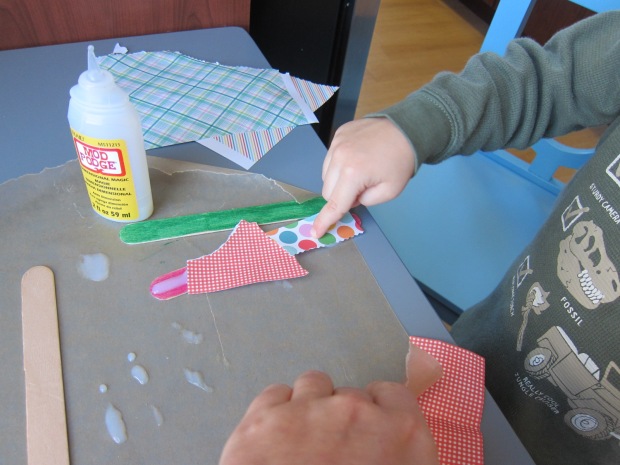
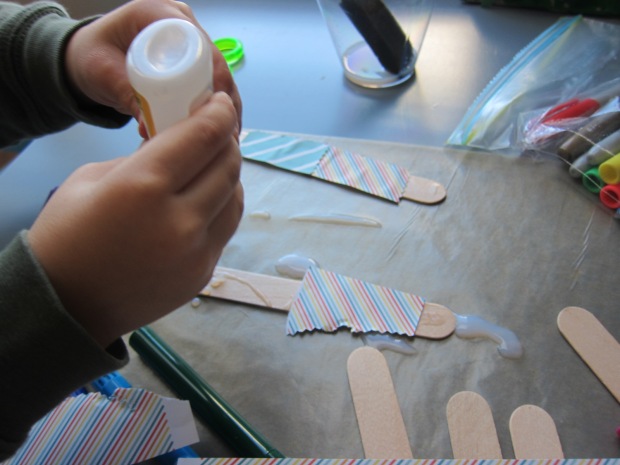
He was way more into applying a layer of mod podge to the craft sticks, proudly squeezing a line of glue down the middle of each.

Craft Dolls (1)

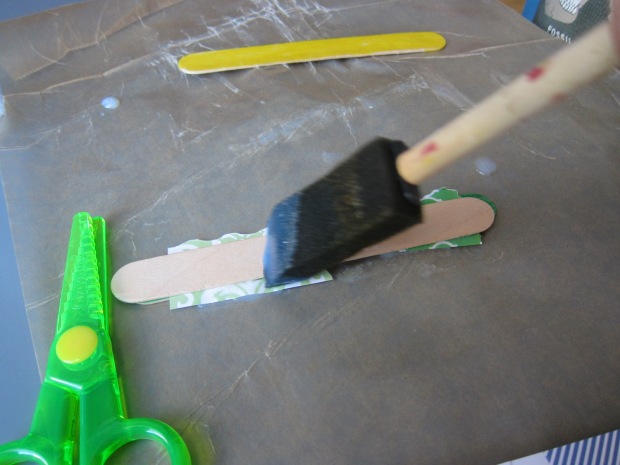
Another option is to brush on the mod podge with a foam brush, which we did a few times, too.

Craft Dolls (9)

Then it was time to dress our dolls! I told Travis he could pick a shirt and skirt for each figure, and he loved selecting “fabric” patterns from the craft paper.

Craft Dolls (4)

My plan was to cut rectangles out for him, but Travis insisted on cutting pieces himself.

Craft Dolls (2)

And proudly glued them on.

Craft Dolls (3)

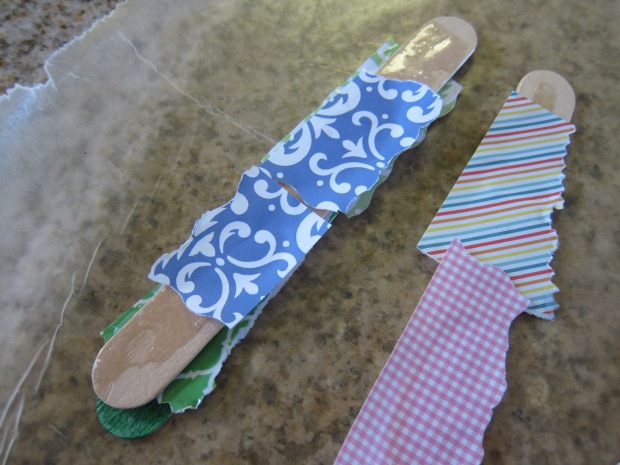
As a result, we soon had very inventive fashion designs popping up. This one turned out to be the perfect shape for a skirt!

Craft Dolls (5)

Then Travis layered two popsicle sticks together; I thought the resulting doll looked like she was wearing a kimono.

Craft Dolls (11)

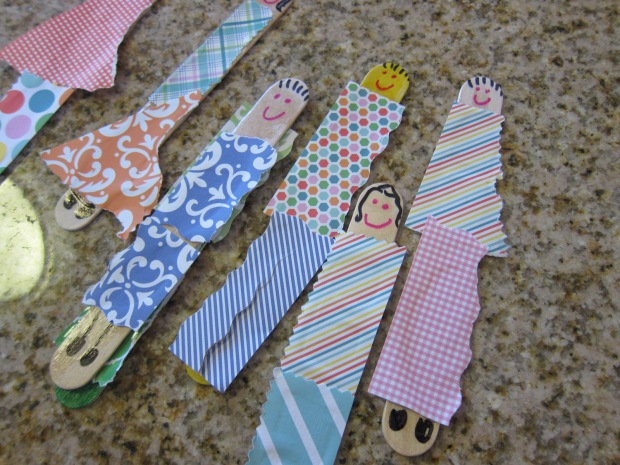
And we even had one wearing pants instead, when Travis made an accidental snip down the middle.

Craft Dolls (10)

Once the glue dried, I markered in smiles, hair, and shoes on our dolls as the finishing touch.

Craft Stick Dolls (13)

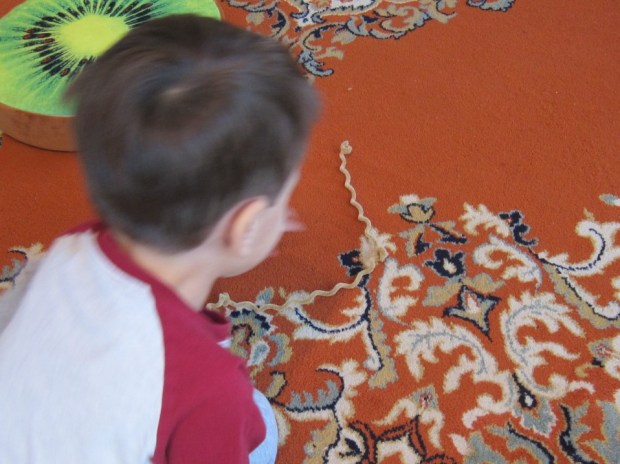
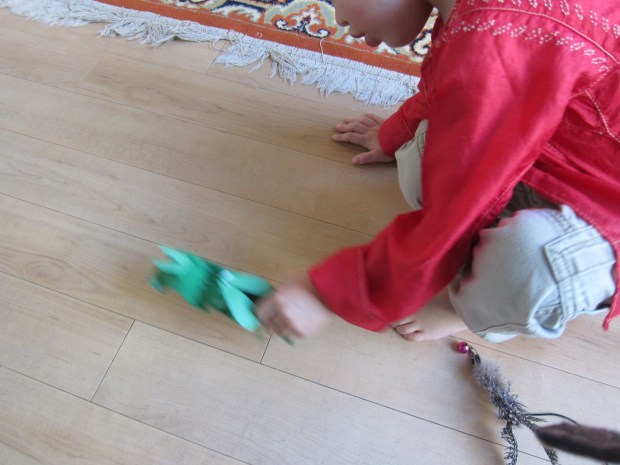
Overall, I loved watching his creativity with this simple activity. Leftover craft paper soon turned into “leaves” around the apartment, so don’t let the inventiveness stop just because the dolls are done!

Craft Dolls (7)

Pipe Cleaner Caterpillar

Pipe Caterpillar (5).JPG

I was delighted to see Travis pretending this morning that he was on a “nature walk” around our apartment, taking along a bucket and finding “treasures.” One of the items we never found on a true nature walk this fall was a wooly bear caterpillar – so we decided to make a few to find around the house!

Wrap pipe cleaners around a pencil tightly, then simply slide off. I only had brown pipe cleaners at home, which served our purpose perfectly, but feel free to be inventive with colors: shiny caterpillars, multi-colored caterpillars, whatever suits your child’s fancy!

Pipe Caterpillar (1)

Travis immediately was wiggling them around the “forest floor.”

Pipe Caterpillar (3)

He then stretched out some of the coils so they could be worms instead – I love when his imagination takes a game in a direction I hadn’t anticipated.

Pipe Caterpillar (6)

He then wanted a turn coiling a pipe cleaner around the pencil, which was tricky for him, but he loved trying it out.

Pipe Caterpillar (7)

We ended up gluing googly eyes on just a couple of the caterpillars, for an extra adorable touch.

Pipe Caterpillar (4)

Hopping Grasshopper

Hopping Grasshopper (5)

After fun bug crafts in our latest Koala Crate, we were ready to take our bug-making up to the next level – with a grasshopper who really hops! I should note that Travis’s patience was very thin when we made this project. We had to wait several times – for paint to dry and then for glue to dry. Make sure to set your child’s expectations that the grasshopper won’t be able to hop right away, and you’ll avoid any disappointment.

To start, cut a recycled egg carton into a piece that is three egg sections long.

Hopping Grasshopper (1)

Paint the carton green and let dry.

Hopping Grasshopper (2)

While the paint dried, I cut wings, antennae, and two legs from green construction paper – older kids might enjoy doing this step themselves! You can of course give the grasshopper a more proper 6 legs, but because of the aforementioned trouble with waiting, Travis only glued on one set of legs.

Hopping Grasshopper (3)

Travis helped decide where each piece should go on the grasshopper, correctly identifying legs on the bottom etc. Then it was more waiting!

Hopping Grasshopper (4)

Finally, attach a small bouncy ball to the middle segment of your grasshopper.

Hopping Grasshopper (7)

The original idea was to attach the ball with two pins, but lacking pins, I used hot glue instead. Unfortunately our grasshopper only lasted through a few hops before the ball came loose, so pins seems like the better way to go.

Hopping Grasshopper (6)

But at last, he’s off!

Hopping Grasshopper (8)

Fall Leaf Votive

Leaf Votive (8)

In addition to our Felt Fruit, here’s another possible adornment for your Thanksgiving table this Thursday. It’s a lovely twist on the Halloween Luminaries we lit up in October, this time putting a leafy autumnal twist on the same idea!

First, head outdoors and collect a few (relatively small) fresh leaves. Try to find a variety of shapes and colors, for the best effect.

Leaf Votice (1)

Coat a glass jar with a layer of mod podge, then have your child arrange the leaves in whatever pattern they like. Set aside to dry overnight.

Leaf Votive (3)

Travis’s favorite part of the project was applying a second layer of mod podge the next morning, to ensure that no edges of the leaves pop up.

Leaf Votive (6)

He thought dabbing a gluey paintbrush over the leaves was great fun, much more so than when we just put the glue on the clear jar!

Leaf Votive (5)

If you like, you can add pieces of tissue paper to fill in the blank space between leaves, but we left ours clear.

Leaf Votive (7)

Insert a tea light, and light up your Thanksgiving celebration!

Leaf Votive (10)

Note: As a bonus, this votive will look lovely lit up for a long time to come. Consider it for a nightlight in your child’s room, or just a pretty decoration after dark.

Leaf Votive (11)

Fabulous Felt Fruit

Felt Fruit (9)

This adorable project from High Five magazine is the perfect centerpiece for your Thanksgiving table this coming Thursday! Kids will be so proud to tell relatives that they put it together (nearly) all by themselves.

To start, you’ll need sheets of adhesive-backed felt in red, green, brown, and orange. This item isn’t even something I knew existed, but it’s sold right by single sheets of felt at the craft store. I could not find orange with the adhesive backing, so read on for how I solved that dilemma.

To start, trace the shape of an apple and pumpkin onto paper and cut out. Those closer to age 5 can trace their own fruits, but I made the shapes for Travis and he worked with safety scissors to help cut.

We then traced the templates onto our felt sheets (great tracing practice!). You’ll need two of each shape for one finished piece of fruit.

Felt Fruit (1)

I cut the felt shapes out, since the material was tough for Travis’s hands. He wanted to try though!

Felt Fruit (2)

Finally, we cut out rectangles from the green felt to be apple stems and one bigger rectangle from the brown felt to be our pumpkin stem. Remove the adhesive backing from the stems and fold in half; set aside.

Felt Fruit (3)

To assemble a fruit, remove the backing from one apple shape. Place two cotton balls on top, and one green stem at the center.

Felt Fruit (4)

Remove the backing from a second apple shape and place the sticky sides together. Travis insisted on doing this step himself (which I loved!) which meant our edges didn’t always line up perfectly, but the sticky felt is very forgiving.

Felt Fruit (5)

He loved that we made a few green apples, since those are his dad’s favorite, and then he told me the red ones were for his grandparents.

Felt Fruit (6)

For the pumpkin, we followed the same method, but I used my hot glue gun to seal the two sheets of non-sticky orange felt together and to attach the brown stem at the top.

Finally, we nestled our adorable felt fruit into a straw basket, the perfect touch for our Thanksgiving table.

Felt Fruit (8)

Recycled Bird Feeders

Recycled Bird Feeder (7).JPG

After our recent pine cone bird feeders didn’t get much nibbling from neighborhood birds, we wanted to give our feathered friends more of a perch to stand on while having a late autumn snack! This project from Barefoot Books is a great way to recycle juice or non-dairy milk cartons.

Adults, cut a rectangular opening in one side of a clean, empty carton, making sure it’s about 2 inches from the bottom of the carton.

Recycled Bird Feeder (1)

Now give your child carte blanche to decorate however they please. We wanted to make our carton bright and vibrant for the birds, so added colorful buttons and pom poms.

Recycled Bird Feeder (2)

And then Travis decided we needed glitter… lots of glitter!

Recycled Bird Feeder (3)

At this point we left the carton to dry overnight. The next day, poke two holes in the bottom of the carton. Select a stick from outside to be the perch; insert through the holes.

Recycled Bird Feeder (4)

Use a hole punch to make a hole in the top of the carton, and thread with string. My milk carton was so thick that I ended up hot gluing the string instead, which worked in a pinch.

Recycled Bird Feeder (5)

Now find a beautiful place to hang it, and fill with  birdseed!

Recycled Bird Feeder (6)

To continue the fun, consider purchasing a kid-friendly field guide to birds, and check off the visitors you receive over the winter.


Birch Tree Tape Resist Picture

Birch Tree (8).JPG

We haven’t done tape resist art in a long time, so it seemed like the right moment to return to an old idea in a new form. A cold winter blast has me thinking of lovely winter birch trees, always my favorite, and tape resist is the perfect way to create these white tree trunks.

First, create the outline of trunks and branches on white paper by covering with tape. Any masking tape or patterned washi tape will work fine – you’re going to remove it at the end. Travis was surprised when we made our trees blue to start (but shh, don’t spoil the surprise for your child yet!).

Birch Tree (1)

Next we painted over the tape and the rest of the paper for a blue sky background. We used tempera paint, but you’ll get a more wintery, softer feel if you use watercolors.

Birch Tree (2)

Let the paint dry, then it’s time to peel back the tape for the big surprise – white-trunked trees!

Birch Tree (3)

Travis was so excited to see our birches, and helped sketch on little black lines in the bark.

BIrch Tree (4)

As the finishing touch, decorate your trees – we used buttons and little leaf cutouts.

BIrch Tree (6)

He told me the first picture was done, but then got more impish with the second, layering on big piles of glue and buttons… Love watching this kiddo’s creativity!

Birch Tree (7)

Jeweled Turtle

Jeweled Turtle (9).JPG

We seem to be on a bit of a reptile kick lately, and this jeweled turtle helped fill a lazy morning at home. Travis loves to play with clay and aluminum foil, so what a bonus to find a craft that combined the two!

To make your turtle shells, crumple aluminum foil into a ball, and then flatten slightly until you achieve the desired shape.

Jeweled Turtle (1)

Next we rolled little bits of air-dry clay to be the head, arms, legs, and tail of the turtle. Press slightly into the underside of the foil to adhere.

Jeweled Turtle (2)

We pulled out a few sparkly odds and ends from our craft bin to decorate the shell of our turtle, including sequins and glitter glue.

Jeweled Turtle (3)

Once our first turtle was finished (admittedly with lots of adult help), Travis immediately began making a second, and this time I sat back and just watched his imagination go wild!

Jeweled Turtle (7)

The turtle had several heads, bits of clay stuck on top of the shell, eyes in several places that didn’t necessarily make “sense”, and star beads pressed into arms and feet.

Jeweled Turtle (5)

I didn’t lift a finger for this second version, and absolutely loved seeing Travis make his own creation.

Jeweled Turtle (6)

What will your child’s turtle end up looking like? Please describe or post a picture in the comments; we can’t wait to see!

Jeweled Turtle (8)

Paper Tube Snake

Paper Tube Snake (8)

We had good fun with a snake straw puppet a few days ago, and soon decided we needed another slithery friend around the house. Travis enjoyed this method of making a snake even more!

To start, paint cardboard tubes to be the snake’s body. I had one empty paper towel tube and one empty toilet paper tube, which dictated how long our final snake would be. Save lots of tubes and you can make your snake even longer!

Paper Tube Snake (1)

We painted the snake with glitter paint, giving it a very reptilian shimmer, then set it aside to dry.

Paper Tube Snake (2)

Once the paint dries, cut the tubes into pieces (about 3 pieces for a toilet paper roll, and 6 or 7 from a paper towel roll).

Paper Tube Snake (3)

Your child can decorate the snake further by making dots, squiggles, or other designs with more paint or with markers. But Travis decided he liked the glitter plain, and was super excited for the next step because it involved…

The hole punch! He loves practicing with the hole punch on paper, and was very curious to see if he could punch all the way through cardboard. The verdict is that he needed a little extra oomph from mommy’s hands, but he loved the process of punching two holes into each segment of cardboard.

Paper Tube Snake (4)

Next up was lacing. We used a long red string with an eyelet at the end, making it easier to poke through the holes without fraying, but regular yarn would work too. Travis was so proud of his ability to thread up and down through the holes as we attached our snake segments together, declaring at one point, “I love lacing!”

Paper Tube Snake (5)

Once all of your pieces are threaded on the string, tape the back and front end of the string to the cardboard. We left a little extra string at the front so Travis could tug the snake around the room.

Paper Tube Snake (6)

A little glue helped us add googly eyes and a red felt tongue as the finishing touches.

Paper Tube Snake (10)

Pardon the blurry picture, but the snake was wiggling too fast once in Travis’s hands for me to capture a clear image – a sure sign of an enjoyable snake!

Tissue Paper Eggs

Tissue Paper Eggs (7)

This morning Travis found his old baby toys in a bin, and dove into it with delight. It’s always a laugh to see the way that older kids go back and play with things they used as babies, inevitably in inventive and different ways. He was particularly enamored with an old bird shape-sorting toy, so we decided to make eggs for the birds!

The process was simple and fun – crumple sheets of tissue paper into little balls. Travis went to town with this, and I neatened them up a bit into ovals as he finished each one.

Tissue Paper Eggs (2)

To finish your eggs, wrap with colored tape. Masking tape would work well, but we had decorative washi tape that seemed even better, since it reminded me of the decorative blown eggs I learned to make in elementary school (in pre-vegan days!)

Tissue Paper Eggs (4)

Travis was very deliberate in deciding which tape pattern should wind around which egg, until we had a beautiful assortment.

Tissue Paper Eggs (6)

And then the birdies got to sit in their new nest!

Tissue Paper Eggs (5)