Chalkboard Frame

Chalkboard Frame (6)

I keep hearing about how fun chalkboard paint is, so it was finally time to give it a try! With a simple coat of paint, you can transform a room, wall, or object.

We opted to start out small; a wooden picture frame (picked up cheap at a craft store) made the perfect canvas. Parents, be forewarned: If you’re used to using washable paint with your toddler or preschooler, you’re entering the big leagues here. Chalkboard paint is acrylic, and won’t wash out nearly as easily.

Chalkboard Frame (2)

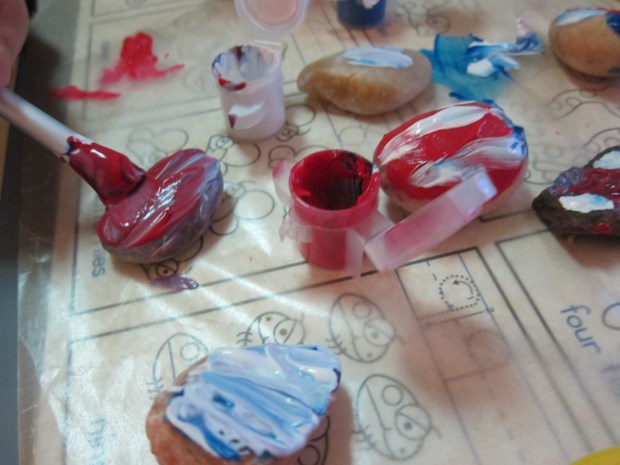
After we carefully covered our work surface, Travis was so excited at the novelty of the paint. He made sure his black paint got all the way to the edges.

Chalkboard Frame (3)

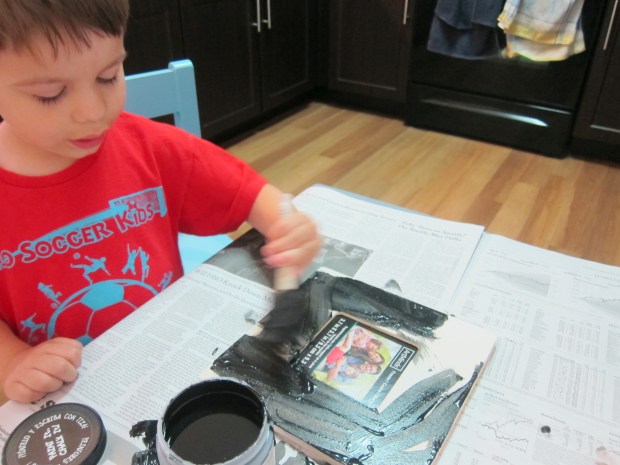
Ok, and he was so excited he painted over the glass in the middle where a photo would go!

Chalkboard Frame (5)

Aim for 2 layers of paint; Travis was so enthusiastic we probably ended up with closer to 3 or 4.

We had to wait awhile for the chalkboard paint to dry, so this was a good project for the morning. Our busy day distracted him until I could present him with the dry frame.

Now it was time to break out the chalk!

Chalkboard Frame (7)

He loved that he could color over it however he liked, and was thrilled when I said this time there was no need for chalk to dry. A very cute project that would make a nice gift, too.

Chalkboard Frame (8)

Paper Plate Frog

Paper Plate Frog (9)

Travis has just started camp, and every day the teacher gathers everyone together for craft time. It has renewed his interest in simple hands-on activities – painting, gluing – which lately he seemed to have tired of when it was just mom in charge! Now he comes home and wants to play camp, so we threw together this easy frog with items we had on hand.

For the mouth, fold a paper plate in half; paint the outside green, and the inside black. Travis didn’t even want my help making sure the paint got all the way to the edges.

Paper Plate Frog (1)

For the legs and arms, I drew simple outlines on green craft foam and cut them out.

Paper Plate Frog (3)

Travis was a big helper putting on globs of glue so we could set the legs and arms in the right place once the paint was dry. A pink construction paper tongue was added as well.

Paper Plate Frog (4)

I glued on googly eyes as the final touch. When the frog was ready, Travis decided all on his own that we needed to make flies to feed it. “Let’s paint them white!” White flies? Why not!

Paper Plate Frog (7)

A hoppin’ good time.

Paper Plate Frog (8)

Seashell Friends

Seashell Friends (5)

After a week at the beach, we’ve come home with treasures galore to turn into crafts! Some of our best clam shells were the perfect base for making these little “friends”, and now they are a fantastic reminder of the summer fun we had at the shore.

Start with any relatively flat, whole shell as your base – clams worked great, but we tried a mussel shell that we’d found as well.

Seashell Friends (2)

After a week away, Travis couldn’t wait to get his hands into our craft bin, meaning this was a before-breakfast undertaking!

Seashell Friends (1)

Use anything in your craft box to make silly, friendly faces on the shells – I thought pipe cleaners or ribbon would make great smiles, but Travis had more fun adding mouths in sparkly glitter glue and paint.

Seashell Friends (4)

Pom poms made adorable noses, and googly eyes were the perfect finishing touch.

Seashell Friends (6)


Spread Your Wings

Butterfly Wings alt

Butterflies are everywhere this time of year, whether flitting past us on the beach, at the playground, or in the nearest batch of pretty garden flowers. If your little one wants to bring home the butterfly beauty, try out this creative suggestion from High Five magazine.

To start, grown-ups need to cut a butterfly wing shape from a large piece of cardboard.

Butterfly Wings (1)

To make our wings shiny, we covered them first in strips of aluminum foil – this part was a huge hit, since Travis loves the way foil looks and feels. Plus glue is always fun!

Butterfly Wings (3)

Once the glue dried, it was time to decorate our aluminum foil. Use anything crafty you have, including markers and paints.

Butterfly Wings (4)

Butterfly stickers added a whimsical touch.

Butterfly Wings (5)

To attach the wings to your little butterfly, punch holes in the middle where the wings meet. Thread string through the holes, and then tie over your child’s shoulders.

Butterfly Wings var

Time to flutter away!

Butterfly Wings


Painted Hydrangeas

Painted Hydrangea (7)

We needed a quick craft pick-me-up for the afternoon, and just about all I had on hand was a bouquet of white hydrangeas. They turned out to be the perfect canvas!

Simply set out the blossoms, along with watercolors.

Painted Hydrangea (5)

Liquid watercolors will provide the most vibrant color, but after this mama tipped over a cup of a very bright pink (and this stuff stains, folks), we decided to play it safe with Crayola’s watercolor paints!

Painted Hydrangea (3)

Travis liked seeing all the different colors appear on our white flowers.

Painted Hydrangea (6)

These would make a great centerpiece for a summer dinner al fresco!

Painted Hydrangea (8)

Clay Flower Pots

Clay Pots (6)

This project couldn’t be simpler, but kids will love playing with the clay and watching their decorations take shape! A great summer craft, especially if you’re teaching your little ones about gardening.

Use any small terracotta pot as the base. I ended up wishing that I had several on hand, because Travis covered his first with clay designs so quickly; consider picking up a few at a craft store ahead of time!

Clay Pots (1)

For the clay, we used Model Magic – it’s easy to work with, mess free, and will air-dry in a few days.

Clay Pots (3)

Travis loved just smooshing on big designs, but older kids can be more deliberate in their art, creating flowers or mini clay gardens. I added a few details as examples.

One cool result of Travis smooshing all the clay onto the pots was a swirled, marbled effect.

Clay Pots (4)

These pots would make a great summer gift for anyone who loves to garden!

Your Tops, Dad!

You're Tops Dad (4)

This easy project from High Five magazine is sure to delight the dads and grandpas in your life this Father’s Day!

You're Tops Dad (5)

Purchase blank white baseball caps, and let your child go wild with fabric markers. Travis had so much fun choosing colors, and deciding where the marker should go!

You're Tops Dad (2)

The only bit I added was a name on the brim and a #1 for his dad. Add a cap for any grandpas or other special father figures in your little one’s life!

You're Tops Dad (6)

The next step was a grown up one, but Travis loved watching; cover the the caps with a piece of white paper, and iron the caps. This will keep the marker from bleeding.

You're Tops Dad

Wishing all the dads a Happy Father’s Day!

Patriotic Rocks

Patriotic Rocks (6)

A very happy Memorial Day to all, and a sincere thanks to all those in our country who serve or have served. We had a very patriotic weekend, catching a local Navy parachute demonstration in honor of the holiday. Travis was smitten, so we brought the patriotic sentiment back home with this easy craft.

Take a walk to collect a few rocks, and then lay them out with red, white, and blue paints.

Patriotic Rocks (1)

Older children will definitely have fun drawing replica American flags on their rocks, but for a three-year-old, simply decorating in the colors of our flag was a joy.

Patriotic Rocks (2)

He liked choosing which colors should go where!

Patriotic Rocks (4)

I added a few lines of paint to a few rocks so that they more closely resembled our flag.

Patriotic Rocks (3)

Let the rocks dry, then proudly display as holiday decorations. These would be great for the 4th of July, too!

Patriotic Rocks (5)

Coaster Gift Set

Coasted Gift (6)

This two-material project is so simple, with such beautiful usable results – real coasters! Perfect for Memorial Day drinks perhaps? They are great just to have around your own home, or even to send off as a gift.

I pulled out all of our washi tape and 4 foam squares (circles would work well too), and let Travis have free creative reign.

Coaster Gift (2)

At first he just wanted to play with the washi tape a little.

Coaster Gift (1)

Then he saw the picture of this craft from where I had found it online. “Look, there are three lines!” he observed. He then wanted to replicate a coaster with three lines.

Coaster Gift (4)

We also replicated one with an X, and then he made up a few design creations of his own.

Coasted Gift (5)

A delightful little project; we made sure to send some on to his great-grandparents as a surprise gift.

Coaster Gift.JPG

Wooden Napkin Rings

Wooden Napkin (3)

We recently switched Travis from his highchair to a big boy table. It seemed like the perfect occasion to make him his own napkin ring as well!

For this simple craft, all you need are wooden beads and pipe cleaners. Threading the beads on is great practice for little fingers.

Wooden Napkin (2)

As we worked, Travis and I discussed the different beads – some dark wood, some lighter, and in different shapes like squares and circles.

He lost interest after a while and the beads themselves became fodder for a game. Meanwhile, I finished the napkin rings by looping any remaining pipe cleaner back over itself to seal.

Wooden Napkin (4)

Slip in a napkin and you’re done! These would be a lovely project for kids around the holidays, too.

Wooden Napkin (6)