Shaving Cream Bonanza

Bananas with Shaving Cream (3)

Today, Veronika went bananas with a shaving cream bonanza! Much like finger painting in the tub, this activity is perfect because you’re exactly where you need to be to rinse off at the end. In fact, your tub may be cleaner than when the game began, thanks to the soapy shaving cream.

I dressed Veronika in her bathing suit and placed her in a dry tub, then simply squirted out shaving cream: lots! I probably used about three-quarters of a container, but this was so fun that I might use a full bottle or two next time.

Bananas with Shaving Cream (1)

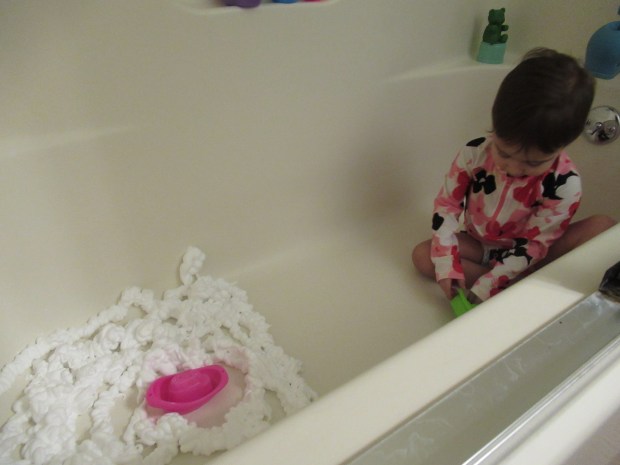
First, Veronika had fun with her tub toys in the oceans of foam. Plastic boats looked like they were in an icy sea!

Bananas with Shaving Cream (2)

She also liked adding bath toys like a penguin and dolphin, which could romp through the soapy waves.

Bananas with Shaving Cream (5)

Your kids might want to play with the shaving cream on the floor of the tub or to smear it on the walls. For the latter, you could even take the opportunity to draw shapes or letters, but honestly we skipped that part today.

Bananas with Shaving Cream (6)

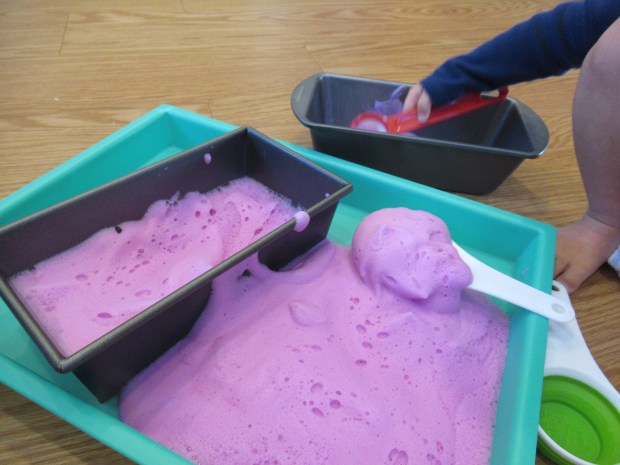
Instead, I placed a basin of warm water next to Veronika and she loved scooping water up in cups and pouring it over the toys. This was neat because it made some of the shaving cream dissolve each time. She then decided it was more fun to scoop up shaving cream in her hand, rinse in the basin, and repeat. She got into such a groove solo with this activity for a while, which is exactly what I was hoping for.

Bananas with Shaving Cream (4)

As she was finishing up play, we turned it into clean-up, simply rinsing each toy and watching the shaving cream go in runnels down the drain. A quick rinse for her hands and feet and clean-up was done!

Valentine’s Day Soapy Sensory Foam

VDay Soapy Sensory Foam (3)

Soapy sensory foam is an idea we first found at Hands on As We Grow when Travis was a toddler, and it’s one of those easy activities you can return to over and over. You can switch it up for just about any holiday simply by adding that season’s colors with food coloring. To wit, today Veronika and I turned the foam pink!

I added about 2 tablespoons of water and a squirt of dish soap to a blender, along with a few drops of red food coloring. Run the blender for just a moment and you’ll get a thick foam that’s ready for play!

VDay Soapy Sensory Foam (2)

I spooned the mixture onto a tray for Veronika and set out kitchen utensils such as a whisk, spoon, and a few measuring cups. Let the soapy, foamy bakery begin!

VDay Soapy Sensory Foam (8)

Veronika told me that she was adding cups of “flour” very seriously as she scooped the foam into a loaf pan.

VDay Soapy Sensory Foam (5)

She also loved using one measuring cup to fill another.

VDay Soapy Sensory Foam (7)

The whisk was great for stirring it around!

VDay Soapy Sensory Foam (4)

This activity kept her busy for quite a while. And while it looks like messy play, don’t forget that you literally just have soap in all those containers. It rinses off in a moment and everything is sparkly clean.

Rainbow Sensory Bags

Rainbow Sensory Bag (4)

Mixing paint is such a great way to teach kids about the difference between primary and secondary colors (namely, that you achieve one of the latter by mixing two of the former), and I’m always looking for ways to make the lesson hands on. These hair gel bags make it easy to mix the colors together in a fun and squishy way!

Rainbow Sensory Bag (2)

To start, squirt a little clear hair gel into each of three sandwich-sized zip-top bags. Add the primary colors on either side of the gel, so you have one bag that contains red + yellow, a second that contains yellow+ blue, and a third that contains blue + red.

Rainbow Sensory Bag (1)

Seal tightly and add a strip of duct tape at the top of each for security. Now invite your toddler to squish and mush!

Rainbow Sensory Bag (3)

Veronika was particularly pleased when the red and blue combined to make her favorite color (purple).

Rainbow Sensory Bag (8)

We simply made this about the squishy sensory play today, but see my previous post on primary color storytime for reading suggestions that can go along with it.

Rainbow Sensory Bag (5)

If you have enough paint, you might consider making one bag that contains just red paint + hair gel, one with yellow paint + hair gel, and one with blue paint + hair gel, in which case you’ll wind up with the full rainbow lineup at the end.

Snow Squishy Bag

Snow Squishy Bag (4)

I’ve put together complicated sensory and squishy bags for Veronika before, but sometimes nature supplies you with all the materials you need! To wit, we had fresh puffy snow on the ground outside when we woke up this morning, so I simply dashed out, filled a bag with snow, and then sealed it shut. Instant sensory bag!

Snow Squishy Bag (1)

Of course the first thing your toddler will discover with this particular bag is the temperature. “Brr, that’s cold!” Veronika said with surprise.

Snow Squishy Bag (3)

And then she promptly placed her hands down again.

Snow Squishy Bag (2)

You can squish the snow around in fun ways inside the plastic. Then Veronika requested purple snow. I hadn’t even thought to add color, but why not! We squirted in red and blue food coloring and then tested whether we could mash the snow around enough for the two colors to blend.

Snow Squishy Bag (5)

And then of course the other fantastic thing about snow is that your toddler gets a quick STEM lesson on states of matter. It wasn’t long before the fluffy snow started to change…

Snow Squishy Bag (6)

…into purple water, instead! This sensory bag is by its very nature (heh), short lived, but lots of fun.

Snow Squishy Bag (7)

Easy Winter Sensory Bin

Easy Winter Sensory Bin (1)

If you need to occupy a toddler on a cold winter day, simply throw a few items that seem “wintry” onto a tray and call it a winter sensory bin!

Yes, this really was as simple as that, just some odds and ends to keep Veronika busy for a short while. I raided the craft bin for items that fit the theme and ended up using: packing peanuts for their snowy white color and puffy texture; sparkly silver and gold ribbon; white and blue pom poms that were like mini snowballs; and some sparkly silver and blue chenille stems that seemed like icicles.

Easy Winter Sensory Bin (2)

The mix of textures, sizes, and shapes turned out great! Veronika could pretend she was sifting through snow with the packing peanuts and pom poms.

Easy Winter Sensory Bin (4)

For a little fine motor work added in, I also set a couple of spring-type clothespins on the tray and encouraged her to pinch some of the items.

Easy Winter Sensory Bin (3)

She proudly lifted a pom pom! The crinkly ribbon, meanwhile, made a wonderful sound and was great fun to lift up and then let “snow” down.

Easy Winter Sensory Bin (6)

Her bin was a mess by the end, the sure sign that she’d had some tactile wintry fun.

Easy Winter Sensory Bin (7)

Primary Colors Squishy Bag and Storytime

Primary Colors Squish Bag (5)

This activity is 50% storytime and 50% art activity, and 100% fun for your toddler.

I set up the color squishy bags first so they would be ready to go. Squirt one primary color into the bottom left corner of a small zip-top plastic bag, and then a second primary color in the top right corner. Seal tightly and tape down to the floor with duct tape. Repeat so that each primary color is paired once with the other two.

Primary Colors Squish Bag (2)

Now I was ready to invite Veronika over for this hands-on storytime! There are so many wonderful color books you can read, but we love Press Here and Mouse Paint, both of which are particularly good for talking about primary colors.

Primary Colors Squish Bag (4)

As we read through Mouse Paint, we copied the mice! As the red one danced in the yellow paint, we squished that bag together and got orange! The middle mouse mixed yellow and blue to make green, and we followed along with our squishy bag.

Primary Colors Squish Bag (6)

And finally the third mouse mixed red into blue, and Veronika did the same. She loved that the storytime was so interactive, not to mention simply loved the squishy feel of the paint bags!

Primary Colors Squish Bag (3)

There were lots of ways for her to continue the play solo, whether continuing to have fun with the sensory bags or leafing through the pages of the books.

Primary Colors Squish Bag (8)

What’s your toddler’s favorite book about primary colors? Please share in the comments!

Primary Colors Squish Bag (9)

Foam Number Sensory Bag

Foam Letter Sensory Bag (3)

Veronika is just starting to recognize the written numeral that goes along with each number, and I thought it might be fun to make the experience more hands-on today. After all, toddlers learn so well through sensory play!

I set up a classic sensory bag for this activity, just a large zip-top bag filled with cheap clear hair gel. I kept the layer of gel very light so the emphasis was on the numbers.

Foam Letter Sensory Bag (2)

Add the foam numbers and seal the bag, and it’s ready for your child to squish the numbers around. Big brother Travis wanted to see how it felt, too!

Foam Letter Sensory Bag (4)

At first I only used numbers 0 through 4, intending to keep things simple. But she spotted the extra numerals (5 through 9) on the floor and wanted a new bag for them. Since she was already tempted to open up the goopy bag, I decided to give her a clean one for this second batch of numbers

Foam Letter Sensory Bag (5)

She loved adding 5 through 9 to this second bag, then taking them out and starting over again. This turned out to be even better, because she named each number as she added it! I was surprised to realize she already seems to know 5, 7, and 8 quite well.

Foam Letter Sensory Bag (6)

She also discovered that the bags were fun to toss on the floor, especially the one filled with hair gel since it made a satisfying plop when it landed.

Foam Letter Sensory Bag (7)

So we had some good sensory play with some good early learning built right in.

Winter in a Bag

Winter in a Bag (5)

Veronika loves glitter but I confess I’m not always in the mood to deal with the sparkly mess it leaves behind. This sensory bag is a great way to enjoy all the sparkle and ice of winter, without a single bit of that mess!

To start, I squirted about half a bottle of clear hair gel into a large zip-top bag. Add any items that are fun to squish and resemble little snowballs or snowflakes. To wit, we used white pom poms and large Dandies marshmallows!

Winter in a Bag (1)

For snowy sparkle, I then poured in blue glitter and a few silver star-shaped sequins that looked roughly like little snowflakes. Veronika wanted to get hands-on with the bag right away!

Winter in a Bag (3)

The marshmallows in particular are fun to squish, even through the bag. As a bonus, there’s no sticky mess left on fingers. She also loved spotting the silver snowflakes in the mix.

Winter in a Bag (4)

She then decided to stand on the bag instead, delighting in how squishy it felt beneath her toes.

Winter in a Bag (6)

The bag didn’t hold her interest for very long, truth be told, but it was sparkly, wintry fun while it lasted.

Cute Winter Snowman Sensory Bin

Snowman Sensory Bin (4)

Instead of painting a snowman today, it was time for a 3-D snowman that was all about sensory play. This little sensory bin of winter goodies was pure fun for Veronika.

To set it up, you’ll need an empty plastic bottle. One with a wide opening will work better than a narrow-necked water bottle in this case; we used a dry-roasted peanut jar.

I added two wiggle eyes and 3 black buttons with hot glue, attaching them roughly where they would be a snowman’s body, then twisted on a sparkly green chenille stem for a scarf and drew a carrot nose with orange marker.

Snowman Sensory Bin (1)

Next, I added lots of cotton balls to the tray. Once stuffed inside the bottle, it looks just like a little snowman, and one that will never melt!

Snowman Sensory Bin (3)

The fun (and challenge!) now was for Veronika to put the cotton in and then take it back out again. I added chopsticks to the tray for her to use as a tool (tongs would be great, too).

Snowman Sensory Bin (6)

But after a few tries, she preferred to use her fingers.

Snowman Sensory Bin (7)

Or just to upend the bottle and dump it!

Snowman Sensory Bin (8)

To round out the tray, I added a collection of plastic arctic animals and lots more black buttons.

Snowman Sensory Bin (2)

After she tired of transferring cotton balls in and out of the jar, she loved putting the little animals inside and then practicing screwing on and off the lid.

Snowman Sensory Bin (9)

All in all, this was great little bin full of wintry fun.

Slippery Sledding Bin

Slippery Sledding Bin (4)

When your kids wake up to a huge snowstorm outside and sledding is in the near future, but it’s too windy and cold to go sledding just yet… Take the toys sledding instead!

I loved the set-up for this activity because it required only one ingredient: shaving cream. I turned a glass bowl upside down over a craft tray and sprayed liberally with shaving cream. The kids were sort of in awe that mommy was doing this!

Slippery Sledding Bin (2)

Smooth down into an even layer, then add toys and send them sledding! Lids from the kitchen make perfect sleds for Playmobil figures (we used one from a peanut jar).

Slippery Sledding Bin (1)

We also have a few Little People figures who came with their own skis and slids, and they were perfect for sending down the “hill”.

Slippery Sledding Bin (4)

Travis loved having figures face plant in the snow!

Slippery Sledding Bin (5)

Veronika just thought it was amazing to see how slippery and soapy the tray was, making it more of a sensory game for her.

Slippery Sledding Bin (7)

This was messy for sure, but a fun way to start the morning.

Slippery Sledding Bin (8)