Beehive Card

Beehive (5)

We’re not the only ones happy to be back outside – the bugs are out in force now that spring is here, too! Travis has been very fascinated by the bees this season, so we decided to welcome spring with this cute project. You can hang it at home, or send it as a lovely card to a friend!

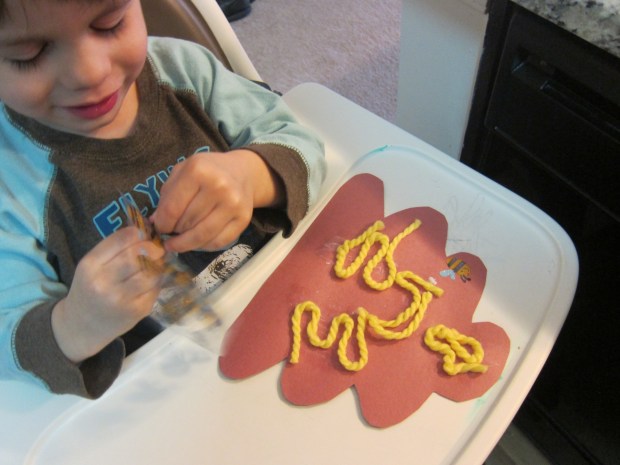
I cut a hive shape from brown construction paper to start, and then Travis went to town with a glue stick.

Beehive (1)

Once the paper was very gluey, we added thick yellow yarn.

Beehive (2)

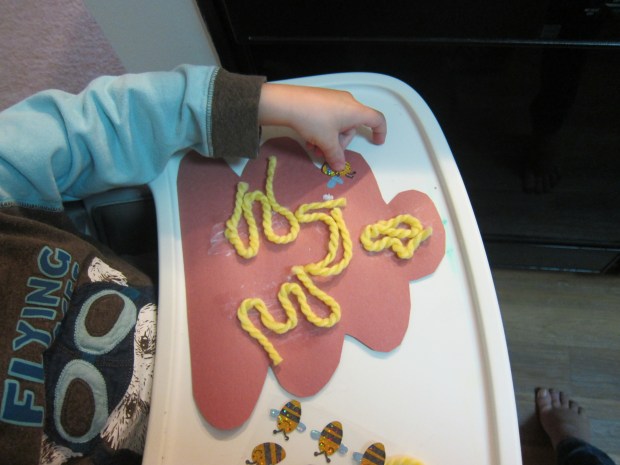
Then of course we needed bee stickers, which I happened to have from the craft store. Travis didn’t stop until his hive was full of a big bee family.

Beehive (3)

We needed a few flower stickers as the final touch of course!

Beehive (4)

Pumpkin Cheesecake

Pumpkin Cheesecake (2)

We read a bedtime story featuring cheesecake this week… How could I not whip up a version for my son to try at home?

Ingredients:

  • 1 (15-ounce) can pumpkin puree
  • 1 (8-ounce) tub vegan cream cheese
  • 2/3 cup light brown sugar
  • 2 teaspoons cinnamon
  • 1 teaspoon nutmeg
  • 1 teaspoon vanilla extract
  • 2 tablespoons cornstarch
  • Chocolate crust (such as Mi-Del)
  1. Combine the pumpkin and cream cheese in a blender and process until smooth – it helps to let the cream cheese soften at room temperature for about 30 minutes, first.
  2. Add the brown sugar, cinnamon, nutmeg, vanilla, and cornstarch; blend again until completely combined.
  3. Pour the batter into the prepared crust, and bake at 350 degrees F for 45 minutes.
  4. Let stand at room temperature for 2 to 3 hours, then transfer to the fridge and chill at least 10 hours.
  5. You can add vegan whipped cream at serving time, if desired! Divide the cheesecake into 8 or 9 wedges and serve at storytime of course.

Pumpkin Cheesecake (1)

Tissue Paper Globe

Tissue Globes (6)

Our Earth Day fun continued with this very easy tissue paper project. It’s a cute way to celebrate this beautiful planet we call home!

First, encourage your child to trace a circular shape onto the paper you’ll use as a background, which is great fine motor skill practice! Our paper plate was larger than our paper (whoops!) so I did some quick thinking and cut off the outer rim.

Tissue Globes (1)

Then it’s time to cut blue and green tissue paper into squares. Travis still can’t quite master this of course, but he had fun playing at it beside me while I cut up lots of little squares. (Note: No cats were harmed in the making of this project!)

Tissue Globes (2)

I showed Travis how to wad up the paper, dip in glue, and apply to his circular Earth, which was fun for a moment…

Tissue Globes (3)

…but then he quickly decided it was way more fun to use his finger as the glue applicator!

Tissue Globes (4)

I indulged this messy impulse, and added a wad of tissue paper wherever he had made our Earth sticky.

TIssue Globes (5)

Happy Earth Day!

Coffee Filter Globes

Coffee Globes (6)

Earth Day is tomorrow, April 22! I wanted to help Travis start to understand what protecting our planet is all about, so we made this craft today in anticipation of the holiday. You’ll celebrate Earth Day while teaching your little ones how they can help!

First, make your Earth. We scribbled in green and blue marker on a plain coffee filter, and as Travis worked I talked about how the Earth contained more water than land, so we needed more blue.

Coffee Globes (2)

Then came his favorite part – spritzing his globe with water to bleed the colors! From there we left it to dry overnight.

Coffee Globes (3).JPG

The next morning, I traced Travis’s hands on black construction paper.

Coffee Globes (4)

We glued the coffee filter to a piece of paper, leaving half of it above the sheet. Glue the hands below, and now your child is helping to “hold up the Earth.”

Coffee Globes (5)

As a final touch, you can talk about simple gestures even kids can do (not wasting water, helping to pick up trash…) and brainstorm a sentence to add to the blank part of your paper.

Mini Cheese Pizzas

Mini Cheese Pizzas

A mix of non-dairy milk, nutritional yeast and miso makes a wonderfully cheesy sauce to go over these individual pita pizzas. Try the cheese sauce anywhere else you’d like too – it’s killer over french fries!

Ingredients:

  • 1/4 cup pizza sauce
  • 2 whole wheat pitas
  • 1/2 cup non-dairy milk
  • 1/4 cup nutritional yeast
  • 1 tablespoon cornstarch
  • 1 tablespoon whole wheat flour
  • 1 teaspoon fresh-squeezed lemon juice
  • 1 teaspoon yellow miso
  1. Spoon 2 tablespoons pizza sauce over each pita; set aside.
  2. In a saucepan, combine the milk, nutritional yeast, flour, lemon juice, and miso. Cook over medium heat for about 5 minutes, until bubbly, stirring frequently.
  3. Divide the cheesy sauce evenly over the pizzas. Bake at 425 degrees F for 5 minutes, then let cool slightly before slicing and eating.

Curried Sweet Potato Soup

Curried Sweet Potato Soup.JPG

This recipe introduces curry flavor in a mild way for children who are new to spicy food – it’s the first time I’ve gotten Travis to eat curry, anyway, and he didn’t stop until the bowl was empty!

Ingredients:

  • 1 medium sweet potato
  • 1 cup chopped onion
  • 1 minced garlic clove
  • 1 cup water
  • 1/2 teaspoon mild curry powder
  • 1/2 cup coconut milk
  • 1/4 cup cooked wild rice
  1. Wrap the potato in foil and bake at 425 degrees F for 1 hour, until very soft; let cool, then peel of the skin. Discard the skin and transfer the flesh to a blender; set aside.
  2. Meanwhile, combine the onion, garlic, water, and curry powder in a saucepan; bring to a boil. Reduce heat and simmer for 5 to 7 minutes.
  3. Add the onion mixture and coconut milk to the blender and process until smooth. Return the mixture to the saucepan and cook over medium heat until heated through, stirring in the cooked wild rice at the end.
  4. Garnish with a dusting of cinnamon before serving, if desired!

Shoes for Sale

Shoe Shop (2)

This idea from High Five magazine was too adorable not to play! Use any blocks or boxes you have on hand to create the racks for your shoe store – ideally, I wish we’d had bigger blocks to utilize!

Once we had our “shelves” arrayed, I asked Travis to help gather shoes, and he was so excited to bring pair after pair from his closet. The game became even more exciting when we added in mommy and daddy shoes.

Shoe Shop (3)

Now all you need is a little imagination (though a toy register helps too!). Travis loved “beeping” shoes at checkout, and helping me try on pairs before we reversed roles.

Shoe Shop (1)

What would you construct your shoe store out of? Please share in the comments!

Foot Sensory Bins

Foot Bins (1)

Why should hands have all the fun? We set up bins today to see how things felt with our feet instead!

For your mise en place, set out 3 separate bins. I used one each of: shaving cream, water beads, and sand. You can make your sand wet or dry, or start with it dry and then gradually add a little water.

Travis wanted to hop in the water beads first, which he declared very cool.

Foot Bins (2)

Quite quickly he was ready to see how the sand felt. It only took a moment before he requested we add some water beads to the sand, and he mixed it all together with his toes for a while.

Foot Bins (4)

He was very hesitant about the shaving cream, but I got him to sit on a stool and we dipped his feet in, after which he decided he liked how creamy it felt. Then he declared we needed water beads in here too.

Foot Bins (6)

When you’re done, dump any trash out and then rinse your buckets in the tub – which is half of the fun anyway!

Foot Bins (7)

Green Power Smoothie

Green Power Smoothie.JPG

This power-packed smoothie is full of surprising ingredients – a great way to sneak new foods into a child’s diet!

Ingredients:

  • 1 cup vanilla almond milk
  • 1 ripe banana, frozen
  • 1/2 cup frozen mango
  • 1 cup baby spinach
  • 1/4 cup pumpkin seeds
  • 1 tablespoon ground flaxseed
  1. Combine all ingredients in a blender and process until smooth. Enjoy!

Note: The smoothie comes out thick, so sometimes Travis likes to eat it with a spoon, more like a slushie. Or, add a little water to thin the consistency and drink with a straw.


Matzo Crunch Bites

Matzo (2)

These three-ingredient bites are easy for kids to help make, kosher for Passover if you’re keeping kosher this week, and absolutely delicious.

Ingredients:

  • 1 cup pitted dates
  • 1/2 cup almond butter
  • 1 and 1/2 pieces matzo
  • Powdered sugar for rolling (optional)

Matzo (3)


    1. Combine the dates and almond butter in a food processor and process until mixed.
    2. Break the matzo into small pieces and add to the food processor; process until combined.
    3. Using your hands, roll the dough into 12 balls; roll in powdered sugar if desired for a sweet coating.
    4. Chill for at least 1 hour before serving.