X Week!

x-week-19

We’re in our third week loosely following Letter of the Week, but X was a little bit different. Because so few words begin with X, we played around with great options ending in the letter. Though of course, I couldn’t skip alphabet-book favorites like x-ray or xylophone!

x-week-1

ToolboX: One of Travis’ favorite activities is to play at his toolbench, so this was a no-brainer. To add to the X-themed fun, I made our play this week purposefully about items we needed to fiX using the tools from his toolbox, leading to great narrated play.

x-week-2

As a bonus, our toy drill ran out of batteries – so we really needed to fiX it!

x-week-4

X-ray: Kids love doctor toys, and Travis has recently taken to acting out giving shots and medicine. This week, I encouraged him to focus on his little toy x-ray machine, which he liked holding up to his stuffed animals to see their “bones.” He had no real way to grasp the concept, having never had an x-ray, but he seemed intrigued by the idea of peeking inside somebody’s body!

x-week-3

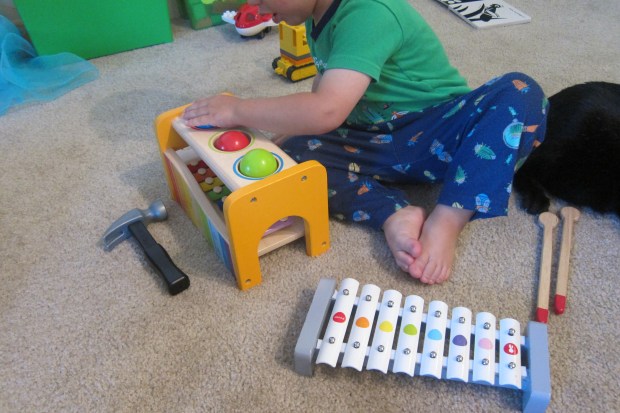
Xylophone: This word is really more of a phonetic zee, but what the heck – pull out your xylophones and make some noise all week!

x-week-5

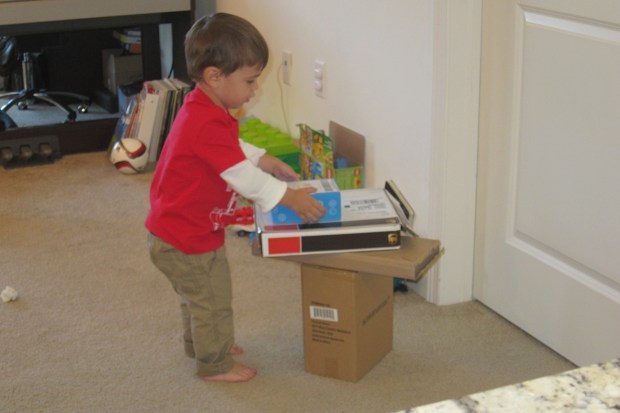
BoX: Here is where the possibilities are almost endless. I’ve posted about our play with boxes before, but we can always think of new boX games!  One big hit was saving up packaging so he could play a “recycling” game, sending the packages down the shoot just like mommy does!

x-week-7

When he tired of that, I looked over to see construction underwear for a very tall box tower!

x-week-8

A simple boX train (three boxes tied together with rope) was a great hit for bringing pals like Cow and Puppy across the floor. Travis loved when the animals tumbled out, and helped them back aboard, and returned to this toy all week long.

x-week-10

Then I remembered to pull out our good old Jack in the BoX! It had been so long that I think we were both surprised Travis could now wind through the entire song himself, delighting in every “pop!” up of Peter Rabbit.


x-week-11

For great motor skills practice, we then used a large box for him to be the Jack in the Box, popping up from a crouch.

youve-got-mail-6

MailboX: On the heels of boxes in general, we focused on the mailbox, not only making Travis one of his own, but then acting out many a game of letters to mail and deliver. See my post for more details!

After these games, here are a few other x-themed ideas that were sprinkled through our week:

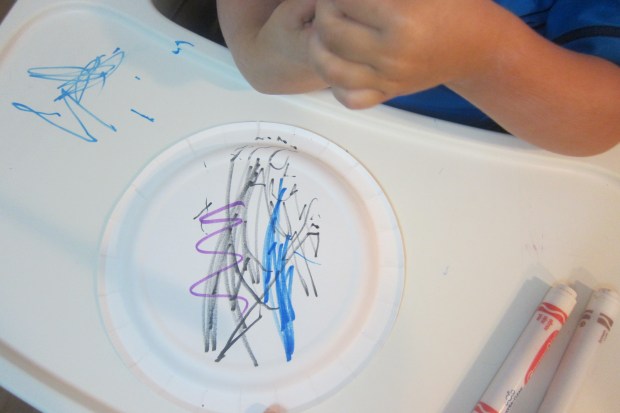
Fine art: Letter of the Week’s suggestion to“decorate an X” seemed sort of mundane, so as we decorated I talked about eXcess – Travis was thrilled to use so much glitter and globby glue! We glued on elbow macaroni to complete the over-the-top eXtravaganza.

x-week-20

Food: Rather appropriately, the verb miX fit into our week, so what better thing to do than mix up a batch of cookies from boxed sugar cookie miX? Just in case that wasn’t enough, we froze a portion of the dough in order to roll and cut out some X-shaped cookies.

x-week-14

If that’s too complicated, you can always cross two pretzel sticks into an X-shape on your child’s tray, for a cute snack.

x-week-18

Books: We don’t have any foX toys, but we were able to talk about foxes with two great library books: Hattie and the Fox by Mem Fox, and Fox on the Loose by Matthew Porter. Travis adored both and requested them all week. We rounded out our X books with The Magic Toolbox by Mie Araki

Song: I played Travis the song SiX Little Ducks, but since he’s known the song for a long time, I don’t think he connected it to X Week.

Math: There are two concepts with a prominent X that we played with. The number siX of course, but the idea of counting items up to six was sort of lost on Travis. He’s more excited about counting up to twenty these days, so didn’t understand why I kept wanting him to pause at six!

x-week-16

More successful was the idea of what comes neXt? We played two great games that helped build the concept, with a tape road for cars and with numbered stars on the wall.

And on that note, we’re off to W week neXt!

You’ve Got Mail

youve-got-mail-7

Travis loves everything about the mail – going to the mailroom with me, turning the key in the lock, putting letters to be sent through the mail slot, spotting mail trucks as we drive, you name it! So it seems only natural he should have his own mailbox at home. Toddlers will delight in this game, getting to send and receive “their” own mail.

Cut a slit in an old shoebox or package box, and let your child paint it however they like. Travis picked out blue and red for his mailbox, and loved mixing them together for a purple-ish final result. (I helped out with painting the sides, which were harder for him than the top).

youve-got-mail-6

Once the box dries, you can decorate more with crayons or stickers, or just skip right to the business of mailing! Use any junk mail, old envelopes, or other slips of paper you have on hand as letters.

youve-got-mail-10

You can re-purpose old stamps and glue them on with glue sticks, or buy stickers in the shape of stamps.

youve-got-mail-1

Either way, Travis had so much fun “sorting” his mail, mailing it into the box, and then seeing what he received. He was very proud to “write” me a letter as well (heart melting…)

youve-got-mail-9

If you have time, decorate a second box to be the grown up’s mailbox. Now you can send letters back and forth!


Yarn Sculpture and Squiggles

Yarn Sculpture (2)

Yarn is a great 3-D medium for toddlers’ art, lending itself to a variety of projects. To wit, Travis and I had fun with these two activities on a recent morning.

To make a yarn sculpture, give your child a shallow dish of glue and pieces of brightly colored yarn. Drag the yarn through the glue and arrange any which way on waxed paper. Travis wanted to use a paintbrush to apply some of the glue as well, and was very excited when his “sculpture” momentarily adhered to the brush.

Yarn Sculpture (3)

Let the glue dry completely before removing the yarn from the waxed paper. The resulting creation could make a great mobile or decoration in your child’s room!

Yarn Sculpture (4)

Less permanent but equally fun is setting up a yarn “easel”. Glue sandpaper to a sturdy piece of construction paper and let dry, then give your child short pieces of string to arrange as artwork on the surface – the sandpaper will grip the yarn to help it stay in place.

Yarn Squiggles (1)

It took a few demonstrations before Travis got excited about the idea, but then he returned to his sandpaper “easel” a few times throughout the afternoon.

Yarn Squiggles (2)

His favorite was telling me that he’d made an ant!

Yarn Squiggles (3)

What other yarn projects have you and your child made? Please share in the comments!

Sausage, Spinach, and Squash Soup

Sausage, Spinach, and Squash Soup

September is here and already there’s a chill in the air. The perfect night for preparing a toddler-friendly bowl of soup, in sum. Use any small pasta shape, such as mini shells, pennette, or farfalline for this recipe.

Ingredients:

  • 2 Field Roast Italian sausage links, chopped
  • 1/2 cup cooked spinach, chopped
  • 1/4 cup leek, chopped
  • 1 tablespoon olive oil
  • 4 cups low-sodium vegetable broth
  • 1 pound precut butternut squash
  • 1/4 cup small pasta
  • French bread
  • Earth Balance butter
  • Nutritional yeast
  1. Heat the olive oil in a large saucepan over medium-high heat. Add the sausage, spinach, and leek; cook for 4 to 5 minutes, until the sausage is browned.
  2. Add the broth and squash. Bring to a simmer, then continue to cook for 5 minutes. Add the pasta and cook for an additional 7 minutes.
  3. Meanwhile, prepare the croutons: cut the French bread into slices, and spread each with the desired amount of butter and a sprinkle of nutritional yeast. Broil for about 1 minute, and serve with the soup.

Broccoli Toss

Broccoli Toss

This recipe travels well, making it ideal to pack a full portion for school lunch or a 1/2 serving as a preschool snack! My toddler likes broccoli soft and cooked, but if you prefer, you can leave the broccoli raw and crunchy.

Ingredients:

  • 4 cups broccoli florets
  • 1 (15.5-ounce) drained and rinsed can Great Northern beans
  • 1 cup frozen shelled edamame, cooked
  • 2 tbsp. fresh-squeezed lime juice
  • 2 tbsp. olive oil
  • 1 tbsp. low-sodium soy sauce
  • 2 tsp. sesame oil
  1. Cook the broccoli in boiling water for about 8 minutes, until tender. Drain and transfer to a large bowl. Add the Great Northern beans and edamame.
  2. In a small bowl, whisk together the lime juice, olive oil, soy sauce, and sesame oil. Drizzle over the broccoli mixture and toss to combine.
  3. Let stand for at least 30 minutes before serving.

Water to Ice

Water to Ice (3)

Use this simple experiment to introduce your toddler to two of the basic states of matter – liquid and solid.

Using an eye dropper, let your child fill the compartments of an ice cube tray with just a thin layer of water per compartment. You could also simply pour in a small amount of water, but the eye dropper is great practice for fine motor skills!

Wait 10 to 20 minutes for the water to freeze, then ask your child if they’re ready to see the exciting results… Has your liquid turned into a solid?

Travis loved playing with the ice that we made, dumping it from the ice cube tray and putting it back in again, and watching with delight as rivulets of water melted off and got us wet. As we played, I talked about how water + cold = ice, and how ice + hot = water. He loved this simple equation, and repeated it to himself when he took his bath later in the evening.

Water to Ice (2)

For added fun, you might try adding food coloring to the ice. If you try this version, please let me know how it goes in the comments! If you’re interested in ice play for slightly younger toddlers, check out my previous post on why Ice is Nice.

Water to Ice (1)

Homemade Tambourine

Homemade Tambourine (4)

It’s easy to create your own musical collection at home without purchasing toy instruments. To wit, a paper plate and jingle bells from a craft store can turn into a tambourine in mere minutes!

To start, have your child decorate the backs of two paper plates with markers or crayons. After a little marker mishap, we switched to crayons for the other side! Good thing markers are washable.

Homemade Tambourine (1)

Once the decoration is complete, place the jingle bells on one plate, and cover with the other. You can use any number of bells, depending how jingly you want it, but I recommend at least 3.

Homemade Tambourine (2)

Seal the plates together with a stapler (or tape) and let your budding musician make some noise.

Homemade Tambourine (3)


Let’s Go Fly a Kite

Let's Go Fly a Kite

I’m not normally one for food art, but this whimsical snack was too cute to pass up – especially here in the lazy kite-flying days of summer! Preschoolers can definitely help you assemble this one.

Ingredients:

  • 1 slice whole wheat bread
  • 1 teaspoon eggless mayonnaise
  • 1 slice non-dairy cheese
  • 1 carrot stick
  • 6 raspberries
  • Popcorn kernels
  1. Lightly toast the bread and cut into a square, discarding the crusts.
  2. Spread the bread with the mayo, and top with the cheese. I cut the cheese into triangles for a cute, patterned-kite effect.
  3. Place the carrot stick at the bottom, and arrange the raspberries on either side.
  4. Add a few popcorn pieces for clouds!

PB&J Overnight Oats

PB&J Overnight Oats

Take a little crazy out of the morning by preparing this hearty bowlful the night before. It’s a nice twist to get you out of an instant oatmeal rut!

Ingredients:

  • 2 cups vanilla almond milk
  • 1 cup steel-cut oats
  • 1/3 cup creamy peanut butter
  • 2 tablespoons agave nectar
  • 4 tablespoons strawberry jam
  1. Combine the milk, oats, peanut butter, and agave in a saucepan. Bring to a simmer and continue to cook for 5 minutes, until the peanut butter is melted.
  2. Let cool slightly, then refrigerate overnight.
  3. Reheat individual servings in the microwave, and top each portion with 1 tablespoon jam.

Lemon Ink

Lemon Ink (1)

“Painting” with lemon juice sounded like a delightful trick to show a toddler. The ink goes on nearly invisible, but appears once the juice dries and is held up to a light. Turns out Travis was way more into the lemon itself, but that still meant we had fun!

Since toddlers don’t typically eat lemons, this is a great way to introduce the fruit and its color and texture. Travis had so much fun squeezing the lemon, and watching as I collected juice in a cup.

Lemon Ink (3)

Then it was time to “paint”! We used q-tips as paintbrushes, adding another layer of novelty to the project.

Lemon Ink (2)

To be honest, Travis was only mildly interested (he was still busy squeezing another lemon half), so I made shapes and spelled his name, in addition to his squiggles, for the big reveal. He had fun holding it up to our ceiling lights…

Lemon Ink (4)

…although the effect was best in the window.

Lemon Ink (5)