Staying Cool

Staying Cool (1)

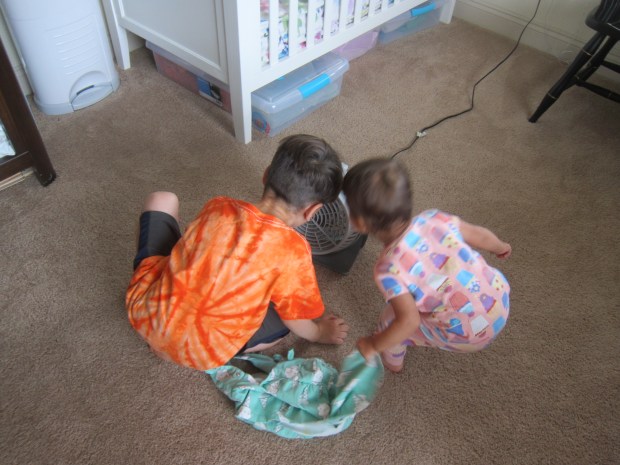
We’re currently in the midst of a heat wave, and are looking for any way to beat the heat. To turn possible-misery into a teachable moment, today I helped Travis explore ways to keep cool, all parked right in front of a nice cool fan!

For this simple STEM experiment, we started out simply by turning on the fan and moving either closer to it or further away. I asked Travis which was cooler, and he rightly noted that being close was best.

Staying Cool (2)

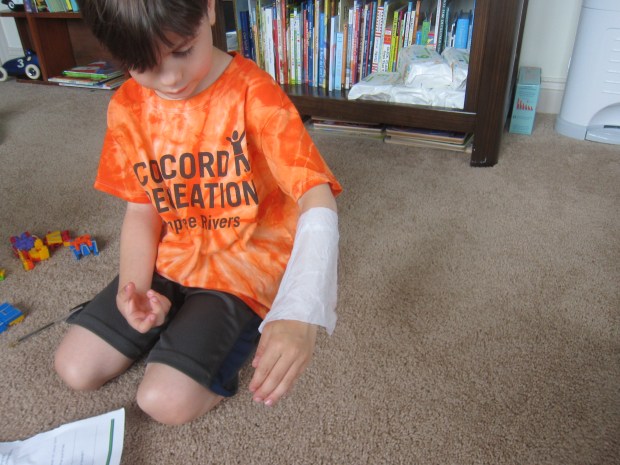
Then we draped a wet paper towel over one of his arms. Now he alternated the wet arm and the dry arm in front of the fan. Which felt cooler? The wet arm!

Staying Cool (3)

So now we had some scientifically-backed ideas to cool down on a hot day: wind and water. We brainstormed other things that might keep us cool, too, like shade.

For a minute there, we beat the heat!

Just Dance

Just Dance (6)

We had some great musical fun today, starting with this prompt: what mood was Travis in, and what music food that mood. In other words, what was his current theme song? Though I might have hoped the answer was something joyful and bouncy (I’m always up for rocking out to Can’t Stop the Feeling) I was not at all surprised that Travis picked Duel of the Fates from Star Wars. Hey, it fit his mood!

Just Dance (3)

So we got the music going and I challenged Travis to come up with two dance moves, one using just his hands, and one using just his feet. We soon had a little arm roll followed by a kick for 4 beats.

I encouraged him to think of the next steps. We talked about the term “choreography”, and soon had a routine involving twirls, waving feather boas in the air… and then improvising!

As the final touch, we raided the dress-up bin. Costumes would be a must!

Just Dance (2)

From here, the “dance” turned more into acting out this movie scene, too. What followed was half-acting, half-interpretive dance, and little sister joined in.

Just Dance (4)

With light saber props, of course!

Just Dance (7)

There are so many ways to elaborate on this activity. Have your child pick a song as their “theme” of the moment… or write their own song! Vary the costumes each time, or add props. Make it more of a dance routine, or more of a play as you act out a story to music.

I would love to hear about your dance fun in the comments, so please share! Without any further ado, here is The Travis:

Make Me a Match

Make me a Match (1)

Veronika loves counting out two of any object, especially when we read books and look at the pictures. “One bicycle, two bicycle,” she might say or, “One bird, two bird.” So today I decided to give her a 3-D quiz on the same concept!

I put a variety of objects in a small box, making sure the items weren’t toys per se, including coasters, square magnatiles, empty paper towel tubes, and canning rings. I put one of each item in the box and then scattered the second from each set along a tape “trail” leading away from the box.

Make me a Match (2)

I called Veronika over to the box with excitement. “Here’s a coaster!” I said. “Can you find me a match?” “Match” was a new word in her vocabulary, so I rephrased my question in the way that was more familiar. “One coaster… Two coaster.” She looked where I pointed to the second and beamed with pride. Now she got it, and she set off down the road to make a match.

One canning ring…

Make me a Match (3)

Two canning rings!

Make me a Match (4)

One paper towel tube…

Make me a Match (5)

Two paper towel tubes! I see you!

Make me a Match (6)

In this way she aced every single item on the list.

Make me a Match (7)

This was a great little lesson for teaching the concept of a pair.

Make me a Match (8)

Nursery Rhyme Productions

Nursery Productions (2)

Today Veronika and I played around with the classic nursery rhyme of Jack and Jill, not just as rhythmic and musical play, but by also acting it out. This was great both for her gross motor skills and for developing imaginative play. You might even consider it her first theater performance!

First, I simply refreshed her memory about the rhyme, since it’s not one we sing that often:

Jack and Jill went up the hill,

To fetch a pail of water.

Jack fell down and broke his crown,

and Jill came tumbling after.

We also watched a cute cartoon version of the song, and then it was time to act out her first role! On the first two lines, I helped her climb up onto a step stool.

Nursery Productions (3)

On the last two lines, she climbed down and then filled a bucket with “water” (actually scraps of blue fabric). Torn blue construction paper or blue tissue paper would also work as pretend water.

Nursery Productions (6)

Well she absolutely loved this whole process. She wanted to climb up onto the stool over and over, and graduated to doing it without my hand for support.

Nursery Productions (4)

Then it was time to work on climbing down “all by self”, too.

Nursery Productions (5)

Plus the bucket and fabric scraps were great fun to play with, nursery rhyme or no.

Nursery Productions (1)

She enjoyed the game so much that we’ll have to think of which nursery rhyme to use next for Veronika’s second “play”.


Butterfly Art

Butterfly Art (7)

You and your toddler can make one of these beautiful paper towel butterflies, or a whole bunch of them to hang on walls or windows. Younger toddlers will probably need to use a paintbrush, but consider using an eye dropper with older toddlers; it’s a great tool to hone fine motor skills.

To start, I set a piece of paper towel down on a craft tray, along with watercolor paints and a cup of water.

Then I showed Veronika how to dip the brush in the water, into the watercolor, and finally onto the paper towel to decorate her butterfly. “Dot dot dot!”

Butterfly Art (3)

I also wanted Veronika to practice with the eye dropper variation, but didn’t want to use liquid watercolors because they can stain. Instead, I mixed some of the watercolor paint with a little water in a cup so Veronika could practice dipping and squeezing that way.

Butterfly Art (1)

It was the first time she mastered the art of squeezing to release water from the dropper. She loved watching the color come out!

Butterfly Art (2)

Then she proved that she still loves to be impish, and upended the cup of water all over the paper towel. That made for one very wet butterfly!

Butterfly Art (4)

Luckily I knew it would dry eventually.

Butterfly Art (6)

As the finishing touch, fold the paper towel in half, then gather up in the center and wrap a pipe cleaner around the middle; bend the extra pipe cleaner on top into antennae. Our butterfly looked so pretty fluttering about the kitchen!


The Gift of Gab

Gift of Gab (4)

Veronika’s at that exciting age where she has enough words in her vocabulary to string together proper sentences. I had forgotten how thrilling it is to watch a child move from noun-noun to subject-verb-noun!

To nourish this milestone, I’m remembering to speak in clear full sentences for every point throughout her day. “What are you drawing?” I might ask her for example, and she comes back with a full, “I’m drawing a heart!”

Gift of Gab (1)

Or “Vivi [Veronika] yellow dress,” she might say. “Yes, you’re wearing your yellow dress,” I reply a bit more completely. “I’m wearing yellow dress!” she repeats. A full sentence!

Gift of Gab (2)

I love seeing her full sentences spill over into her solo play, too. She’ll speak to her dolls and other toys, sometimes still in gibberish, but mostly in words I can decipher. “Daniel and Baby! Daniel is falling, oh no!”

GIft of Gab (3)

Be sure to listen carefully for your child’s words. Often, only a parent can recognize the particular phonemes or syntax at this age, but the words are there if you’re attuned to them.

And you might just find they are in full sentences!


Watermelon Squish Bag, Two Ways

Watermelon Squish (7)

Summertime just begs for watermelon in all its forms, and today we decided to use watermelon as a theme not just to eat but to play!

I made two watermelon sensory bags for Veronika and although these didn’t turn out exactly as I hoped, she still had lots of fun.

The first was a true watermelon bag. Using leftover chunks from a big watermelon we sliced into for snack, I placed cubes of fruit in a zip-top bag. Seal with green duct tape to prevent your toddler from opening (and to look like a watermelon rind!). Then squish!

Watermelon Squish (1)

Veronika loved using this bag with her hands, crushing the soft cubes between her fingers. She also smashed at it with a toy hammer.

Watermelon Squish (2)

Then we made a pretend watermelon in a second zip-top bag. Fill the bag with clear hair gel and add a touch of red food coloring for a pink tint. Unfortunately my red turned out to look more purple, so next time I would color it with pink tempera paint.

Watermelon Squish (8)

As a result, the fact that we were trying to replicate a watermelon was lost on Veronika. Still, I added a few black seeds from the real watermelon, and she loved moving these around with her fingertips. Initially she thought they were bugs, but then she started saying “seeds!” as she squished at them.

Watermelon Squish (5)

Arguably, she liked this “failed” squishy bag better, holding it, squeezing it, and occasionally even draping it on her head.

Watermelon Squish (6)

So if the goal of a sensory bag is to keep a toddler busy, then this one was a winner.

Watermelon Squish (3)


Play Dough Suncatcher Craft


Playdough Suncatchers alt

You can never go wrong with a morning of play dough play, but to add a fun twist when I pulled out all the colors for Veronika this morning, I thought it would be fun to make suncatchers.

Playdough Suncatchers (1)

I showed Veronika how to press small pieces of color into an empty yogurt container lid.

Playdough Suncatchers (2)

She loved to help mush them in, which was great for fine muscle development!

Playdough Suncatchers (3)

Even more, though, she loves to tear play dough into tiny pieces.

Playdough Suncatchers (4)

That meant she unwittingly created the perfect size pieces for me to gather up and arrange in the lids, alternating colors as much as possible.

Playdough Suncatchers (6)

We filled two lids this way!

Playdough Suncatchers (7)

In order to hang them once complete, I cut two pieces of string and made a loop for each suncatcher, securing with an additional blob of play dough.

Playdough Suncatchers (9)

Let the play dough harden and dry overnight, and then you can hang these the next day to catch the morning sunlight.

Playdough Suncatchers (8)

At first I suspended them in the plastic lids. But then I realized the play dough had set enough that I could pop them out from these molds and simply hang in the window. Even prettier!

Playdough Suncatchers var


Shaving Cream Fingerpaint

Shaving Cream Fingerpaint (11)

There’s more to this activity than just the sensory fun of shaving cream or the artistic fun of colors and “painting”; half the fun was doing the activity right on the tabletop!

I squirted about half a can of shaving cream onto the kids’ table, which immediately piqued everybody’s interest, Veronika and big brother alike.

Shaving Cream Fingerpaint (1)

The curiosity grew once I added drops of food coloring throughout.

Shaving Cream Fingerpaint (2)

Now it was time for the real sensory fun to begin! I demonstrated for Veronika that she could put her hands right in the mixture, either to swirl the colors around or just to get messy.

Shaving Cream Fingerpaint (3)

Interestingly, she was hesitant at first, but soon a little finger dipped in. Foamy!

Shaving Cream Fingerpaint (4)

The sensation must have made her quite happy because it merited a little swirling dance.

Shaving Cream Fingerpaint (8)

After that, though, I couldn’t quite tell if she liked the shaving cream or was a little afraid of it. She did lots of delicate dabbing, but never got as messy as I had anticipated.

Shaving Cream Fingerpaint (9)

Big brother Travis tried his hand gladly and liked creating “animal footprints” through the shaving cream.

Shaving Cream Fingerpaint (7)

Veronika preferred just having some of the shaving cream on her palms. She smooshed her hands together and admired both the creaminess and the color left behind. Then it was time to wash! And the shaving cream mixture wipes off of the table like a dream.

Shaving Cream Fingerpaint (10)

Overall, this wasn’t the best version of fingerpainting we’ve done as far as producing art. But it was still a great sensory experience.


Pool Noodle Seahorse

Pool Noodle Seahorse (5)

It was time for the last of our pool noodle crafts this morning, and it turned out to be the biggest and best yet!

To start, curl the end of one long pool noodle so it resembles a seahorses’s curlicue tail. Secure with garden Velcro strips.

Pool Noodle Seahorse (1)

For the head, curl down the top 10 inches or so of a second pool noodle; secure with a garden strip. We then glued on two foam eyes (alternatively, use sticky-back foam and eliminate the need for glue).

Pool Noodle Seahorse (3)

Travis loved helping with the mane; snip a piece of craft foam to create fringe, then make a slit in the seahorse’s head with scissors and insert the foam.

Pool Noodle Seahorse (2)

Now tape the head and tail pieces together securely with duct tape. Our original seahorse seemed a bit too tall, so I cut about 6 inches from each noodle and then taped them. Now it was the perfect height. Travis was immediately galloping his seahorse around!

Pool Noodle Seahorse (6)

Little sister loved it so much that we needed to make a mini version from just one pool noodle!

Pool Noodle Seahorse (4)

As with the Ball Toss game we made, yes you could use the seahorse in a real pool, but the kids were ecstatic even on dry land. So don’t feel like you need to wait for water before making this craft!