Leftover Art Streamers

Leftover Art Streamers (10)

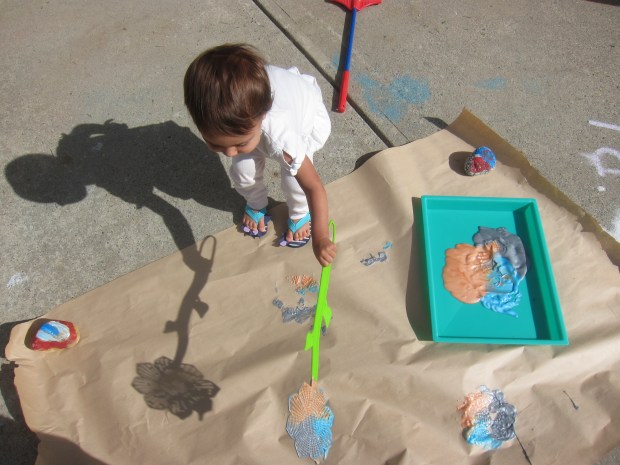
Veronika has been making big works of art lately, with full sheets of craft paper from our giant roll laid down on the floor. Unfortunately I have no place to store such big masterpieces, so usually I just crumple up the paper when the fun is done. Today we came up with this way to “recycle” the art as decoration instead.

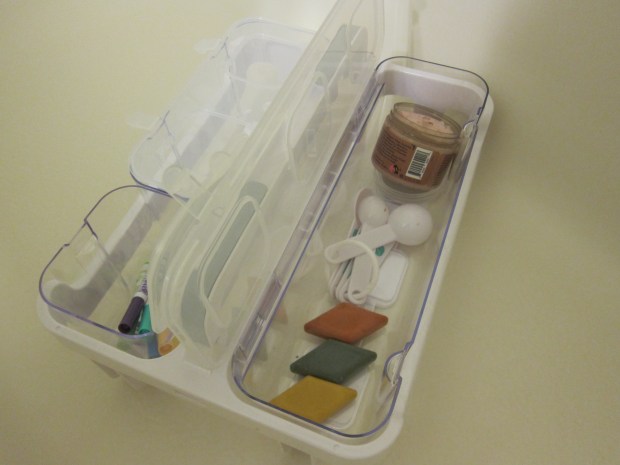
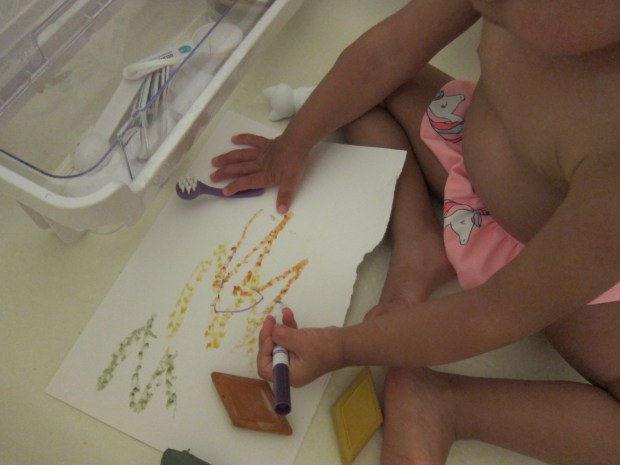
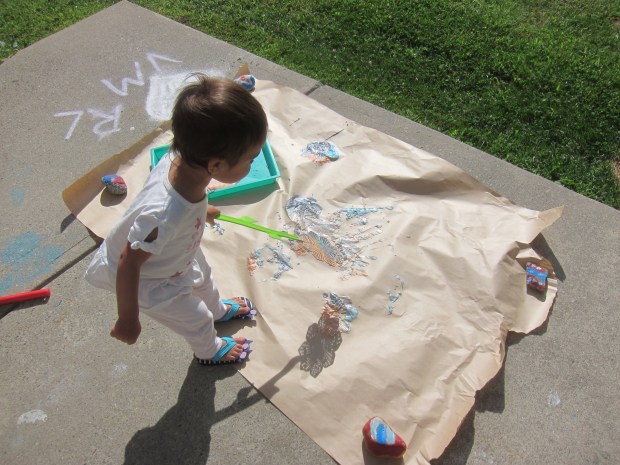
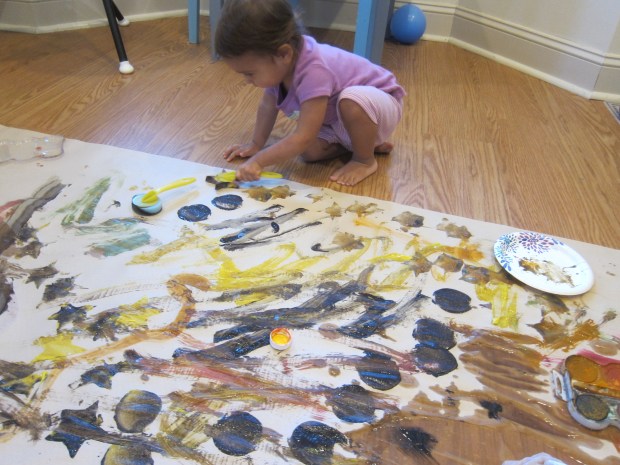
First up was making art, and Veronika loved painting all over a big piece of paper just before bed. We used a mix of watercolors, regular tempera paint, and sponge brushes with shapes on them.

Leftover Art Streamers (1)

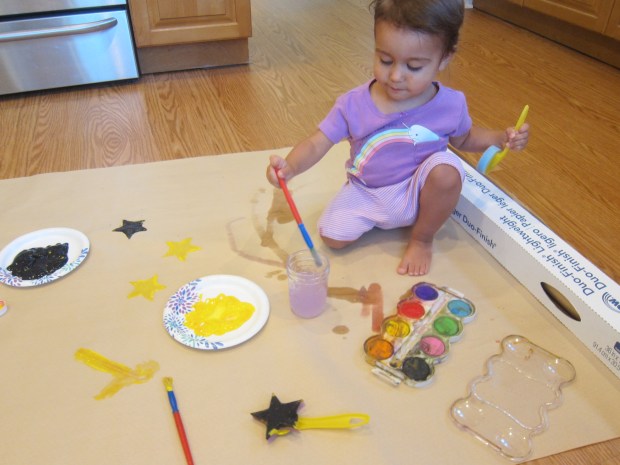
“Lots of black stars!” she said proudly as she worked.

Leftover Art Streamers (2)

I left it to dry overnight. The next morning, we covered a second sheet of craft paper with lots marker scribbles and drawings.

Leftover Art Streamers (4)

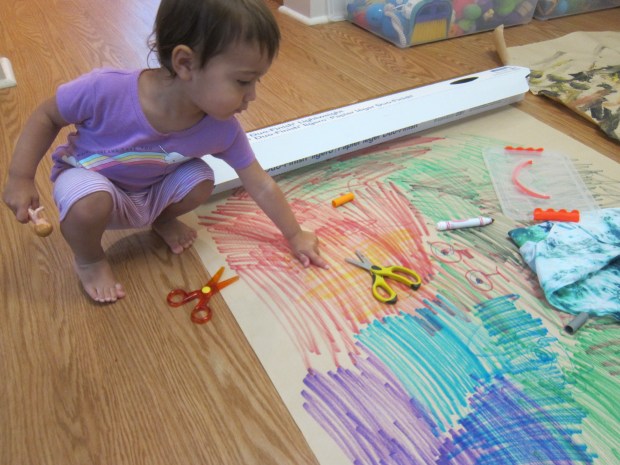
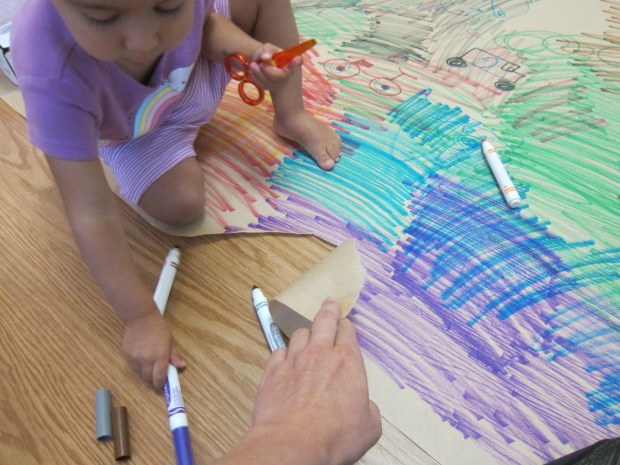
Now, I simply cut each masterpiece into long strips. If you’re doing this activity with a preschooler, consider drawing lines for your child to cut along and practice their cutting skills. For Veronika, I simply handed her a pair of safety scissors so she could “cut” alongside me.

Leftover Art Streamers (5)

My original plan was to hang these like streamers from an archway in our home, thinking it would be a blast for the kids to run under them and through them.

Leftover Art Streamers (3)

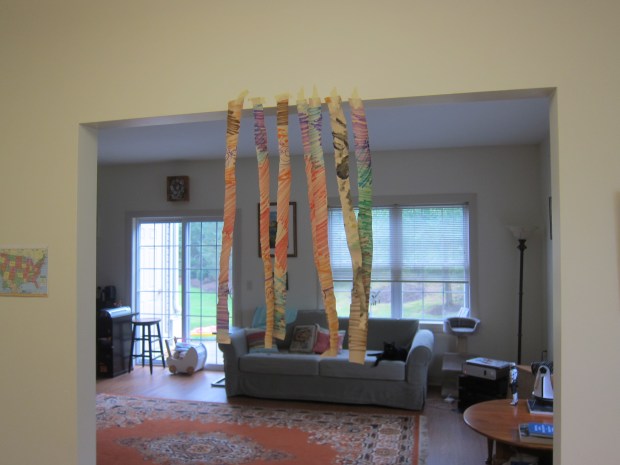
I quickly realized this wouldn’t work because the streamers needed to be much longer. I held Veronika in my arms for her to feel the streamers, which made her giggle, but it wouldn’t make for solo play.

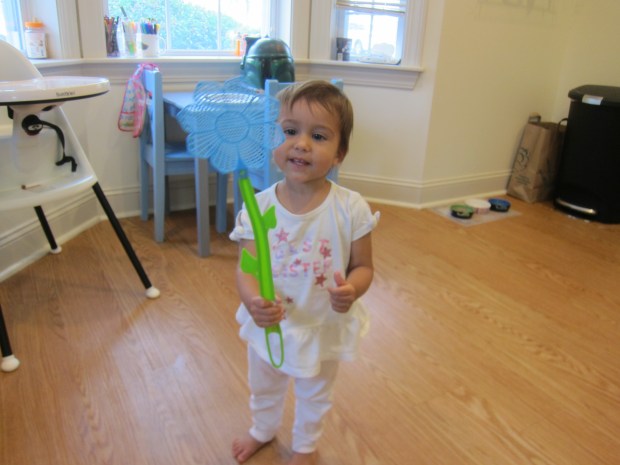
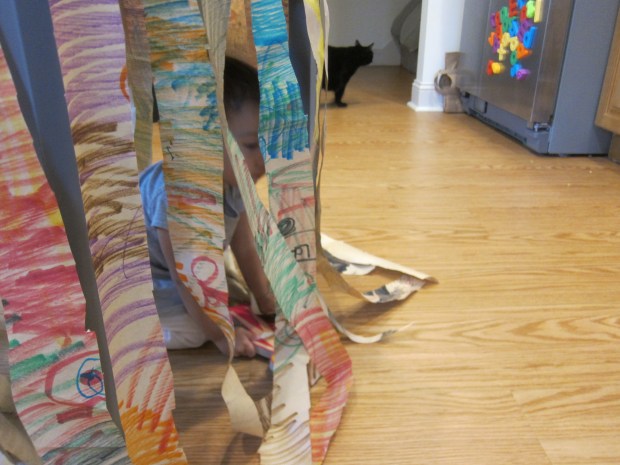
Thinking quickly, I taped the streamers all around the kids’ craft table. Now it was a secret fort and hideout for her!

Leftover Art Streamers (13)

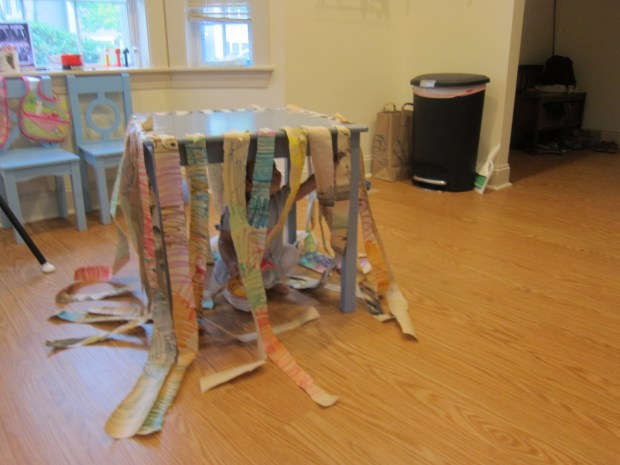
She loved to crawl inside.

Leftover Art Streamers (12)

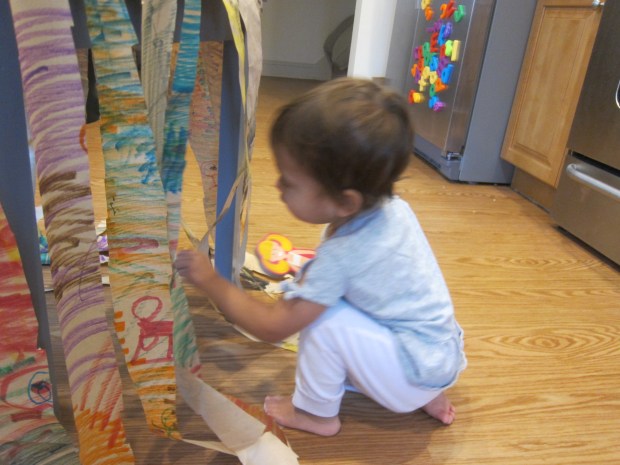
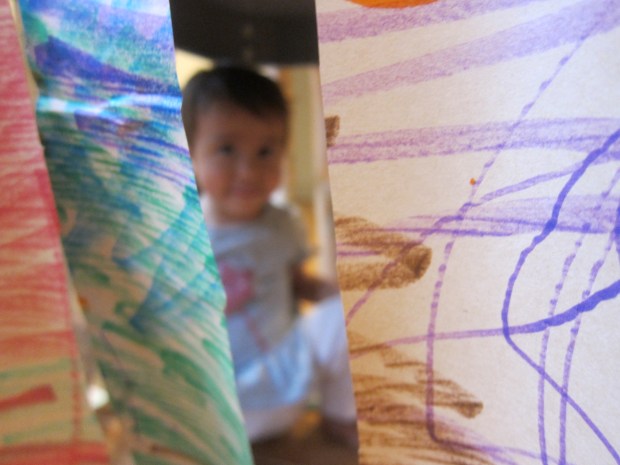
And play peek-a-boo through the streamers with me.

Leftover Art Streamers (8)

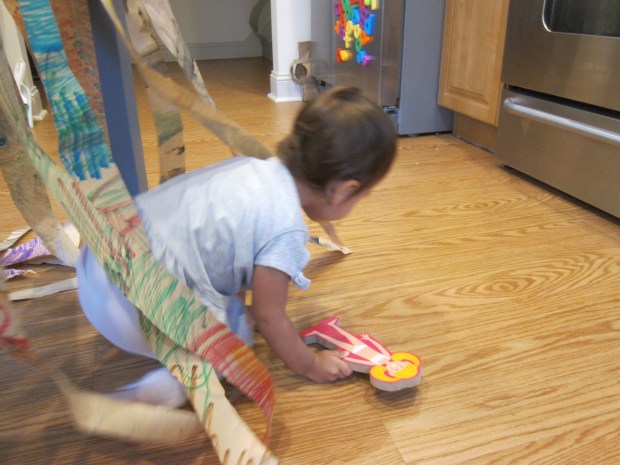
And then find her way out again.

Leftover Art Streamers (11)

These streamers would also look really pretty over a window as makeshift “curtains” in a kids bedroom.


Art Station in the Tub

Art Station Tub (1)

I’ve seen a lot of cute “art stations” set up in playrooms and bedrooms, but when I read about setting one up for kids in the bathtub I thought it sounded like a neat alternative. After all, there’s no where better to make a mess than the exact place where you’re going to clean off.

Oddly, I couldn’t find inspirational images of what to include in our tub art station when I searched online, so I sort of just rigged this together. I filled an art caddy with a few water-friendly “art” activities. We had all-natural bath crayons, a “soap fluff” that I thought the kids might enjoy smearing on the walls (or their bodies!), and a little set of animals with washable markers.

The fluff, it turned out, didn’t interest them at all.

Art Station Tub (2)

The crayons received lots of attention. I had laid down scrap paper to scribble on, but of course the tub itself was fun to draw on, too.

Art Station Tub (5)

The biggest hit turned out to be those silly animals and markers. Once the kids had covered the animals with color, we drew a bath and used water to “scrub” them clean.

Art Station Tub (3)

What would you include in a bathtub art station? Please share in the comments!

Art Station Tub (4)

Water Play

Water Play (3)

We suddenly had a day that was 60 degrees and rainy and felt more like fall than summer. And truth be told, I wasn’t ready for it! What do you do when you suddenly can’t head outside for water play, like you’ve grown accustomed to all summer? Bring the water play in.

I wanted Veronika to play for a while as I worked in the kitchen, so all I did was drag in the baby wading pool from our patio and place it on a towel on the kitchen floor. I added toys from our indoor bath, as opposed to beach toys, which instantly made the pool seem novel. Then it was simply a matter of putting her in a swim diaper and putting her in!

Water Play (1)

She was initially hesitant to sit, until I added slightly warmer water.

Water Play (2)

Once that was taken care of, she was happily scooping and pouring with cups, and enjoying other bathtub favorites like toy frogs and bath books.

Water Play (4)

Next time I think I would add her plastic teapot and teacups, too! This is a great way to pass some time when those rainy days start to feel extra long.

Water Play (5)


People Blocks

People Blocks (2)

Veronika hasn’t shown much interest in her building blocks lately. But you can add novelty to any set of blocks by adding family pictures. Suddenly each block has a name and a face!

I cut up old calendar pictures for this game, but you could also have a set printed cheaply at the drugstore. Cut out faces until they fit on your child’s blocks. I think classic rectangular wooden blocks would have worked best, but the game was fine on our foam blocks.

People Blocks (1)

I attached one relative’s face per block, using clear contact paper to stick them on, while Veronika was napping. She woke up to discover her family!

People Blocks (4)

This game was great for building of course, encouraging her to use the blocks for quite some time.

People Blocks (9)

It was also great for putting names to faces, especially for family members we haven’t seen recently due to coronavirus.

People Blocks (3)

All that aside, there was a definite silly factor. “It’s the daddy block!” she said, stacking the block with her dad’s face. “It’s the Travis block!”

People Blocks (5)

Her favorite was of a baby cousin, and she almost lovingly carried around the block for a while, cradling it and giving it the best spot in her creations.

People Blocks (6)

“Let’s but the baby right here,” she narrated as she played.

People Blocks (7)

This activity was a great way to make an old toy new again. We might have to try it on something other than blocks soon.

People Blocks (8)

Chopstick Challenge

Chopstick Challenge (8)

After preparing a meal of homemade sushi, Travis was eager to learn how to use chopsticks. I remember learning this same skill as a child, and how tricky it can be! Here were a few fun games (hint: there’s candy involved) that honed his skills.

First up was simply showing him proper form, with the chopstick wedged between thumb and pointer finger. Then I showed him how to place the second chopstick between thumb and forefinger and to use the middle finger on top like a little lever.

Chopstick Challenge (1)

It was tricky, but he was a good sport about it! For the games that followed, he did revert to a typical first-timer move, pinching the items between two chopsticks with one in each hand instead.

His favorite was Color Sorting because of course we used candy.

Chopstick Challenge (5)

Choose any candy with multiple colors and move them from a jumble into color-sorted piles.

Chopstick Challenge (4)

The reward of course was eating them.

Chopstick Challenge (6)

Next up was a Pick-Up Relay. You can play this as a true competition, moving items from a full bowl to an empty one and seeing who’s fastest, but Travis and I worked as a “team”. He tackled the easy item (mini Dandies marshmallows) and I handled the hard one (marbles – tough even for grown-ups!)

Chopstick Challenge (7)

Then we played a Passing Game. Using chopsticks, we passed a rubber band back and forth. Travis loved this one!

Chopstick Challenge (9)

Finally, we played Chopstick in the Hole. Tie a string to a chopstick and then the other end to a player’s wrist.

Chopstick Challenge (11)

The goal was to lower the chopstick into an empty water bottle. There may, in fact, have been some cheating involved.

Chopstick Challenge (10)

But Travis was still so proud!

Chopstick Challenge (12)

Fly Swatter Painting

Fly Swatter Painting (5)

This art project is messy, so you’re going to want to take it outside. But I can happily report that it’s worth the effort!

I placed a long sheet of craft paper on our back patio, securing the corners with heavy rocks so it wouldn’t blow away. (As an alternative, you could clip craft paper to a fence or other outdoor surface that is upright).

Then I set out a tray with several different colors of metallic craft paint. You’ll need a nice puddle of paint for this project to work well, so don’t worry if the colors mix together.

Fly Swatter Painting (1)

I dipped our fly swatter in the paint, making sure to coat it evenly, then showed Veronika how to say “Whap!” and slap it down hard on the craft paper.

Fly Swatter Painting (4)

Well of course now “Whap!” was the most fun thing in the world to say.

Fly Swatter Painting (2)

Dip and whap, dip and whap, dip and whsp.

Fly Swatter Painting (3)

She loved every bit of this project, both dipping the fly swatter in paint, and seeing the marks she made.

Fly Swatter Painting (6)

She wanted to whack the fly swatter against the rocks, too!

Fly Swatter Painting (8)

Her little feet paraded all around the craft paper, making sure she covered her big canvas.

Fly Swatter Painting (9)

As a bonus, our fly swatter happens to be flower-shaped, so it made beautiful prints!

Fly Swatter Painting (7)

This project likely won’t get you a lasting work of art. But Veronika sure loved the process!

Fly Swatter Painting (10)

The Magic of Mulch

Magic of Mulch (3)

For a final science experiment in his summer workbook, Travis learned a bit about gardening and soil. You’ll need potting soil for this experiment, as well as any “mulch” that your child gathers, either from your yard or on nature walk. Simple dried leaves and pine needles work just fine!

Travis helped measure out potting soil into two small plastic containers, making sure each contained the same amount (we used 3/4 cup soil per container). Add water to make the soil very wet, and again measure to make sure the containers have an equal amount; we used 1/2 cup.

Magic of Mulch (1)

Now cover only one with the mulch you’ve gathered. Travis proudly patted this on.

Magic of Mulch (2)

Place the containers some place sunny and wait 3 days!

After the third day, we headed out to check on our soil, but rain had skewed our results! The idea was that the soil with mulch should remain moister, but instead, both our containers were swamped. Luckily, we had a teachable moment; the soil with no mulch was washed away completely. But the soil under the mulch had been protected! So without intending too, Travis also learned how mulch enhances a garden’s drainage.

Magic of Mulch (4)

He finished the lesson by answering a few workbook questions about the experiment, which was a great chance for inventive spelling.


Mayflower Soap Ship

Mayflower Soap Ship (3)

Here’s an easy history lesson for “summer school”, if you’re helping kids transition back towards an academic mode for the fall. It’s a project that’s equal parts history, STEM, and play!

To start, I wanted Travis to learn a bit about the Mayflower ship that carried the Pilgrims to America, and we found an online read-aloud for kids on YouTube. Travis was thunderstruck (pun intended) by images of the voyage across the ocean as the ship was caught in storms and waves.

Mayflower Soap Ship (9)

Once he finished the video, it was time to create our own ship! Ideally you’ll want a bar of soap that floats for this project and be careful because not all do. Ours was a heavy soap and had a tendency to sink, but we could always nudge it gently back to the top.

To make the sails, cut construction paper (Travis chose blue) to the same size as the soap bar, and tape these “sails” to toothpicks.

Mayflower Soap Ship (1)

Insert the toothpicks into the soap.

Mayflower Soap Ship (2)

Travis sent his boat out to sea! Blow gently on the sails and watch the boat move.

Mayflower Soap Ship (4)

Again, this was tricky since we had to rescue our soap from the bottom of the basin a few times, but Travis loved that he could move it along, and learned a bit about how real sailboats operate.

Mayflower Soap Ship (5)

And then of course he gave his Legos a ride!

Mayflower Soap Ship (7)

Finish the project with a drawing of the boat to add in a little art to the mix!

Mayflower Soap Ship (8)

Cloud Dough with Vehicles

Cloud Dough Vehicles (3)

It’s been a long time since I made cloud dough, which is basically just a super soft play dough requiring only flour and oil. In the past I’ve made this with baby oil, but this time I used regular vegetable oil.

Cloud dough should be 8 parts flour to 1 part oil, so I used 4 cups flour and 1/2 cup oil. Mix with a spoon or your fingers until incorporated.

Cloud Dough Vehicles (1)

To add purpose to the play, we added Veronika’s construction vehicles. I also gave her two little cups that I thought we could use to mold sandcastles, but she preferred to use them for scooping, pouring, and filling up her trucks.

Cloud Dough Vehicles (4)

Or vice versa, using the trucks to fill up the cups!

Cloud Dough Vehicles (5)

It was fun to drive trucks through the dough and make tracks.

Cloud Dough Vehicles (8)

Or just to sift through with her fingers. This stuff is always so soft and fluffy.

Cloud Dough Vehicles (6)

It’s also nice for play because it clumps together enough to momentarily hold a shape.

Cloud Dough Vehicles (2)

And when she tired of the game, a quick rinse of cold water got the vehicles clean!

Cork Printing

Cork Painting (8)

Veronika and I have played around with several ways to make dot paints recently and since I had a few corks left over, I figured we’d test out how they worked.

I set out a craft tray with several different colors of metallic craft paint, construction paper for Veronika to dot onto, and the corks.

Cork Painting (1)

It turned out the corks were the perfect size for little toddler hands to hold!

Cork Painting (2)

She loved to dip in the paint…

Cork Painting (3)

…and dot on the paper.

Cork Painting (5)

She tested out all the different colors in this way.

Cork Painting (6)

Then she tried dotting two of the corks together, with a look of very serious concentration on her face.

Cork Painting (7)

This didn’t keep her busy for that long, but it was a cute alternative to a paintbrush, and we always like testing new tools around here.

Cork Painting (9)