How to… Feed Feathered Friends

Feed Feathered Friends (7)

Travis and I have loved hearing birdsong on recent walks to the bus stop, a sure sign that spring is near. So we loved that this month’s “How To” column in Highlights magazine was a bird feeder for our feathered friends, helping them out while the ground is still quite frozen.

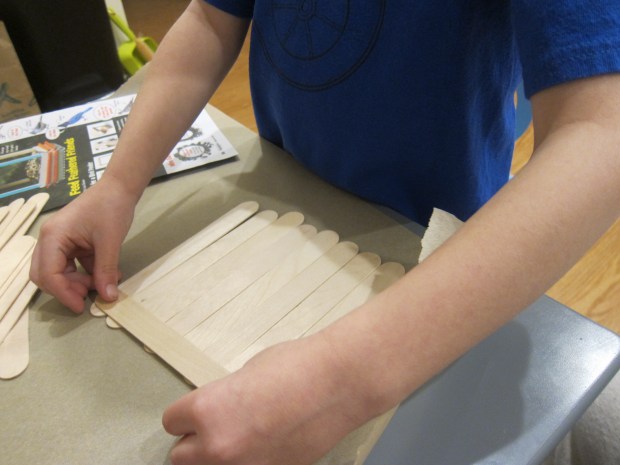
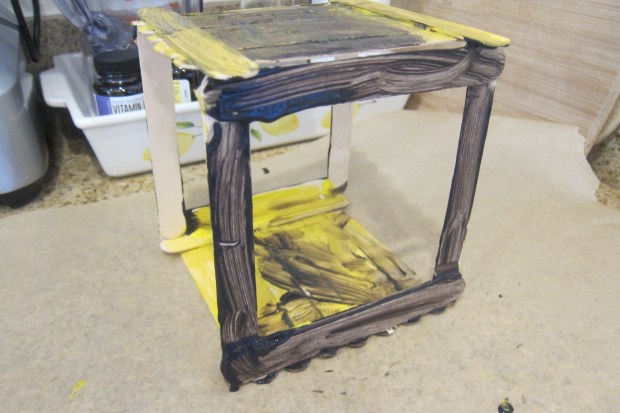
I challenged Travis to think of how he could make a strong base for the feeder from craft sticks. Seven lined up in a row with two across the top and bottom for reinforcement did the trick.

Feed Feathered Friends (1)

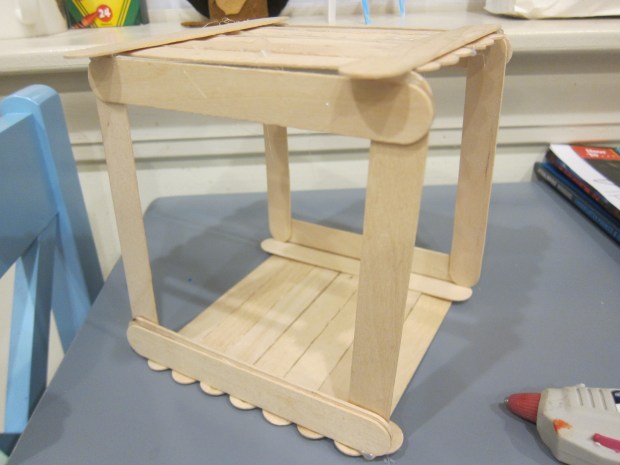
We repeated this arrangement for the roof. For the sides, glue 4 craft sticks together in a square.

Feed Feathered Friends (2)

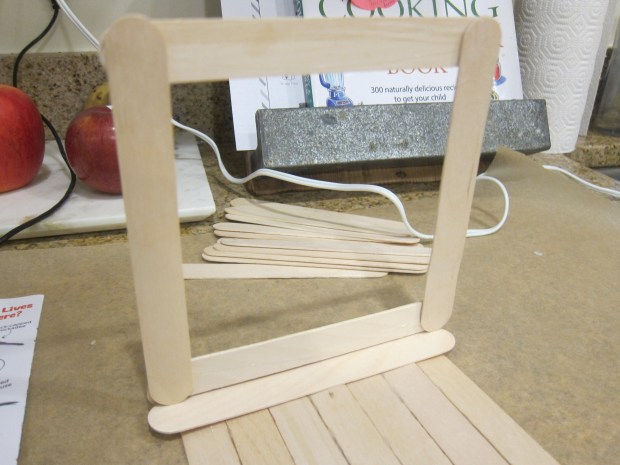
I hot-glued everything together (wood glue would also work), and then added a few extra craft sticks for reinforcement where needed.

Feed Feathered Friends (3)

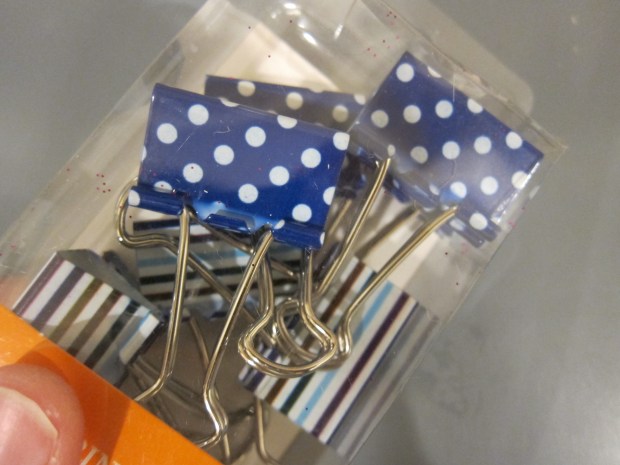
Note: If using wood glue, consider using binder clips to hold everything together until the glue dries.

Feed Feathered Friends (4)

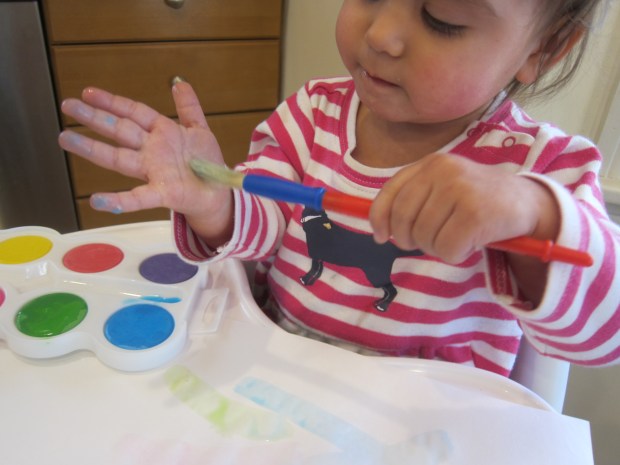
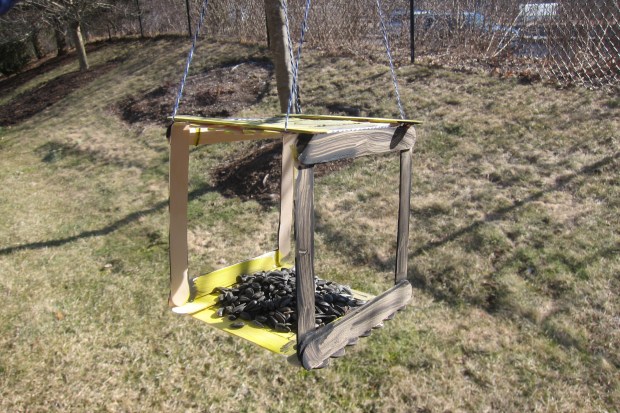
Next we gave our bird feeder a coat of paint.

Feed Feathered Friends (8)

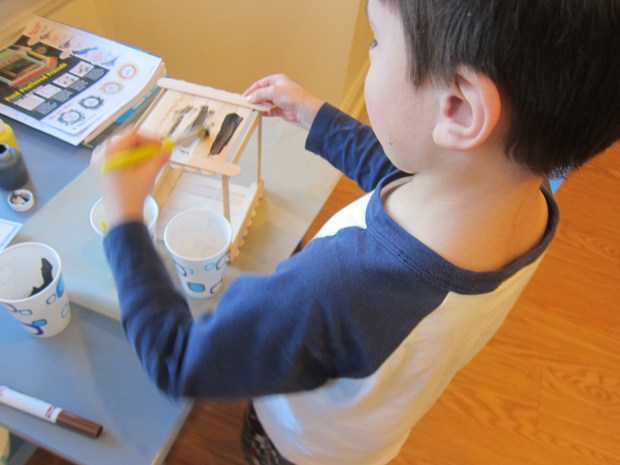
Travis chose black and yellow – oriole colors!

Feed Feathered Friends (5)

We took a special trip the store for birdseed, following Highlights suggestions for who eats what in which part of the country. We opted for black-oil sunflower seeds, popular with titmice in our region.

Feed Feathered Friends (6)

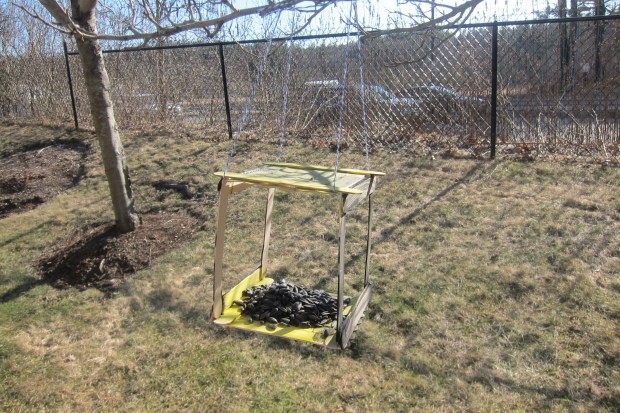
It was so warm outside that we didn’t even need our coats when we went to hang this in the sunshine. We can’t wait to watch the birds enjoy their meal.

Shaving Cream Color Mixing Bag

Shaving Cream Color Mix (4)

Here’s a spin on a recent color mixing activity Veronika enjoyed for Valentine’s Day. This time the bags were bigger and the whole thing was a lot squishier!

For set up, squirt paint into the corners of three gallon-sized zip-top bags. Each bag should contain a pair of primary colors: red + yellow, yellow + blue, and blue + red.

Shaving Cream Color Mix (1)

I next squirted a healthy dose of shaving cream into each bag between the two colors.

Shaving Cream Color Mix (2)

Seal the tops with duct tape for added security, or this could get messy!

Shaving Cream Color Mix (3)

Now it was just up to Veronika. She immediately loved squishing the bags between her palms.

Shaving Cream Color Mix (6)

It turns out they were also a blast to throw up in the air…

Shaving Cream Color Mix (7)

…or behind her back. Ta da!

Shaving Cream Color Mix (8)

Once she had thoroughly kneaded the bags, the colors started to mix together. It wasn’t as clear a “lesson” on primary and secondary colors as other sensory bags we’ve tried, but the visual effect was still lots of fun and quite pretty!

Shaving Cream Color Mix (9)

Here is the final, squished and much enjoyed result.

Shaving Cream Color Mix (!0)

Expressing Emotion

Expressing Emotion (2)

Anyone who has a toddler knows that those little bodies have big emotions. That’s why today I focused on putting words to feelings whenever Veronika had an emotion coursing through her. This is a helpful tactic for dealing with toddler tantrums, not just for your child (who learns to put words to feelings) but also for caregivers who might feel at a loss witnessing a full meltdown.

I’m always glad to point out a good mood, of course, so don’t forget to do so. At breakfast, I told a smiling Veronika, “You’re feeling happy!”

Expressing Emotion (1)

Later in the day, it was her big brother who was feeling sad, and Veronika looked worried. I named the emotion for her so it was less scary: “Brother is feeling a little sad right now, but he’ll feel better soon.”

Expressing Emotion (3)

And then of course, there’s the tantrum. “I can see that you’re angry, I understand,” I told her when she wanted me to hold her but the laundry needed folding.

Expressing Emotion (4)

Follow this up with a big hug. Sometimes just that physical touch will be enough to circumvent tantrum mode.

Do you have any tricks to curb a toddler meltdown? Please share in the comments!

Your Child’s Voice

Child's Voice (1)

I haven’t recorded Veronika since she was still in the babbling phase. Now, she’s using words, phrases, and even full sentences, and I wanted to make sure to capture the moment. You’ll probably have to try several times before you capture the sounds you want in a game like this, but set aside some time today for audio recording, no matter what age your child is!

In the good old days this task would have required a cassette player and tape and lots of patience. Today, I just tapped the voice record app on my smart phone and sat down by Veronika. I gave a brief intro, including her age and the date.

Next I coaxed her with a few cues, like singing the first line of favorite songs. Luckily she played along and chimed right in. Old Macdonald Had a Farm is a favorite, for example and I caught her on tape calling it “e-i-e-i”.

Child's Voice (2)

She asks for lots of songs like this, including, “uppa” for Twinkle, Twinkle Little Star (as in: “up above the world so high”).

Child's Voice (3)

Once we’d recorded a few songs, I tried tricking her into saying current favorite phrases. Her first full sentence is “All done with…” whenever we finish something, i.e. “All done with diaper,” “All done with water,” etc. I got the recorder ready as these moments approached over the course of the day, and captured her little voice saying the words. “All done with dinner!”

Child's Voice (4)

This is definitely an activity you can return to again and again. Pretty soon you’ll have a whole library of adorable audio clips!


Hedgehog Pencil Holder

Hedgehog Pencil (5)

Travis has been so into coloring lately, and we need a spot for all his art supplies! This adorable hedgehog in his latest Highlights magazine came just in time, therefore. Now we can corral all those colored pencils.

Older kids will likely enjoy cutting felt and designing all the features for their hedgehog critter solo; however, for a kindergartner I did most of the work, since cutting felt is still tough for Travis. Instead, he helped me decide what the hedgehog needed – arms, a belly etc. – and what should go where. Don’t forget a whimsical red bow-tie!

Hedgehog Pencil (2)

Once you have the pieces cut out, hot-glue light brown felt to an empty toilet paper tube. Then hot glue on the additional features you’ve made, including a head, belly, nose, and arms.

I hot-glued a piece of darker brown felt to a piece of thin cardboard to be the spikes.

Hedgehog Pencil (1)

Similarly, hot-glue brown felt to thin cardboard for the feet; this will make the hedgehog sturdy enough to stand. Add these to the decorated tube.

Hedgehog Pencil (3)

For the finishing touch, Travis added eyes and a nose with paint markers. Puffy paint would also work for this step. Slip in colored pencils and your artist is ready to create!

Hedgehog Pencil (4)

Textured Touch

Textured Touch (9)

This advanced texture game will delight toddlers because it also contains an element of surprise!

Cut two holes in the top of a flat box (such as a tie or scarf box).

Textured Touch (1)

Next, gather together a variety of fabrics and materials. We had burlap, felt, cotton, silk, wrapping paper, and sandpaper, for lots of nice contrast.

Textured Touch (2)

One at a time, I placed a piece of material under the lid and showed her how to poke a finger through to explore.

Textured Touch (3)

She looked so intrigued by the mystery of it!

Textured Touch (5)

I put my finger in the second hole so I could describe the texture to her. Burlap, for example, was bumpy and rough. Then we lifted the lid to see what we’d been feeling!

Textured Touch (4)

Wrapping paper was next, smooth and slippery. Soon, Veronika loved being the one to remove the lid and discover what was inside.

Textured Touch (6)

The lid definitely adds a fun element to the game, since toddlers will adore putting it on and off between each new material.

Textured Touch (8)

We played a second version of the game in a paper bag. Again, she loved the surprise of reaching in…

Textured Touch (10)

…and lifting out a new fabric with delight each time.

Textured Touch (11)

Talk about all the different textures as you play this version of the game, too. The more descriptive your words, the better!

Textured Touch (12)

Chances are, your little one will be busy putting the fabric in and out of the bag for a while. Boxes plus bags plus fabric, oh my! This game was a winner.

Textured Touch (13)

Watercolor for Toddlers

Watercolor (7)

It may seem like a recipe for disaster, but don’t be afraid to use a washable watercolor with even the youngest toddlers (just save the liquid watercolors for bigger kids!). Today it was Veronika’s turn to experiment with this medium.

In all honesty, she was an imp about the whole craft. Much more so than pressing the brush to paper, she liked to squeeze the brush…

Watercolor (6)

…paint on her hands…

Watercolor (3)

…dip in her fingers…

Watercolor (2)

…and even lift the bristles to her mouth with a cackle one time.

Watercolor (1)

To excite her about setting the brush to page, I drew a simple picture with crayon and then showed her how to paint over it. Kids will love the way the color runs off the wax instead of adhering, leaving pretty pockets of color.

Watercolor (4)

For extra fun, we moved the art to a bigger canvas. First, I laid Veronika down on a large sheet of craft paper and traced her. This got giggles!

Watercolor (9)

The idea is to let your little one fill in “self-portrait” features with the watercolor. Obviously at 15 months old, Veronika had only a rudimentary understanding of what we were doing, but I showed her how to paint on pants and a shirt, and a few cartoonish facial features.

Watercolor (12)

Really she just loved exploring the medium, dipping the brush in the water, watching how it could swirl the colors from dry to wet, and testing it with her fingers.

Watercolor (11)

In conclusion, Veronika was a bit too young for this first foray into watercolor, but I did enjoy introducing it; you have to start somewhere! I would definitely repeat this activity when she’s older, especially the self-portrait part, which older toddlers can tackle with greater care.

Watercolor (13)

Dip-Dye Caterpillar

Dip Dye Caterpillar (9)

Putting together this charming little caterpillar takes some time, but it’s worth it in the end!

Dip Dye Caterpillar (1)

To start, you’ll want to dye as many coffee filters as you have patience for (and/or room to dry!) in liquid watercolor. For each color, I squirted a few drops into an empty butter tub and then added a few tablespoons of water. Scrunch up a coffee filter (or a handful of them is fine) and dip in.

Dip Dye Caterpillar (2)

Travis loved watching the colors bleed up the filters! After a few single colors, he decided it was fun to re-dip some old ones, which resulted in a pretty mottled look on many of our filters.

Dip Dye Caterpillar (3)

A tutorial online suggested using as many as 250 filters for this project (!), but I would guess we dyed about 50. Lay these on paper towels and dry completely.

Dip Dye Caterpillar (4)

While the filters dried, we made the caterpillars head. Give your kids carte blanche to decorate an empty tissue box any way they like; it’s the perfect excuse to raid the craft bin for bits and bobs. Travis added buttons, pom poms, and wiggle eyes.

Dip Dye Caterpillar (5)

We twisted together sparkly pipe cleaners for the antennae.

Dip Dye Caterpillar (6)

Later in the day, it was time to poke holes in the coffee filters. Travis thought it was amusing to pierce each one with a kebab skewer. Kids will probably need grown-up help for this step, and to make the process move along more swiftly.

Dip Dye Caterpillar (7)

I then punched two holes in our caterpillar head, one in the top of the tissue box and one on the side. Using a large plastic needle, thread string through all of the filters and then up through the two holes in the head. Now suspend your caterpillar and watch it wiggle!

Dip Dye Caterpillar (10)

One of these would look so beautiful in a garden, but since we a) have no garden and b) it’s winter, we strung it up inside for a few days of play.

Dish Soap Tub Bubbles

Dish Soap Bubble Bath (4)

Blowing bubbles in dish soap is always fun, whether your kids are old enough to blow into the mixture themselves, or young enough that you do it for them. Tonight, I took dish soap bubbles to Veronika’s bath for some great soapy play!

To start, I tinted the tub blue with a little food coloring.

Dish Soap Bubble Bath (2)

(Side note: This was purely for extra entertainment, and not necessary at all. We always love a colored bath around here whether red, yellow, green, or something in between.

Colored Bath (2)

Just squirt in a few drops of all-natural food coloring and let your toddler swish the colors around!).

Colored Bath (3)

Once the water this blue, I filled a Tupperware container with a few squirts of dish soap and added a little water.

Dish Soap Bubble Bath (1)

Blow into the mixture with a straw and honeycomb bubbles will begin to rise to the surface. Definitely only let your child use the straw if you are confident he or she can blow out, not in.

Dish Soap Bubble Bath (3)

Veronika loved it the moment the bubbles spilled over the top of the container! After watching a few times, she was brave enough to put her hands in. These dish soap bubbles won’t pop, making for endless fun dipping hands in and out of what feels like endless bubbles.

Dish Soap Bubble Bath (5)

We hid a few fish toys in the big bubbles and she loved feeling around for them!

Dish Soap Bubble Bath (7)

After holding the container for a while, I set it down to float in the tub and she continued to enjoy putting eager hands into the bubbles.

Dish Soap Bubble Bath (9)

This made them spill over into the water, so then she loved stirring at them with one of the straws I’d used!

Dish Soap Bubble Bath (11)

I think she wanted to stay in this bath forever.

Dish Soap Bubble Bath (8)

Go to a Boat Show

Go to Boat Show (6)

It’s been quite a while since we did a “field trip” with Veronika, but today we had the opportunity to take her to her first boat show!

Don’t shy away from crowded places like these with a toddler in tow. My best advice: bring a small stroller, not the bulkier kind that goes with a travel system. This allows for storage of diaper bags and lunch bags and coats without making it tough to navigate the crowds. Then hit the show! Just the vantage point from above was exciting.

Go to Boat Show (3)

Once inside the show, there is so much about boats for little hands to love. Wheels to turn and buttons to press..

Go to Boat Show (8)

…soft seats to scamper over, and hidden berths below decks to explore.

Go to Boat Show(4)

Pontoon-style boats were a favorite; from a parent’s point of view, these are great because there are no tricky stairs or ladders to navigate.

Go to Boat Show (7)

Boat shows often feature hands-on activities for kids, too. Veronika loved watching the older children splashing in kids-only paddle boats!

Go to Boat Show (1)

Next she got to paint a wooden boat to take home.

Go to Boat Show (2)

In sum, the event was a splash!

Go to Boat Show (5)