Tie-Dye Cloth Napkins

Tie Dye Napkin (8)

This fun tie-dye project is a nice way to intro the method to kids, smaller than tie-dyeing a full t-shirt. As an added bonus, you can tuck one of the napkins into a child’s lunchbox for a sweet reminder from home while he or she is at school!

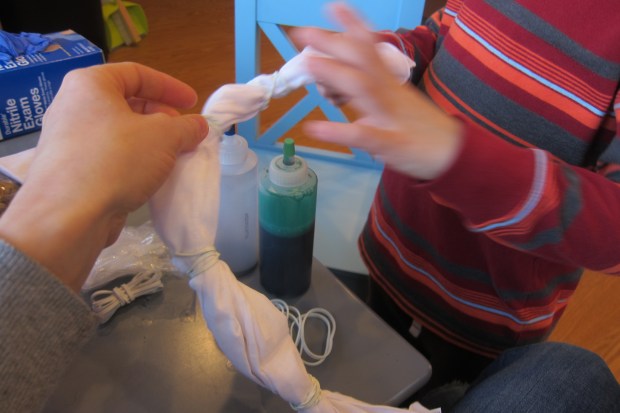
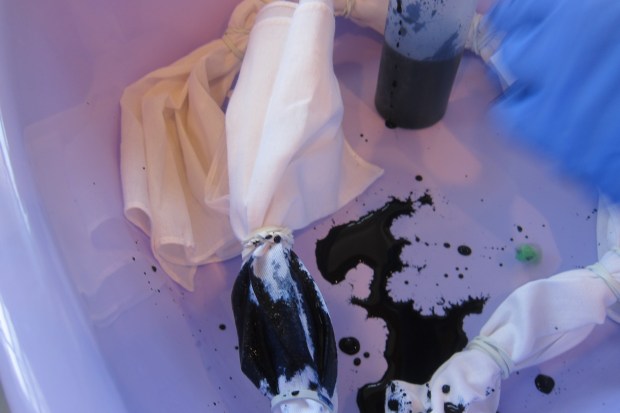
We actually started with blank handkerchiefs from the craft store, not technically napkins. Twist them tightly and secure with elastics at several intervals.

Tie Dye Napkin (1)

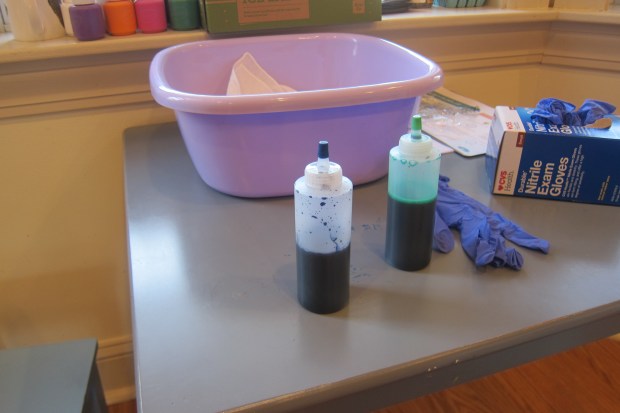
We purchased two bottles of dye that came ready to mix in a squirt bottle, one blue and one green, which made the whole project extremely easy.

Tie Dye Napkin (2)

Travis thought it was fun to wear plastic gloves as we mixed the solutions, then dyed sections of the napkin in alternating colors.

Tie Dye Napkin (4)

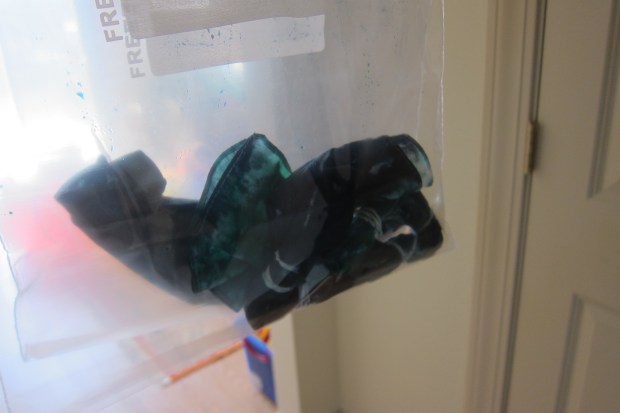
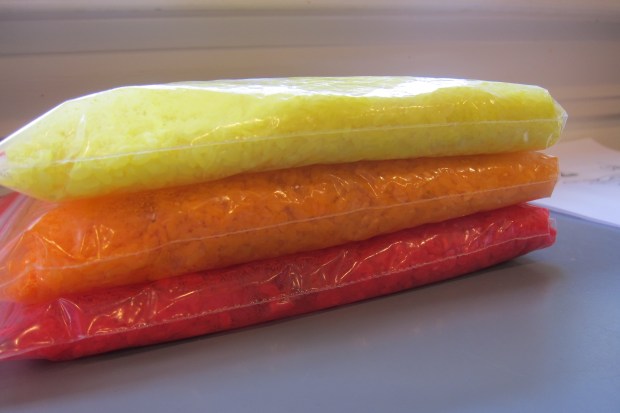
Seal the napkins in a zip-top plastic bag and let dry for 6 to 8 hours.

Tie Dye Napkin (5)

Ring out the extra liquid over a sink, then wash in the laundry machine in cool water.

Tie Dye Napkin (6)

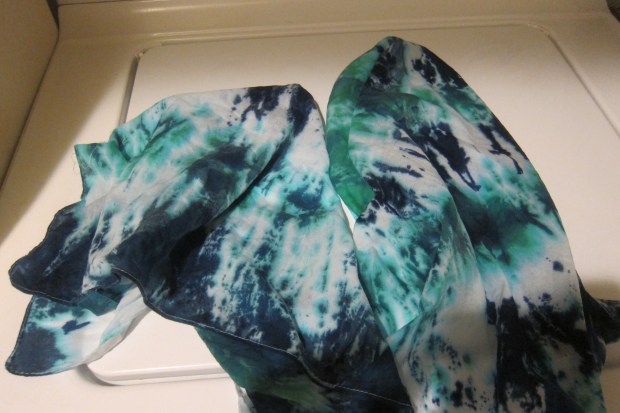
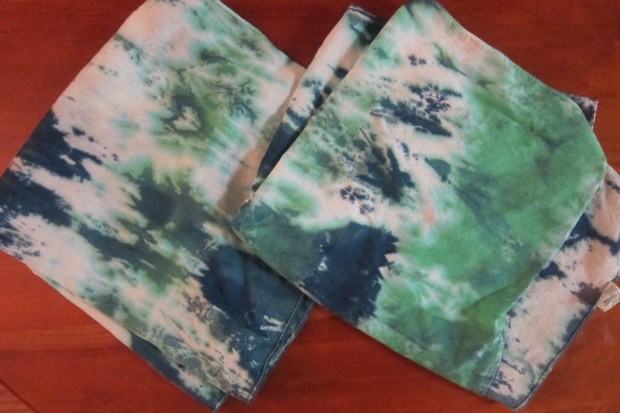
Tumble dry, and repeat if necessary. We thought these came out so pretty!

Tie Dye Napkin (7)

Turn the Beat Around

Turn the Beat (2)

I recently read that recognizing the patterns and rhythms of music can help children with gross motor skills, everything from walking to jumping to dancing. Did this game today actually tip Veronika over the edge into a true walker? I’ll never know for sure, but I think it did the trick!

Veronika has been hesitant to walk, but I noticed a few times that the “stomp feet” verse of If You’re Happy and You Know It had her lifting her feet and almost walking forwards. Today, I was determined to get those feet stomping into a walk.

We started off with the above-mentioned song. Getting your toddler to clap along at this age is great fun, too.

Turn the Beat (4)

Then it was time to stomp. She gamely stomped her little feet, which she accompanied with a little pat pat to her belly. Still no steps though…

Turn the Beat (3)

After that we danced to a few more favorite songs, each time choosing something with a strong beat. We clapped our hands and wiggled and tapped our toes.

Turn the Beat (1)

Well wouldn’t you know, a few hours later I turned around and Veronika was walking. She was so proud of herself and spent the rest of the evening doing circuits of our apartment.

So if you have an almost-walker, I’d love to hear if a similar activity also helps with first true steps! Please share in the comments.

Rainbow Rice Sensory Bags

Rainbow Rice (7)

These easy sensory bags kept my toddler busy for ages… and they look so pretty, too!

If you are playing this game with preschoolers, definitely enlist their help when putting the rice bags together since it’s great scooping practice.

Rainbow Rice (1)

With my 16 month old, though, I did the set-up solo. Here’s my little helper standing by:

Rainbow Rice (3)

Scoop 2 cups rice into each of 6 sandwich-size zip-top bags. Pour a little paint into each in all the colors of the rainbow, using red, orange, yellow, green, blue, and purple. Seal the bag and shake until the rice is completely covered in the paint.

Rainbow Rice (2)

It’s then helpful to open back up and squeeze out as much air as possible before resealing. Now you have a sort of rice “brick” for your child to play with. Repeat for the remaining colors.

Veronika couldn’t wait to come see what it was all about. She stacked them…

Rainbow Rice (10)

…threw them…

Rainbow Rice (9)

…squeezed them…

Rainbow Rice (5)

…and of course tried to open them up (phew, with no success!). In other words, they kept her very busy. There was lots of talking to herself as she played, so she must have had some game going in her head.

Rainbow Rice (4)

For a little learning, I briefly lined the bags up in rainbow order and took the opportunity to sing The Rainbow Song.

Rainbow Rice (6)

You can also pile them in rainbow order, although don’t expect the pile to stay neat for long with a toddler around!

Easy Scarf Pull Activity

Scarf Pull (3)

This gross motor skill activity for toddlers is sure to tantalize!

For set up, attach containers to the wall with painter’s tape. These could be empty paper towel tubes or old bottles or really any container through which you can pull a scarf. For the bottles, you’ll need to cut off the closed end first. Make sure to tape over any sharp or jagged edges. I used two empty juice bottles, but water bottles or even an empty gallon jug would work!

Scarf Pull (1)

While Veronika was napping, I secured these to the wall and stuffed a scarf into each with the end dangling out.

Scarf Pull (2)

She came wandering over mildly curious. Because she loves draping herself in scarves, I thought she would be so into this.

Scarf Pull (4)

Surprisingly, she really only gave each one a single tug through its tunnel, but then lost interest. She showed a bit more interest about the containers themselves, and how they were stuck to the wall.

Scarf Pull (5)

Well, at least we got in a little gross motor play as she pulled those scarves. Your kids may want to stuff the scarves back into the containers and play this game over and over.

Scarf Pull (6)

Crinkle, Crunch

Crinkle Crunch (6)

Paper games never get old for a toddler, and while materials like wrapping paper and newspaper might seem mundane to a grown-up, they are a goldmine of fun for little ones. There’s sound, there’s texture, and there’s also fine motor skill building from ripping paper. So yes all this fun even has a purpose!

First up was the sound aspect. I set out three different kinds of paper for Veronika: brown paper bags, wrapping paper, and tissue paper.

Crinkle Crunch (1)

One by one, we crumpled them up. The brown paper was the loudest, and then the game grew quieter and quieter with the tissue paper making the softest sound.

Crinkle Crunch (2)

Of course then Veronika needed her own turn to take a piece of each material and crumple crumple until she’d formed a small ball in her hands.

A great twist on this auditory play is to hold one ball of paper behind your back and squish it so it makes a crinkle sound. Veronika came to find it!

Crinkle Crunch (3)

Sit back and watch what your child does with the paper. Veronika liked tossing it in the air, and wearing it as a hat!

Crinkle Crunch (4)

Then I demonstrated the sound that wrapping paper made as I ripped a piece in two. “More more!” she immediately asked. I had to start a small tear for her, but then she was able to wrench the two halves apart. Which she then did over and over, testing all three materials.

Crinkle Crunch (5)

What delight to learn she can rip! I thought she might enjoy returning to an old classic game, hiding toys in balls of the paper.

Crinkle Crunch (7)

But she was having so much fun ripping the paper she barely noticed the toys! (Okay, maybe one quick bus zoom).

Crinkle Crunch (9)

I guess that makes this game a winner.

Crinkle Crunch (8)

National Polar Bear Day

Polar Bear Day (3)

I’ve wanted to introduce Travis to the idea of global climate change, and chances are other parents struggle with how to discuss the issue with their kids. As a citizen of the world, this is going to be a very real issue in Travis’s lifetime, but I also don’t want to alarm him. When I learned from Highlights that February 27 is National Polar Bear Day, I seized the opportunity to open the discussion!

We started off with a read of two picture books that gently address the warming Arctic and the threat to polar bears as a result. Check out The Last Polar Bear, by Jean Craighead George or Where do Polar Bears Live? by Sarah Thomson, or see what your library has to offer!

Polar Bear Day (2)

After discussing his takeaway from the books, it was time to get crafty! This was a simple project, gluing cotton balls to a paper plate for a furry polar bear face.

Polar Bear Day (1)

Add a black button for a nose, and glue on wiggle eyes. Finally, I cut two ear shapes from cardstock, which we glued to the plate and covered with additional cotton balls.

Want more polar bear ideas? Try a shaving cream version instead!


Touch Adventure

Touch Adventure (1)

Veronika makes it quite clear when we’re out and about these days that she’s no longer a baby, content to sit and watch the world. She wants to touch and explore! This “touch adventure” game is one you can play anywhere – a restaurant, a waiting room, a playground – and will hopefully help pass the time with a curious toddler. For the sake of photographs, we also played a round at home today!

The idea is just to look around you, select and object, and put your toddler’s hand on it. Describe everything he or she is feeling, and invite them to hold the object. Some children may just want to look at first, which is just fine, but Veronika definitely wanted to hold.

A stuffed animal was soft and fluffy.

Touch Adventure (2)

A ball was hard and smooth. Duplo blocks were bumpy.

Touch Adventure (3)

A tea cup was cold and metallic.

Touch Adventure (4)

Now that she had the idea, we could play out and about! At the library, a pom pom was crinkly and scratchy.

Touch Adventure var

A toy pirate was plastic and hard.

Touch Adventure alt
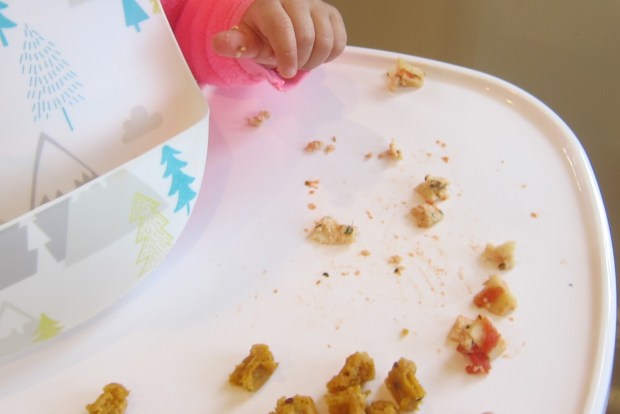
At a restaurant, ravioli was soft, warm and squishy.

Touch Adventure (6)

You get the idea! You can literally play this game anywhere, so let the touch adventures begin.

Follow the Leader

Follow the Leader (1)

Veronika has taken five steps forward on her own… but she’s reluctant to do so and will drop to a crawl more often than not. Today, I was hoping a good old-fashioned game of Follow the Leader might inspire her forward.

We started out with a few copying moves (almost like ‘Simon Says‘) to get her in a follow-along mood. Could she tap sticks like me?

Follow the Leader (3)

Stomp her feet like me?

Follow the Leader (2)

(Note: We have a silly sloth toy that claps its hands and moves to the beat. Toys like these are also great to teach your toddler to play copycat).

Follow the Leader (5)

Now it was time to follow the leader! Big brother marched ahead and we sang “We’re Following the Leader” as we marched around the apartment.

Follow the Leader (4)

Finally, I let go of her hands and kept marching to see if she would continue to follow. It’s still a work in progress, but this was a great game to set her steps in motion!

Follow the Leader (6)

Don’t forget to play a reverse version and let your toddler be the leader. I took a few minutes to copy her moves, whether crawling after her or tapping our tummies, and she loved being the one in charge!

Deep Sea Adventure

Deep Sea (11)

Today Veronika and I had an adorable play session pretending we were at sea! I love that she’s old enough now (at just shy of 16 months) to combine imaginative play with toys and games.

First, I set the stage with lots of sea-themed objects. We had plastic whales, sharks, and fish, a toy boat, and a book with a fish on the cover as scenery. Later I even remembered to add a blue blanket on the ground for “water”.

Deep Sea (2)

If you don’t have any sea creature toys, just cut fish shapes from cardboard and color them in together first!

All we needed to set sail was an empty laundry basket. Veronika climbed aboard the ship, and I attached a jump rope as her ship’s line.

Deep Sea (7)

We “sailed” around the room singing “Row, Row, Row Your Boat”, to her great delight. Another fun song goes like this:

A sailor went to sea, sea, sea

To see what she could see, see, see

and all that she could see, see, see

Was the bottom of the deep blue sea, sea, sea!

I added an empty paper towel tube to be her telescope.

Deep Sea (8)

We loved spotting fish. And whale watching!

Deep Sea (4)

Her fast favorite was a little green fish, which she swam all over the floor. You could even encourage older toddlers to get on the floor and pretend they are swimming.

Deep Sea (6)

The shark was the next big hit. After she learned to say “shark”, she had it jumping around and climbing on board the boat.

Deep Sea (10)

If anybody needs a rescue at sea, reel them in with your jump rope “line”.

Deep Sea (5)

In sum, don’t discount a 16 month old’s ability for imaginative play. That imagination is kicking in, right alongside the gross motor and fine motor skills.

Deep Sea (9)

Story Sound Effects

Story Sound Effects (4)

Here’s a fun way to add dynamics – literally! – to story time with a toddler. This activity is particularly useful for kids who might not otherwise sit still for a story.

First, I gathered together items that make noise. Instruments are an obvious pick, but also think of rattles or toys that jingle, and things that can be tapped together like wooden blocks.

Story Sound Effects (1)

For the first version of the game, I told a story out loud instead of reading from a book.

Story Sound Effects (3)

Picking “Jack and the Beanstalk” as our tale, I used the tinkle of a triangle for magical moments like the cornstalk growing, a castanet for the hooves of the cow at market, a horn to toot for the golden goose, and wooden blocks to tap for the Giant’s big footsteps.

Story Sound Effects (5)

Veronika might not have understood the story, but she was enthralled by all the sounds. She loved grabbing a noisemaker or two to join in.

Story Sound Effects (6)

For the next round, I read from a favorite book (Little Blue Truck) and similarly found items that made sounds throughout the story. A toy horn was perfect for Blue’s “beep beep beep”!

Story Sound Effects (7)

As we got to each animal, I invited Veronika to chime in. Horse says…? “Neigh!” she responds. Here’s a clip!

Invite your child to join in on any similar animal sounds in your story, or to sing along to various words. Whether you’re shaking maracas for rain or stomping your feet for thunder, story sounds effects like this will be a fantastic way to keep your child engaged!

Story Sound Effects (2)