Rainbow Craft Challenge

Rainbow Challenge (5)

Just in time for St. Patrick’s Day, Travis’s art challenge from Highlights magazine was to make a rainbow using tissue paper, glue, and… anything from the recycling bin!

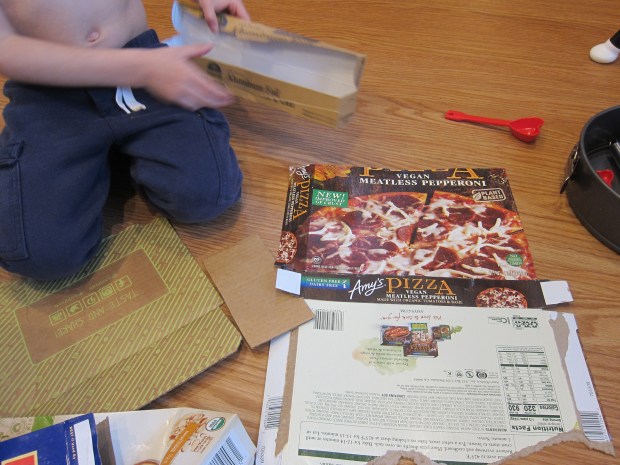
So of course first we had to dump everything from the bin onto the floor. Travis loved going through the pile, including boxes and tubes and cans that we didn’t ultimately use for the project (some of which became props for his games all afternoon).

Rainbow Challenge (1)

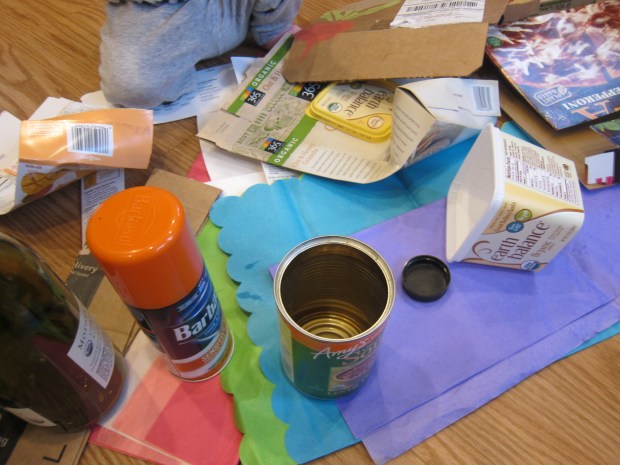
A pizza box was the largest piece of cardboard available so that became our base. We glued down blue tissue paper for a quick background.

Rainbow Challenge (2)

I had bought tissue paper in every color of the rainbow, and assumed we would tear these into tiny pieces. But Travis had other ideas, and I loved watching him twist a sheet of each color into a rope, then glue these in rainbow order.

Rainbow Challenge (3)

A black bottle cap made a pot of gold and white tissue paper glued on to a container lid became a puffy cloud. Clever!

Rainbow Challenge (4)

Here’s hoping we have some extra luck whenSt. Patrick’s Day rolls around next week.

Magic Carpet Ride

Magic Carpet (5)

Veronika is at the age where imaginative play starts to take off, so today I took her on a magic carpet ride!

Clearly your child will have no context for such a game, so you may want to take a quick peek at the magic carpet scene of a movie like ‘Aladdin’. Veronika was entranced by the soaring carpet!

Magic Carpet (1)

Then I sat her down on a big beach towel (with a rather magic carpet-esque print). A few doll friends came along for the ride.

Magic Carpet (3)

Humming and singing songs, we went for a magic carpet ride around the apartment, waving to the things we passed.

Magic Carpet (4)

I then transferred her dolls to a smaller towel to see if she wanted to be the one to give a ride, but this was met with confusion.

Magic Carpet (6)

So it was back to her big carpet for another ride! Does your child prefer to pull toys on the magic carpet, or sit for a ride? Please share in the comments!

Shoe Box Train

Shoe Box Train (8)

We had a few leftover boxes around the house, so it felt like the perfect day to make Veronika a cardboard train. Okay, technically none of these were shoe boxes, but I use the term in the title because they were all about that size. Use any similarly-sized packages for this terrific tot train.

To put it together, simply puncture holes in the sides of each box, and attach them together with yarn or string.

Shoe Box Train (1)

To make even this part fun, I made lots of drilling and clanging construction sounds as I worked.

Shoe Box Train (3)

Veronika wanted to hold a pair of safety scissors to get in on the action! Once our train was complete, it was time to load up passengers. Some stuffed animal friends happily climbed aboard at the station.

Shoe Box Train (5)

I showed Veronika how to hold the yarn so she could pull the train along with her as she walked forwards. I realized this was the first time she’s used a toy that pulls, rather than pushes, so it was great for her motor development.

Shoe Box Train (6)

After a while, she did prefer to push the train cars along, which was just fine too.

Shoe Box Train (7)

Station change! Next it was all aboard the dinosaur train.

Shoe Box Train (9)

There were so many elements to this game that I loved, whether watching her busily load the passengers in and out, the way she said “roar!” to the dinosaurs, or how determined she was to make the train move. She even decided to test out a seat for herself!

Shoe Box Train (10)

Motor skills, imaginative play, and so much more, all thanks to a few upcycled boxes.

Salty Cave Crystals

Salty Cave Crystals (3)

Travis has seen stalactites and stalagmites in cartoons and real life, so he was intrigued when we set out to make our own. You’ll need about a week for this project from start to finish, so it’s also a good lesson in patience!

For set up, add 1/4 cup Epsom salts to each of two paper or plastic cups. Fill with water and stir for 1 minute. There should still be some Epsom salts undissolved in the bottom, making this a supersaturated solution.

Salty Cave Crystals (1)

Add food coloring in your child’s colors of choice. Travis stirred in blue and green.

Salty Cave Crystals (2)

Tie a piece of yarn around two paper clips (or safety pins), and dangle the ends in the cups. Now set the whole contraption some place where it can sit undisturbed with the yarn dangling over an old jar lid between the two cups.

Alas, we didn’t have great results with this. Either something is wrong with Epsom salts in our apartment these days, or we’re making a mistake! But we could see crystals growing lightly along the string.

Salty Cave Crystals (6)

Interestingly, there was a leak in one cup and the best crystals formed around the base. So Travis declared these our stalagmites.

Salty Cave Crystals (8)

As a side note, we could also see the blue food coloring creeping up the yarn: capillary action in action!

Salty Cave Crystals (7)

What’s That Smell?

What's That Smell (2)

For some olfactory fun today, I presented Veronika with smells from around the house and we had fun naming each item as we smelled it. Unlike when she was little, now she can parrot these words back to me, hold the items herself, make yummy noises of delight, and more.

I wanted to clearly differentiate between edible and non-edible items in the game, so we started with the latter. I laid out a flower, tea bags, spice jars, and three different scents of soap.

What's That Smell (1)

One by one, I held them to my nose, then showed her how to do the same. For breakable items, like the spice jars, I waved the item under her nose. But she got the hang of it solo with the soap!

What's That Smell (4)

The tea bags were a big hit, so much so that I got out a bag of coffee and let her inhale that one deeply, too.

What's That Smell (5)

She looked so pleased when she smelled the cinnamon sticks, but she pulled back quickly from curry and a few other spices.

What's That Smell (3)

Next we moved on to items she could smell and eat. I set out a few pungent foods, like cooked vegan sausage and yogurt. Berries would be good, too. Or berry yogurt!

What's That Smell (6)

Veronika then found other fun ways to play with the items, and I was more than happy to watch her toddler brain explore. The cinnamon sticks were fun to take in and out of the jar, and the yogurt was fun to spoon through.

What's That Smell (7)

Finally, I made her a chart with a smiley face for the scents she had liked and a sad frown for ones she did not. Older toddlers will get a kick out of this part of the lesson, and may want to add to it on occasion.

What's That Smell (8)

Have fun continuing this kind of play no matter what room of the house you’re in, whether the bathroom or even outside.

Erupting Chocolate Ooblek

Chocolate Ooblek (3)

Today I made Veronika a new version of ooblek. Wanting to make this one stand out from the crowd, not only did this version feature chocolate, but it could explode! And yes this activity is toddler safe.

As a reminder ooblek is about 2 parts cornstarch to 1 part water. From there, there are so many ways to fancy it up. Unfortunately I messed up the texture of our ooblek from the get-go because I thought I had a full box of cornstarch in the pantry. It turned out I only had less than 1 cup left, and I’d already poured in over 1 cup of water to a plastic tub. So our mixture was on the watery side, not true ooblek.

But that’s okay, because there was more for Veronika to play with here! First, we sprinkled on cocoa powder in addition to the cornstarch. This was purely for the heavenly smell. Yum!

Chocolate Ooblek (1)

We also added 2 tablespoons baking soda because we wanted our ooblek to erupt. (Note: Be careful, because the baking soda will offset the now-solid-now-liquid property of ooblek, as it will dissolve in the water).

To make the explosions, add white vinegar to squeeze bottles and squirt in a bit at a time. This is great for exercising those little fingers.

Chocolate Ooblek (4)

Veronika almost couldn’t believe it when the first bubbles appeared. I had to help out with lots of the squeezing, but she was transfixed watching the eruptions every time the vinegar hit the baking soda.

Chocolate Ooblek (6)

The resulting bubbles are really neat ones, too, almost like honeycomb, but with a quasi-solid texture. They won’t pop until you pop them!

Chocolate Ooblek (7)

This made for lots of fun poking and prodding. Veronika was a little hesitant to get her hands messy, but adding a spoon helped her get in there.

Chocolate Ooblek (9)

There also was also an added auditory component to the fun, thanks to the hissing sound whenever baking soda mixed with the vinegar.

Chocolate Ooblek (11)

In sum, this project made for one happy girl!

Chocolate Ooblek (10)


Restaurant Games


Restaurant Games (var)

Dining out with a toddler is a lot harder than dining out with baby. While babies might be content to coo from a stroller and watch the world go by, not so your toddler! Here are a few favorite games I’ve found to keep Veronika occupied.

Drawing Games: Restaurants often provide paper and crayons… but good luck with that paper staying on the table. Now, I carry a roll of masking tape in my purse. Tape the paper down, and your toddler won’t be able to rip up his or her masterpiece!

Restaurant Games (bis)

Hide a Hand: Hide a small item in one hand. Let your toddler see it, but then close both fists. Today, for example, Veronika loved finding a piece of chalk over and over, grinning with delight no matter how many times I switched it back and forth between my hands.


Restaurant Games (3)

Hide-and-Seek: This is a classic of course. Hide a small object (a quarter works well) in an easy to spot location, and let your toddler be the seeker.

Restaurant Games (6)

Ta da! She found it under the menu.

Count Together: Finally, don’t forget about counting. Veronika already chimes along to “One, two, three…” and although she might not grasp what those words convey, kids can learn to parrot up to ten easily.  So count out sugar packets, crayons, single-serve creamers, or whatever else is on the table!

Restaurant Games (alt)

Today Veronika loved counting pieces of chalk into an empty plastic cup.

Restaurant Games (5)

And of course, it doesn’t hurt if you happen to be at an establishment so cool that the table itself is a chalkboard and there is a basket full of dinosaurs to play with!

Restaurant Games (7)

Do you have a favorite restaurant game with your toddler? Please share in the comments!

Playing with Cups

Plastic Cups (3)

Let’s face it: sometimes a toddler can be in the way. Whether you’re helping an older sibling with a project or trying to get chores done, sometimes those little hands just need to be kept busy!

The easiest hack ever? Give them plastic cups to play with. Do you need to add anything to the cups? Nope, that’s it; just plastic cups!

Plastic Cups (1)

I handed Veronika this stack of clear cups when originally she wanted in on a messy project with big brother. But the moment she saw the cups on the floor, she was hooked.

Plastic Cups (4)

She sat surrounded by a pile of them and stacked them. Sometimes she stacked them upside down, and sometimes facing up (nesting).

Plastic Cups (2)

Sometimes one faced down and one faced up. Then she could topple them over.

Plastic Cups (8)

After a while, she had fun kicking and rolling them, and chasing after them. She even discovered that they made neat reflections when held in front of the shiny dishwasher.

Plastic Cups (5)

I may just give her cups to play with every day. We’ll have to try some in colored plastic for future variation!

Plastic Cups (7)

What’s your favorite toddler toy hack? Please share in the comments!

Nature Collage

Nature Collage (9)

This was Travis and Veronika’s first art project together, a really wonderful milestone for siblings.

It started with a nature walk! On a gorgeous spring-like day, we took Veronika out to stretch her legs, and although she has come along on nature hikes, this was the first time she walked on her own two feet.

Nature Collage (1)

Travis was a great help along the trail, pointing out the names of objects. “Log!” he told her proudly, and also pointed out grass, acorns, pine cones, sticks, pebbles, and dirt.

Nature Collage (4)

Of course dirt had to be explored.

Nature Collage (3)

When Veronika saw that big brother had a walking stick, she needed one too!

Nature Collage (2)

As we hiked, the kids added treasures to a brown paper bag. Because it is late winter, there wasn’t a whole lot of color, but there was beauty to be found in dried brown leaves, curiously-shaped sticks, and bristly pine needles.

Nature Collage (5)

Once home, I asked Travis what shape we should draw on construction paper. He chose a butterfly, but anything else from nature – a flower, a favorite animal – would be fun.

Working together, we dripped on glue and applied bits of our nature finds into a collage. Travis loved using an acorn for a big eye and pine needles for antennae. Veronika loved pressing down pieces of leaf on the wings. Something for everyone!

Nature Collage (6)

She even loved squeezing the glue bottle.

Nature Collage (8)

This project helped shape an absolutely beautiful afternoon, and I hope you find the project equally magical.

Nature Collage (7)

Sun Catcher Sensory Bags

Sun Catcher Sensory (5)

This easy sensory bag doubles as a sun catcher for toddlers… so be sure to play on a sunny day!

My original intent had been to make several of these bags, using different combinations of primary colors in each. But I quickly realized that my one container of hair gel was only going to fill a single large zip-top bag, so one version it was! If you have hair gel in bulk, by all means make several.

Sun Catcher Sensory (1)

I decided to work with blue and yellow. Squirt the hair gel into the bag and then drip in food coloring so that two separate colors are in opposite corners of the bag. I then taped it to our patio door, which catches the morning sunlight beautifully.

Sun Catcher Sensory (8)

Veronika was entranced!

Sun Catcher Sensory (4)

She loved how squishy it was when she poked at it.

Sun Catcher Sensory (3)

She loved how the colors splashed around when she tapped it with her full palm.

Sun Catcher Sensory (6)

She loved the way we could chase bubbles through it with our fingers.

Sun Catcher Sensory (7)

Meanwhile, I loved pointing out the reflections it made on our wall, and how the blue and yellow were combining toward green in the center. Plus I loved watching her sunlit smile as she played.

We left this one up for a few days!


Sun Catcher Sensory (9)