Hand-Shaped Dish

Hand Bowl (7)

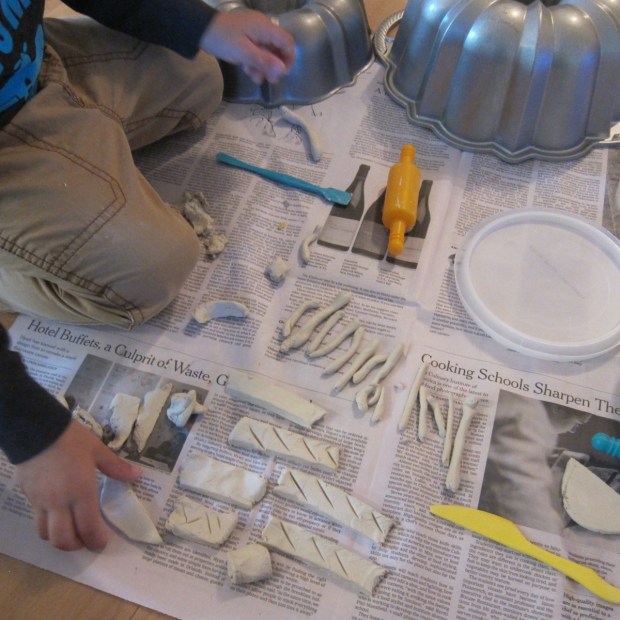
I’m a sucker for any craft that incorporates the size of a child’s hand. Last year, we made  a wreath featuring Travis’s handprints. This year we switched our art medium to clay. This little dish is perfect for holding holiday candies, and would also make a great gift for grandparents on your Christmas list!

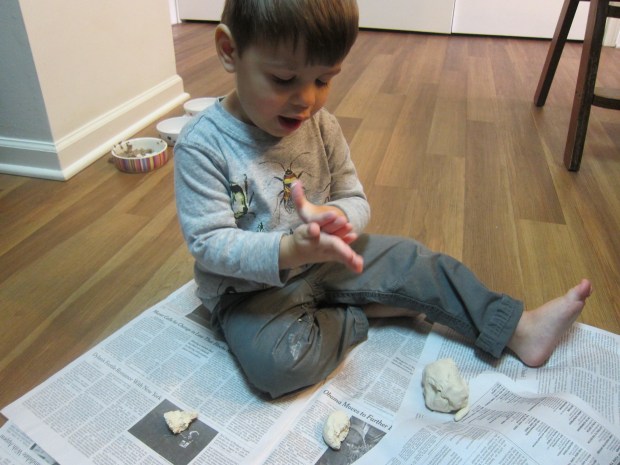
To start, we gathered our materials: air-dry clay and balloons. Balloons and clay first thing in the morning? Travis was in heaven!

Hand Bowl (1)

Blow up one balloon to a size your child can comfortably hold in his or her hand; set aside.

Hand Bowl (2)

Trace your child’s hand onto a piece of paper and cut out; set aside.

Hand Bowl (3)

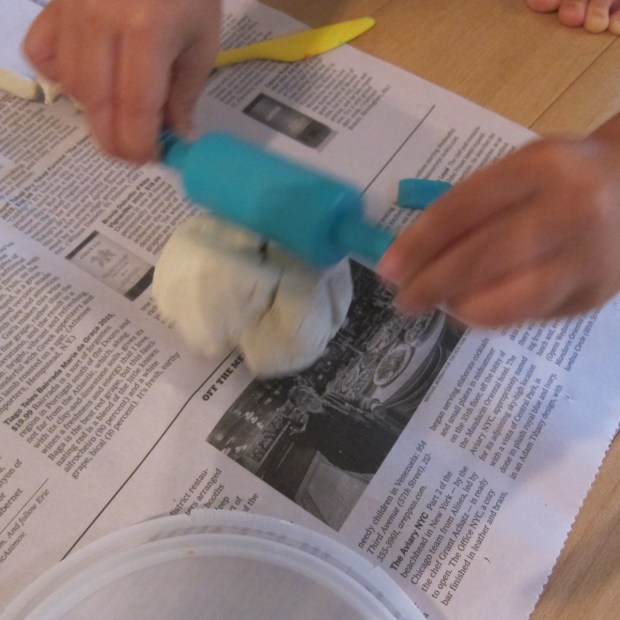
Now flatten your clay using a rolling pin until it is large enough to hold the handprint.

Use a clay slicing tool or plastic knife to cut around the handprint.

Hand Bowl (4)

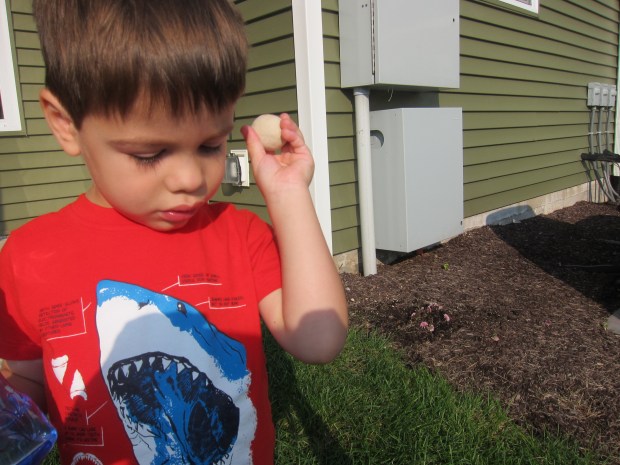
Now here’s the slightly funny part: drape the hand over the balloon, and let sit somewhere kids can’t touch it or mess with it until dry.

Hand Bowl (5)

Once dry, remove the balloon and set your hand on the counter as a decorative dish.

Hand Bowl (6)

Don’t forget to inscribe with kids’ names and the year, so you’ll always remember!

Hand Bowl (8)

Jeweled Turtle

Jeweled Turtle (9).JPG

We seem to be on a bit of a reptile kick lately, and this jeweled turtle helped fill a lazy morning at home. Travis loves to play with clay and aluminum foil, so what a bonus to find a craft that combined the two!

To make your turtle shells, crumple aluminum foil into a ball, and then flatten slightly until you achieve the desired shape.

Jeweled Turtle (1)

Next we rolled little bits of air-dry clay to be the head, arms, legs, and tail of the turtle. Press slightly into the underside of the foil to adhere.

Jeweled Turtle (2)

We pulled out a few sparkly odds and ends from our craft bin to decorate the shell of our turtle, including sequins and glitter glue.

Jeweled Turtle (3)

Once our first turtle was finished (admittedly with lots of adult help), Travis immediately began making a second, and this time I sat back and just watched his imagination go wild!

Jeweled Turtle (7)

The turtle had several heads, bits of clay stuck on top of the shell, eyes in several places that didn’t necessarily make “sense”, and star beads pressed into arms and feet.

Jeweled Turtle (5)

I didn’t lift a finger for this second version, and absolutely loved seeing Travis make his own creation.

Jeweled Turtle (6)

What will your child’s turtle end up looking like? Please describe or post a picture in the comments; we can’t wait to see!

Jeweled Turtle (8)

Phoneme Week 9: AY

AY week

With Travis now in nursery school three days a week and lots of other projects on our agenda, I’ve greatly abbreviated our phoneme games; we seem to be doing phoneme months instead of phoneme weeks. But it’s still nice to have a guiding letter pair up on our wall, introducing Travis to the sounds that letter pairs make, and using that as a jumping-off point for play.

You’ll notice that this post is much simplified from previous phoneme weeks, but this pace suits us just right for now. Have your child practice tracing A and Y over the course of your week or month, and then enjoy the suggestions below!

Words of the Week:

  • Day: To focus on this word, we made a Days of the Week chart. This was a great visual guide for Travis, now that he can anticipate school three days a week, but not on others.Days of Week (5)
  • Clay: We love playing with our model clay kit, great for imagination and fine motor skills. In addition, we had fun with a few clay-based crafts like clay fortune cookies, clay charm necklaces, and silly moon craters made from clay asteroids.Clay Fortune (4)
  • Gray: Besides teaching the color and having fun with gray crayons or paint (what will you draw – elephants? rhinos? mice?)… AY week alt.JPG
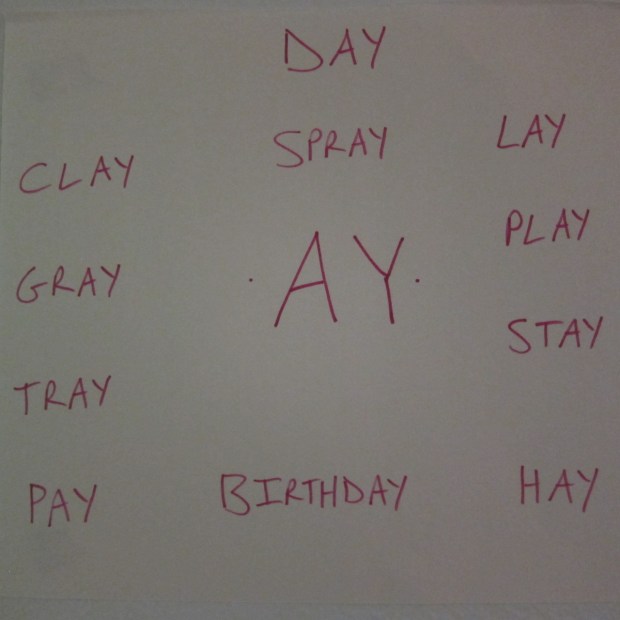
…we also took advantage of moments when the weather was cloudy to do activities best suited to grAY-sky dAYs: Rainy day window painting and a rainy day art picnic! These fun activities are sure to chase any rainy-day blues awAY.Rainy Window (3).JPG
  • Tray: You can use this word as the jumping off point for any number of sensory trays, or focus on the tray as a wAY to contain projects that are particularly messy. To wit: vinegar, baking soda, and balloons!VInegar Balloons (5)
  • Birthday: As luck would have it, this unit overlapped with birthdays for both mommy and daddy in our household. We celebrated with cupcakes, presents, and a read of birthday books. There are so many kids books to choose from with Birthday in the title. On his dad’s birthday, Travis cozied up to read the quirky Oscar’s Half Birthday Froggy’s Day with Dad.AY Week (10)
  • Lay: Make a cozy bed fort, then take turns laying down and make silly noises to “wake” each other up.AY week (5)
  • Play: A rather obvious one, which you’re no doubt doing with your child every day anywAY! But to put a fine point on the word, we played post office and cash register games – perfect opportunities also to pAY.AY Week (1)
  • Stay: We played a round of freeze dance (an old favorite in our house), but switched up the words as we started and stopped to the music this time – “go” and “stay”!
  • Pay: Thinking beyond the monetary definition of this word, we used it as the leaping off point to pay attention to things. This inspired us to put together a Kindness Wreath, which turned into the perfect fall adornment for our door.Kindness Wreath (8)
  • Hay: Definitely the word that inspired the most fun in this unit, first we went a field trip to a local farm sanctuary, where of course there was lots of hay to be seen, and a chance to feed the animals grassy hay.AY week (3) 
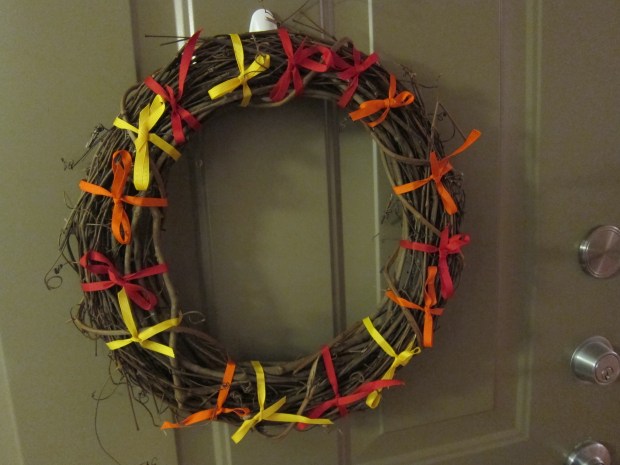
We took the fun home with a bale of hay from a craft store (easy to come by, here in the fall). Travis loved having his own little farm out back where his animals could play in the hay. AY week (6)Finally, we incorporated hay into a craft with our Q-tip Painting Indian Corn project.
  • Spray: The runner up for favorite word of the unit, you can’t go wrong with a preschooler, a spray bottle and water. Spray Fun (7).JPGI also decided to have Travis be my sous-chef for a recipe requiring cooking sprAY, and wanted it to be something novel. That meant we pulled out my old waffle maker for the first time in years, sprayed it with the cooking spray, and scooped in the batter for homemade pumpkin waffles!Pumpkin Waffles (4).JPG

Clay Fortune Cookies

Clay Fortune (15)

Last night was the Chinese Mid-Autumn Festival (or Mooncake Festival), celebrating the harvest. Traditionally, families celebrate with picnics and mooncakes eaten underneath the full moon. Making vegan mooncakes was too arduous an undertaking, but fortune cookies seemed like a nice cultural symbol to set the tone, and were easy to make with… clay! This was a fun way to introduce Travis to a new culture and new ideas.

Clay Fortune (1)

After a real fortune cookie snack, he loved watching the “cookie shop” we set up, as I demonstrated how to roll the clay flat into circles.

Clay Fortune (3)

Fold each circle in half, then pinch inwards into a fortune cookie shape.

Clay Fortune (2)

This was a bit tough for Travis, but he loved watching me pinch our cookies as he created other shapes.

Clay Fortune (5)

We let the clay air-dry overnight, and then painted with watercolors the following afternoon. Travis had fun selecting different shades for each cookie!

Clay Fortune (12)

To make the fortunes, simply cut paper into thin strips and decorate with pictures or words.

Clay Fortune (10)

I gave Travis a few prompts, asking what he most hoped for or would wish for somebody else, and wrote his words on some of our fortunes.

Clay Fortune (11)

Then it was time for the “festival”! This really just entailed heading out after dark as a family to see the moon (so bright my camera couldn’t handle it).

Clay Fortune (7)

We enjoyed the Chinese tradition of telling riddles as we snacked on real fortune cookies. Two fun ones for kids that earned big giggles:

What’s full of holes but still holds water? – A sponge!

What’s black and white and re(a)d all over? – The newspaper!

Clay Fortune (8)

Overall, a really fun activity whether you tie the clay cookies into a larger festival or not.

Clay Fortune (16)

Starfish Friend

Starfish Friend alt

If clay is fun, then sand + clay is infinitely more so! You can find colored sand at craft stores, and use whatever color you like best for this project.

After a recent trip to a natural history museum’s touch tank, Travis was in love with the feel of sea animals, so we decided to make our own starfish at home. The project was great for using clay in multiple ways. First we rolled it flat.

Starfish Friend (1)

Then we needed to cut out our starfish. A big star-shaped cookie cutter would have worked great, but I couldn’t find ours, so a plastic knife did in a pinch.

Starfish Friend (2)

Now it was time for the extra special sand bit. It was amazing how much more fun this made clay play. Travis loved the way it made the clay look, so we couldn’t stop there – he began adding other denizens to our “touch tank” including “snails” and “crabs,” which all needed to be sprinkled in sand of course.

Starfish Friend (3)

These were “snail eggs.”

Starfish Friend (7)

Meanwhile, use googly eyes or buttons for the eyes to finish your starfish friend; we chose the latter, after which Travis loved pressing buttons into additional pieces of clay.

Starfish Friend (5)

For the final touch, we left our clay to air-dry slightly curved on a piece of newspaper; this gave it that real starfish look once it had dried!

Starfish Friend (4)

Clay Charms

Clay Charms (10).JPG

With a big batch of clay in the house, we decided to shape some into charm necklaces – they’ll make the perfect gift for the upcoming September birthdays of several relatives!

You can shape your charms in one of two ways. First we tried a butter knife to cut out simple squares or rectangles. This was definitely Travis’s preferred method.

Clay Charms (2)

Alternatively, you can use cookie cutters to fashion your charms into circles.

Clay Charms (3)

We found a bunch of old buttons in our craft box, which made perfect imprints into the clay, like flowers or hearts.

Clay Charms (5)

Once you’re happy with your designs, let the clay set. If you have oven-dry clay, bake according to package instructions. Ours was air-dry clay, so we left it out overnight. While the clay is still soft, poke a hole through each with a toothpick or wooden skewer so you can string it onto a thread later on.

The next day it was time to paint! Watercolor works very well on clay, but you could also use acrylic paint.

Clay Charms (6)

After a swipe or two with a paintbrush, Travis decided it would be much more fun to do watercolors by hand. I laughed and decided why not! The results were surprisingly beautiful.

Clay Charms (7)

Let the charms dry again, then thread twine through the hole in each charm. Voila! A charm necklace.

Clay Charms (9)

Making Moon Craters

Moon Crater (5).JPG

Some games are educational, some games are artistic – but for this one I confess we basically just wanted to take advantage of our new backyard and have some messy fun!

That said, the moon has been on our mind since the eclipse, so I asked Travis if he wanted to see an example of how asteroids and comets made craters on the moon. That was the extent of our “science lesson”, but older kids doing this project might want to look at videos of the moon or research craters a little further.

For our moon surface, I filled a bin with about 2 inches of white flour. A little cocoa powder sprinkled on top added contrast.

Moon Crater (1).JPG

Three “asteroids” of dried clay made the perfect asteroids. Hold them at about chin level, then drop down onto your moon surface.

Moon Crater (6)

There was a very satisfying puff of flour and cocoa with each impact!

Moon Crater (3)

And very neat holes left behind.

Moon Crater (4)

Because this activity was so action-based, here’s a quick video!


Watercolor Clay Turtles

watercolor-turtle-11

This cute project is really the first time Travis has worked with clay, not counting the rubbery feeling air-dry kind, and he dove into it like he’s being modeling clay all his life!

watercolor-turtle-6

Our stated purpose was to make some turtles in order to paint their shells, and Travis liked helping me shape the shells at first.

He then was so busy rolling “snakes” and “worms” that I finished the turtles’ heads and limbs on my own… but I loved watching Travis roll the clay between his hands until he had a little collection!

watercolor-turtle-5

We set aside the “worms” to dry, and turned back to our turtles. Normally, you want your clay to dry out, but we wanted ours to get wet and messy! First use a paintbrush or your hands to cover the surface of the turtle shells with water.

Next, paint or drip on watercolor paints, and watch the colors run and swirl over the shells!

watercolor-turtle-9

The result is gorgeous and fun. You can also sprinkle on little patches of salt, which makes the color bleed or intensify in places.

watercolor-turtle-10

A very cool project, the first of many clay games to follow I’m sure.