Black Bean Indoor Sandbox

Black Bean Sandbox (1)

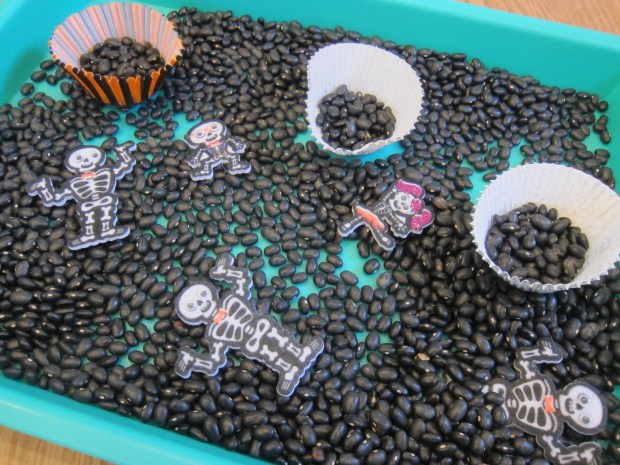
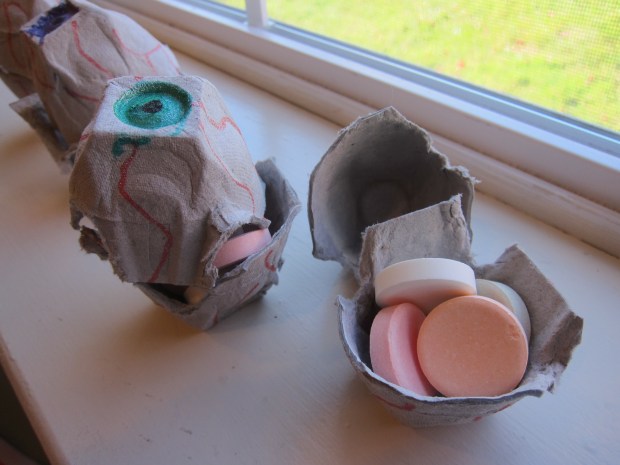
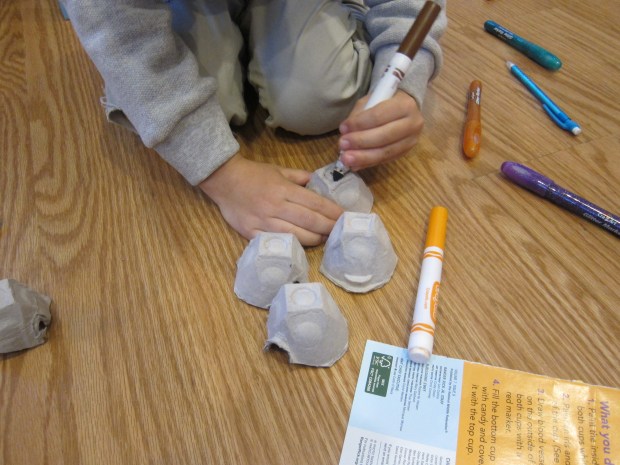
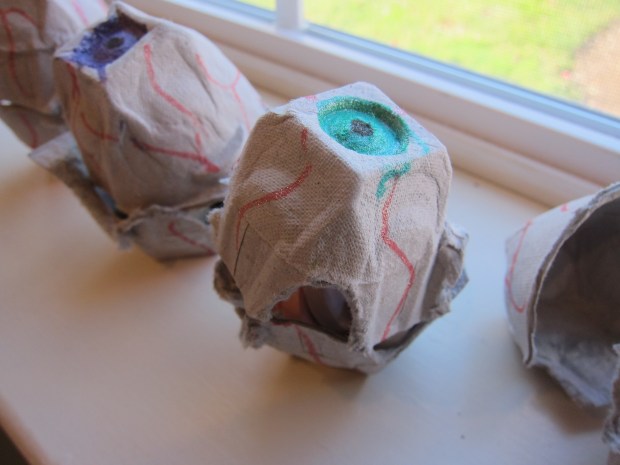
Perhaps I should have held off on this particular indoor sandbox for a couple of days until October is officially here. But when I spotted my bulk bag of dried black beans, the color instantly made me think of all the Halloween decor I just stocked up on. So it was a spooky indoor sandbox a few days early!

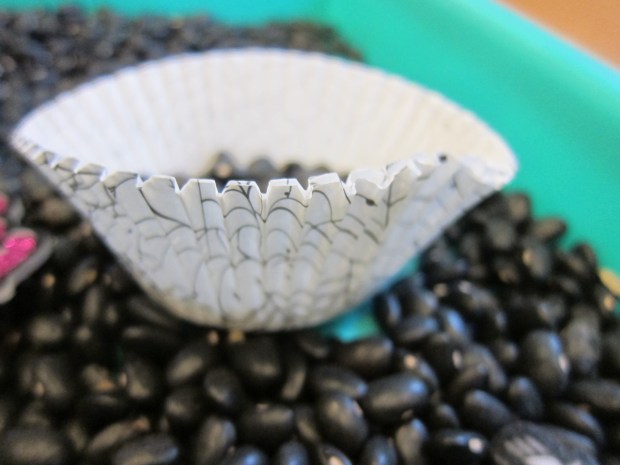
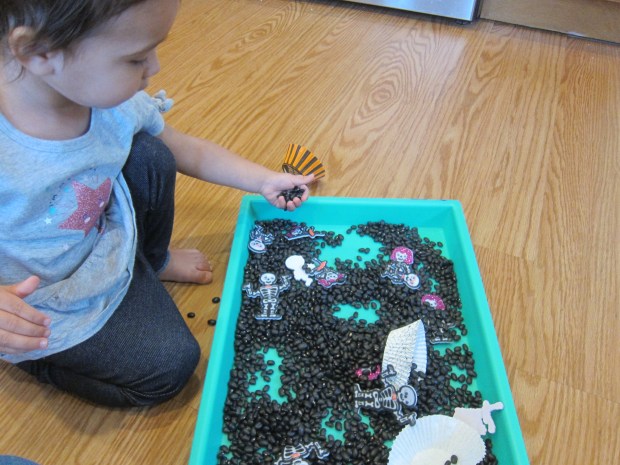
I poured the beans into a shallow tray and added a few Halloween items that lent themselves well to sensory play. These included cupcake liners (with spiderweb and black-and-orange print designs), as well as felt skeleton figures.

Black Bean Sandbox (2)

First her attention went to the little skeletons, and she loved putting them in the cupcake liners, or burying them under the beans and then digging them back up again (spooky!).

Black Bean Sandbox (5)

She could also use the cupcake liners for scooping and pouring, which was great for fine motor skills.

Black Bean Sandbox (3)

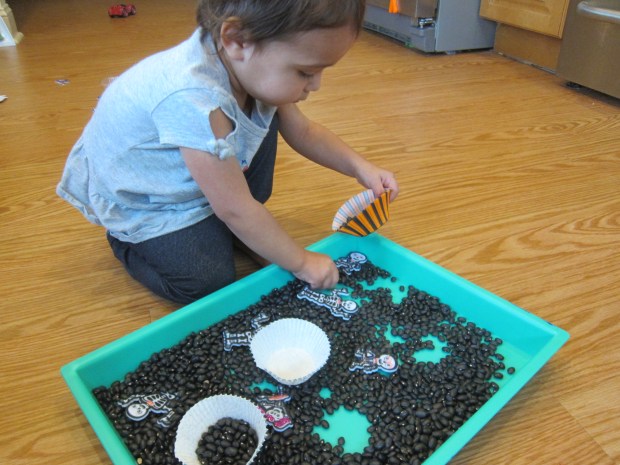
She spent quite some time transferring beans back and forth this way.

Black Bean Sandbox (4)

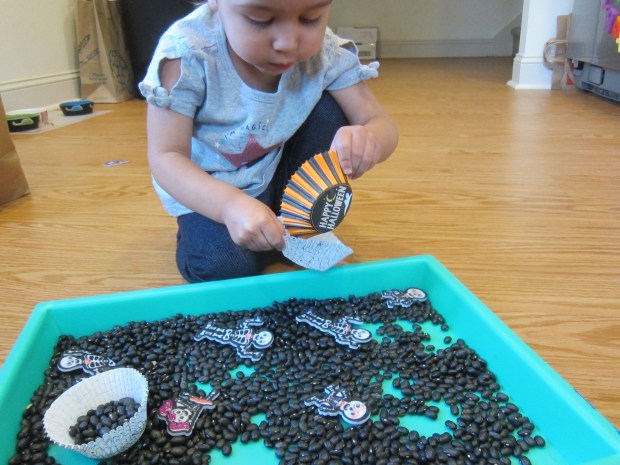
I had planned just to let her use her hands, but she requested a spoon to scoop through, too.

Black Bean Sandbox (7)

Then to my surprise, she first sat in the beans…

Black Bean Sandbox (8)

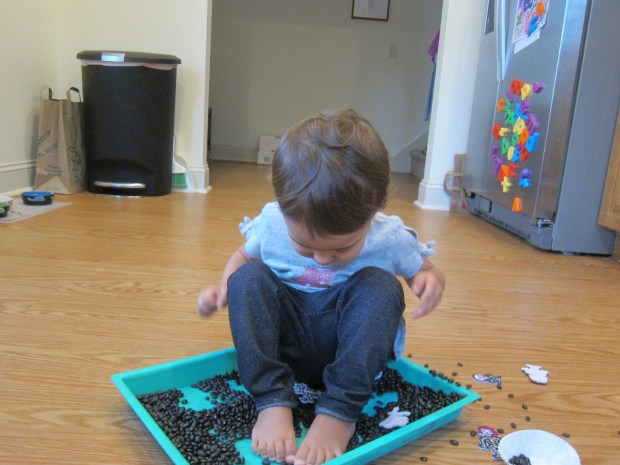
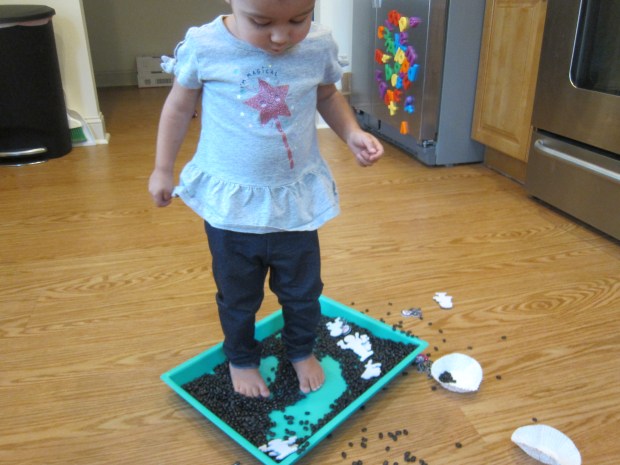
…and then stood right up in them! This gave her the giggles.

Black Bean Sandbox (9)

In sum, the bin was a great one for keeping her busy and for introducing the upcoming holiday!

Black Bean Sandbox (6)

Monster Balloon Decorating

Halloween Balloon (8)

Blow up these “monsters” to decorate the house on the eve of Halloween! The LED lights should last about 48 hours.

Halloween Balloon (1)

Travis was thrilled with the little balloon lights (you can find these at party stores). Turn one on and slip into an uninflated balloon, then blow up.

Halloween Balloon (3)

I had pre-cut a few monster features for Travis on sticky-back black craft foam. As an alternative, you can make mouths, eyes, and noses on black cardstock and use a glue stick to attach to the balloons. But we found that the sticky backing made things very easy!

Halloween Balloon (4)

Our monsters were wiggly and wobbly as we decorated them; it was ultimately easier to hold them between my legs than to tape them onto a table, which we had tried first.

Halloween Balloon (7)

The darker it gets, the more your monsters glow!

Halloween Balloon (6)

Travis loved having these creatures around to set the mood for Halloween.

Halloween Balloon (9)

Boo Mobile

Boo Mobile (5).JPG

The spooky decor continues! On the heels of eerie snack cups, Travis helped make a mobile to hang in the house this Halloween.

First, wrap 2 dowels in orange. Thick yarn would have made quicker work of this step but since I only had orange needlepoint thread, so I was proud of Travis sticking with it.

Boo Mobile (1)

Secure the thread with tape. Tie the two dowels crosswise to each other with more thread.

Boo Mobile (2)

For decorations, we cut simple ghost shapes from white craft foam. Travis loved adding their spooky faces, including one with “fangs”.

Boo Mobile (3)

I also cut the letters B-O-O from orange craft foam. Attach these decorations to more thread with tape, and tie each thread to one end of the dowels. Hang with a final piece of thread, whether in black or orange.

Boo Mobile (4)

Boo!

Boo Mobile (6)

Eerie Eyeball Cups

Eerie Eyeball (5)

With Halloween a week away, Travis is starting to demand spooky decor around the house. We put together these eerie snack cups, perfect for holding candy or portions of little snacks or dry cereal.

Cut an upcycled egg carton into separate compartments. Decorate half of them as the top of the eyes, with a circle right in the center.

Eerie Eyeball (1)

Add wiggly lines of red marker for the bloodshot veins. (Note: You can use paint, but we preferred marker since there was no drying time).

Eerie Eyeball (2)

For the other half of the cups, omit the iris and just make wiggly veins.

Eerie Eyeball (3)

Fill the bottoms with treats, then stack an eyeball cup on top.

Eerie Eyeball (4)

Spooky!

Catnip Toys

Catnip Toys (6)

It’s our cat’s birthday today, 11 years old! Travis loved the idea of celebrating our little guy, so we put together these easy catnip toys for him.

Ranger Rick had a template to follow for Halloween-themed cat toys, since National Cat Day (October 29) falls just before the spooky holiday. I printed out the pumpkin and ghost templates and  traced them onto appropriately colored felt, along with shapes for facial features and a green pumpkin stem.

Catnip Toys (2)

Whoops, because I didn’t have much white felt, some of our ghost features were reversed white-on-black.

Catnip Toys

Use fabric glue or hot glue to attach both sides of each shape nearly all the way around, leaving an opening. Travis helped stuff these openings with cotton balls.

Catnip Toys (3)

And then of course we added catnip, a small spoonful to each. Travis thought the smell of it was wild, and loved the idea that it would drive the cat crazy.

Catnip Toys (4)

Seal up the remaining seam with more glue. I glued on the features, and then it was time to treat the cat!

Catnip Toys (5)

Travis loved tossing down the birthday present.

Catnip Toys (8)

And our cat was quite appreciative! How will you celebrate National Cat Day? Please share in the comments!

Catnip Toys (7)

Morphing Monster Clay

Monster Clay (3)

Yesterday Travis made monster slime. Today, we morphed it into monster…clay!

You’ll need to start with the slime recipe, whether or not you’ve made a monster jar to hold it in. As a reminder, that’s stirring together 1/2 cup glue, 1 tablespoon baking soda, and a few drops food coloring of choice. Add 1 teaspoon contact lens solution.

Monster Clay (1)

Place the slime in a large bowl. Add 2 tablespoons white vinegar and 1 tablespoon vegetable oil

Monster Clay (2)

Travis loved that we were dissolving the monster – scary! Begin adding 1 and 1/4 cups cornstarch (that’s 20 tablespoons!) 1 tablespoon at a time. Eventually you’ll have a clay you can work and mold with your hands. This comes out exactly like the model magic you can buy at the store!

Monster Clay (4)

Travis loved the non-goopy texture since he doesn’t always love sticky and slimy projects. Soon he was rolling up monster snakes.

Monster Clay (5)

And he told me this was a mummy!

Monster Clay (7)

Have fun making multiple colors and see what spooky Halloween monsters your kid will create.

Monster Slime

Slime Monster (8).JPG

The slime craze isn’t over yet, and it seems like there’s always a way to make it new and novel for kids. Travis went bananas for this slime monster he could trap in a jar!

To make the slime, stir together 1/2 cup glue, 1 tablespoon baking soda, and a few drops of food coloring. We decided on an orange monster, so mixed together some red and yellow drops.

Slime Monster (2).JPG

Add 1 teaspoon contact solution and your slime will seize up right away.

Slime Monster (3)

Travis loved watching it stretch. And even better, capturing the beast in its jar!

Slime Monster (4)

To add monster facial features, we cut out shapes from white and black felt and glued on.

Slime Monster (6)

Eek, a monster!

Slime Monster (5)

If you like, make a whole batch of these and decorate a windowsill for the upcoming holiday.

Slime Monster (7)

Glow-in-the-Dark Croquet

Glow Croquet (9).JPG
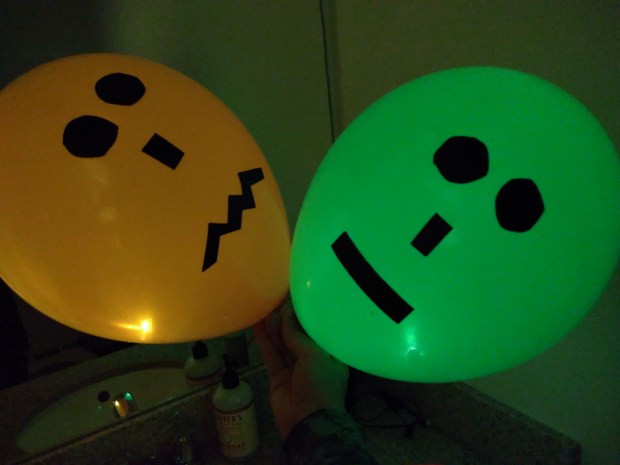
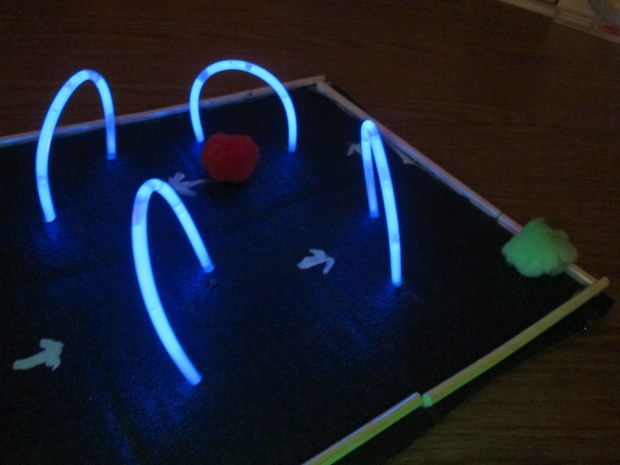
Nights are getting longer, which means finally the sun sets before Travis goes to bed. That opens up whole realms of possibility for games we can play! To wit, put those glow-in-the-dark-sticks and bracelets (ubiquitous this close to Halloween!) to novel use with this game of mini croquet.

First, we painted a piece of large cardboard. Travis chose a sparkly blue, thinking that would look like a starry night sky against our glowing wickets. Paint two coats and let dry.

Glow Croquet (1)

Glue on paper straws around the entire rim of the cardboard as bumpers; let dry.

Glow Croquet (2)

At first, we made straw mallets by cutting a 2-inch piece of straw and gluing crosswise on a second straw to form a T. These didn’t hold up well, so read on for our quick fix.

Glow Croquet (3)

To make the wickets, poke holes in the cardboard. Activate 4 glow bracelets (or up to 8 if you want more wickets!) and insert into the holes, bending each one into an upside-down U.

Glow Croquet (4)

Add arrows with white-out or white paint showing the direction of play.

Glow Croquet (5)

Have each player select a different color pom pom for their ball. Now take turns whacking through the wickets and see who reaches the end first!

Glow Croquet (6)

As mentioned, our straw mallets didn’t hold up well. No problem! We snapped a few regular glow sticks to activate them, and used these as the mallets.

Glow Croquet (7)

Needless to say, Travis was smitten with the game. Anything that glows is always a hit!

Glow Croquet (8)


Feed the Frog

Feed Frog (7)

Ha, this activity is probably more suited to a creepy-crawly time of year like Halloween, but how do you keep a 4-year-old busy on the day before Christmas? With some good, spider fun, it turns out!

Travis spotted an old trove of spider rings in our craft bin, so we set up this game.

We needed a tissue box, and I let Travis go to town emptying the box and playing with the leftover tissues – something I wouldn’t normally encourage, but every once in a while, you need a sacrificial tissue box.

Feed Frog (2)

Ideally, use a green box. Ours had streaks of green as well as other colors, so I guess looked more like one of those tropical bright frogs – why not!

Feed Frog (3)

I made two big eyes for the frog, simply drawing black circles onto white paper and taping to the frog. Cut out the plastic around the hole of the tissue box, and your frog is ready to eat.

Present your child with the “frog”, a pair of tongs, and a set of spiders, and challenge him or her to feed the frog. Tongs are great for fine motor skills!

Feed Frog (4)

Travis would happily have done this all day. To throw in a little education, I asked if he could think of a pattern to feed the frog. “Black, orange, black, orange,” he suggested. Yes!

Feed Frog (5)

Next we tried rolling a dice, taking turns and feeding the frog the appropriate number of spiders.

Feed Frog (6)

When our frog got full, we simply dumped him out and started over.

Travis wanted other things for froggie to eat, so we found red pom poms, which he decided were poisonous bugs.

Feed Frog (8)

He even suggested we make a little mouth for froggie that could open and close, to keep all the food inside.

In sum, a great way to keep your kids entertained!

Pineapple Pumpkin (and More Pumpkin Fun)

Pineapple Pumpkin (8)

We had so much fun at the pumpkin patch this year; Travis needed to come home and carve one right away. We even sorted and saved the seeds for roasting (full recipe below). With our final three pumpkins, we got a little craftsier, putting together these three painting projects.

First up was Mr. Pineapple Pumpkin. Paint your pumpkin with a layer of yellow acrylic paint and let dry overnight.

Pineapple Pumpkin (1)

Once dry, I added upside-down V marks with a sharpie to mimic the exterior of a pineapple.

Pineapple Pumpkin (4)

Travis helped glue on two eyes, and we used dot stickers (cut in half and slightly overlapped on the top) for the mouth.

For the pineapple stem, attach two pieces of green sticky-back craft foam together, leaving a sticky overhang on either side. Cut leaf-like shapes into the foam. Attach one sticky portion to the stem, then wrap tightly and use the remaining sticky edge to hold the “stem” in place.

Deck out your pineapple fellow with a blingy pair of shades for the final touch!

Pineapple Pumpkin (5)

Needless to say, this particular pumpkin craft required significant adult help for a four-year old. For something he could do entirely on his own, I set Travis up with puffy paints and a whole pumpkin.

Pineapple Pumpkin (2)

He loved squeezing out all the colors, which almost looked like goopy spider webs.

Pineapple Pumpkin (7)

Kids who are too young to carve might also love attaching feathers to a pumpkin, or sticking on pre-cut foam shapes for a funny face. Many sets of facial features come available in craft kits, and Travis enjoyed selecting this goofy look.

Pineapple Pumpkin (6)

What pumpkins are adorning your stoop this year? Please share in the comments!

I’ll leave you with this easy pumpkin seed recipe:

Scoop seeds from 1 pumpkin (about 1 cup). Rinse well and pat dry. 

On a baking sheet, drizzle with 1 and 1/2 tablespoons melted butter and sprinkle with 1 teaspoon salt.

Roast at 200 degrees F for 40 minutes. Increase the heat to 325 degrees F and roast a final 5 minutes.