Eerie Eyeball Cups

Eerie Eyeball (5)

With Halloween a week away, Travis is starting to demand spooky decor around the house. We put together these eerie snack cups, perfect for holding candy or portions of little snacks or dry cereal.

Cut an upcycled egg carton into separate compartments. Decorate half of them as the top of the eyes, with a circle right in the center.

Eerie Eyeball (1)

Add wiggly lines of red marker for the bloodshot veins. (Note: You can use paint, but we preferred marker since there was no drying time).

Eerie Eyeball (2)

For the other half of the cups, omit the iris and just make wiggly veins.

Eerie Eyeball (3)

Fill the bottoms with treats, then stack an eyeball cup on top.

Eerie Eyeball (4)

Spooky!

Tangram Toast

Tangram Toast (3)

Travis had a tricky time of it with tangram puzzles recently, so I made things a little more accessible in the best way possible: edible tangrams!

Toast slices of bread first until nice and crispy, making as many as you’d like for the project. Cut into shapes as shown:

Tangram Toast (2)

In a bowl, stir together 1/2 cup softened Earth Balance butter, 1 teaspoon cinnamon, 1/2 teaspoon vanilla extract, and 4 tablespoons sugar. Travis loved mixing all this up!

Tangram Toast (1)

Through trial-and-error, we found it easiest to make the tangrams while the toast was plain, otherwise our fingers got messy (as we learned while designing a slightly-lopsided house).

Tangram Toast (6)

So instead, we spread the cinnamon butter on after, but first Travis helped design a rocket…

Tangram Toast (4)

…and what could this jumble be?

Tangram Toast (7)

Aha a bird!

Tangram Toast (8)

After the puzzling, he was so proud I gave him a real butter knife to spread our cinnamon-sugar mixture over his own toast pieces.

Tangram Toast (11)

He proudly served up triangles, squares, and trapezoids. This was a great way to get kids puzzling while thinking it’s just a messy fun snack!

Tangram Toast (9)

Banana Bread

Banana Bread (2).JPG

This nut-free banana bread is sweetened with agave and applesauce and has no added oil. Perfect for babies and toddlers, in other words, but big kids love it, too!

Ingredients:

  • 2 cups flour
  • 1 tablespoon + 1/2 teaspoon baking powder, divided
  • 1 teaspoon baking soda
  • 3/4 teaspoon salt
  • 1/2 cup applesauce
  • 1/2 cup melted Earth Balance butter
  • 2 tablespoons thawed apple juice concentrate
  • 1/3 cup agave nectar
  • 1 teaspoon vanilla extract
  • 4 ripe bananas
  1. In a bowl, combine the flour, 1 tablespoon baking powder, baking soda, and salt. Set aside.
  2. Pour the applesauce into a large bowl and stir in the remaining baking powder. Whisk in the butter, apple juice, agave, and vanilla.
  3. Mash the bananas in a bowl and add to the applesauce mixture.
  4. Add the dry ingredients to the wet ingredients, stirring just until combined.
  5. Pour the batter into a greased loaf pan and bake at 350 degrees F for 1 hour; a wooden pick inserted in the center should come out clean.

Banana Bread (1)

Snack Animals

Snack Animals (8).JPG

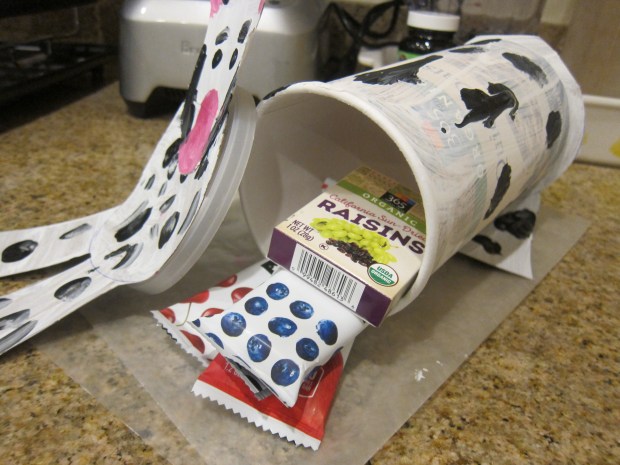
Independence is so crucial to kindergartners, and I have loved watching Travis’s confidence grow since school began only a month ago. Now, he wants to do all the little steps himself each day, from buttoning shirts to buckling his backpack. Being able to serve themselves drinks and snacks is also key for kids’ independence at this age, so we created this adorable snack animal to keep easy snacks at hand!

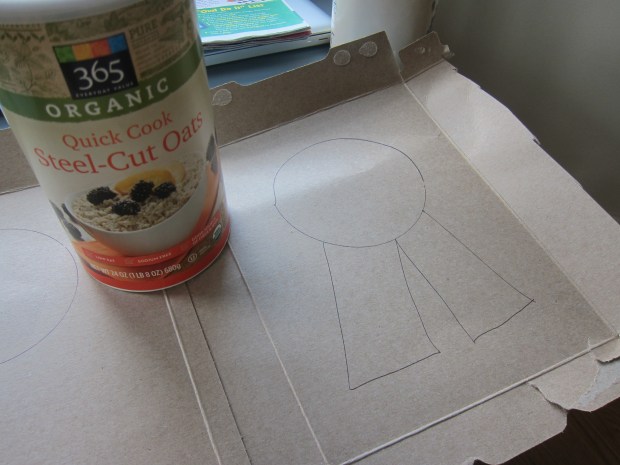
To start, remove the lid from an empty oatmeal canister, and trace twice on cardboard. Note: I found an old cereal box easier than stiffer cardboard packaging for tracing and cutting out. That said, it means your final animal won’t be quite as sturdy and might sit on your counter instead of standing!

Draw legs below each circle and cut out; these will be the front and back of your animal.

Snack Animals (1)

Travis decided we should turn ours into a cow, but really any animal will work! Highlights magazine also suggested a pig or a deer.

Snack Animals (3)

For the cow, we painted the legs white with black spots.

Snack Animals (2)

I cut an additional shape to be the cow’s head, which we glued to one of the circles.

Snack Animals (4)

Don’t forget to paint the canister, too, which received its own coat of white paint and black dots.

Snack Animals (5)

Once the paint dries, glue the head piece to the lid of the canister. Glue the back legs to the back of the canister.

Snack Animals (6)

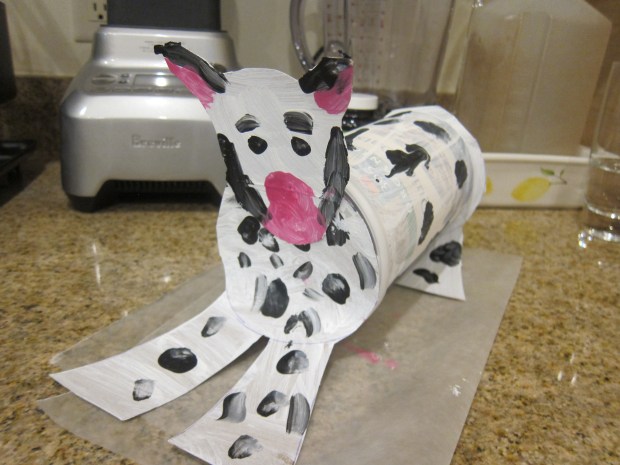
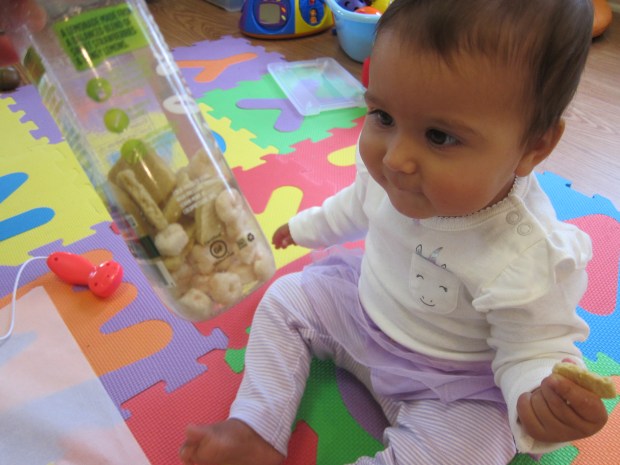
Let the glue dry, then stuff with treats! You can also add yarn for a tail, depending which animal you choose. Pink would have been cute on the pig version!

Snack Animals (7)

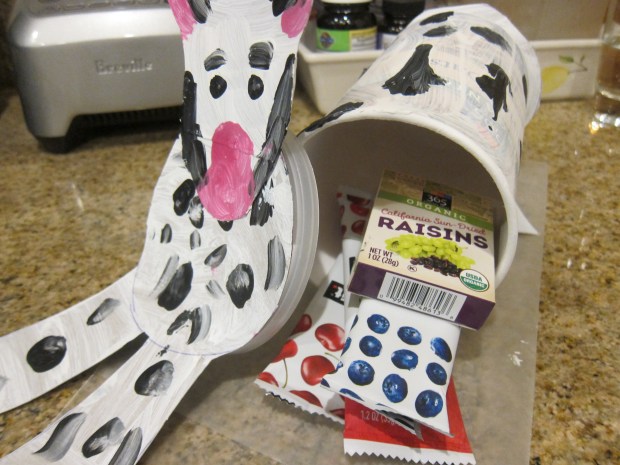
As noted, our cow kneels down a bit, but Travis loves that he can help himself to an afternoon treat.

Snack Animals (9)

Capillary Snack-tion Straw

Snack Straw (5).JPG

This straw has some serious action! After learning about how trees and plants drink their nutrients up from the soil in his latest Kiwi Crate, Travis discovered he too can sip in defiance of gravity: by slurping through a straw.

Cut a watermelon into thick slices. Use a flower-shaped cookie cutter to make a flower shape from the watermelon. Insert the “flower” onto a thick straw “stem”.

Snack Straw (1)

Give a quick blow into the straw to expel the watermelon piece inside. This earned a “whoa!” from Travis.

Snack Straw (2)

We filled a glass with lemonade – any drink will do, but lemonade is a favorite around here – and then tested it out.

Snack Straw (4)

Travis provided the power for his flower’s “roots”. What a delicious way to soak up nutrients! When the drink is finished, you can eat your “flower” of course.

Snack Straw (3)

Share a Special Snack

Special Snack (3)

Veronika is old enough that she doesn’t need “baby food” anymore, and the best way to develop a love of healthy foods in your little one is to savor them together. I love making recipes that my two kids (and the grown-ups!) can share together now. To wit, this kid-friendly version of guacamole is a hit with everyone at the table.

Scoop the flesh from two avocados and transfer to a bowl; mash.

Special Snack (1)

Stir in 2 teaspoons fresh-squeezed lemon juice and 1 chopped tomato.

I served the guac with cucumber sticks and bell pepper sticks, as well as toasted pita bread. You could also add toasted bread slices or roasted carrot sticks.

Special Snack (2)

Travis and Veronika had a blast sharing this afternoon pause together!

Special Snack (4)

Eat the Alphabet

Eat Alph main.JPG

What better way to conclude an almost-kindergartner’s summer alphabet lessons than to eat your way through it? Each day for 26 days at snack time, I gave Travis a food starting with a letter, in alphabetical order. He had to make that letter first, then – yum – gobble it up! Without further ado, Travis nibbled his way through:

A for apples

Eat Alph A

B for banana slices

Eat Alph B

C for cereal

Eat Alph C

D for dates

Eat Alph D

E for eggplant

Eat Alph E.JPG

F for Fritos

Eat Alph F

G for grapes

Eat Alph G.JPG

H for Hippies (chickpea puffs)

Eat Alph H.JPG

I for ice cream cone

Eat Alph I

J for jelly

Eat Alph J.JPG

K for kiwi

Eat Alph K.JPG

L for licorice

Eat Alph L

M for marshmallows

Eat Alph M

N for nuts

Eat Alph N

O for Oreo cookies

Eat Alph O.JPG

P for pretzels

Eat Alph P

Q for quesadilla

Eat Alph Q

R for raspberries

Eat Alph R

S for Sour Patch kids

Eat Alph S.JPG

T for Twizzlers

Eat Alph T.JPG

U for Utz chips

Eat Alph U.JPG

V for veggie stix

Eat Alph V

W for watermelon

Eat Alph W

X for two x-ed bell pepper stix

Eat Alph X

Y for yams

Eat Alph Y

and Z for zucchini!

Eat Alph Z

Quick Make & Play Edible Sensory Bottle

Edible Bottle (4)

This fantastically easy sensory bottle is quite possibly my new favorite thing in the world…and Veronika’s, too!

To set up the bottle, save any clear plastic juice bottle with a wide mouth and a lid you can screw on tightly.

I gave Veronika the bottle (which of course is a toy all by itself!) and set out a few easy-to-hold snacks in front of her, including Plum Organics super puffs and Earth’s Best letter of the day cookies (both vegan!).

Edible Bottle (1)

I showed her how to drop some of the snacks into the bottle, making a nice plink sound each time. She soon was following suit, with the added fun that she could nibble as she worked.

Edible Bottle (2)

Once she paused to enjoy the puffs, I filled the bottle a little further and put on the cap.

Edible Bottle (3)

Now it was a sensory bottle to shake!

Edible Bottle (5)

The real beauty of this sensory bottle became apparent as soon as we were on the go. At the grocery store, first Veronika could just enjoy playing with it, shaking it or chewing at the cap.

Edible Bottle (8).jpg

But when she got a little fussy, I unscrewed the cap and surprised her: a snack!

Edible Bottle (9)

She kept handing me the bottle over and over, asking for little puffs with sounds and gestures. I loved watching her enjoy the toy in multiple ways during our shopping trip and I may very well always keep one of these on hand from now on.

Edible Bottle (6)

Spiderweb Snacks

Spider Web Snack (7).JPG

Travis is so into spiders lately: finding them in our new home; discovering their webs in the garage; you name it. So no better way to foster his interest than to make a spider-themed snack! We actually tried to do this craft once before, but lacked a good vegan white chocolate at the time. This time turned out so much better. As a bonus, the webs are an example of circular symmetry, something we’e been studying lately in our play.

First, arrange 5 or 6 pretzels as the spokes of the web on wax paper.

Spider Web Snack (4)

Meanwhile, place vegan white chocolate and non-dairy chocolate chips in zip-top bags and place in glass jars.

Spider Web Snack (1)

Fill the jars with hot water (a grown-up step). Travis loved watching the chocolate turn from solid to melted in this method.

Spider Web Snack (3)

Remove the bags from the water and snip a small hole in the bottom corner. We piped a big circle of chocolate in the center, and added a few raisin “flies” as victims. Oh no!

Spider Web Snack (5)

Pipe additional circles of white chocolate to form each web.

Spider Web Snack (6)

Then each web got a big melted chocolate spider. They were tarantulas, Travis decided. We ran out of white chocolate, so made one dark chocolate web as well. Transfer the wax paper to the fridge to cool.

Spider Web Snack alt

The webs will set quite quickly, at which point you can peel them off the wax paper for a neat reveal. It turned out that the dark chocolate web peeled off more easily, but they all were fantastically creepy and fun!

Spider Web Snack var

Hot Air Balloon Muffins

Balloon Muffins (7)

Travis has had fun exploring different elements of flight lately, so we brought the theme to snacktime today! Okay, so our muffins didn’t actually fly, but now that we’ve made the recipe, I’d be curious what happens if you fill the balloons with helium!

First we made muffins from a mix (the gluten-free and vegan muffin mix from King Arthur Flour). Divide the batter evenly among muffin liners – since the liners were to be our hot air balloon “baskets,” I chose some with a fun print on them.

Balloon Muffins (1)

The sous-chef needed to lick the spatula, of course.

Balloon Muffins (2)

Bake according to package directions and let cool.

Insert 4 wooden skewers into each muffin.

Balloon Muffins (3)

Blow up balloons and tape onto the skewers with washi tape.

Balloon Muffins (5)

Let snacktime soar!

Balloon Muffins (6)

Needless to say, our balloons were not aloft for long, but Travis was wild about this project!

Balloon Muffins (8)