Handprint Sheep

Handprint Sheep (6)

There are multiple experiences contained within this one art project: the concept of tracing, fine motor skill development from using glue, and of course the tactile fun of cotton balls! It’s a simple art project for a lazy morning at home.

To start, trace your child’s hand on construction paper with a pencil. In retrospect, I wish I’d used a better background than plain white – perhaps green for a sheep’s meadow? Your child’s fingers are now the sheep’s four “legs” and his or her thumb is the “head.” Travis really enjoyed having his hand traced. He removed it from the paper a few times before I could finish, but put it right back in the same spot when I asked him to.

Handprint Sheep (1)

Since a child’s hand is so small, I decided to make a “mommy sheep” next to his baby sheep, and traced my own hand.

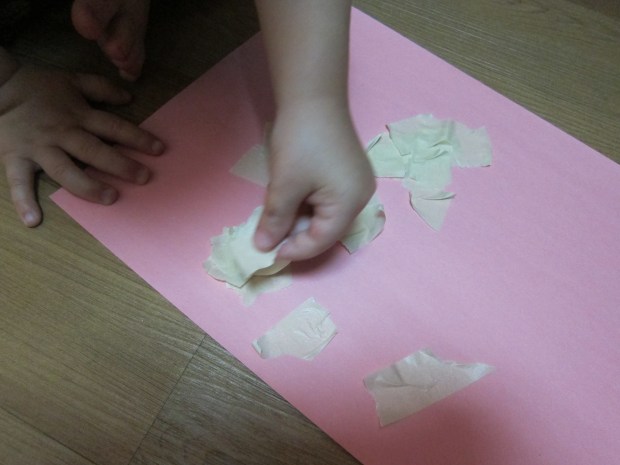
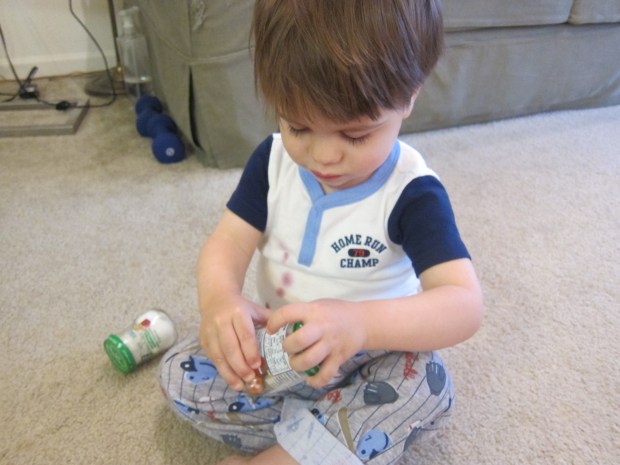
Have your child dab glue all over the bodies of the sheep (the palms of your handprints), then press down fluffy cotton balls for the wool. Needless to say, Travis loved this part!

Handprint Sheep (2)
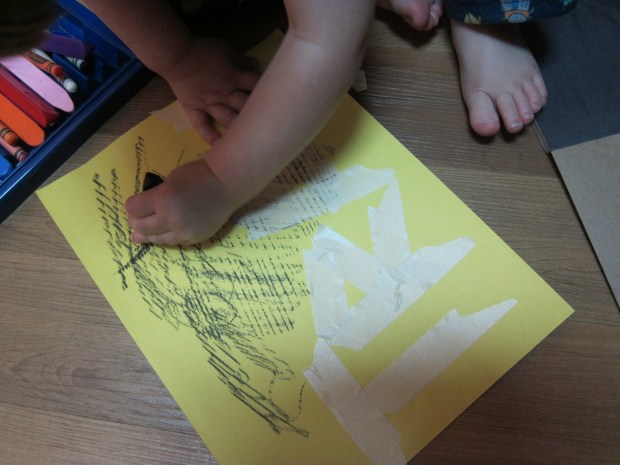
Once the glue dried, we finished our creation with crayons. I can’t say that Travis really understood we were coloring in a sheep’s head and legs, but in his defense, I’m not sure our woolly little creatures look much like sheep either! They’re cute and fun though, so can’t beat that.

Handprint Sheep (5)

The craft also lends itself nicely to a few ways to continue your playtime; Travis wanted to trace other objects with the pencil after we finished, and of course extra cotton balls had to take a turn in our pom pom chute.

Handprint Sheep (3)

Animal Safari

Animal Safari (3)

This activity is an oldie-but-goodie in our household, one of Travis’s favorite games to play before bed. We only play a couple of times a month so that it’s always exciting when I announce it’s a night to hunt for our animal friends!

While your child isn’t looking, hide a few stuffed animals, preferably jungle-themed. This set from Giggle fits the bill perfectly. I recommend “hiding” the animals in fairly obvious places so your little one doesn’t get frustrated.

Animal Safari (1)

As part of your bedtime routine, dim the lights and announce that it’s safari time. I love giving Travis a flashlight to hold as he searches to add to the excitement, and he loves when his spotlight falls on a furry find.

Somebody’s getting warmer…

Animal Safari (4)

Tada! Travis triumphantly uncovers a hippo:

Animal Safari (5)

And is that a monkey under the couch?

Animal Safari (2)

Encourage your child to name the animals they have found, for some fun vocab practice as well. And now good night!

Hey Diddle Diddle

Hey Diddle Diddle (5)

Travis and I are having a bit of a moon-themed week, so the popular nursery rhyme “Hey Diddle Diddle” has been forefront in my mind. This game is a fun way to introduce not only the lyrics to this childhood favorite, but also to teach about spatial concepts. In case you need a parental brush-up, the words are as follows:

Hey Diddle Diddle, the cat and the fiddle

The cow jumped over the moon.

The little dog laughed to see such sport

And the dish ran away with the spoon.

Tape a picture of the moon to a piece of construction paper or poster board and present to your little one, along with a cut-out of a cow. You can then ask your child if they’ve ever really seen a cow jumping over the moon. Travis took right to the game, moving his cut-out cow above the moon on the paper.

I turned it into a bit of a quiz, which he proceeded to ace! Could he put the cow under the moon? Yup!

Hey Diddle Diddle (3)

Next to the moon? Yup! I found it very interesting that when I asked for the cow “over the moon” a second time, he covered the moon like it was peek-a-boo instead of putting the cow above the moon, as my adult brain would have.

Hey Diddle Diddle (2)

We then got a little silly, having the cow “dance” next to the moon and “jump” across the paper.

Hey Diddle Diddle (4)

To continue the fun, I taped our moon picture to the wall and put the cow on a popsicle stick, so Travis could return to the game a few times over the course of the afternoon.

Hey Diddle Diddle (6)

You can also act out the riddle in 3-D by having your child jump a stuffed toy cow over a ball to represent the moon.

Can you think of fun ways to act out the remaining lines of the nursery rhyme? Please share ideas in the comments!

Build a Sand(Paper) Castle

Sandpaper (6)

Today was our first beach day of the summer! We took Travis to the beach last summer, but at one-year old, he likely has only foggy memories of it.

So to set the tone for a fun beach day, we started our morning with this easy sand(paper) castle craft at home!

You’ll need various grades of sandpaper to make the castle (coarse, medium, and fine), and I recommend a variety of colors as well for the best visual effect. Cut the sandpaper sheets into shapes like rectangles, squares, and triangles and then let your child arrange on the paper.

Sandpaper (1)

At this age, Travis needed help gluing the pieces in proper formation, but he loved dipping a paintbrush in the glue and dabbing on the back of the sandpaper pieces before I affixed each one (and sometimes added more glue after, as you see in the picture!).

Sandpaper (2)

If you have older kids, let them be the architect of their own castle formation!

Once the glue has dried, finish your castle with a marker background. We made sure to add a beautiful blue sky day.

Sandpaper (5)

The fun need not stop there; leftover sandpaper pieces made for great play on the carpet, organizing into structures and talking about the various shapes.

Sandpaper (3)

Then Travis discovered it felt funny on his feet to walk on the sandpaper. “Ouch!” he said with a laugh, before walking back across.

Sandpaper (4)

And then it was off to the real beach!

Sandpaper (7)

Stuffed Snake

Stuffed Snake (7)

Yesterday, Travis got to see snakes at a nearby nature preserve. So of course we had to bring the fun home today!

To make your “snake,” all you need is a pair of old knee-high nylons and yesterday’s newspaper. Parents, you’re going to largely have to put this craft together for your little one, as little arms can’t reach all the way to the toe of the stocking. But Travis had a blast helping to crumple up the newspaper:

Stuffed Snake (1)

He was eager to help stuff the newspaper inside until we had a long snake. To finish, simply tie a tight knot at the end.

Stuffed Snake (2)

Before playing with the snakes, Travis had fun selecting a few pieces from our felt collection to glue on as eyes and mouths. After that, the sky’s the limit! What didn’t we do with our snakes?

We “slithered” them:

Stuffed Snake (6)

We crawled them along the windowsill:

Stuffed Snake (3)

We kicked them:

Stuffed Snake (8)

We shook them (the newspaper makes a fantastic approximation of a rattlesnake’s rattle):

Stuffed Snake (10)

We also recreated a jungle play scene from Daniel Tiger (Season 1, Episode 2), jumping from bean bag to bean bag through snake-infested territory. Travis got quite a kick out of this activity.

Stuffed Snake (4)

And what jungle is complete without base camp? Ours even had a special guest appearance by a black panther:

Stuffed Snake (5)

How did your child play with the snakes? Please share in comments below!

Black Magic

Black Magic (3)

I told Travis that today we were going to make some magic with our artwork, and he got so excited! There are two versions of this game, “revealing” other colors through black paint or crayons, and the second version worked much better for us.

Try both and see which one your child likes better!

In the first, have your child color as thickly as they can with crayons on white paper. Travis loved the idea of coloring very thickly, and took to it right away.

Black Magic (1)

Next, use black watercolor paint and a paintbrush to color over the whole paper. The crayon wax will resist the paint, for a very cool effect. Travis was only mildly interested in this version though, because he is new to watercolors and was more interested in mixing the various colors and dipping the paintbrush in water than in covering over his crayon work.

I finished the picture off just so he could see the full effect:

Black Magic (6)

The next version was a big hit! After coloring a rainbow of colors thickly on white paper, I told Travis we had to hide the rainbow under black crayon.

Black Magic (2)

We’ve been playing a lot of hide-and-go-seek lately, so he was very into the idea that his other colors were hiding (even though we could still sort of see them), and showed him how to scratch off the black crayon with a coin.

BLack Magic (4)

He was so excited to reveal the colors underneath (“I see yellow!), even though the result wasn’t crystal clear. Overall, very exciting and “magical.”

Tape Pictures

Tape Pictures (4)

If your kid loves crayons, this is a neat way to vary the fun. In full honesty, Travis needed quite a lot of direction as we put the craft together, since the concept and method were new, but it still made for lots of fun, and filled a nice half hour of our morning.

To start, help your child tear masking tape into small pieces, and arrange however he or she would like on a piece of construction paper. Travis told me he was making “helicopters” and trucks,  piling his tape in big mounds, so I added a few extra pieces to space things out a little more.

Tape Pictures (1)

Likewise when it came time to color, Travis was making circles and blotches in small segments of the paper, so I showed him how to apply the color more evenly, including over the tape, for the best result.

Tape Pictures (2)

I made 2 versions of my own – one with his name and one with a helicopter – of course! – so he could fully appreciate the tape’s effect.

Tape Pictures (3)

Then it was time to peel the tape off! Travis loved this part, although it was quite difficult even for a grown-up to do without tearing the construction paper.

Tape Pictures (5)

Still, we ended up with very neat pictures to display on our fridge for a few days.

Tape Pictures (7)

Next time I would try the activity with markers and poster board for a sturdier final result.

Tape Pictures (8)

Witch’s Brew

toddler 29 (1)

My sister and I used to have a game we called “witch’s brew,” which basically just meant taking all the ingredients in the kitchen and making the most repulsive concoction we could come up with (peanut butter and ketchup were featured ingredients). This game is sort of the toddler version of that!

On a less yucky level, kitchens are full of learning and playing experiences for tots. I’m so excited for Travis to learn about food and how it’s prepared: how to spoon and scoop and pour, the concept that multiple ingredients can combine together so that the result is greater than the sum of its parts.

So while I was busy prepping lunch over the weekend, I set him up with a few ingredients that I didn’t mind “wasting,” as well as measuring cups and spoons.

Well the very first thing that happened is that he upended the baking powder all over the floor! I didn’t let this “oops” moment deter the fun, but made sure to redirect his attention to pouring the remaining ingredients into a bowl.

Travis was only mildly interested just mixing flour and oil, but he loved the look of his concoction once we dumped in red chili powder.

toddler 29 (3)

Suddenly he was mimicking the things I say as I make a recipe. “We need milk!” he cried. “We need… [pause to think, little brain working] bread!”

toddler 29 (4)

He was so enthusiastic that I confess a fair amount of sacrificial food followed. “We need applesauce!” he insisted. “We need… We need bananas!”

toddler 29 (6)

Super messy fun, but so worth it!

Baby Food Jar Surprises

toddler 27 (1)

Chances are you have plenty of baby food jars to recycle, but before you toss them, try out this neat game.

Fill 3 to 5 clean baby food jars with small toys, making sure to use a variety of materials. I wanted to present Travis with 2 jars that were quiet when shaken and 2 that were loud. For quiet, I used small rubber dinosaurs and cotton balls. For quiet, I chose coins and marbles (Note: I do not advocate using marbles if you have a child who puts things in their mouth. Please use your own discretion!)

Travis fell upon the jars with delight, first wanting to know what was in each, and then helping me find which ones were loud and quiet. We had fun shaking them and deciding which were which for a while. Then he asked me to open them.

toddler 27 (2)

“That’s up to you,” I told him. “Can you see how it opens?” I helped him twist off the lids, and twist them back on again, great practice.

toddler 27 (5)

He was quite busy with the lids for some time while I cleaned up breakfast. A fun and easy start to out morning.

toddler 27 (3)

Sticky Situations Part 3

toddler 14 (4).JPG

Next time your toddler needs a “canvas” for their art, try taping a sheet of sticky contact paper to a window, wall, or the floor. Decorations can include crumpled tissue paper, cotton balls, or anything else that adheres to the contact paper. I’ve seen gorgeous rainbow art done in the this way!

I needed to wrap a gift in tissue paper, so thought Travis might have fun having a tissue paper project of his own to occupy him while I worked, but…

…. I should have subtitled this post “How Not to Entertain Your Toddler While Wrapping a Bridal Shower Gift.”

First, there was the excitement of sticky contact paper on the floor. Travis was very curious to walk across it, but needed my help for big sticky steps off a few times.

toddler 14 (1)

We decided we were going to use his tissue paper to make a garden, so then came the fun of ripping the paper into pieces small enough to crinkle into “flowers.” This activity was delightful, although I had to play defense near the cat food bowls so that little tissue paper pieces didn’t end up in the turkey.

toddler 14 (2)

We needed stems for our flowers, but I was out of green yarn. Luckily there’s nothing wrong with blue stems in a toddler’s magical fairy garden!

So then of course we needed glitter. Travis wasn’t content with a few sprinkles; he dumped on whole canisters of Martha Stewart Crafts glitter. “We need purple!” he insisted, once the green was all over our garden, and I couldn’t say no. He loved dumping the purple and spreading it evenly among his flowers.

At this point we were both covered in glitter and embarked upon clean-up with a lint roller. We had a great time, but needless to say, it’s not exactly the right distraction to keep a toddler busy while you’re wrapping someone else’s present!