Handprint Bird

handprint-bird-4

Your child’s hand can magically turn into a baby bird’s body and wings with the help of a little paint!

Travis’s favorite part of this craft by far was smooshing his whole hand in a plate full of white paint, and pressing it onto the paper.

handprint-bird-1

So that our craft would stay precise, I provided him with extra paper where he could make hand prints to his heart’s delight until the white paint was gone.

handprint-bird-2

We returned to the craft itself once the paint was dry, and now it was time for glue! Have your child help you rip up a brown paper bag into pieces, and then glue in an overlapping pattern to form the bird’s nest.

handprint-bird-3

You can then add a googly eye and triangular beak (which I cut from orange construction paper) to finish your bird. Because white-on-orange wasn’t the best color choice, I outlined our bird in order for Travis to see it better.

The handprint makes this particular craft keepsake worthy – you’ll marvel some day at those tiny fingers and thumb! It might make a beautiful gift to send to grandparents or other family members!

Bird Crate


koala-bird-8

Although the crafts were cute, I confess that Travis and I weren’t as interested in this month’s Koala Crate with a bird theme – mainly because he does not like dressing up in costume, and two of the projects involved items for your child to wear.

The most fun by far was sculpting a little clay bird. As always, you could put together these crafts with supplies from a craft store, but we used the blue clay provided by Koala to shape a little bird body, head, and wings. Travis loved rolling the clay, even though I neatened things up a bit to make the final product like avian.

koala-bird-2

His favorite part was sticking in a few tail feathers! We had to wait overnight for the bird to dry, but then it was fun to fly around. Leave some extra clay for little “eggs” to put in a nest.

koala-bird-3

The next project involved looping fabric feathers over buttons on a piece of blue fabric, to make wings. The buttons are great practice for little fingers, so even though Travis needed my help, I consider it a fine motor success.

koala-bird-4

He only tried on the wings once, but wasn’t a fan of the elastic loops over wrists and shoulders…


koala-bird-5

…so we made it more of a wrap, which he enjoyed briefly.

koala-bird-6

The mask was almost entirely done by me, after Travis attached feathers to a sticky strip along the top of the felt mask.

koala-bird-10

It very cutely came with interchangeable beaks – a kiwi, a duck, and a cardinal – attachable by velcro, so your child can learn about different birds. Since Travis didn’t want to wear the mask, Teddy was our model!

koala-bird-13

Discomfort in the costume aside, Travis had fun with the materials, and loved pretending to be a bird once the crafts were assembled, including “soaring” like an eagle, “pecking” like a woodpecker, and other fun variations.

We tried out one final craft suggestion, of a “hatching” baby chick on a clothespin. Draw two halves of an egg and a baby bird’s head on paper, and have your child color them in.

koala-bird-14

Cut out (either adults, or preschoolers with safety scissors) and attach the chick to the back of a clothespin and the egg halves to the front. Then pinch the clothespin open and closed to watch your chick “hatch”!

koala-bird-16


Tissue Paper Baby Chick

tissue-paper-chick-3

Travis saw older children at the library this past week with baby chicks from a school project. He couldn’t get over how cute the chicks were, and I love letting him learn about animals, but chick-hatching programs in schools often do more harm than good. As a humane alternative, we headed home and made our own fluffy chicky!

Cut an orange or yellow circle of construction paper, and let your child cover the surface with glue. Crumple small squares of yellow tissue paper and press onto the glue until your “chick” is covered. In full honesty, Travis was having so much fun with the glue that I did almost all of the tissue paper… we made a good team!

tissue-paper-chick-1

Once the glue dries, tape on two yellow feathers for wings and two pipe cleaners for feet. Travis was so enthralled with his chick, cheeping it all around the living room, that I didn’t even have time to add a little triangle for a beak!

tissue-paper-chick-2

X Week!

x-week-19

We’re in our third week loosely following Letter of the Week, but X was a little bit different. Because so few words begin with X, we played around with great options ending in the letter. Though of course, I couldn’t skip alphabet-book favorites like x-ray or xylophone!

x-week-1

ToolboX: One of Travis’ favorite activities is to play at his toolbench, so this was a no-brainer. To add to the X-themed fun, I made our play this week purposefully about items we needed to fiX using the tools from his toolbox, leading to great narrated play.

x-week-2

As a bonus, our toy drill ran out of batteries – so we really needed to fiX it!

x-week-4

X-ray: Kids love doctor toys, and Travis has recently taken to acting out giving shots and medicine. This week, I encouraged him to focus on his little toy x-ray machine, which he liked holding up to his stuffed animals to see their “bones.” He had no real way to grasp the concept, having never had an x-ray, but he seemed intrigued by the idea of peeking inside somebody’s body!

x-week-3

Xylophone: This word is really more of a phonetic zee, but what the heck – pull out your xylophones and make some noise all week!

x-week-5

BoX: Here is where the possibilities are almost endless. I’ve posted about our play with boxes before, but we can always think of new boX games!  One big hit was saving up packaging so he could play a “recycling” game, sending the packages down the shoot just like mommy does!

x-week-7

When he tired of that, I looked over to see construction underwear for a very tall box tower!

x-week-8

A simple boX train (three boxes tied together with rope) was a great hit for bringing pals like Cow and Puppy across the floor. Travis loved when the animals tumbled out, and helped them back aboard, and returned to this toy all week long.

x-week-10

Then I remembered to pull out our good old Jack in the BoX! It had been so long that I think we were both surprised Travis could now wind through the entire song himself, delighting in every “pop!” up of Peter Rabbit.


x-week-11

For great motor skills practice, we then used a large box for him to be the Jack in the Box, popping up from a crouch.

youve-got-mail-6

MailboX: On the heels of boxes in general, we focused on the mailbox, not only making Travis one of his own, but then acting out many a game of letters to mail and deliver. See my post for more details!

After these games, here are a few other x-themed ideas that were sprinkled through our week:

Fine art: Letter of the Week’s suggestion to“decorate an X” seemed sort of mundane, so as we decorated I talked about eXcess – Travis was thrilled to use so much glitter and globby glue! We glued on elbow macaroni to complete the over-the-top eXtravaganza.

x-week-20

Food: Rather appropriately, the verb miX fit into our week, so what better thing to do than mix up a batch of cookies from boxed sugar cookie miX? Just in case that wasn’t enough, we froze a portion of the dough in order to roll and cut out some X-shaped cookies.

x-week-14

If that’s too complicated, you can always cross two pretzel sticks into an X-shape on your child’s tray, for a cute snack.

x-week-18

Books: We don’t have any foX toys, but we were able to talk about foxes with two great library books: Hattie and the Fox by Mem Fox, and Fox on the Loose by Matthew Porter. Travis adored both and requested them all week. We rounded out our X books with The Magic Toolbox by Mie Araki

Song: I played Travis the song SiX Little Ducks, but since he’s known the song for a long time, I don’t think he connected it to X Week.

Math: There are two concepts with a prominent X that we played with. The number siX of course, but the idea of counting items up to six was sort of lost on Travis. He’s more excited about counting up to twenty these days, so didn’t understand why I kept wanting him to pause at six!

x-week-16

More successful was the idea of what comes neXt? We played two great games that helped build the concept, with a tape road for cars and with numbered stars on the wall.

And on that note, we’re off to W week neXt!

Numbered Stars Flashlight Game

numbered-stars-2

This whimsical game adds a touch of magic to your toddler’s bedtime routine, while sneaking in some early learning!

Cut stars from yellow construction paper and number from 1 to … however high you can get your child to count! I didn’t want to tax Travis all the way up to 20 soon before bed, so made stars as high as 12.

Once it’s dark enough, enlist your toddler to help hang the stars on the wall, then provide him or her with a flashlight.

numbered-stars-1

Now it’s time to hunt for the stars in sequential order. As he shined his flashlight on number 1, I would ask Travis, “What’s next?” and he eagerly began the hunt for 2, ad so on. Being able to pin a star in the spotlight was a thrill every time. Ok, so he didn’t always go in order, but he did always proudly read off the number he found.

numbered-stars-3

To add to the “star-lit” magic, we set up our little campfire (care of Koala Crate) and pretended we were really outside with the stars overhead.


What’s Next?

x-week-16

Counting to ten by rote is one thing, but this game really gets tots thinking about the idea that numbers come in a sequential order. Thanks to Hands on As We Grow for the cute idea!

Make a tape road with masking tape on your floor, making lots of detours and turns. Wherever two pieces of tape intersect, add a number (I went as high as 12, since Travis is dabbling into numbers up to 20 now).

He couldn’t wait to start driving his toy cars along the road, but first I gave him a task. The car had to hunt for number 1 to begin with, and once that destination was reached, I asked him, “What’s next?”

x-week-17

He knew the answer was 2, but seemed so surprised and proud that he now had to find a way to drive to the next number, instead of following the road any which way. We continued all the way up to 12, and by the end Travis was joining in on every “what’s next?”

img_0036

Very simple but very educational and very enjoyable – a triple win!

You’ve Got Mail

youve-got-mail-7

Travis loves everything about the mail – going to the mailroom with me, turning the key in the lock, putting letters to be sent through the mail slot, spotting mail trucks as we drive, you name it! So it seems only natural he should have his own mailbox at home. Toddlers will delight in this game, getting to send and receive “their” own mail.

Cut a slit in an old shoebox or package box, and let your child paint it however they like. Travis picked out blue and red for his mailbox, and loved mixing them together for a purple-ish final result. (I helped out with painting the sides, which were harder for him than the top).

youve-got-mail-6

Once the box dries, you can decorate more with crayons or stickers, or just skip right to the business of mailing! Use any junk mail, old envelopes, or other slips of paper you have on hand as letters.

youve-got-mail-10

You can re-purpose old stamps and glue them on with glue sticks, or buy stickers in the shape of stamps.

youve-got-mail-1

Either way, Travis had so much fun “sorting” his mail, mailing it into the box, and then seeing what he received. He was very proud to “write” me a letter as well (heart melting…)

youve-got-mail-9

If you have time, decorate a second box to be the grown up’s mailbox. Now you can send letters back and forth!


Planting Flowers

peppa-flowers-2

I have no green thumb – so bad in fact that I often joke I have a brown thumb; plants tend to wither under my care.

But Travis received a cute set of flower seeds embedded in paper flowers in a goodie bag recently. Hoping to start him off with a better knack for gardening than I have, I decided we’d give the project a try!

First, the paper flowers needed to soak overnight in water. Travis was intrigued already, even having no idea what came next!

peppa-flowers-1

Next we needed dirt, so I filled three containers on our balcony. Travis had great fun ripping up the paper flowers and planting them under a thin layer of soil, wondering where the colors had disappeared to.

peppa-flowers-3

Every morning thereafter, we diligently headed outside with a watering can, and we were rewarded with small shoots within a week!

peppa-flowers-6

Although we still have no flowers, just green stems and leaves, Travis loves taking care of his plants each morning. “I can look at them a little longer?” he’ll ask, even once the watering is done for the day. I do hope we see colorful blossoms eventually!

peppa-final


Y Week!

y-week-17

Week 2 of my modified Letter of the Week play with Travis was a huge success – I’m so glad I embarked on this project, as it gives me ideas for introducing new concepts and games each week, while promoting letter and sound recognition. Below is just some of the fun Travis and I had during Y week. If you missed it, don’t forget to checkout what we did in Z week!

y-week-2

Yarn: A fantastic material for play, including making yarn sculptures and yarn squiggles on sandpaper. Another neat idea is to loop a long piece of yarn (in yellow of course!) over and around furniture while your toddler naps, and then surprise them with a little snack or toy tied to the end when they wake.  Be sure to supervise all yarn play closely, as the strings can be a choking hazard.

y-week-4

Yo-Yo: You’re never too young to enjoy this oldie but goodie! Travis loved watching my husband perform yo-yo tricks, and gave it a try himself a few times over the course of the week.

y-week-12

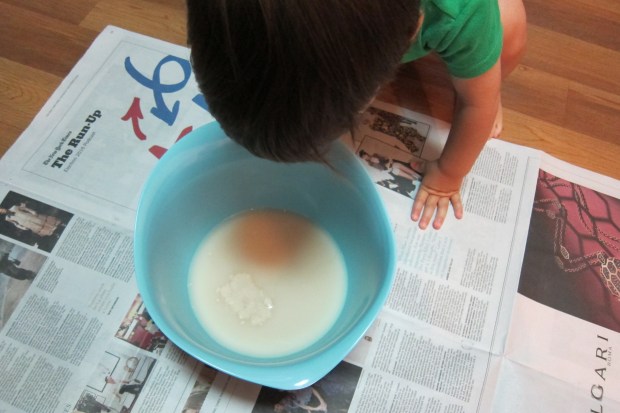
Yeast: One of my favorites from the week; I introduced the magic of “hungry” yeast, and it’s amazing ability to make things rise. I won’t go step-by-step through the baking project we did, as another blogger has already done so, but this easy bread recipe is a fantastic intro to yeast for toddlers, including “feeding” the yeast, letting it “sleep,” etc… and ending with yummy Y-shaped breadsticks! Travis was entranced.

y-week-14

Another great yeast experiment is to inflate a balloon with nothing more than water, yeast, and sugar. You’ll notice though that Travis was equally interested in sweeping up some spilled yeast off the floor!

y-week-15

I confess watching the balloon inflate was exciting, even as an adult!

y-week-18

Yacht: We took advantage of late summer weather to stroll the docks in a nearby town! Okay, maybe none of the boats we saw technically classified as a “yacht,” but Travis didn’t know the difference and was very excited we were seeing big boats.

y-week-10

You: This can be a tricky word for kids; I call you “you” but you are supposed to call yourself “me” – confusing, right? So it was nice to focus on the word here during Y week. One great “you” game is to take a large piece of butcher paper and trace your toddler – then say, “It’s you!”

y-week-11

Label body parts, invite your child to color the outline in, then hang “you” on the wall. Travis was delighted with this game, and not only wanted me to trace him again the next day, but wanted a turn “tracing” me.

y-week-13

Yoga: A huge hit! I had hoped to find a Mommy & Me yoga class in the area, but failing that, I turned to a YouTube video. Travis loved it, mimicked all the poses (with varying degrees of success), and couldn’t get enough of child’s pose at the end. “Yoga” was a new word for him, and he quickly identified that it started with “Y” while looking at our week’s poster.

Beyond those games, here were a few more highlights from our week:

Fine art: Yellow is the name of the game, of course! First, we had fun with Travis’ crayons, exploring all the various shades of yellow from light to dark. Then, I suggested he add a little yellow paint. He had so much fun that the yellow crayon was soon covered.

y-week-6

We finished with gluing practice, putting down pieces of yellow yarn.

y-week-8

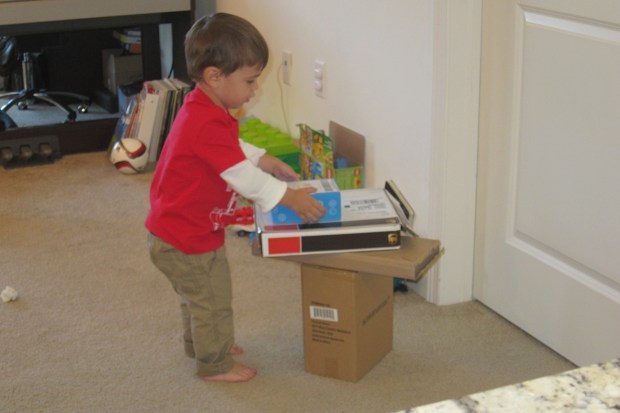
Food: Yogurt is an obvious choice of course, and we kicked off the whole week with a vanilla soy yogurt at dessert, while I showed him our Y poster. Later in the week, Yogurt-Cup Cake gave us a great baking project. He loved being in charge of his measuring cup, and needed to sample a piece as soon as the cake was out of the oven. For dinner one evening, I made sure our veggie of the night was yams.

Books: I checked several Y-titled books out of the library, but these three were the favorites, read on repeat all week: Yaks Yak by Linda Sue Park; Yawn by Sally Symes, and Yoohoo, Ladybug by Mem Fox.

Song: Yellow Submarine was the sleeper hit of the week! I played a clip once and Travis paraded around singing it the entire rest of the week.

Math: Two calindrical concepts begin with Y:  Year and Yesterday. Magnet calendars are a great way to introduce both! I certainly didn’t expect Travis to perfect the concept of either at this age, but each morning we would set up the calendar, and emphasize what day was yesterday, and then talk about what we did yesterday. I was impressed with the way he latched on to the concept!

y-week-9

Signing off until X week!

Veg-i-licious Quesadillas

vegilicious-2

This quesadilla recipe (care of High Five) is so easy your toddler can nearly construct it all him- or herself. Adult supervision required for microwave buttons, of course!

Place a whole wheat flour tortilla on a plate and have your child sprinkle on the following: 1/2 cup chopped fresh baby spinach, 2 chopped white mushrooms, and 1/4 cup shredded non-dairy mozzarella (such as Daiya).

vegilicious-1

Place in the microwave and cook for 20 seconds. For those learning numbers higher than 10, this is a great time to count down!

Top with an additional tortilla and microwave for an additional 10 seconds.

Let stand for about 1 minute, then cut into quarters (or bite-sized pieces), and serve with a dollop of salsa. Travis was initially leery of the salsa, but was spooning it onto his plate by the end!

vegilicious