Orzo Pasta Salad with Tofu

Orzo Pasta Salad

Here’s an alternative way to serve the tofu and bell pepper mixture I featured a few nights ago in a fajita recipe! For the cheese, I like to use Miyoko’s Kitchen double cream chive.

Ingredients:

  • 2 tablespoons olive oil, divided
  • 1 medium yellow onion, thinly sliced
  • 1/2 teaspoon cumin
  • 1/2 teaspoon chili powder
  • 2 red bell peppers, thinly sliced
  • 1 (14-ounce) package firm tofu, cubed
  • 1/2 lime
  • Orzo pasta
  • Vegan soft cheese
  1. Heat 1 tablespoon olive oil in a large skillet over medium-high heat. Add the onion, cumin, and chili powder; saute for 5 minutes. Add the bell pepper and saute for an additional 6 minutes, until the peppers are soft; transfer the mixture to a bowl.
  2. Heat the remaining tablespoon oil in the pan. Add the tofu and juice from half a lime. Cook for a final 6 minutes.
  3. Meanwhile, cook orzo pasta according to package directions: for every 1 cup of cooked orzo, top with 1 cup of the tofu mixture, and stir in 1 to 2 ounces of the vegan cheese to taste. Leave the cheese in chunks or stir until it melts to make a creamy, cheesy sauce.

Orzo Pasta Salad (2)

Music Crate

koala music (15).JPG

I was thrilled when I spotted our latest Koala Crate – a music-themed kit awaited us! Music is Travis’s favorite thing in the world, so I knew this one was sure to be a hit.

As always with Koala Crate, you can recreate most of the crafts below after a trip to your local craft store.

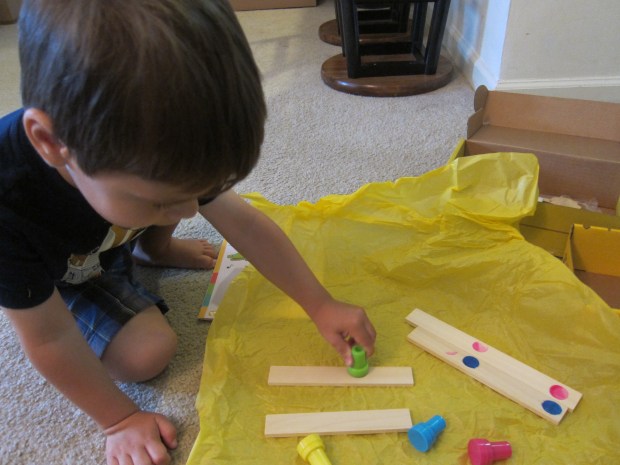
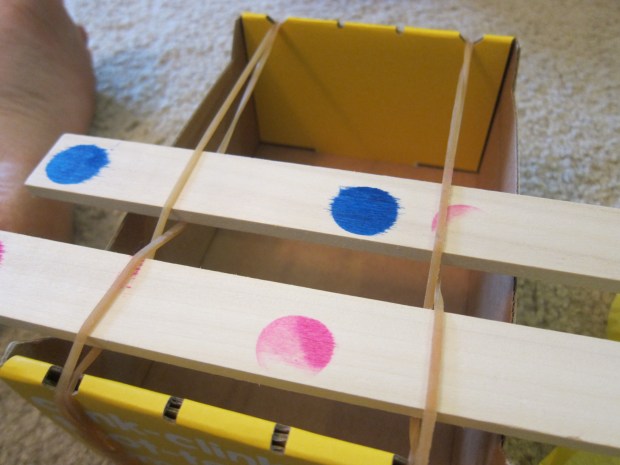
The first project was a make-it-yourself xylophone, made from a cardboard box, elastics, and wooden slats. There were some interesting learning components to explore as we put together the xylophone; for example, first he had to arrange the wooden pieces from longest to shortest.

koala music (1)

Each wooden slat then needed to receive a color-coded dot from the provided dot stamps, which would become its “note.” This was a bit of a hard concept for a three-year-old, who simply wanted to dot his stamps all over the wooden pieces any which way. So it became a good lesson in restraint!

koala music (2)

Threading the four xylophone pieces through the rubber bands required grown up hands, but Travis loved the end result.

koala music (3)

“You sing and I play!” he instructed me, and was off and running with games pretending to be a music teacher. I was pleased with the sound, very similar to a marimba or other African wooden xylophone.

koala music (4)

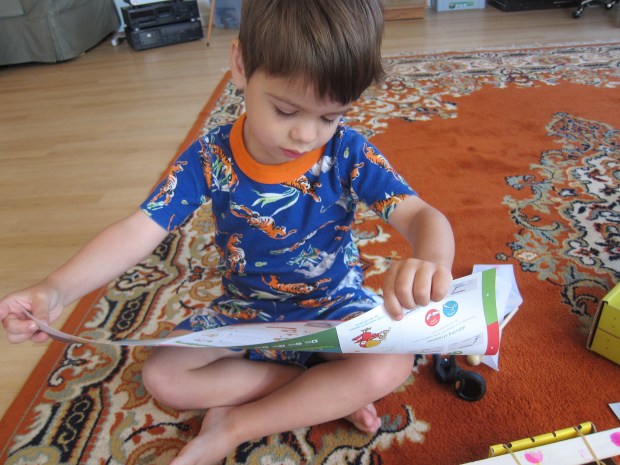
Now it was time to compose our own song with the provided “musical composition” sheets. By filling in each circle on the sheet with a dot stamp, kids can play a tune in order on their xylophone. All this was a bit beyond Travis’s interest – he simply had fun composing a “song” that was nearly all blue…

koala music (7)

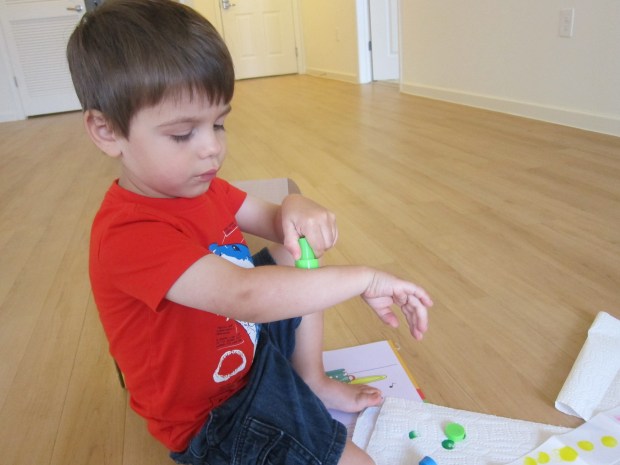
And testing out how the stamps looked on his arm…

koala music (6)

Luckily the kit came with two blank sheets, so I made one with a pattern Travis would later be able to play.

koala music (8)

In a neat twist, you can also remove the four wooden slats any time, reposition the elastics, and turn this toy into a “guitar.”

koala music (26)

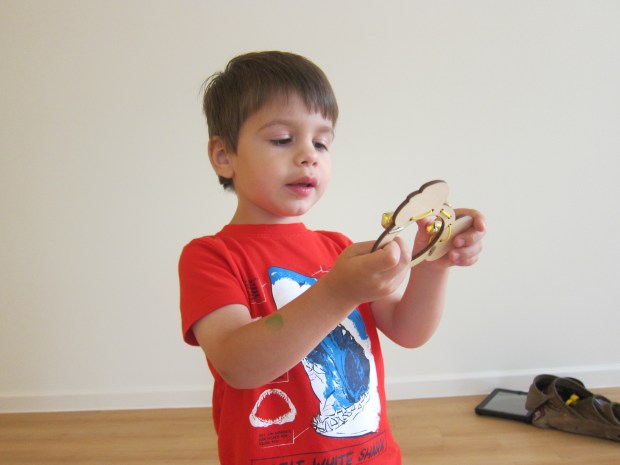
Next up was a homemade tambourine. The kit came with a cardboard (koala-shaped, very cute) tambourine base, bells, and elastic thread. Travis easily did his best threading yet as we pulled the elastic through a hole, added a bell, then looped back down again.

koala music (10)

This one was quick and easy, and enjoyable to shake along to a beat.

koala music (11)

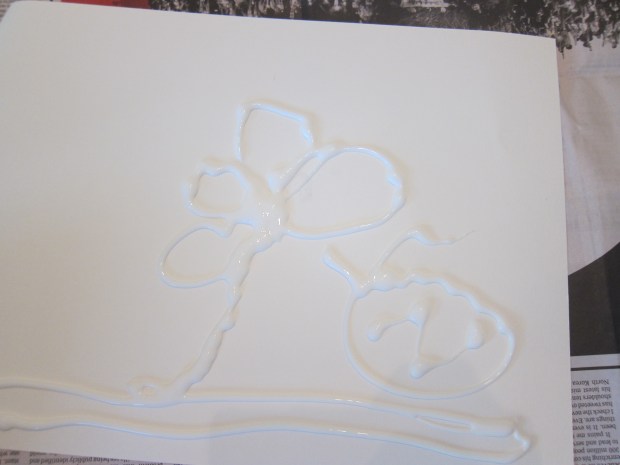
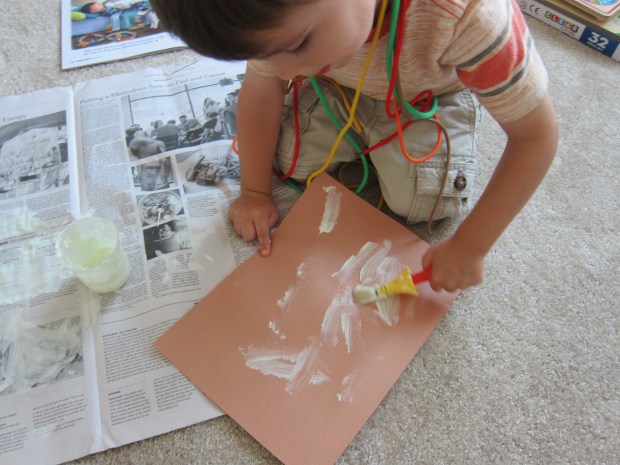
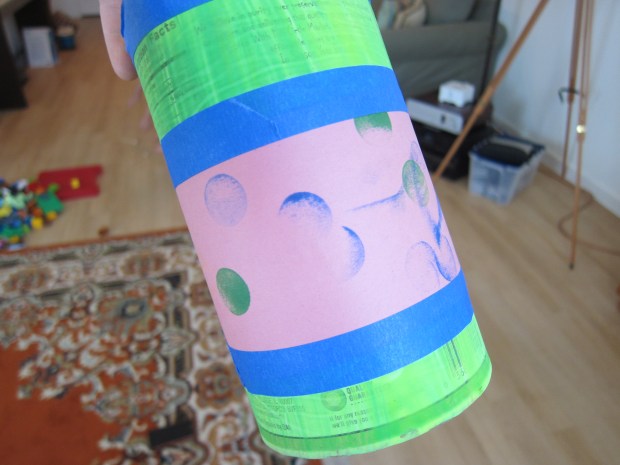
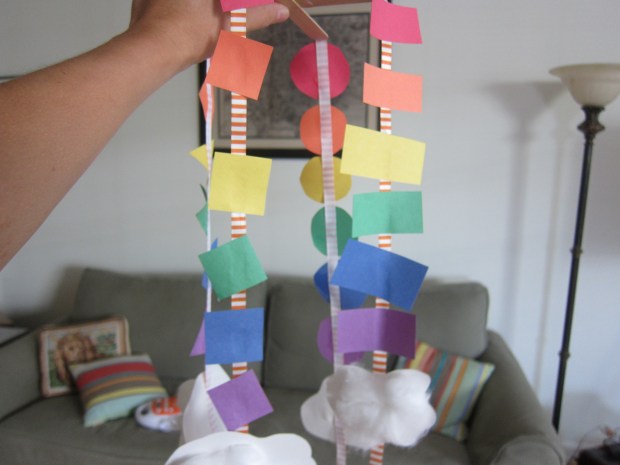
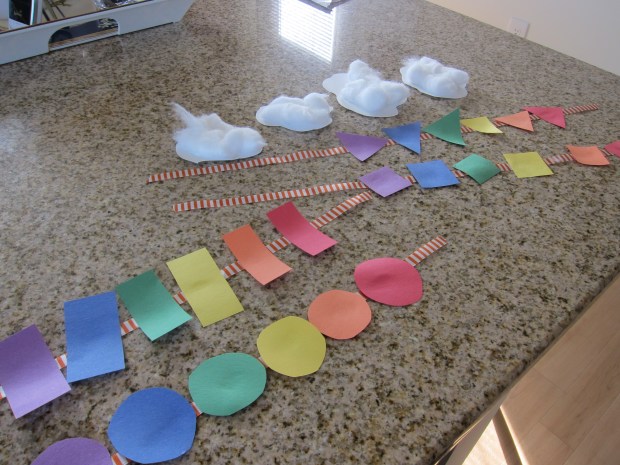
The final project gave Travis a chance to go wild with the dot stamps as he’d hoped to do on the wooden xylophone pieces. Simply dot all over the provided ribbon fabric, then let dry.

koala music (5)

Once the stamps were dry, I looped the ribbon onto a wooden mallet and it was now a musical prop to wave around.

koala music (12)

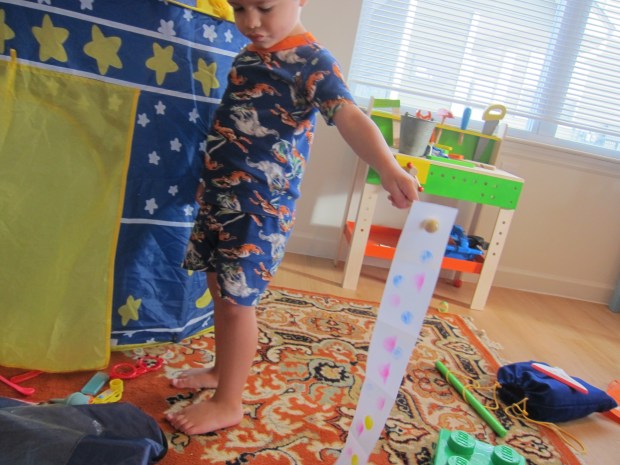
We had fun exploring tempo (fast and slow), wiggling the ribbon like a snake, holding it overhead like a rainbow, and more.

koala music (13)

We couldn’t stop there, of course. The kit came with a suggestion for one final DIY instrument – a drum upcycled from a soup can! We decided to make two sizes of drums, so painted both the soup can and an empty oatmeal container.

koala music (19)

Once the paint dries, snip the narrow necks from balloons, and stretch the wide part of a balloon over each container as the drum skin. Secure the balloon with masking tape. We covered a piece of construction paper with the dot stamps and added that to the middle of our drums as decoration.

koala music (24)

Now it was time for a drum circle!

koala music (22)

Or a drum stack?

koala music (25)

Needless to say, a huge hit – pun intended!

koala music (21)

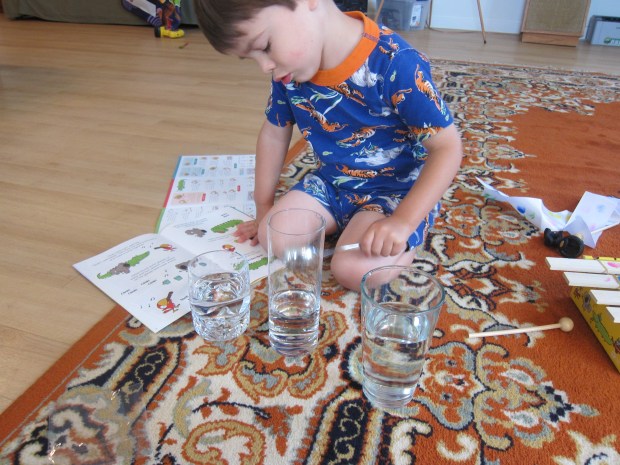
As a final note, it’s fun to watch Travis’s brain grow with this subscription. This was the first month in which he was interested in the games in our Imagine magazine, following along maze trails with his finger and more. One storyline in the magazine even prompted us to test a water glass xylophone!

koala music (16)

I love watching this boy grow, and love the ways in which Koala helps us do it!

Koala music (14)


Help the Helpers

fireman brownie (8)

Kids love the iconic figures who can be found around every town – policemen, fire fighters, mailmen – even librarians! But how often do we think to give back to these community helpers? Instead of just watching their neat vehicles go by or talking about what they do, here’s a simple idea for giving back to your community.

Now felt like the perfect time for us to do this activity, since we’re in a new town and could introduce ourselves. But whether you’ve lived in your town for ten days or ten years, there’s never a bad time to get to know local police and other helpers.

So to start, bake a batch of brownies (full disclosure: we simply used a packaged mix!) then stop by your nearest fire station, police station, post office, or library – whichever one your child likes best.

fireman brownie (1)

Making the brownies in the morning got the fun started. Whether you’re using a mix or brownies from scratch, invite the kids to pour and stir!

fireman brownie (2)

We wrapped the brownies in foil and added a card that Travis had decorated with crayon before heading off to the station!

fireman brownie (3)

The fireman who let us in looked pleasantly bemused that we showed up bearing brownies, but happily accepted them into the kitchen. I thought perhaps we’d get a glimpse at the trucks on the way out, but Travis didn’t waste any time asking if he could sit inside them – and he was not disappointed!

fireman brownie (5)

Firefighter Luke took him into every vehicle in the station before our time there ended, and let Travis look at equipment I never even knew existed.

fireman brownie (7)

It was a beautiful and private behind-the-scenes peek, all for giving back a little.

fireman brownie (9)

What community helpers would your child enjoying visiting the most? Please share in the comments!

fireman brownie (4)


Tofu and Bell Pepper Fajitas

Tofu Bell Pepper Fajita.JPG

We adapted this recipe from a Family Fun version with shrimp as the protein – an easy vegan swap!

Ingredients:

  • 2 tablespoons olive oil, divided
  • 1 medium yellow onion, thinly sliced
  • 1/2 teaspoon cumin
  • 1/2 teaspoon chili powder
  • 2 red bell peppers, thinly sliced
  • 1 (14-ounce) package firm tofu, cubed
  • 1/2 lime
  • 6 small flour tortillas
  • 1 avocado
  • Non-dairy sour cream
  1. Heat 1 tablespoon olive oil in a large skillet over medium-high heat. Add the onion, cumin, and chili powder; saute for 5 minutes. Add the bell pepper and saute for an additional 6 minutes, until the peppers are soft; transfer the mixture to a bowl.
  2. Heat the remaining tablespoon oil in the pan. Add the tofu and juice from half a lime. Cook for a final 6 minutes.
  3. Warm the tortillas according to package directions, and top each with about 1/2 cup tofu mixture. Slice the avocado and divide the slices evenly among the servings. Top with non-dairy sour cream if desired!

Rainbow Shape Mobile

Rainbow Mobile (9)

Travis has been a big helper decorating our new home, and this project was a fantastic way to continue recent projects where we talked about exact rainbow order. It’s also a great review of shapes before he steps into pre-k in a few weeks!

Sorry grown-ups, but this one’s a little labor-intensive on your part at the front end. Using construction paper in all the colors of the rainbow, I cut out a square, rectangle, triangle, and circle from each.

Rainbow Mobile (1)

While I was busy cutting, Travis got in some practice with safety scissors:

Rainbow Mobile (2)

Your child might also like to try tracing or drawing shapes of his or her own as you work.

Once the shapes were ready, we needed to sort! Travis has been very into sorting lately, so loved helping separate the pieces into four piles by shape.

Rainbow Mobile (3)

For each group, we snipped a long ribbon and then glued the pieces on in rainbow order, singing the order of the colors as we went: “Red, Orange, Yellow, Green, Blue, Purple, Makes a Rainbow.” (My apologies to indigo and violet).

Rainbow Mobile (4)

When we had finished with the rectangles, Travis excitedly asked, “Are we going to do another one??” He chose triangles next, and so on until all our shapes were glued.

Rainbow Mobile (5)

This project was gorgeous even while drying on the counter!

Rainbow Mobile (8)

While the shapes dried, we made the finishing touch – white cloud shapes with puffy cotton balls glued on. We added these below the purple shapes on our ribbons.

Rainbow Mobile (6)

To assemble your mobile, glue two jumbo craft sticks together at the middle. Note: You can have your child color on the craft sticks with marker if they’d like to, but since this part of the mobile will hang up on the ceiling, it’s not necessary.

Rainbow Mobile (7)

Glue one strand of shapes onto each of the four craft stick ends, then use a length of yarn or ribbon to suspend your mobile.

Rainbow Mobile (10)

You’ll have a rainbow to cheer you every day in your home, whether you’ve just moved in or have been there for years!

Rainbow Mobile (11)


Eclipse Viewing

Eclipse (8)

Apologies that I did not post this blog before today’s amazing eclipse – but tuck this post away for a mere 7 years from now, when the next total eclipse comes to the U.S. Not a terribly long wait…

We made sure we were out there today for the viewing, even though we were in an area with a 71% eclipse. We came equipped with two homemade viewing techniques.

The first is very simple to put together, tho the results weren’t fantastic. Cut a square in one piece of cardstock, and cover the square with aluminum foil. Prick a hole in the foil with a pin, then project onto a second piece of white cardstock. Here’s the sun with the fun just getting started!

Eclipse (1)The box pinhole projector we made was much more effective, though a bit more labor intensive. Cut two holes into one short side of a shoebox or cereal box. Cover one hole with foil; leave the other hole open (this is what you’ll peer into). Prick the foil with a needle or toothpick.

Eclipse (6)

Stand with your back to the sun and peer in – you’ll see the eclipse projected onto the inside wall of the box. The effect will be clearer if you line that side of the box with white paper, although this step isn’t necessary. In fact, we could see the shadows of the clouds on the inside of our box.

Of course, nothing compared to the look we got through the special viewing glasses of some friendly neighbors (who managed to buy theirs before every place under the (eclipsed!) sun sold out).

Eclipse (10)

Needless to say, we’ll be watching again on April 8, 2024.

Eclipse (9)

Salt Painting with Liquid Watercolor

Salt Painting (7)

My impish three-year-old doesn’t need an excuse to pour a huge pile of salt out of the container – but this project turned the result into beautiful art! If you don’t have liquid watercolors, mix watercolor from a tube with a little water in a bowl before your child starts to paint.

Make sure you cover your work space well for this craft; it’s a messy one! To start, we squeezed a bottle of glue onto watercolor paper to make designs.

Salt Painting (1)

Although Travis normally loves squeezing out glue (which is also excellent fine-motor skill practice), this time he preferred to watch me make designs of actual things. We ended up with a flower and an ant, alongside a few more abstract designs.

Salt Painting (3)

Now for the best part: Place your paper in a tray, and cover the glue with salt; shake any excess salt off into the tray or bin. Repeat with the remaining pictures and let dry for at least 20 minutes.

Salt Painting (2)

I set up several bowls of watercolor for Travis after the glue was dry enough, and he quickly got to work. Encourage your child to dab the color on with a paint brush (a pipette would also work very well), and to watch the color spread along the salt crystals in the most beautiful way.

Salt Painting (4)

At first Travis was making strokes with his brush, but once he got the hang of it, he began dabbing more carefully.

Salt Painting (5)

Here was our abstract take on the solar eclipse!

Salt Painting (6)

Note: This project won’t be a great candidate for hanging on walls or fridges when finished; there is too much potential for extra salt to flake off.


Hiking on an Ant Trail

Ant Trail (2)

This adorable idea came to us from Barefoot Books’ Kids’ Garden kit. All you need is a 3-foot length of string, magnifying glasses and your imagination to have a magical moment.

Our new home has a patch of grass – a novelty after years with a balcony that overlooked a dumpster – so when I asked Travis if he wanted to pretend to be an ant outside just after breakfast, the answer was an enthusiastic yes!

Ant Trail (1)

I cut a length of string about three feet long and we placed it in the grass with a few loops and coils. Using our magnifying glasses as we walked, we went inch by careful inch to try and see the world from an ant’s point of view.

Ant Trail (3)

Some of our best finds were little roots of a bush:

Ant Trail (9)

Tiny plants popping up from the soil:

Ant Trail (6)

and dew drops sparkling on a spiderweb.

Ant Trail (8)

It was fantastically fun to slow down and move so carefully, especially in this fast-paced world of ours.

Ant Trail (7)

Do your child and yourself a favor and try this game soon!

Ant Trail (5)

Chunky Monkey Cookies

Chunky Monkey cookies

We pretty much never tire of banana + chocolate + nuts around here. If you prefer your chunky monkey in liquid form, head on over to my smoothie recipe. These cookies will satisfy anyone looking for something a bit more toothsome.

Ingredients:

  • 6 pitted dates
  • 1/4 cup water
  • 1 cup rolled oats
  • 1/2 teaspoon salt
  • 1/2 teaspoon baking soda
  • 1/2 cup peanut butter
  • 1/2 cup mashed ripe banana
  • 1 Ener-G egg
  • 1/2 teaspoon vanilla extract
  • 2/3 cup vegan chocolate chips
  • 1/2 cup chopped pecans
  1. In a blender or food processor, combine the dates and water and process until very smooth, to make a date paste. You should have about 1/2 cup. Set aside.
  2. Combine the oats, salt, and baking soda in a bowl; set aside.
  3. In a large bowl, whisk together the peanut butter, mashed banana, and date mixture until smooth. Stir in the Ener-G egg and vanilla.
  4. Add the oat mixture to the peanut butter mixture and stir until combined. Stir in the chocolate chips and pecans. Let the mixture chill for about 10 minutes while you preheat the oven.
  5. Using an ice cream scoop, drop the dough by generous portions onto a parchment paper-lined baking sheet. Bake at 350 degrees F for 14 to 16 minutes, until set.

If, like me, you’re a little tired when you make these cookies and end up doubling the amount of chocolate chips by accident, so much the better!

Night Sky Mobile

Night Star Mobile (8)

How perfect that our September issue of High Five magazine included this decoration for a child’s bedroom – we’ve just moved to a new home, and making this craft not only made Travis so proud to decorate his new space, but also feel safer at night in the unfamiliar setting.

To start, I drew a crescent moon and two stars on white craft foam and cut them out.

Night Star Mobile (1)

No pinterest worthy shapes here, but Travis didn’t mind an askew star or two, plus wanted to try doodling his own!

Night Star Mobile (2)

Then came the novelty factor of the project: glow-in-the-dark paint! The only non-toxic version I could find was actually face paint, but it seemed to do the trick.

Night Star Mobile (5)

Travis loved painting on a layer before we let the shapes dry, and then repeated with a second layer.

Night Star Mobile (4)

In fact, he thought the paint was so neat that he wanted to make a glow-in-the-dark picture before we put it away.

Night Star Mobile (6)

Next up was punching a hole in the top of each shape once they were dry.

I mostly did the final assembly solo, threading string through each shape and attaching to the perfect stick we had found on a walk in the new neighborhood. This step would be great knot-tying practice for little fingers.

Night Star Mobile (7)

Finally, tie a long piece of string to both ends of the stick, and hang from a peg in your child’s room. Ideally, it will be some place that the sun hits during the day, for optimal glowing at night.

Night Star Mobile (9)

Sweet dreams!