Threaded Orange Garland

Orange Garland (6)

Kids will love helping thread dried slices of orange onto pretty ribbon, making this an easy Christmas decoration for the whole family to put together. Plus the oranges will make your house smell amazing while they dry out in the oven.

To start, cut thin slices from navel oranges, and place on a baking sheet in a single layer. Bake at 225 degrees F until completely dried. Depending on the thickness of your slices, you’ll need anywhere from 1 hour to 90 minutes per side.

Orange Garland (2)

Cut a small slit in each slice once cool, then string along plaid ribbon.

Orange Garland (4)

We wound the ribbon alongside a pine garland on our banister for a fantastic holiday look!

Orange Garland (5)

Advertisement

Snowman and Santa Wobblers

Santa Wobbler (4)

These cute holiday items from Kiwi Co. come together quickly, but make adorable stuffies that wobble back and forth thanks to a weight inside. You can opt for just a snowman, just a Santa, or both!

Either way, start the craft by adhering a metal weight into the bottom of a plastic base with a sticky foam dot. Take care in this step that the weight doesn’t fall on any toes; it’s heavy! Insert the base and weight into the provided sock.

Snowman Wobbler (1)

Stuff the socks with the provided cotton fluff. Travis loved how soft this material was!

Santa Wobbler (1)

We secured the top of each sock with a thin elastic band, then pushed a second, thicker elastic about 1/3 of the way down each. This divides the wobbly toys into a head and body.

Now decorate! There were stickers for the snowman’s face, as well as stick-on buttons and arms, and a strip of red fabric to tie on for a scarf.

Snowman Wobbler (5)

Meanwhile, Santa gets a beard that slips over the head and a little red shirt that slides on from the bottom. Stickers for facial features, belt, and hands complete the look.

Santa Wobbler (3)

Travis loved that these toys were meant to be played with, unlike some of our Christmas decor that is just display.

Snowman Wobbler (6)

The wobblers even curled up to watch a Christmas movie with him, and Santa pretty much comes everywhere with us now. That’s what I’d call Christmas magic!

I Spy Baggy

I Spy Baggie (5)

Veronika is at an exciting stage where she’s mastered shape-recognition games, so we’re moving on to letters! I realized she knows some from others when she grabbed letter puzzle pieces and said she wanted to sleep with “I” and “S” (!) so clearly she’s ready.

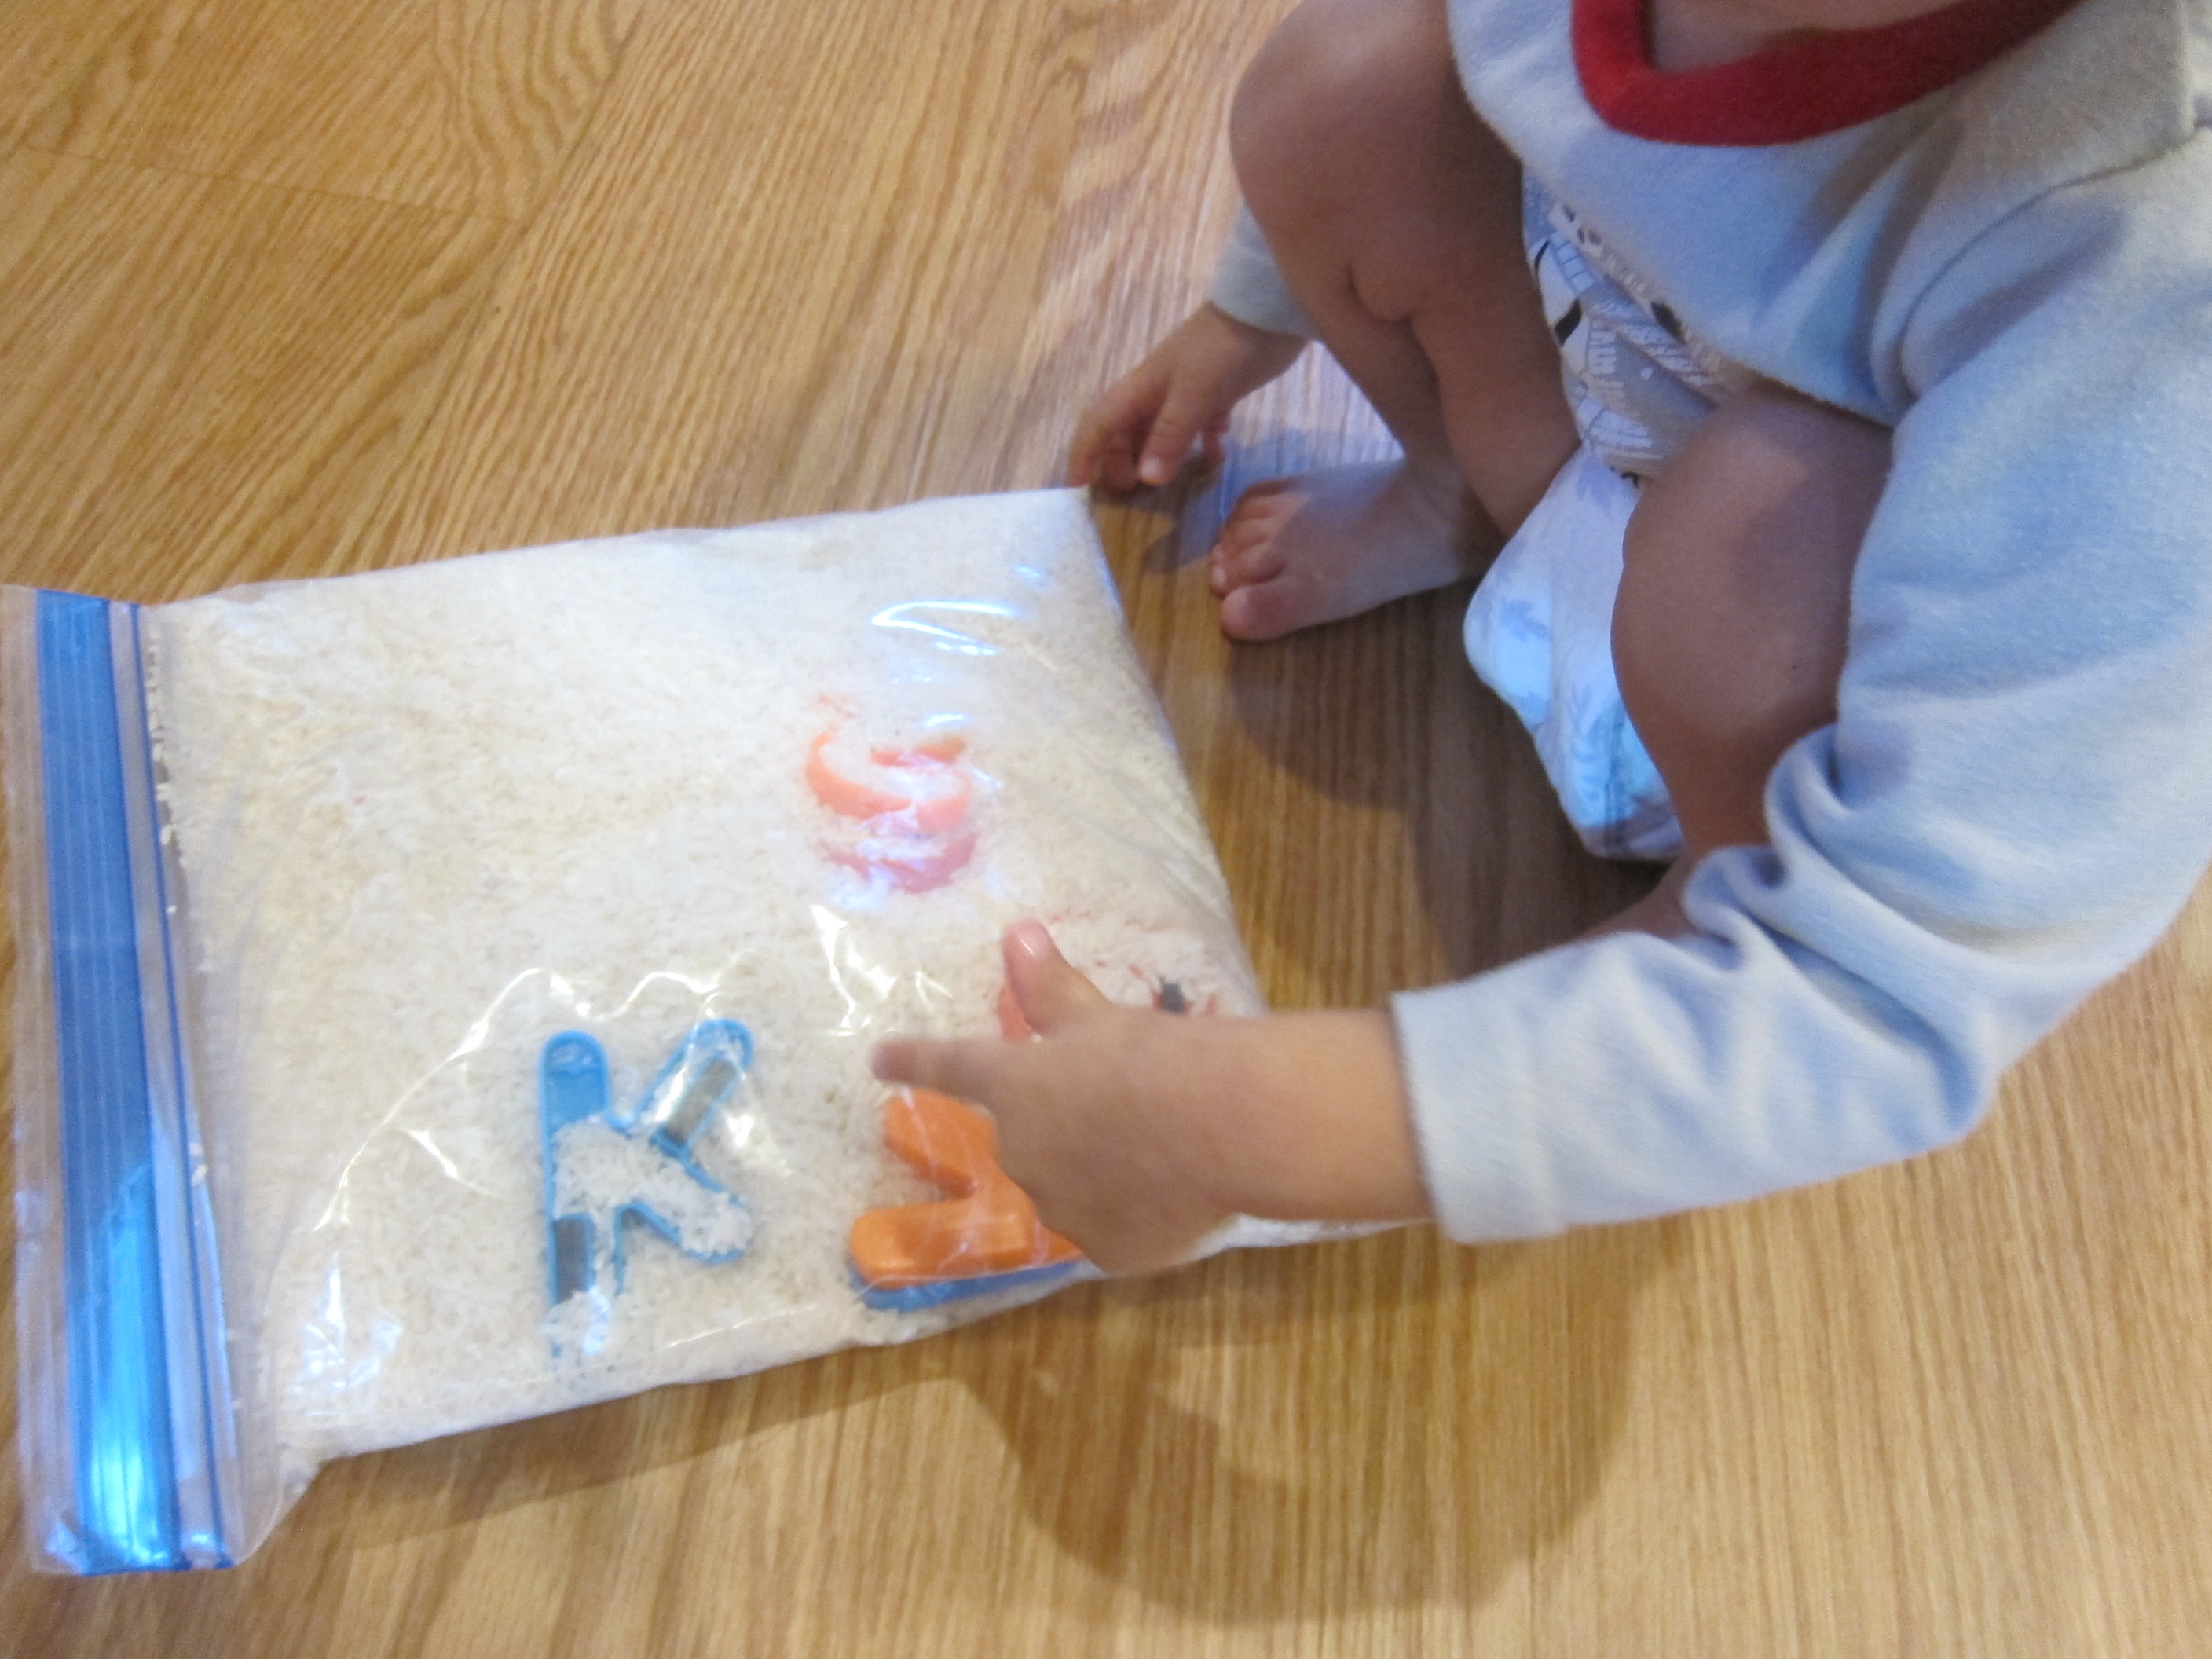
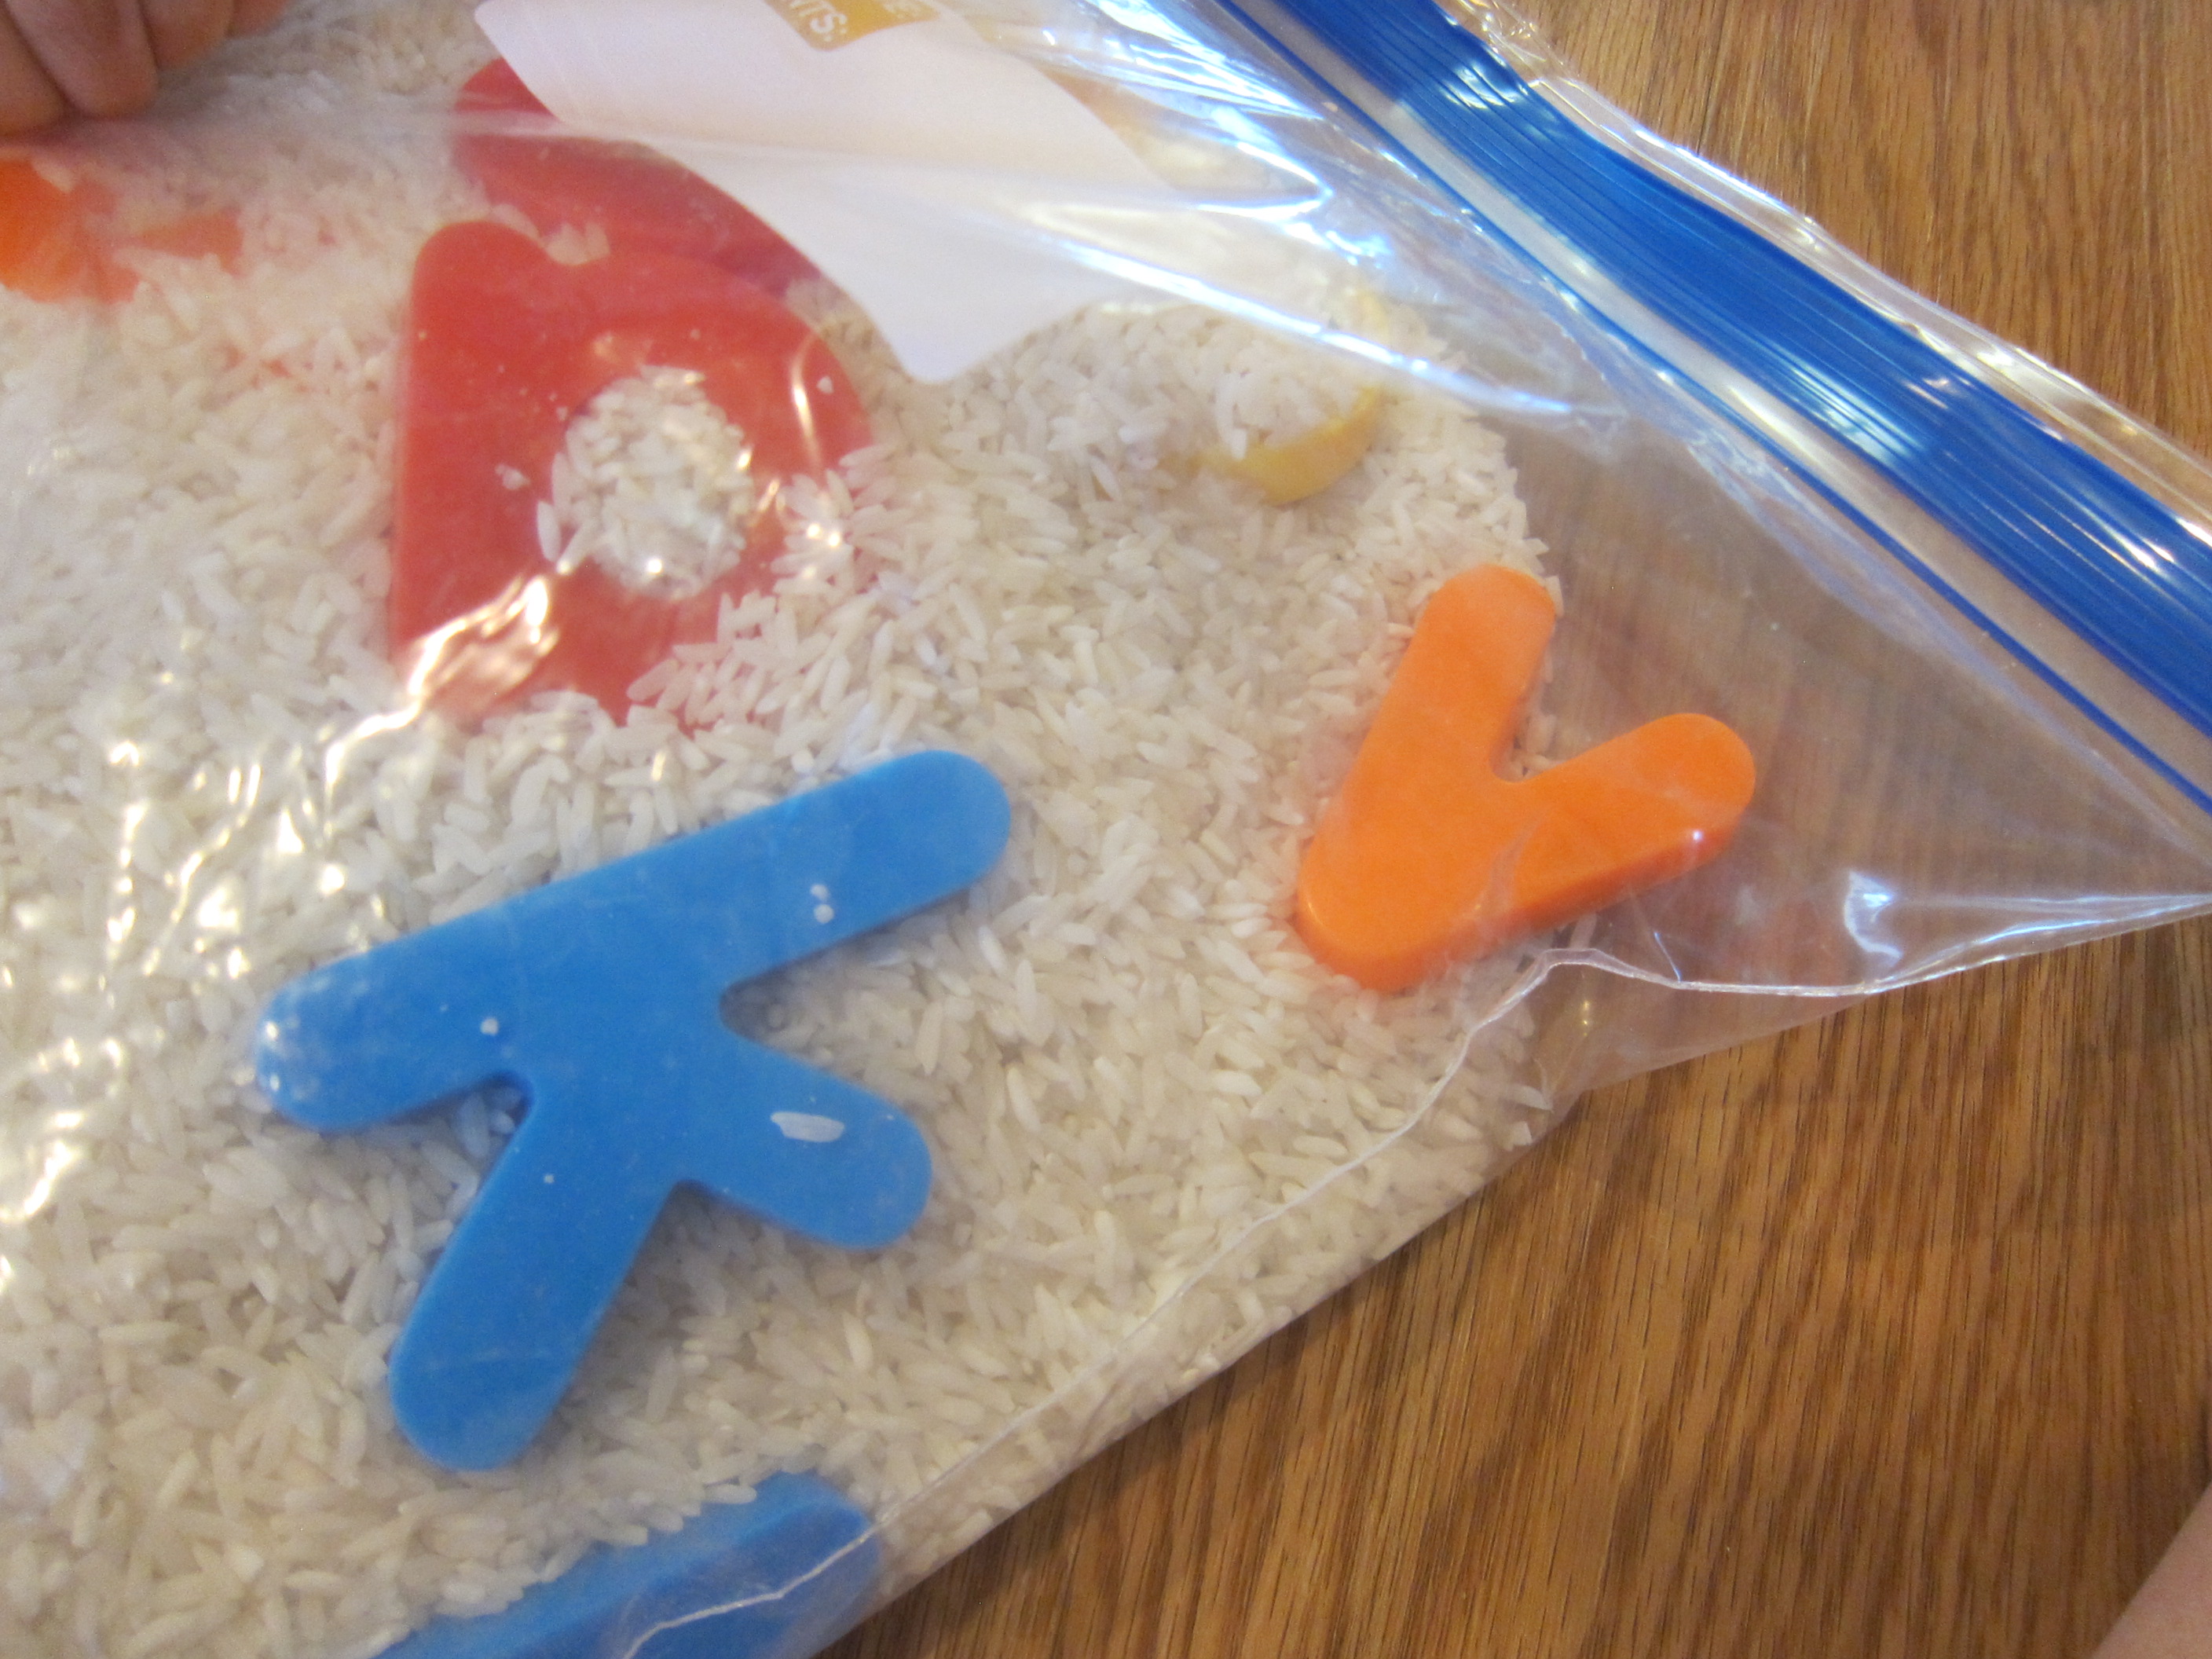
It’s great to start with letters in your toddler’s name, since this is often the first word he or she will need to write in preschool. I used just Veronika’s nickname today (V-I-K-A) and placed chunky magnet letters in a zip-top bag. We filled the bag with white rice and then could play a game of I Spy!

I Spy Baggie (1)

“I spy a V,” I told her, and she quickly followed suit, digging through the rice grains to unearth the letters. “An I!” she said.

I Spy Baggie (4)

She thought it was hilarious to see letters in rice, and soon was trotting over to the fridge to add more to our bag.

I Spy Baggie (7)

“Let’s at the red O,” she might say, or the green A, etc. I was so proud to see how many she knew already!

I Spy Baggie (6)

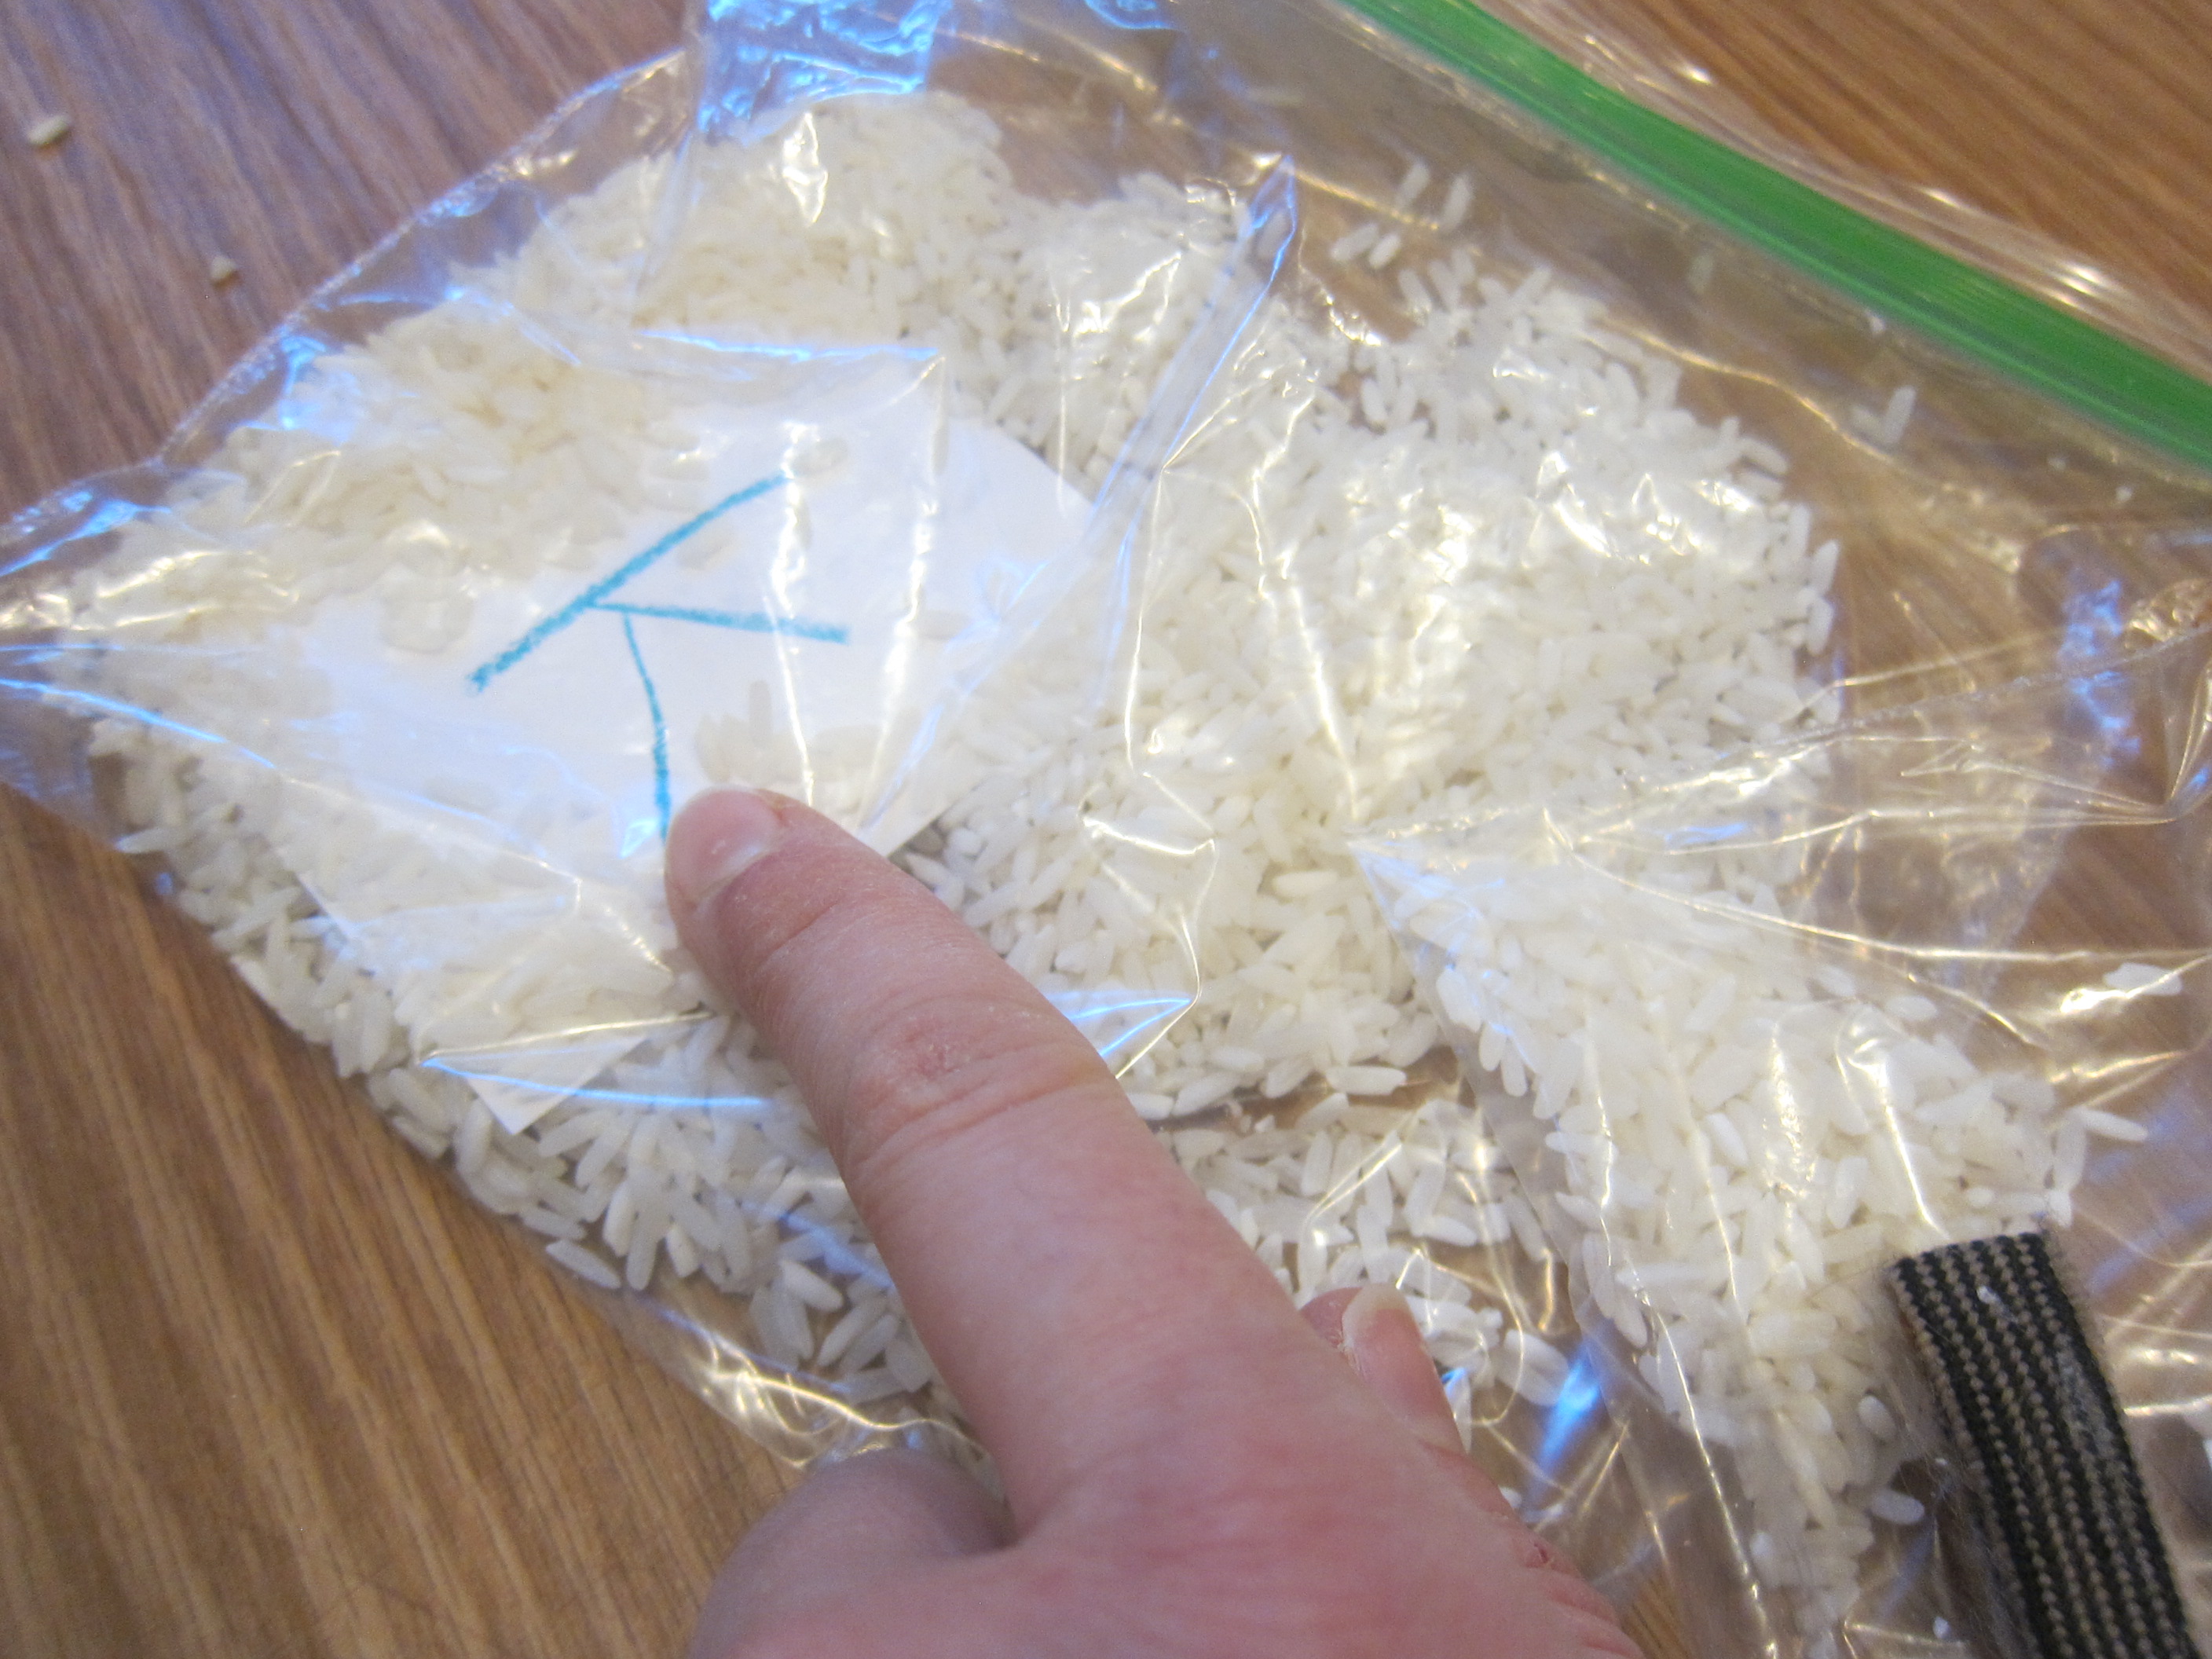
For variation, I then wrote a few letters on index cards and placed these with only a small covering of rice in sandwich-sized zip-top bags.

I Spy Baggie (12)

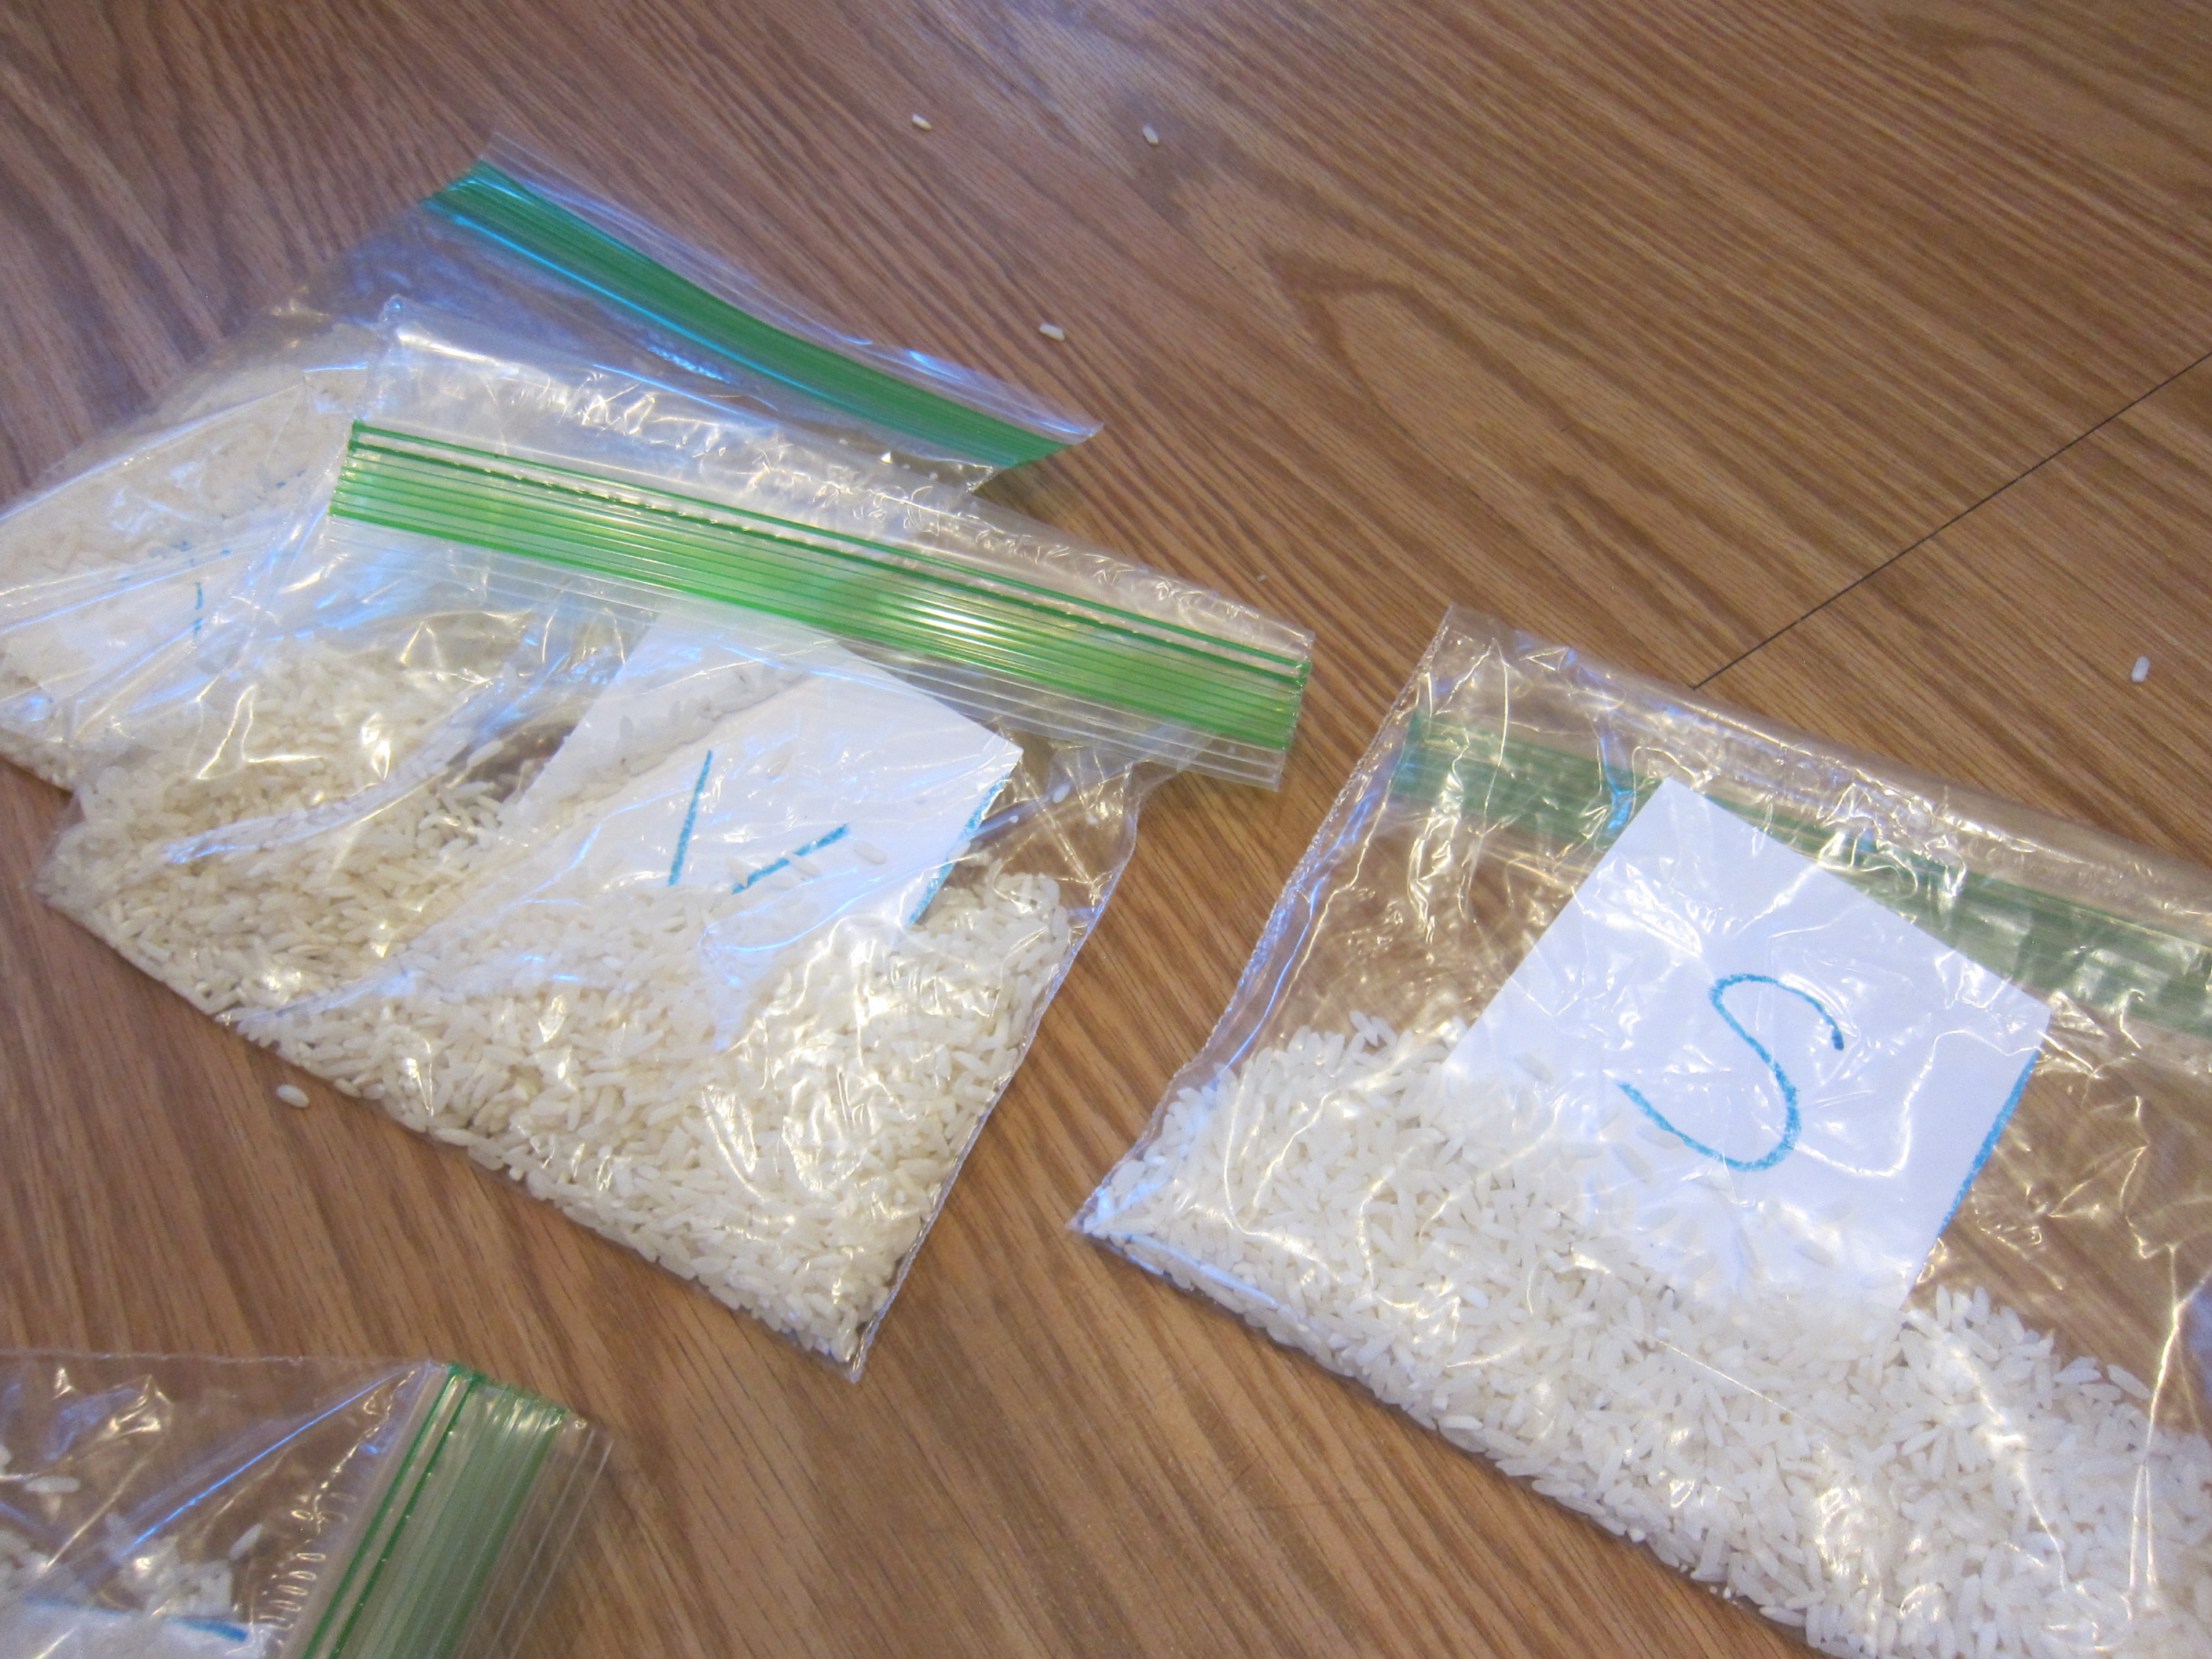
These were fun because she could swipe the rice aside with a few fingers and reveal the letter underneath.

I Spy Baggie (11)

This was a great first letter-recognition game, and can easily grow with your child.

I Spy Baggie (10)

For preschoolers, try writing early sight words on the index cards instead. For younger kids, draw shapes!

I Spy Baggie (3)