Make Me a Match

Make me a Match (1)

Veronika loves counting out two of any object, especially when we read books and look at the pictures. “One bicycle, two bicycle,” she might say or, “One bird, two bird.” So today I decided to give her a 3-D quiz on the same concept!

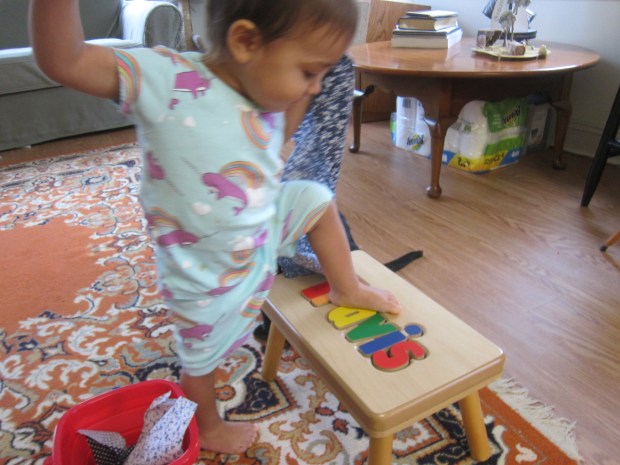
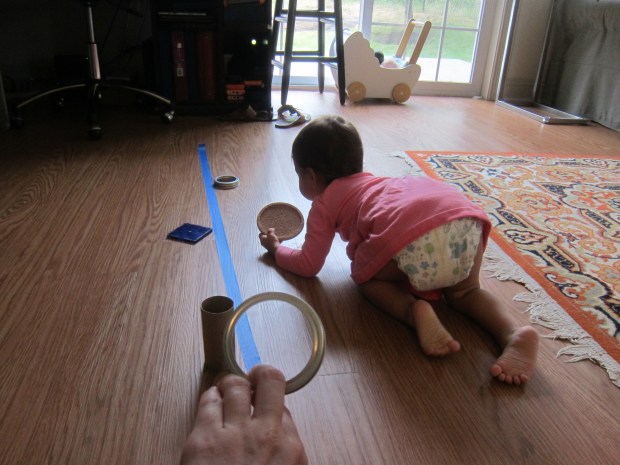
I put a variety of objects in a small box, making sure the items weren’t toys per se, including coasters, square magnatiles, empty paper towel tubes, and canning rings. I put one of each item in the box and then scattered the second from each set along a tape “trail” leading away from the box.

Make me a Match (2)

I called Veronika over to the box with excitement. “Here’s a coaster!” I said. “Can you find me a match?” “Match” was a new word in her vocabulary, so I rephrased my question in the way that was more familiar. “One coaster… Two coaster.” She looked where I pointed to the second and beamed with pride. Now she got it, and she set off down the road to make a match.
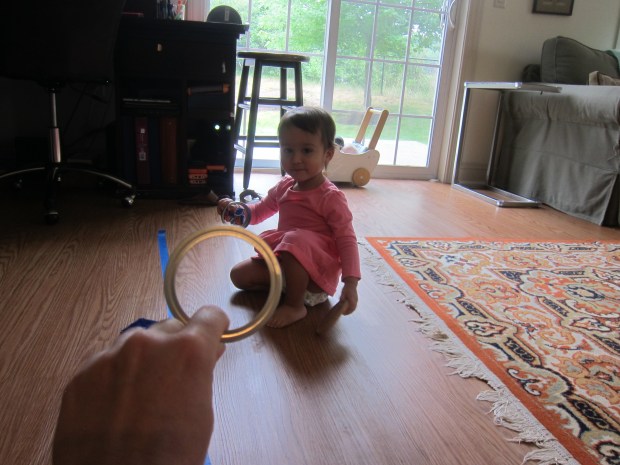
One canning ring…

Make me a Match (3)

Two canning rings!

Make me a Match (4)

One paper towel tube…

Make me a Match (5)

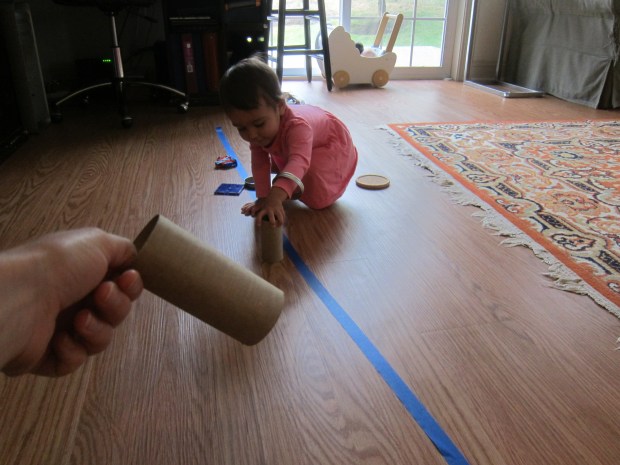
Two paper towel tubes! I see you!

Make me a Match (6)

In this way she aced every single item on the list.

Make me a Match (7)

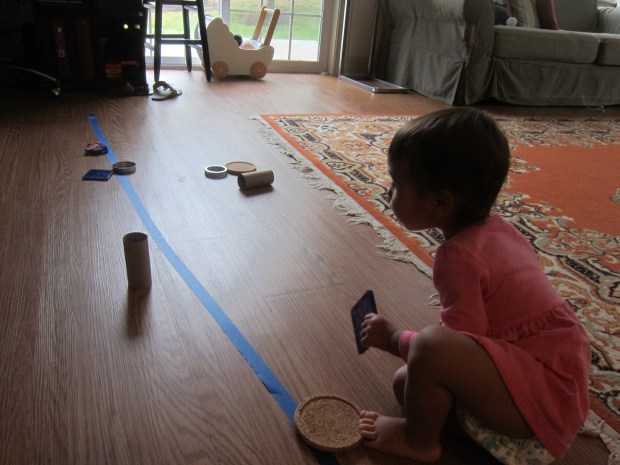
This was a great little lesson for teaching the concept of a pair.

Make me a Match (8)

Nursery Rhyme Productions

Nursery Productions (2)

Today Veronika and I played around with the classic nursery rhyme of Jack and Jill, not just as rhythmic and musical play, but by also acting it out. This was great both for her gross motor skills and for developing imaginative play. You might even consider it her first theater performance!

First, I simply refreshed her memory about the rhyme, since it’s not one we sing that often:

Jack and Jill went up the hill,

To fetch a pail of water.

Jack fell down and broke his crown,

and Jill came tumbling after.

We also watched a cute cartoon version of the song, and then it was time to act out her first role! On the first two lines, I helped her climb up onto a step stool.

Nursery Productions (3)

On the last two lines, she climbed down and then filled a bucket with “water” (actually scraps of blue fabric). Torn blue construction paper or blue tissue paper would also work as pretend water.

Nursery Productions (6)

Well she absolutely loved this whole process. She wanted to climb up onto the stool over and over, and graduated to doing it without my hand for support.

Nursery Productions (4)

Then it was time to work on climbing down “all by self”, too.

Nursery Productions (5)

Plus the bucket and fabric scraps were great fun to play with, nursery rhyme or no.

Nursery Productions (1)

She enjoyed the game so much that we’ll have to think of which nursery rhyme to use next for Veronika’s second “play”.


Water Wheel

Water Wheel (4)

This homemade water wheel is easy to make and works so well, arguably even better than the version that Travis put together from a recent Kiwi Crate.

The set up was largely a grown-up job, as it involved hot glue and scissors. Trace an empty ribbon spool onto a plastic lid (such as from a non-dairy yogurt container). Cut out the plastic circle and hot glue onto the spool.

Water Wheel (1)

Pierce a hole through the center with a push pin.

Now use plastic condiment cups as the spokes of your water wheel; hot glue these around the spool as close together as possible. Insert a skewer through the hole you made with the push pin, then slip a straw over the skewer for comfort.

Water Wheel (2)

Time to spin!

Water Wheel (3)

We headed outside and used a recycled water bottle to pour water over the contraption. The water wheel worked so well, even though I had worried gaps between the condiment cups might mean poor performance.

We even later took it up to bath time as a tub toy! Want more water experiments? Check out some of our previous fun with water.

Summer Scavenger Hunts

Summer Scavenger (7)

Summer is here and school is out, but there’s still so much to learn on any excursion outdoors. To wit, we headed off on a nature hunt today with a three-part agenda for exploration.

First, I simply announced that we were off to explore: What did Travis hope to find? After some initial thought, he settled on butterflies and bees. To make the hunt exciting, I gave both kids their own little notebook to draw in (though obviously little sister’s drawings would be more of a scribble), a pencil to take notes, and a magnifying glass. It was time to look and discover!

Summer Scavenger (2)

Travis was soon rewarded with a white butterfly, plus lots of bees buzzing among the flowers.

Summer Scavenger (3)

He loved pausing on a bench to draw a flower!

Summer Scavenger (4)

For the second part of the hunt, I gave his search a little more direction with a list of things to find. The categories and his answers were:

  • Something wet: a puddle on a rock
  • Something scratchy: a plant stem
  • Something soft: fern leaves
  • Something slimy: wet lichen on a tree
  • Something pretty: flowers
  • Something dry: tree bark
  • Something from a tree: a leaf on the ground
  • Something tall: a rock
  • Something hard: a tree trunk
  • Something blue: a blue jay

He enjoyed the challenge a lot, and pulled out the magnifying glass for most of the items he found.

Summer Scavenger (7)

“I see something tall!” he shouted proudly, running to a big rock.

Summer Scavenger (11)

Oddly, the hardest to find was something slimy, though we thought a recent rain storm might have turned up lots of worms.

For the final part of the lesson, it was time for a rainbow hunt. I recommend bringing along paint chips (free at hardware stores) for this activity, and working your way through ROYGBIV. Travis very carefully compared his samples to the flowers and other items that he found, rejecting these flowers as not a true yellow for example.

Summer Scavenger (8)

He took it very seriously until each color was checked off the list!

Summer Scavenger (14)

How are you enjoying nature so far this summer? Please share in the comments!

Summer Scavenger (5)

Butterfly Art

Butterfly Art (7)

You and your toddler can make one of these beautiful paper towel butterflies, or a whole bunch of them to hang on walls or windows. Younger toddlers will probably need to use a paintbrush, but consider using an eye dropper with older toddlers; it’s a great tool to hone fine motor skills.

To start, I set a piece of paper towel down on a craft tray, along with watercolor paints and a cup of water.

Then I showed Veronika how to dip the brush in the water, into the watercolor, and finally onto the paper towel to decorate her butterfly. “Dot dot dot!”

Butterfly Art (3)

I also wanted Veronika to practice with the eye dropper variation, but didn’t want to use liquid watercolors because they can stain. Instead, I mixed some of the watercolor paint with a little water in a cup so Veronika could practice dipping and squeezing that way.

Butterfly Art (1)

It was the first time she mastered the art of squeezing to release water from the dropper. She loved watching the color come out!

Butterfly Art (2)

Then she proved that she still loves to be impish, and upended the cup of water all over the paper towel. That made for one very wet butterfly!

Butterfly Art (4)

Luckily I knew it would dry eventually.

Butterfly Art (6)

As the finishing touch, fold the paper towel in half, then gather up in the center and wrap a pipe cleaner around the middle; bend the extra pipe cleaner on top into antennae. Our butterfly looked so pretty fluttering about the kitchen!


The Gift of Gab

Gift of Gab (4)

Veronika’s at that exciting age where she has enough words in her vocabulary to string together proper sentences. I had forgotten how thrilling it is to watch a child move from noun-noun to subject-verb-noun!

To nourish this milestone, I’m remembering to speak in clear full sentences for every point throughout her day. “What are you drawing?” I might ask her for example, and she comes back with a full, “I’m drawing a heart!”

Gift of Gab (1)

Or “Vivi [Veronika] yellow dress,” she might say. “Yes, you’re wearing your yellow dress,” I reply a bit more completely. “I’m wearing yellow dress!” she repeats. A full sentence!

Gift of Gab (2)

I love seeing her full sentences spill over into her solo play, too. She’ll speak to her dolls and other toys, sometimes still in gibberish, but mostly in words I can decipher. “Daniel and Baby! Daniel is falling, oh no!”

GIft of Gab (3)

Be sure to listen carefully for your child’s words. Often, only a parent can recognize the particular phonemes or syntax at this age, but the words are there if you’re attuned to them.

And you might just find they are in full sentences!


Lentils & Brown Rice

Lentils and Brown Rice

I used a rainbow of farm-fresh carrots for this recipe instead of just orange ones, but you can use only one color in a pinch.

Ingredients:

  • 1 cup short-grain brown rice
  • 2 and 1/4 cups water
  • 2 peeled and sliced carrots
  • 1/2 cup dried lentils
  • 1/4 teaspoon cumin
  • 1 tablespoon olive oil
  • 1 vegetable bouillon cube
  1. Combine all of the ingredients in a large saucepan and bring to a boil.
  2. Once boiling, cover, reduce heat to low, and simmer for 40 minutes. Let stand, covered, for an additional 5 minutes before fluffing and serving.

Wind Direction

Wind Direction (2)

Here’s a quick STEM experiment to teach kids how to observe wind direction… with some bubble fun thrown in!

First Travis helped make a bubble solution. The recipe was for an enormous batch (6 cups of water!) and I knew we would never use that much. Instead, I decided to make one-third of the recipe, using the following:

  • 2 cups water
  • 1/4 cup corn syrup
  • 1/2 cup dish detergent

My proportions weren’t exact, but we ended up with great bubbles so I guess it worked! Combine the ingredients in a jar and shake to combine, then let the mixture settle for at least half an hour.

Then it was time to head outside with the bubbles and a compass. I taught Travis how to locate north. He proudly then pointed to east, south, and west. So how could we tell which way the wind was blowing?

Wind Direction (1)

Dip a wand into the bubble solution and see which way your bubbles go. Ours headed west, nice and lazily.

Wind Direction (3)

So if our bubbles were floating west, I asked Travis where the wind was coming from. “East!” he correctly answered.

Wind Direction (4)

This led to almost an hour of play on the patio, blowing bubbles, popping them against our screen door, and otherwise having a blast.

Wind Direction (5)

Which means this is the perfect STEM activity for a summer day.

Wind Direction (6)

Tub of Delights


Tub of Delights (8)

We love to make indoor sandboxes and have played with multiple variations on the idea. This one was particularly fun because we combined three materials for the “sand” base: oatmeal, cornmeal, and rice.

Tub of Delights (2)

The other change I made today was using a larger, deeper bin (a storage bin from under the bed). The high sides meant easier clean-up at the end, and less mess on the floor!

As I layered in each of the three ingredients, I paused to talk about its texture with Veronika. Oatmeal was soft on our fingers. The cornmeal was finer and dusty, and the rice was smooth and pointy at the edges.

Tub of Delights (1)

Then we added scoops and funnels! Veronika loves to scoop and pour, whether with a measuring cup…

Tub of Delights (3)

…spoon…

Tub of Delights (4)

…or just her fingers!

Tub of Delights (5)

As you can see, the three ingredients didn’t stay in separate piles for long. For added fun, we then buried toys. I decided to make it a jungle theme and added wooden monkeys and a plastic giraffe and elephant. These were so fun to bury and then unearth. “Oooh, monkey!” Veronika said with true surprise each time she found one hidden under the cornmeal mix.

Tub of Delights (9)

I wouldn’t consider this an edible sensory bin, since the rice isn’t cooked, but at least you don’t have to worry if curious little mouths take a taste. Veronika quickly realized the texture wasn’t yummy after a little sample.

It all looked like so much fun that big brother Travis joined in!

Tub of Delights (7)

I loved watching them scoop and pour and imagine together. In sum, a great way to keep kids busy, and the high sides of the storage bin meant clean-up was a breeze.

Tub of Delights (6)

Watermelon Squish Bag, Two Ways

Watermelon Squish (7)

Summertime just begs for watermelon in all its forms, and today we decided to use watermelon as a theme not just to eat but to play!

I made two watermelon sensory bags for Veronika and although these didn’t turn out exactly as I hoped, she still had lots of fun.

The first was a true watermelon bag. Using leftover chunks from a big watermelon we sliced into for snack, I placed cubes of fruit in a zip-top bag. Seal with green duct tape to prevent your toddler from opening (and to look like a watermelon rind!). Then squish!

Watermelon Squish (1)

Veronika loved using this bag with her hands, crushing the soft cubes between her fingers. She also smashed at it with a toy hammer.

Watermelon Squish (2)

Then we made a pretend watermelon in a second zip-top bag. Fill the bag with clear hair gel and add a touch of red food coloring for a pink tint. Unfortunately my red turned out to look more purple, so next time I would color it with pink tempera paint.

Watermelon Squish (8)

As a result, the fact that we were trying to replicate a watermelon was lost on Veronika. Still, I added a few black seeds from the real watermelon, and she loved moving these around with her fingertips. Initially she thought they were bugs, but then she started saying “seeds!” as she squished at them.

Watermelon Squish (5)

Arguably, she liked this “failed” squishy bag better, holding it, squeezing it, and occasionally even draping it on her head.

Watermelon Squish (6)

So if the goal of a sensory bag is to keep a toddler busy, then this one was a winner.

Watermelon Squish (3)