Glue Play

Glue Play (2)

Your toddler is going to be a using a lot of glue in the next few years, since it’s part of just about every nursery school and preschool project. But how often is glue itself the object of play? The point of this activity was simply for Veronika to explore glue… and yes, you can probably count on it to be messy.

I lined the bottom of a shallow tray with two pieces of construction paper just to contain some of that mess, and then showed her how to squeeze a glue bottle.

Glue Play (1)

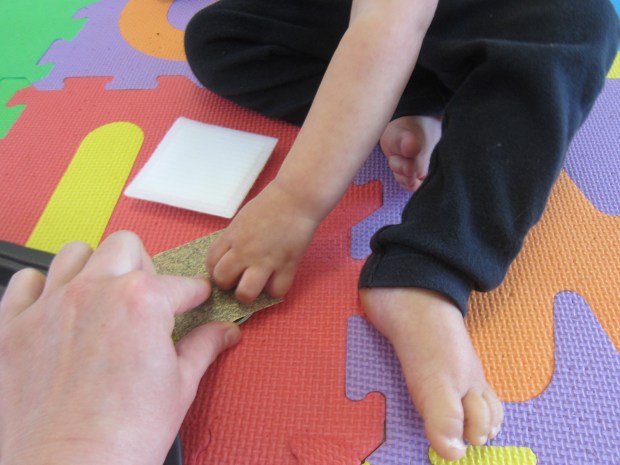
Squeezing glue bottles is actually great for muscle development in the hands, and she was so proud when she could do this all by herself. “Dot dot dot!” she said.

Glue Play (3)

Then we opened up the nozzle and really let the glue pour out, which she found fascinating.

Glue Play (4)

From here, she wanted to touch it, and I used the word “sticky” as she played. She was not at all afraid to get hands-on with the stuff.

Glue Play (6)

Thinking to extend the play, I added a few plastic spoons and little pom poms she could sprinkle into the glue.

Glue Play (5)

But really she was mostly interested in the glue itself! Then it was time for a hand wipe and clean up.

Glue Play (7)

Kindergarten Home School Week 8: Thursday

Home School 38 c

Beach-themed fun made for a different feel to our home school day, and I could tell Travis loved the shake-up! It felt like playing with learning thrown in, rather than learning with play thrown in. Hopefully we can keep this up!

9-9.30: Math. His workbook page involved finding and coloring shapes on a beach picture (hence the day’s theme). I turned this into reality by dressing both kids in bathing suits, putting down beach towels and a few toys, and having Travis tackle the page right in our living room “beach”! The change in setting alone made him so happy.

9.30-10: Art. A flapjack octopus was a nice craft extension to the beach theme. (Little sister kept busy, meanwhile, at the nearby scribble table)!

10-10.30: ELA. We’re starting a Star Wars-themed 1st grade writing book, so I had Travis work on handwriting for about 10 minutes. Star Wars pictures kept things lighthearted! Then it was 15 minutes on Lexia. Again, he got to do this right on our “beach”. (Little sister was busy with stained glass).

Home School 38 e

10.30-11: Snack/free play.

11-11.30: Science. His encyclopedia page was about friction. The topic seemed dry to Travis at first, including the QR video, but then I showed him how we could make a cold penny turn hot! Place a penny on a pad of paper, and pin it down with one index finger. Rub back and forth 50 times (again, counting practice!). By the end, the penny is quite warm to the touch.

Home School 38 d

11.30-1.30: Lunch/free play. During Veronika’s nap, I also taught Travis how to play the card game War. Beyond the thrill of this game (it brought back so many memories!), War teaches kids to quickly recognize less than and greater than.

1.30-2: Spanish. His teacher had recorded a game involving colored cups, which we then acted out. The kids also danced to the Mexican Hat Song!

Home School 38 g

2-3: Letter D/Dump trucks. I had Travis do one final workbook page, devoted to the letter D, and we took the play outside toy dump trucks in a local sand lot. The kids played for an hour in beautiful sunshine! We returned home full of laughter.

Home School 38 b

His bedtime book tonight was the nonfiction Me on the Map, which made for a good discussion as he gave it a “review” after.

home school 38 i

Stained Glass Window

Stained Glass Window (8)

Any project that involves kid + sunlight + reflective colors somehow makes me so happy. Hence why I returned to the idea of toddler “stained glass” today, even though I’ve done similar projects in the past.

For this particular version, I cut strips of thin cardboard from an old cereal bo and taped them into a square on the patio door as a “window” frame. I then cut squares of cellophane in various colors and simply showed Veronika how we could tape them one at a time into the frame.

Stained Glass Window (2)

The idea was to let her dictate where each piece should go, although I then had to be the one to tape it.

Stained Glass Window (9)

After starting in this way, I decided to just cover the space inside our frame with tape pieces so she could start to stick the cellophane on herself.

Stained Glass Window (7)

(Note: For this reason, I think it’s better to use contact paper as the background, instead of tape).

Stained Glass Window (10)

Of course, being a toddler, Veronika was also interested in the materials themselves.

Stained Glass Window (5)

She loved crumpling up the cellophane and handing it to me (“Trash!” she said), as well as the way it stuck to her feet.

Stained Glass Window (3)

Once the sun hit our “window” at just the right angle, we had beautiful colors projected onto our floor.

Stained Glass Window (11)

Like I said, I’m a sucker for any combination of beautiful reflected colors and an adorable toddler face.

Stained Glass Window (4)

Scribble Table

Scribble Table (2)

Veronika wants to scribble anywhere and everywhere these day, so today I made it easy for her – not to mention extra fun! – by setting up a low “scribble table”.

All you need for this activity is a table that’s about waist-high on your child, such as a coffee table or craft table. Cover it with long sheets of craft paper, taping securely and making sure that no tabletop shows through.

Add jumbo crayons and you’re ready to go!

Scribble Table (1)

Veronika was thrilled to learn she could scribble on a normally-taboo surface. She made lots of, well, scribbles of course!

Scribble Table (3)

She even experimented with holding multiple crayons at once.

Scribble Table (5)

I added a few simple drawings and depictions for her, but mostly I just left the craft paper blank as her canvas to fill in throughout the day.

Scribble Table (4)

Big brother did later realize he could use this as a backdrop for Lego games, making scenes of pirate ships and sea monsters. So we got multiple uses out of it!

Scribble Table (7)

One note of caution: You may want to avoid this game with a toddler who is too young to follow directions, otherwise they might start to think any table or piece of furniture is fair game for scribbling.

Flapjack Octopus

Flapjack Octopus (6)

This suggestion from Kiwi Crate was both a way to upcycle Travis’s latest package from the company and an extension on the theme of the deep sea. Winding yarn around a piece of cardboard is also a method you can use for making pom poms, but we found this project to be even easier.

Cut the top off of a Kiwi crate box (or any shoe box), and cut off any flaps, leaving a rectangle. Begin winding yarn around the middle of the rectangle, wrapping about 100 times. This was great practice for counting to 100, something Travis has been working on for home school!

Flapjack Octopus (1)

When we reached 100, we slipped a piece of yarn through the loops at the bottom of the rectangle, and double-knotted securely. Now slip the whole bunch of yarn off the cardboard. Find the middle of the yarn bundle, and tie another piece of yarn there in a double-knot to form the octopus’s waist.

Flapjack Octopus (3)

Snip the loops at the bottom of the octopus. Divide into eight portions (these will be the eight legs) and secure each bundle with a piece of yarn.

Flapjack Octopus (4)

For ears, slip a pipe cleaner through the yarn at the top of the head, and twist down into cute little ear shapes, trimming any extra pipe cleaner.

Flapjack Octopus (5)

As a final touch, glue on wiggle eyes. Once the glue dries, your flapjack octopus is ready to be discovered in the deep sea!

Kindergarten Home School Week 8: Wednesday

Home School 37 f

Happy hump day! We were busy and tantrum free except for one fit about pants (yes, pants). Here’s how the day went:

9-9.30: Letters B & C. We started with two workbook pages that focused on B and C. There were all sorts of activities crammed into these two pages: coloring pictures that started with the correct letter; drawing picture to go with a poem about a bee; practicing lowercase letters; completing rhyming words, etc. Whew! It was well worth the two stickers Travis could put up on his chart. (Good thing little sister was busy with texture swatches).

Home School 37 b

9.30-10: Art. We extended the beach and crab theme with ocean watercolor scenes.

10-10.30: Math. This was simultaneously math and snack, because today we played “Who stole the cookie from the cookie jar”. After watching a cartoon clip of the song, we sat in the playroom with a real jar of cookies. Travis liked chanting the rhythm, and then of course the kids’ hands were diving in for a snack.

Home School 37 c

I challenged him to make up cookie subtraction stories as he munched. If we started with 14 cookies and the kids had eaten 4, how many were left? This was also good practice for writing out an equation by hand.

Home School 37 d

10.30-11: Free play. (This allowed me to sit through an online storytime with baby sister).

11-11.30: Social studies. His encyclopedia page was about doctors and the work they do, including a QR link to a page with further info. We have a doll that zips open to reveal lungs, kidneys, a heart, a liver, etc. all in the proper place. I made Travis (and Veronika!) little doctor hats to wear to extend the hands-on play.

Home School 37 g

11.30-1.30: Lunch/free play.

1.30-2: Library. This would have been his special today. He was not terribly interested in the librarian’s online read of Ugly Vegetable Soup, though I tried to make it hands-on with a bowl and toy veggies!

Home School 37 h

2-2.30: Outside. A walk downtown was a chance to search for signs of community helpers.

That was it for his school day, since I had a baby gym class with Veronika to attend. Luckily Travis kept busy building Legos! A Whistle for Willie as a bedtime story capped off the day.

Watercolor Ocean Scene

Watercolor Ocean Scene (3)

Travis had so much fun drawing a squid for a project yesterday that I wanted to expand upon it today. This time, the assignment was to draw a full ocean!

For this project, it’s really up to your child to draw whatever ocean scene he or she envisions. Make sure to use thick watercolor paper for the best results. Travis started out with a big red octopus, but he was dissatisfied with it. He changed it into a crab, but was still displeased. So then he decided he wanted to start over!

Watercolor Ocean Scene (1)

On his second sheet of paper, I could tell he was really thinking about how the world might look under the waves. He drew sand at the bottom, green seaweed growing up, a crab, and a big toothy shark.

Watercolor Ocean Scene (4)

He added blue water all around as background. I worked beside him on a second scene with similar animals.

Watercolor Ocean Scene (2)

When we were done drawing with art pencils, the real watery fun began. Brush over your pencil marks with just a light layer of water. It will smear the colors somewhat, and make it took like you are scuba divers exploring beneath the waves!

Watercolor Ocean Scene (5)

Helpers and Heroes

Helpers and Heroes (5)

This activity gives purpose to any walk in your town, perfect if your family is outside getting a daily quotient of sunshine during social distancing!

We set off downtown and I assigned Travis the goal of finding signs of any community helpers. The trick here was not necessarily to spot the helpers themselves, which Travis can readily identify (police offices, firemen) but rather signs of them.

First up was a fire hydrant! That was used by the firemen, and Travis gave it a big thumbs up.

Helpers and Heroes (3)

Next we spotted a recycling bin. I pointed out how the bin doesn’t empty itself; we need sanitation workers!

Helpers and Heroes (2)

Now that he had the idea, he began to notice subtler signs, posing by an ATM for bankers, and ladders for construction workers. We also walked past the library, representing the librarians.

Helpers and Heroes (7)

Once we reached the town green, Travis spotted the memorial to local war heroes, which was a moving and apropos moment.

Helpers and Heroes (4)

This would be a great outdoor extension to any school lesson plan on “community helpers”!

Rainbow Salt Tray

Rainbow Salt Tray (9)

Here’s a project I remember doing with Travis when he was a toddler, and the seeming “magic” of it never grows old. I told Veronika that today she was going to paint a rainbow!

To set up, line the bottom of a shallow tray with construction paper, arranging the pieces in rainbow order.

Rainbow Salt Tray (2)

Oddly, our pack of paper doesn’t include purple, so I quickly colored a white piece with purple marker to fix that! Tape down the pieces of paper so they overlap. It’s helpful to use clear tape along all the seams, so salt doesn’t slip in between the sheets in the next step.

Now just cover the paper with a layer of table salt!

Rainbow Salt Tray (3)

I showed Veronika the tray and handed her a paintbrush. “Paint?” she asked. She began swirling the paintbrush through and immediately saw blue.

Rainbow Salt Tray (4)

A huge smile appeared on her face. As she worked, she uncovered all the colors of the rainbow.

Rainbow Salt Tray (5)

Of course she got a little impish and enjoyed sweeping salt out of the box for a time, too.

Rainbow Salt Tray (8)

You can make this educational by drawing big letters or shapes in the salt. (Hint: it might make for good sightword practice if you’re homeschooling a kindergartner, too!).

Rainbow Salt Tray (7)

But mostly Veronika just had fun, seeing what color would magically rise to the surface next as she brushed through each portion of the tray.

Rainbow Salt Tray (6)

You’ll notice that the tray was great fun to sit in, even after we’d dumped the salt!

Rainbow Salt Tray (11)

Texture Touch

Texture Touch (13)

I have a neat set of fabric swatches for Veronika, featuring a pair of each item ranging from the nubby to the scratchy to the smooth. Today we played with the swatches in multiple ways, for games that involved both sensory play and learning.

Texture Touch (2)

First, I hot-glued one of each pair onto a baby food jar lid. Hot-glue a magnet onto the other side. Now, the swatches had become magnetic toys that Veronika can slide around on a baking sheet!

Texture Touch (6)

I set them out for her to explore at her own leisure, but then we took the time to go through the pile together, talking about each one. Rough and scratchy were definitely interesting.

Texture Touch (1)

Veronika also loved any that were soft and smooth. When she felt the fluffy ones, she said our cat’s name and started rubbing it all over herself!

Texture Touch (11)

There are then lots of ways to extend the play. I gave her the other half of the swatches (not glued to magnetic lids), and helped her find the match for each one.

Texture Touch (9)

Although the ability to find a match will probably be beyond your 18-month-old’s ability, there has to be a first time for introducing any concept! I made things easier by giving her a choice of only 2 or 3 swatches. “Which one is the pair?” I asked her.

Texture Touch (7)

Then we lined them up in order, going from softest to roughest.

Texture Touch (12)

She also loved transferring the magnets over from the baking tray to our fridge. After that, I left the little swatches in a bin which meant she could return to them throughout the day. I have a feeling we’ll get a lot more play out of these!

Texture Touch (8)