Muscle Machine

Muscle Machine (5)

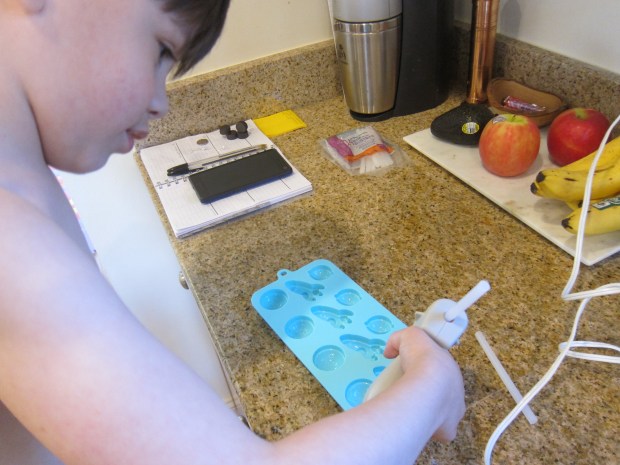
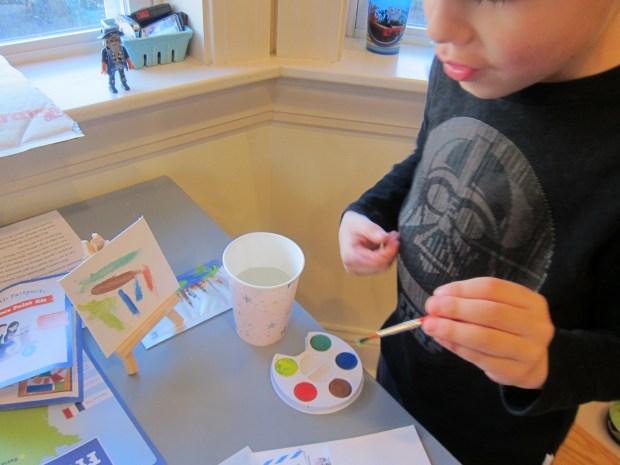
For a little STEM to our home school day, I showed Travis a demonstration of how muscles work in opposing pairs. This craft was also a great way to upcycle his latest Kiwi Crate box. Here’s Travis flexing his muscles to get started!

Muscle Machine (1)

To start, we printed out a printable with shapes of the shoulder, upper arm, and forearm. Place the paper shapes on cardboard and use push pins to mark anywhere that circles are shown. Remove the push pins and cut out the cardboard. Widen each push pin hole with a brad.

Muscle Machine (2)

Use double-sided tape to attach the bicep and tricep muscle shapes to the upper arm. Insert two brads about half way in the two outside holes (these will act more like bobbins; alternatively, you can use real bobbins if you have them). Push a third brad through the middle hole, inserting it fully, and attach to the shoulder piece.

Muscle Machine (3)

Insert two brads into the outer two holes of the forearm. Cut two pieces of string 18 inches long and knot around these two lowest brads. Add a center brad on the forearm to attach it securely to the middle arm. You now have something roughly like this:

Muscle Machine (4)

Loop the top string clockwise over the brads that align with the bicep.

Loop the lower string clockwise around the brads that align with the tricep. Pulling the strings can now allow the arm to flex upwards or downwards, depending which you pull.

Muscle Machine (6)

For added stability, you can zip-tie the whole apparatus to an empty plastic bottle, but we skipped this step and pulled it more like a marionette’s strings. Have fun having your child see which other muscles move in pairs, like bending a wrist up or down, or bending back and forth at the waist.

French Toast

French Toast (2)

This easy French toast recipe is quick enough even for a weekday morning!

Ingredients:

  • 3 tablespoons ground flaxseed
  • 6 tablespoons water
  • 2 tablespoons almond milk
  • 1/4 teaspoon cinnamon
  • 1/2 teaspoon vanilla extract
  • 4 slices whole wheat bread
  1. Whisk together the flaxseed and water in a shallow bowl to make flax eggs. Add the almond milk, cinnamon, and vanilla, whisking to combine.
  2. Dip one slice of bread at a time into the mixture, coating both sides.
  3. Transfer to a skillet heated over medium-high heat and cook for about 3 minutes on each side. Repeat with the remaining bread. Delicious as is, or drizzled with a little maple syrup!

French Toast (1)

Froot Loop Sand

Froot Loop Sand (10)

This project is a fun way to use up a box of any rainbow colored o-shaped cereal, whether brand name Froot Loops or an organic version.

To start, you’ll need to crush the cereal until very fine, which is half the fun/ Yes you can do this step in a food processor, but I wanted Veronika to get hands-on with it.

Froot Loop Sand (1)

I placed a big batch of the cereal in a large zip-top bag and had her help roll over it (or just whack it at!) with a rolling pin. I helped her out because the finer the “sand” the better the project turns out.

Froot Loop Sand (2)

Next I gave her a glue stick and showed her how to rub all over a piece of construction paper, which she loved!

Froot Loop Sand (3)

Once the paper is really sticky, pour the cereal sand on top. Shake off any excess over a tray, then let dry.

Froot Loop Sand (5)

The colors really do look so pretty! We tried this a second time by pressing a gluey piece of paper down over the cereal sand instead, once it was all in the tray. This didn’t work quite as well, but was a nice variation.

Froot Loop Sand (7)

Of course Veronika was busy with leftover “sand” and a few utensils for quite some time!

Froot Loop Sand (6)

In sum, a great toddler art project.

Froot Loop Sand (8)

Kindergarten Home School Week 5: Tuesday

Home School 21 b

On the heels of a trulydifficult Monday, we had a Terrific Tuesday around here. Travis loved school today and was up for every bit of it. Color me one proud mama.

9-10: ELA. For Tuesday writer’s workshop, we watched a read-through of Plant a Little Seed for an Earth Day unit. He then got busy writing a recap (first, next, last), using full sentences and periods, and he was so proud of the picture he drew. Baby sister, meanwhile, was happy with chalk. Travis was on such a roll that he requested extra time on the Lexia spelling program, after.

Home School 21 c

10-10.30: Recess/snack. Travis went off collecting rocks. Baby sister was happy with pom poms. I was happy in the sunshine.

Home School 21 k

10.30-11: Emotional Learning. Travis watched another read-through (How Full Is Your Bucket), and then we discussed the story and ways to fill our own emotional “buckets” each day. He drew himself playing a game nicely with his little sister!

Home School 21 d

11-12: We took a STEM break to make LED magnets!

12-1: Lunch/free play.

1-2: Outdoor time: We turned a beautiful spring day into a nature scavenger hunt.

Home School 21 e

Travis enjoyed checking off items on the list his teacher provided, as well as finding novelties like a square-shaped stick!

Home School 21 j

Little sister squeezed in some nature learning, too.

Home School 21 f

2-2.30: Acting: After a quick watch of the Three Billy Goats Gruff, Travis built a bridge so we could act out the story. His involved two stools and a big cardboard box. Kids might also like making a bridge from smaller objects like Legos or building blocks. Then we acted out the billy goats gruff!

Home School 21 h

This led to an inventive afternoon of pretend play, leaving me free to make dinner. So hurray for Terrific Tuesday.

LED Magnets

LED Magnets (6)

Okay, this is likely the last time Travis and I will play with LED lights and batteries for a while, but we’ve had lots of fun with them this month. Of all our light-up projects, this was the simplest. But by now Travis is an expert!

To start, we needed to make magnets using a silicone mold and hot glue. We have a mold in fun rocket and planet shapes that was perfect.

LED Magnets (1)

Because it required squirting a lot of hot glue into a relatively wide receptacle, this was the first time I let Travis use the gun solo. He was so proud! You’ll likely go through three or four glue sticks to fill a couple of molds.

LED Magnets (2)

Let the glue cool slightly, but before it’s completely set, push an LED light in. Make sure the wires are still sticking out.

LED Magnets (3)

Glue the positive (longer) leg of the LED to a circular magnet. Attach a 3V battery to the magnet with small pieces of tape so that it touches this positive leg, and then tape the other (negative) leg of the LED to the negative side of the battery.

LED Magnets (4)

Perhaps you can use these magnets to hang up any home school work!

LED Magnets (6)

Here’s our planet in action:

Toddler Nature Walk

Nature Walk (3)

This game can grow with your child. Initially, it’s a fun way to teach the name of nature objects. Later, it can become a guessing game or a sorting game, once your toddler firmly has a few of nature words under his or her belt.

For the easiest variation on a nature walk today, I asked Veronika to pick up treasures and fill a paper bag we’d brought along. Of course she didn’t entirely understand, but she certainly loved bringing me sticks and dropping them in!

Nature Walk (1)

I rounded out the collection with other items we spotted, like leaves, tall grasses, pine needles, acorns, and seed pods.

Nature Walk (4)

Once we were home, we took our treasures to the back patio. For older kids, have them reach into the bag and guess what they are feeling; you can even use a blindfold, if your child wants to! At seventeen months old, it was easier to dump the bag out in front of Veronika and hand her one item at a time.

“Leaf,” I could say, for example. She is a parrot these days, and loved practicing new words right back to me, as we then discussed the color or texture.

Nature Walk (5)

When I gave her grass, she immediately grabbed it…

Nature Walk (6)

…and ran to return it to the grass just off our patio, an amazing insight to her little brain!

Nature Walk (7)

There was definitely some new vocab here, including words like “acorn” and “bark”. I sorted our items into piles so she could better understand each new word.

Nature Walk (8)

In sum, we got a nice pause in the spring sunshine, and a little lesson all in one!

Nature Walk (9)

Musical Chalk

Musical Chalk (5)

This game is the toddler version of a musical art project I recently did with big brother Travis. This time, I sat Veronika down with a long piece of craft paper on the kitchen floor… the bigger the better! I gave her pieces of chalk and turned on some upbeat music in the background.

Musical Chalk (2)

Then I invited Veronika to make the chalk “dance”. I showed her how to draw big loops and swirls to the happy music. Obviously toddlers will be too young to vocalize how a song makes them feel, but babies have an intuitive understanding of rhythm and will likely take on the tone of whatever is playing.

Musical Chalk (3)

To make chalk less messy on little hands, try wrapping one end in masking tape. This definitely increased the amount of time she was happy to play with it.

Musical Chalk (4)

I set out a little dish of water about halfway through her play. Dipping chalk in water makes for bolder, smudgier colors, and she loved the way this looked.

Musical Chalk (6)

Of course don’t be surprised if your little dish of water gets upended, which is just fine, too.

Musical Chalk (7)

The music kept playing in the background, sometimes faster, sometimes slower. Did she alter her strokes because of it? It was hard to say, but the game was a great intro to emotional learning, while we made messy art in the meantime!

Pom Pom Squeeze Water Play

Pom Pom Squeeze (10)

Here was the perfect game to play on the patio with Veronika while big brother had “recess” today. It not only involves great sensory elements, but also builds fine motor skills from squeezing.

I first laid down a towel, both for comfort and to absorb any spilled water as we played, then I set out a shallow tray filled with pom poms. Because Veronika still puts small objects in her mouth at times, I used only large ones. Use a variety of pom pom sizes for older toddlers!

Pom Pom Squeeze (1)

First I just let her play with the dry fluffy pom poms, because she loves them. Then I filled the tray with a little warm water (use cold water if it’s a hot day!). The pom poms will almost immediately become saturated.

Pom Pom Squeeze (2)

I pointed out to her that they felt differently now, and then I showed her how to squeeze out the pom poms over a cup.

Pom Pom Squeeze (3)

“Squeeze!” I said, and she echoed me and clenched her fists around a few of them.

Pom Pom Squeeze (4)

She also of course loved splashing her hands in the warm water.

Pom Pom Squeeze (8)

She sometimes squeezed the pom poms over the cup, and sometimes just tossed them in.

Pom Pom Squeeze (6)

Older toddlers and preschoolers will really enjoy the challenge of squeezing out water until the cup is filled to the brim! It turns out pom poms can hold a lot of water.

Pom Pom Squeeze (7)

Then there’s the fun of pouring the water back out of the cup and starting over.

Pom Pom Squeeze (5)

Or the fun of transferring pom poms from one cup to another.


Pom Pom Squeeze (11)

Or just swishing all those pom poms around in the shallow tray endlessly. In sum, this one is sure to keep your toddler busy!

Pom Pom Squeeze (9)


Kindergarten Home School Week 5: Monday

Home School 21 i

Well, happy Monday. There was lots of resistance and tantrums today, folks, a few moments of laughter to break the tension, and a toddler who refused to nap. Chaos, in sum! How did your day go? Please share!

9-10: ELA. Travis and I started out with a game of sight word Fiddlesticks. Ideally play this with craft sticks, but I recently used mine up so I wrote sight words on the end of paper strips.

Home School 21 a

We put these in a cup, along with one strip marked with a purple diamond. Travis and I took turns pulling out the strips and reading the word. If we drew the purple, we declared “Fiddlesticks!” and our strips went back in.

Home School 21 b

This got some laughter at least. He also did a letter page in his workbook and 20 minutes of Lexia, which involved a fair amount of yelling, fussing, and hating me.

10-10.30: Math. While Travis wrote the numbers 1 through 10 on red squares of paper, I marked 10 additional squares with hearts in corresponding amounts. Travis laughed at making me draw so many hearts. I’ll take laughter where I can!

Home School 21 d

Then we played a version of Memory: finding a number card and the corresponding number of hearts means you keep the pair and get another turn.

10.30-11: Much needed snack and free play (sigh, pouring rain).

11-11.30: Science: Travis watched a read-through of The Tiny Seed. Then we made a giant flower by coloring a green stem, yellow center, and tracing his hand on red paper for the petals. As a bonus, we glued down dried beans in the center for seeds! He was mildly into the project. At least he wasn’t screaming at me.

Home School 21 j

11.30-12: Gym. Everyone needed to move and baby sister wouldn’t take her nap, so we checked out his P.E. teacher’s suggestions.

Home School 21 g

A rhythm stick dance to ‘Thunder’ by Imagine Dragons fit the bill, followed by a game called Kicking Corners. Put 2 cups in each of the 4 corners of a rug or other open area. Time your child and see how long it takes to kick all the cups down with a soccer ball. This was great for kicking skills, no hands allowed.

Home School 21 h

12-1: Lunch/free play.

1-1.30: Spanish. For some silly fun we watched the teacher’s dog “sing” a song about 10 little dogs. Then Travis drew 10 animals in circles, and was proud of his own details!

Home School 21 k

We then looked up the names of each animal in Spanish. Mommy even learned a few new ones.

Home School 21 l

We called it quits early, turning to a fun cooking project instead and going for a drive in the pouring rain just to get out of the house. We’re hoping for a nature walk, fewer tantrums, and more naps tomorrow.


Little Passports: France

LP France (13)

I’ve never been so glad to have a Little Passports subscription as I am now, perfect during this era of home schooling. Travis’s latest package took him to France. The booklet felt a little too advanced this time, reminding me that Travis is on the youngest end of the age spectrum for World Edition. The maze was hard (even for mommy!) and activities like being an art critic and following a landmark hunt involved lots of reading that was too advanced.

LP France (11)

Still, he enjoyed the extras on the web like seeing vibrant pictures of monuments and landscapes in France, learning a few French words, and selecting his favorite French dessert. And he proudly added the flag to his passport and the “push pin” to his map.

LP France (3)

Souvenir:

The mini easel and watercolor palette, complete with two tiny canvases, was a huge hit!

LP France (1)

Travis was immediately making masterpieces after we looked at a few examples from Monet and Matisse for inspiration. He even corrected me, pointing out that one of his canvases was meant to be viewed horizontally and the other vertically.

LP France (2)

Activities:

We opened this package on April 1 which turned out to be perfect because one activity was to color in a fish for the “poisson d’avril“.

LP France (5)

This French variation on April Fool’s Day is to tape the fish to the back of a friend or family member and declare that person the “Fish of April!” Travis got a big kick out of doing this to daddy.

LP France (6)

Next up was making an Eiffel Tower out of Dandies marshmallows and dry spaghetti!

LP France (7)

This was STEM at its best: thinking spatially about how to engineer the tower; using shapes (rectangles, triangles); dividing spaghetti pieces into halves or quarters; and of course eating marshmallows along the way for sticky fingers and lots of laughs.

LP France (8)

Look how it turned out!

LP France (9)

I had also purchased the optional add-on, an Aquarellum Parisian Painting Kit. This included 9 watercolors and three scenes of Paris on absorbent paper. Travis loved that he could use the provided eye dropper to mix colors.

LP France (10)

The scenes turned out beautiful. My petite artiste!

LP France (12)

Finally, we colored in the French flag to add to our garland.

Recipe:

Of course we weren’t done until we’d taken our culinary voyage. This time we turned our kitchen into a French bakery, plus learned a little cultural background for the galette des rois (Kings Cake).

Galette des Rois (3)

We had to improvise a little, since the recipe called for puff pastry which is hard to find vegan. We used store-bought pie crusts instead, which means our cake didn’t puff up like a traditional version, but it sure still came out yummy!

Ingredients:

  • 1/2 cup sugar
  • 1/2 cup ground almonds
  • 1 teaspoon almond extract
  • 1/2 cup Earth Balance butter, softened
  • 1 tablespoon ground flaxseed
  • 3 tablespoons water
  • 2 (9-inch) pie crusts
  • 1 tablespoon melted Earth Balance butter
  1. To prepare the filling, mix together the sugar, almonds, almond extract, and 1/2 cup butter.
  2. Whisk the flaxseed into the water to make 1 flax egg. Add to the sugar mixture and stir until mixed. Chill in the fridge.
  3. Meanwhile, turn one dough circle out onto a baking sheet lined with foil. Spread the chilled filling evenly over the dough, leaving a 1-inch border.
  4. Top with the remaining dough circle, pressing the edges of the dough to seal. Brush with the melted butter. Bake at 450 degrees F for 15 minutes, then reduce heat to 350 degrees F and bake an additional 20 minutes.

Galette des Rois (4)

Note: If your kids want to, hide a dried bean inside in keeping with the French tradition of this cake around Epiphany.

Galette des Rois (1)

Whoever finds the bean or a toy figurine in their slice is the king for the day and gets good luck! Skip that step if you are worried about choking hazards.

Galette des Rois (2)