Peach Popsicles

Peach Popsicle a

Happy Memorial Day and unofficial start to summer! We’re kicking things off with this pretty peach popsicle recipe, perfect for cooling down poolside or wherever you may be on this holiday!

Ingredients:

  • 2 cups frozen peaches
  • 10 ounces unsweetened hemp milk
  • 2 tablespoons maple syrup
  • 1 teaspoon vanilla extract
  1. Combine all ingredients in a blender and process until smooth.
  2. Pour into popsicle molds and freeze until set. Unmold and enjoy!

Peach Popsicle b

Mini Gym

Mini Gym (8)

Whatever your baby’s latest gross motor skill milestone is, this cute gym session will have him or her giggling! It can be a Mini Rolling Gym, a Mini Sitting Gym, or a Mini Crawling Gym. The key is to get down on your baby’s level and show them the actions, which will serve both as a model and as a game!

Mini Gym (1)

Veronika is already a roller, but first for some review I lay down next to her. Well she thought this was just the greatest.

Mini Gym (2)

I rolled away from her…

Mini Gym (3)

…which soon had her rolling to me. This was a nice refresher because she’s so busy sitting up these days, she sort of forgets to roll when I put her on her back.

Our next gym session was planks (okay, tummy time). She loved having me down at elbow level with her.

Mini Gym (4)

Next I started to crawl in circles around her. This is probably the next gross motor skill that Veronika will master, since she’s currently kicking with legs and pushing up on her arms, but not quite able to put it all together yet.

Mini Gym (6)

She looked like she wanted to chase after me!

Mini Gym (10)

I then sat her up, placed a few favorite toys just out of reach, and mimed reaching for them. Soon she was copying me.

Mini Gym (9)

In short, we both got in a little workout, and lots of giggles!

Mini Gym (7)

Purr-fect Pancakes

Purr Pancakes (3)

These kitty-faced pancakes are the purr-fect way to kick off Memorial Day weekend (or any leisurely morning) to set the tone for a lazy summer ahead. After all, no one nails the art of napping quite like a cat. In sum, this fun twist on pancakes had Travis grinning.

Prepare a batch of your favorite pancakes – or  heck, just use a mix!

Purr Pancakes (1)

We spread our pancakes with about 1 tablespoon maple syrup to help our fruit faces “glue” on.

Purr Pancakes (2)

Add ears, noses, mouths, eyes, and don’t forget the whiskers! Ideally we would have used blueberries for the eyes, but a certain sous-chef ate them all up.

Purr Pancakes (4)

Please share your animal face pancakes in the comments!


Have Breakfast Together

Breakfast Together (5).JPG

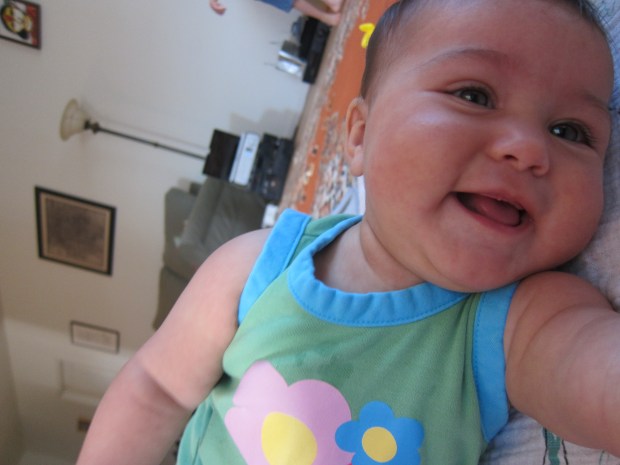
All too often on weekdays, we eat breakfast in a rush and then it’s time to get everybody ready ready ready and out the door. On weekends, consider making breakfast feel extra special for your baby, even from a young age. This will help set the tone for the day and create bonding moments for your family. At almost seven months old, I can finally make Veronika and big brother Travis the same recipe – and mom and dad can enjoy this one, too!

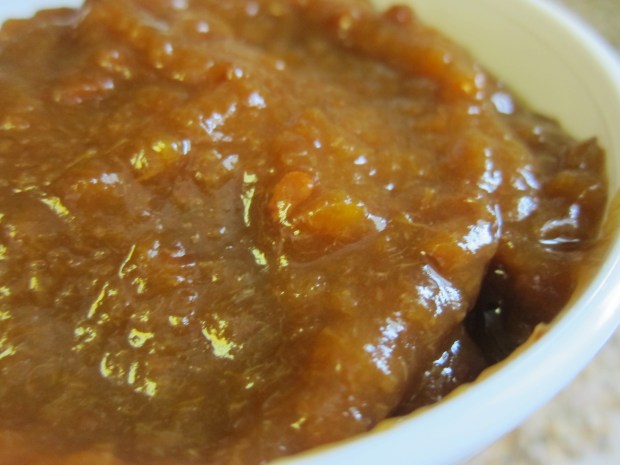
The night before, prepare the apricot puree:

Combine 3 and 1/2 ounces dried apricots and 8 ounces water in a saucepan. Bring to a boil, then reduce heat and simmer for 8 minutes, until soft. Transfer to a food processor and process until smooth. Let cool, then refrigerate overnight.

Breakfast Together (1)

In the morning, prepare the oats:

In a saucepan, combine 3/4 cup rolled oats and 10 ounces hemp milk (we like unsweetened vanilla). Bring to a boil and continue to cook just until thickened, stirring frequently.

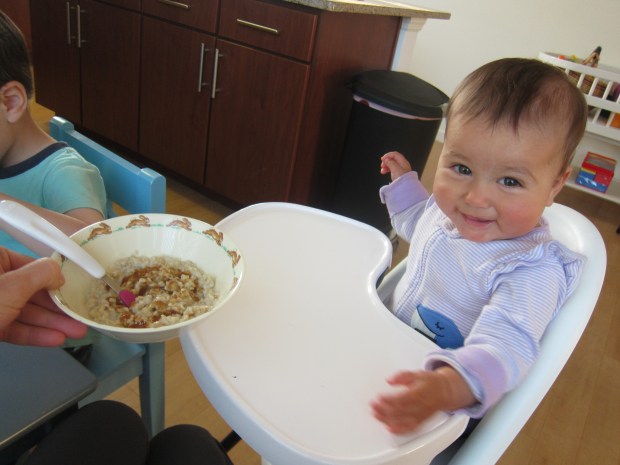
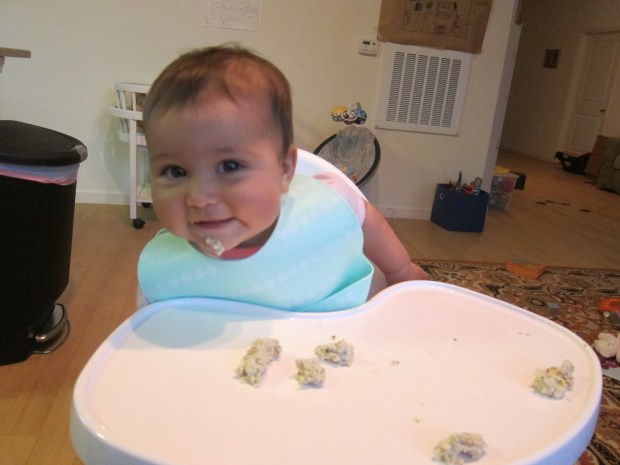
Ladle into bowls, varying the serving size depending on family member; that means about 2 tablespoons for Veronika and about 1/2 cup for big brother! Stir 1 tablespoon apricot puree into each bowlful.

Breakfast Together (2)

Now that you have your meal, enjoy each other’s company! It was a delight watching these two dine together.

Breakfast Together (7)

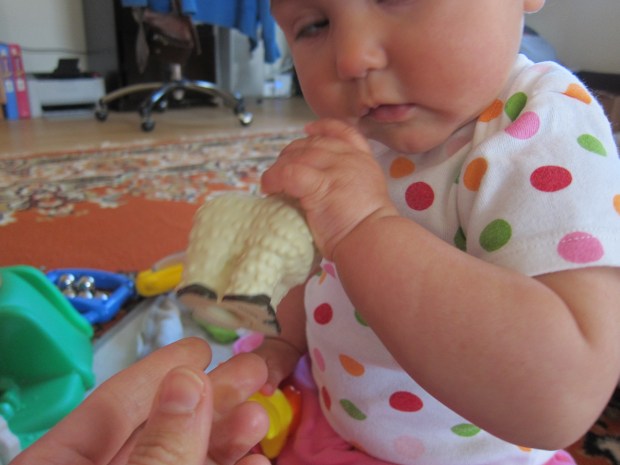
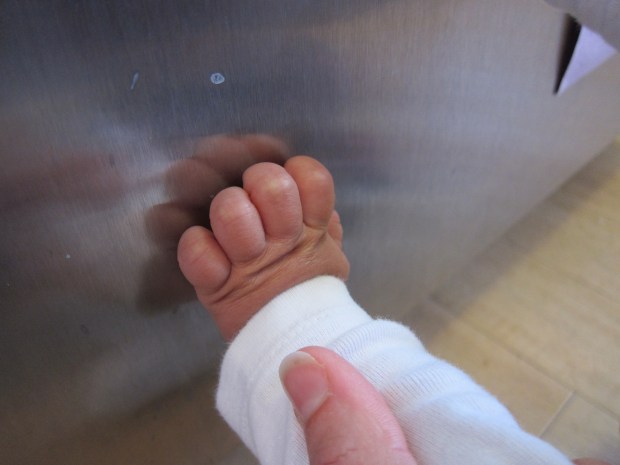
Veronika decided she liked eating clumps by hand rather than spoonfuls.

Breakfast Together (6)

Other meals that will fit into a Baby Led Weaning menu plus appeal to big kids include: English muffins with non-dairy cream cheese;

Biscuit Cream Cheese

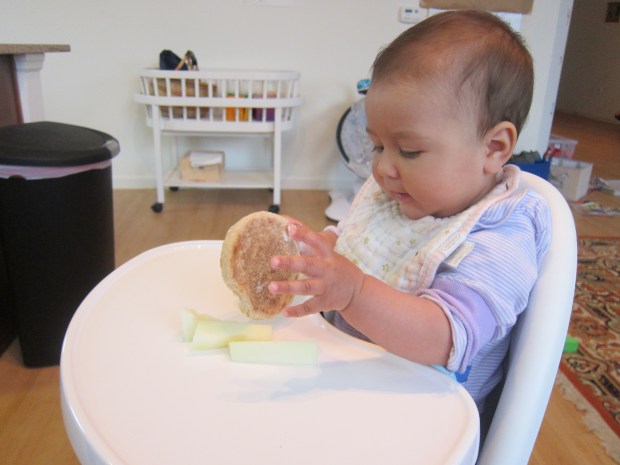
Melon – cut it into strips for baby, and cubes for big kids;

Biscuits Cream Cheese alt

Muesli made with oats, non-dairy yogurt, and chia seeds;

Muesli (1).JPG

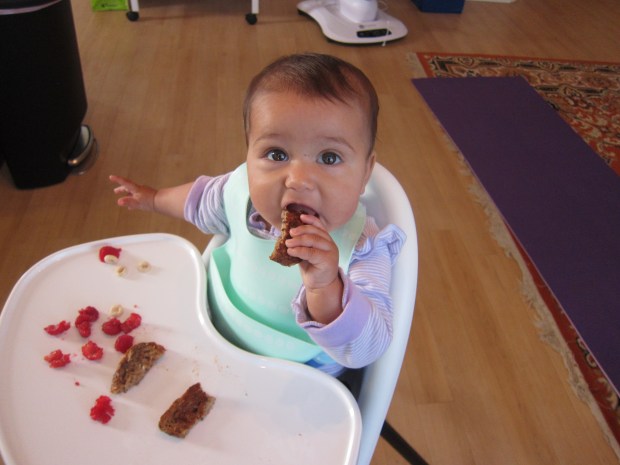
and French toast fingers!

french toast (b).JPG

For a super-easy French toast, dip slices of bread in a mixture of: 1 cup hemp milk, 1 tablespoon chia seeds, 1/2 teaspoon cinnamon, and 1/2 teaspoon vanilla. Cook for 4 minutes on each side and serve with raspberries.

french toast (c).JPG

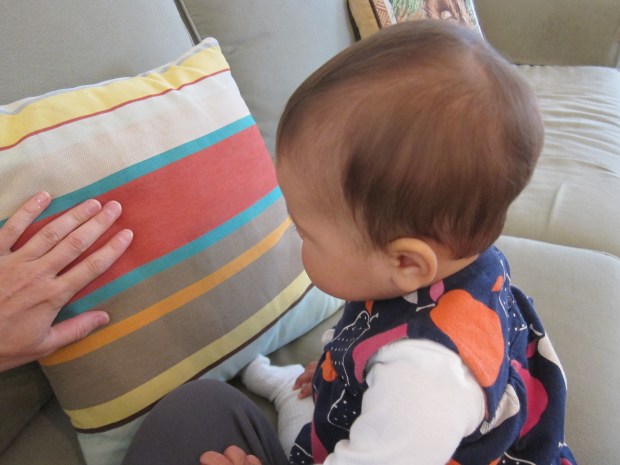
I also like to involve Veronika when I pause for my mid-morning snack. She loves to “share” my apple, and I always hand her my smoothie carton when I’m finished.

Breakfast Together (9)

Involving your baby in family meals right from the start will help set a great foundation for the years ahead.

Breakfast Together (3)

New Switch-It Game

New Switch It (7).JPG

In the past when I played “switch-it” games with Veronika, the idea was for her to practice letting go of a toy, dropping one in exchange for another. At just shy of 7 months, the goal this time was more sophisticated: to switch a toy from hand to hand, in order to make room for another. She aced the test!

Plastic farm animals were the perfect toy for this purpose. First I handed her a duck, which she passed hand-to-hand as she played.

New Switch It (1)

While it was in her left hand, I offered up llama, holding it up to the same hand.

New Switch It (2)

In a flash, duckie was in her right and llama was in her left!

New Switch It (3)

I praised the change she’d made, even though she didn’t entirely understand why.

New Switch It (4)

But she quickly soaked up the happy vibe and beamed proudly!

New Switch It (5)

Soon she was drumming the two animals together.

New Switch It (6)

Don’t worry if your baby doesn’t get this right away; keep practicing and soon he or she will be a hand-to-hand passing champ.

Popsicle Sticks Bow and Arrow

Bow and Arrow (9)

When your son requests a bow and arrow at 6 am on a Saturday, you pray to the craft gods that you have all the materials in your craft bin. And when in fact you do, it feels like a little miracle, especially when that includes wooden bobbins that I’d purchased only the day before for a different craft, but had never owned before. Clearly it was meant to be!

So here is the quite-complicated bow and arrow we put together. For my preschooler, it mostly meant watching mommy since it involves lots of hot glue. If your child is 8 year old and up, they can get more hands on!

First, glue together 6 jumbo craft sticks in an arc, securing at each meeting point with hot glue.

Bow and Arrow (1)

Repeat with 6 additional craft sticks for the other side of the bow. It’s very important that you line these up exactly right, or your two sides won’t glue together properly.

Bow and Arrow (2)

Although not necessary, we added reenforcements and embellishments with decorative craft sticks, making V and T shapes. Hot glue these down.

Bow and Arrow (3)

Add wooden bobbins at each of the craft stick intersections, gluing the right side of the bow to the tops of the bobbins and the left side of the bow to the bottom of the bobbins.

Bow and Arrow (4)

Ideally, we would have used a very stretchy elastic for the bow string. Since I didn’t have one that was large enough (the craft bin gods weren’t perfect!) we tied on two taut pieces of twine instead. This wasn’t ideal, but it worked in a pinch. Add duct tape around the center for a smoother arrow launch.

Bow and Arrow (5)

To prepare the arrows, insert two straws together and tape where they meet.

Bow and Arrow (8)

Hot glue a pom pom to one end and cut the other end into a V so it can notch onto your bow string. Again, what I had on hand (bendy straws) wasn’t ideal. Next time we’ll use thicker straight straws, which will make much sturdier arrows.

Bow and Arrow (6)

But my little knight/samurai/warrior now had a bow, and that was all that mattered!

Bow and Arrow (10)

We might not have had perfect launches, but we did have imaginative fun!

Bow and Arrow (11)

Be a Thoughtful Traveler

Thoughtful Travel (3)

The lesson that accompanied Travis’s Mango Sticky Rice from Raddish Kids was all about etiquette while traveling abroad – big stuff for a small four-year-old! I made it accessible with more of a role-play game and I liked giving him this intro to different customs.

First, I walked up to Travis and gave him a fist bump. Well, this got a look of surprise, not normally how mommy greets him!

Thoughtful Travel (2)

Do something similar to your child, whether a wave, a hug, a high five, or anything out of the norm. I explained that people around the world greet each other differently, and we were headed on a “trip” to find out more!

We checked out a good infographic with different greetings, and cut up cards with each country’s name on it.

Thoughtful Travel (1)

I asked him which one he liked best (everything from touching an elder’s feet in India to shaking fists in Niger), and he chose the Maori hongi greeting. To New Zealand we go!

That meant racing to his room to spot New Zealand on the map. “We have to fly far!” he exclaimed. For role-play fun, pack a bag. Travis decided he needed a comic book and a bathing suit.

Thoughtful Travel (4)

Off to the plane! The country name card became our plane ticket, which he loved hole punching.

Thoughtful Travel (5)

We mimed getting into our seats and flying.

Thoughtful Travel (7)

I could get used to this travel without the hassle! In no time we were in “New Zealand”, and now we could do the hongi.

Thoughtful Travel (8)

We also tested out a high five, a traditional Thai wai, and more, each time first pinpointing the country on his map, and then boarding our airplane.

Thoughtful Travel (6)

There’s a lot in this lesson that we didn’t do. For extension with older children, ask lots of questions about what it will be like upon reaching their destination. Reflect on what it means to be “thoughtful” in another country. Have your child pick a country and learn the traditional greeting, then design a way to teach their peers about it, whether through a travel brochure, song, dramatization, or other medium. You could even play World Greeting Charades!

Babble with Baby

Baby Babble (1)

Veronika is definitely trying to tell us (and her toys!) something these days; that girl can babble! And she keeps up a steady stream of chatter when she plays or looks at us these days, as if to say, “Can’t you understand me?”.

In the past, I’ve advocated turning your baby’s syllables into words. “Ga” can become garage or goose, for example. But today, I flipped that around. If she “hmmmed,” I “hmmmed” back at her. If she said “ga ga ga” (a favorite these days), I replied “ga ga ga” or “la la la”, trying to pick up on her rhythm.

Baby Babble ($)

Wouldn’t you know, she loved it. It was as if I had learned her language, and she was praising me!

Baby Babble (3)

One way to get her going is to read the newspaper by her side. I read my news and she “reads” her Hello magazine. Pretty soon she was babbling up a storm. I responded back with my own sounds – all the news that’s fit to babble!

Baby Babble (2)

We kept it up all day, and big brother Travis loved it. “Everyone talk like Veronika!” he said on our walk. You can see her delight when he copied her.

Baby Babble (5)

This was a great way to get an older sibling more focused on your baby’s sounds, especially if they are frustrated that baby isn’t “talking” yet.


Take a Texture Trip

Texture Trip (3)

The other day, Veronika and I took a listening trip around the house, giving her plenty of auditory sensory play. Today, it was time to take a texture trip!

As with sounds, this is one of those activities that might seem simplistic, but your baby will never know these words and sensations if you aren’t the teacher! So we paused at some obvious contrasts. Cold fridge and hard wood floor.

Texture Trip (1)

Fluffy carpet:

Texture Trip (6)

Smooth pillow:

Texture Trip (2)

Soft towels:

Texture Trip (4)

Don’t feel like your need to stick to your child’s hands, either; rubbing a fabric on a baby’s cheek or leg is a great new sensation. Here’s Veronika feeling mommy’s silky scarves.

Texture Trip (5)

We also sought out toys today with lots of texture. She especially loves elephant’s crinkly ears!

Texture Trip (7)

In sum, have fun with this, and be sure to use lots of descriptive language and find exciting contrasts around the house. What textures will you show your baby? Please share in the comments!

Carved Fruit Swan

Thai Fruit (6).JPG

As a fun bonus to compliment his Taste of Thai recipes, Travis learned to make a fruit sculpture today, a popular activity with a rich history in Thailand!

To start, juice one lemon.

Thai Fruit

Add the lemon juice to a measuring cup and fill with water to equal 1 cup. This will prevent your apple slices from browning as you work – be sure to dip each slice in the mixture before adding to the “swan”.

Cut an apple into three pieces vertically, so you have two rounded sides and the core.

Make two slits in the core piece to resemble the shape of a swan’s neck, as shown; discard the rest of the core, but save two seeds for the eyes!

Thai Fruit (2)

Now cut the round edge from one side piece, so it sits flat.

Thai Fruit (3)

Add the swan neck, securing with a toothpick. The toothpicks were Travis’s favorite part, and when our actual sculpting was complete, he loved adding a few more toothpicks just for fun!

Thai Fruit (4)

Thinly slice the remaining side piece of apple. Start adding to the base of the swan, using the largest pieces first and ending with the smallest.

Thai Fruit (5)

This was not only a great craft, but a fantastic snack as well. There was something about tearing apart a sculpture before eating that greatly appealed to Travis, too – go figure!

Thai Fruit (7)