Spaghetti Fun

spaghetti-fun-8

We haven’t played with cooked spaghetti in quite some time – so I was curious to see if Travis would interact differently with the game this time around. Low and behold, things were very dissimilar.

Unlike last time, now Travis was old enough to help with set up, too. First, I cooked a full box of spaghetti, and divided it into three bags. Travis helped me add food coloring to each bag, and loved squishing the bags until the color was dispersed.

spaghetti-fun-2

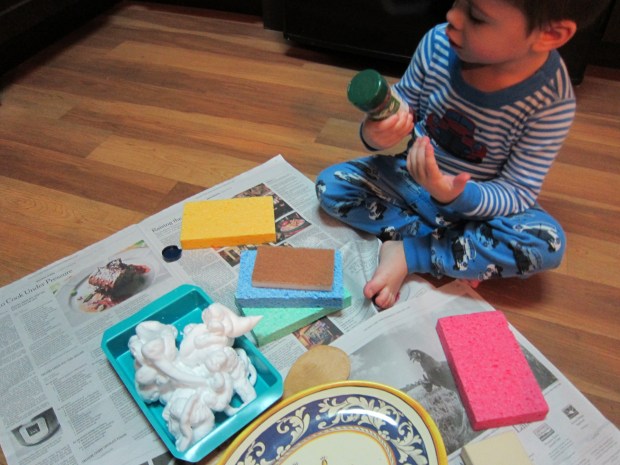
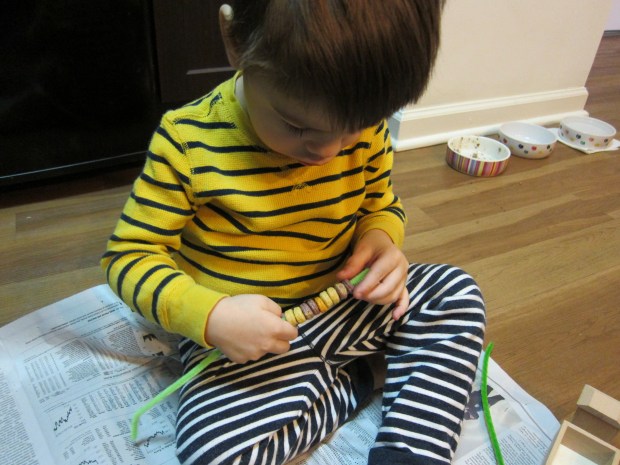
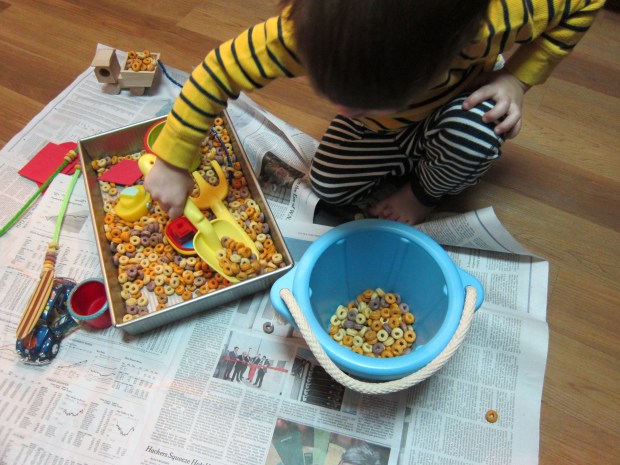
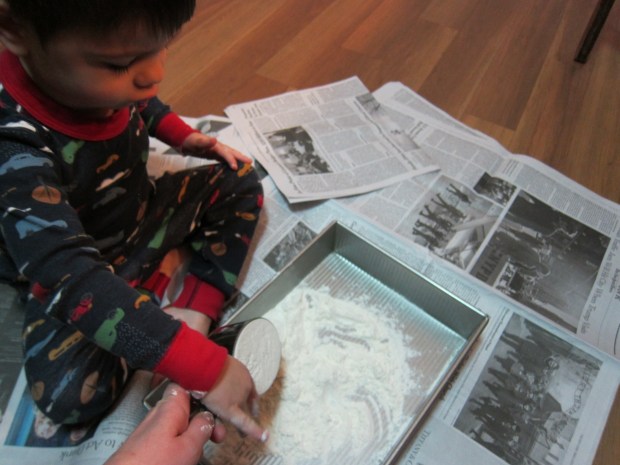
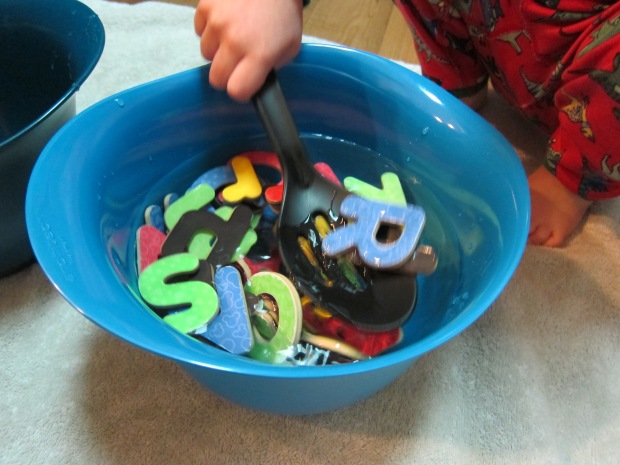
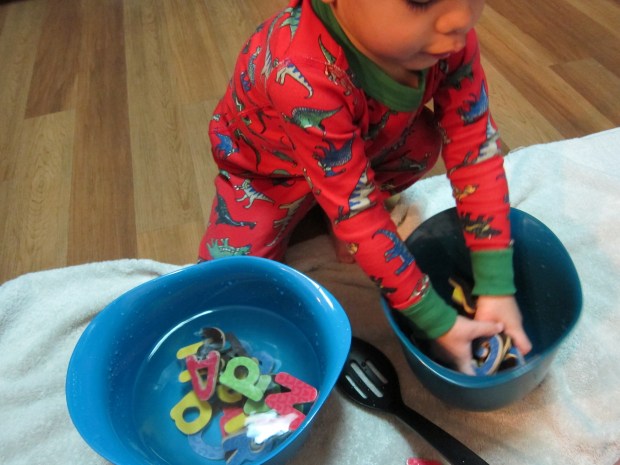
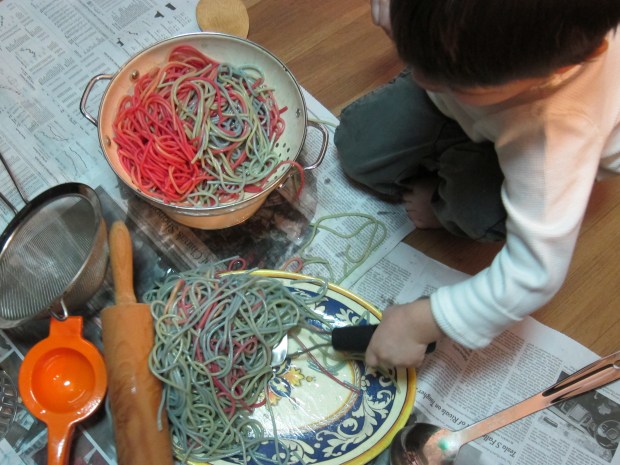
I set up an area on the floor with colanders, trays, and kitchen utensils, and let Travis have at it. Surprisingly, he didn’t want to touch the spaghetti this time around, always using either a utensil or asking me to help pick it up. But that didn’t deter him from experimenting with stirring:

spaghetti-fun-6

rolling pins:

spaghetti-fun-3

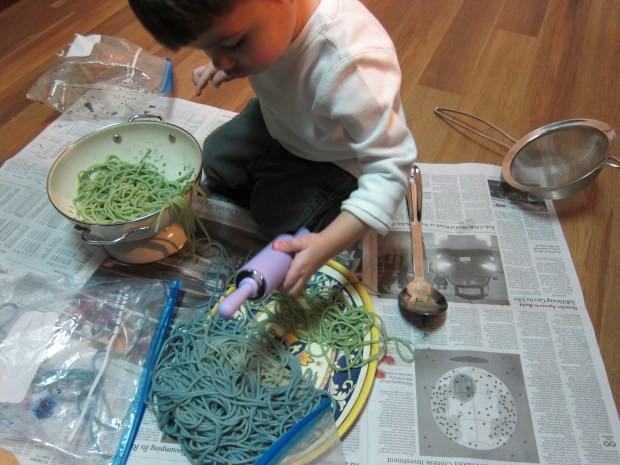
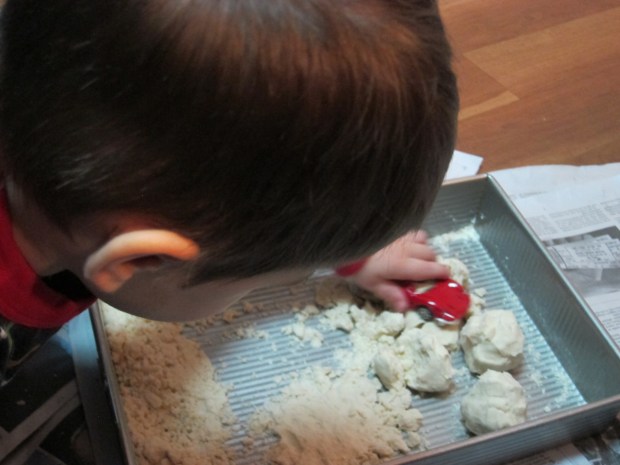
and mashing with a mallet. His favorite was to squeeze a portion of the spaghetti in an orange juicer and make “pies,” and he had fun telling me which colors to add to each pie e.g. “Red and green for this one!”

spaghetti-fun-5

I thought maybe the spaghetti was too sticky for his hands since I didn’t coat it with any oil, so he helped me drizzle on a little canola oil. Even then he didn’t want to touch the stuff. Oh well, it still made for great exploration!

spaghetti-fun-7

Overall, the game was very different from his play at 20 months old, when he just used his hands to transfer spaghetti back and forth. This time we talked a lot about the colors, and used our imaginations for a fun spaghetti bake shop.

spaghetti-fun-4

Chunky Monkey Smoothie

chunky-monkey-smoothie

This is a power-packed smoothie that my son and husband both love! One batch makes enough for about 2 adult portions or about 4 child-sized portions. Look for vegan protein powder brands such as Vega or Biochem Fitness.

Ingredients:

  • 2 cups frozen banana slices
  • 1 cup loosely-packed baby spinach
  • 1/4 cup cashew butter
  • 3 tablespoons chocolate protein powder
  • 3 tablespoons shredded coconut
  • 2 tablespoons cocoa powder
  • 1 tablespoon maple syrup
  • 2 cups plain coconut milk
  1. Combine all of the ingredients in a blender and process until smooth. Enjoy!

Rock Box

rock-box-9

If your child likes collecting rocks, this craft not only lets you decorate with your latest finds from outside, but also gives your tot a place to store future treasures!

In the morning, I showed Travis the plain wooden box I had purchased (from Creative Hobbies) and asked him if he wanted to fill it with treasures. Of course the answer was yes!

It was a cold, gray morning, but that didn’t deter my little rock hunter. We headed out to our building’s courtyard to select some special rocks to take home.

rock-box-1

If it’s not too snowy in your area, head along a local nature path and see what treasures you find, not necessarily just rocks.

rock-box-2

Once home, we sorted our collection, and selected the smaller rocks to glue to the top of the box.

rock-box-3

As always, Travis loved squeezing glue, but pressing on the rocks was the novel part here, so much bigger than the objects we normally glue down.

rock-box-6

I left the box to dry overnight, and then pulled out the paints the next morning.

rock-box-8

We used a combination of silver and purple, giving our rock box a glittery, space age-y feel. Travis was very intrigued with how it felt to paint over the bumpy rocks, and loved covering every surface of the treasure chest.

rock-box-10

Once dry, it was time to store our remaining rocks inside! What treasures does your child like to collect? Please share in the comments.

rock-box-12

DIY Frog Pond

frog-pond-5

With a few rubber frog bath toys and lily pads cut from craft foam, you can turn your child’s bathtub into a magical frog pond!

I set the game up shortly before bath time, with Travis in a bathing suit just in case things got splashy!

frog-pond-1

Fill your tub with water and add the “lily pads”, frogs, and a few other fun toys that fit the theme – we also added a rubber turtle, a cup for pouring, and a net. Consider adding other pond elements you have at home, like rocks or rubber snakes!

frog-pond-3

Travis immediately grabbed the net and began fishing the frogs and lily pads from the water, which he thought was pretty much the best game ever.

frog-pond-6

He also used a beach rake to skim among the lily pads. I thought he would be more into hopping the frogs from lily pad to lily pad, but he preferred simply to catch them or swish them around in the water.

frog-pond-4

He also liked filling a plastic cup with water to rain down over the frogs.

frog-pond-8

And perhaps the biggest delight of all: after we drained the water, he lined them all up on the side of the bath and then had them jump into the empty tub – a feat we had to repeat several times!

frog-pond-9

I definitely want to try this activity again with an outdoor water table in the summer. Having access to all four sides, rather than just one side of the bathtub, would no doubt make it even more enjoyable.

Shaving Cream Bakery

shaving-cream-bakery-6

With leftover shaving cream in the can from our shaving cream paint earlier this week, today we turned our kitchen into a shaving cream bakery!

All you need to set up a bake shop for your tot are large kitchen sponges, a few kitchen utensils, and a dose of imagination.

shaving-cream-bakery-2

Travis really enjoyed smearing the shaving cream onto the sponges with a plastic utensil:

shaving-cream-bakery-4

Then I showed him how to layer two sponges together to create a layer cake.

shaving-cream-bakery-5

For an extra realistic effect, I added a drop of red food coloring to sea salt and put it in an old spice shaker, which meant Travis could add sprinkles!

shaving-cream-bakery-1

After he made a couple of “cakes,” he simply enjoyed shaking the sprinkles directly into the tray of shaving cream I had set out, and stirring all that together into a big mess.

shaving-cream-bakery-8

Other than layer cakes, what would you make in your bakery? I’d love to hear about any cupcakes or frosted cookies that your kids create! Please share in the comments.

shaving-cream-bakery-7

Blueberry Lassy Muffins

blueberry-lassy-muffins

Whip up a batch of these molasses-infused muffins for breakfast or snack time.

Ingredients:

  • 2 and 1/4 cups whole wheat flour
  • 1/4 cup sugar
  • 1 teaspoon ground cinnamon
  • 1/2 teaspoon ground nutmeg
  • 1/4 teaspoon sea salt
  • 1/4 teaspoon ground ginger
  • 2 teaspoons baking powder
  • 1/2 teaspoon baking soda
  • 2 tablespoons molasses
  • 1/2 cup unsweetened applesauce
  • 3/4 cup nondairy milk
  • 1/3 cup maple syrup
  • 1 teaspoon vanilla extract
  • 3/4 cup blueberries
  1. In a large bowl, combine the flour, sugar, cinnamon, nutmeg, salt, ginger, baking powder, and baking soda; stir until well combined.
  2. In a separate bowl, whisk together the molasses and applesauce, then add the milk, maple syrup, and vanilla.
  3. Add the wet ingredients to the dry ingredients, and then fold in the blueberries.
  4. Divide the mixture evenly among 12 muffin cups coated with cooking spray. Bake at 350 degrees F for 23 minutes; transfer to a wire rack to cool.

We like them best warm with a little pat of Earth Balance butter!

Fruit Loop Sensory Bin

fruit-loop-1

If sensory bins are great… edible sensory bins are even better! The original idea for this game called for Froot Loops, but for a healthier version, we used Cascadian Farm’s Fruitful O’s. They’re not quite as colorful as Froot Loops, but the colors are all natural and the cereal is vegan, meaning Travis could play and snack at the same time.

fruit-loop-7

To punch up the rainbow nature of the bin, I added colorful plastic cups, red craft foam cut into various shapes, a bright yellow beach shovel, and a few toy cars that fit the mood of the bin.

fruit-loop-2

Travis didn’t need any prompting to get started. He used the cups to pour the cereal back and forth…

fruit-loop-3

…and to load up the dump truck.

fruit-loop-4

It only took about three minutes before he took his first bite, and his eyes popped with delight. From there it was play a little, nibble a little, play a little, nibble a little, which I was just fine with since it was sort of the point!

fruit-loop-5

I threaded some of the cereal onto a pipe cleaner, thinking it might be fun to eat a “kebab” snack as he played, but to my delight, he preferred to thread loops onto his own pipe cleaner. Great for fine motor skills!

fruit-loop-6

He then requested a bucket, so I pulled out an old beach pail and he was busy shoveling the cereal into that for a while.

fruit-loop-9

Overall, an effortless game to put together with joyful rewards.

fruit-loop-8

Toddler Stained Glass Window

stained-glass-14

This art project is gorgeous in a window hit by direct sunlight, and your toddler will be unable to resist the sticky surface!

While Travis was asleep, I cut scraps of multi-colored tissue paper and crepe paper, and arranged them in a bin. I then drew little floral motifs and various shapes on a large piece of contact paper with permanent markers.

Tape the contact paper, sticky side out, to a window and leave it for your toddler to find. In the morning, it only took Travis about 5 minutes. “Mom, you drew clouds!” (Well, I was going for flowers, but good enough!)

stained-glass-1

Now that he had spotted it, I brought over the tissue paper scraps and showed him how they adhered to the paper.

stained-glass-5

He tested out a few pieces, and then became very interested in the tissue paper itself for a while.

stained-glass-4

His favorite way to attach the pieces was by crumpling them into balls first, an idea I hadn’t even considered!

stained-glass-7

It was a project that we didn’t do all at once, bur rather one that he returned to over the course of the day. He also discovered how sticky the contact paper felt if he pressed it with his fingers!

stained-glass-9

The project was best when we had gorgeous sunlight spilling in at midday. “Look at our stained [glass]!” he exclaimed, and added a few more pieces.

stained-glass-11

Because I wanted him to have a real-world reference for the art we had created, we also popped into a local cathedral to marvel at the stained glass there.

stained-glass-15

Be sure to leave your artwork up in the window for a few days to enjoy it!

stained-glass-13

Cloud Dough

cloud-dough-2

Let’s be honest: the giggles and joy are so worth it when we break out a big tray of flour and let our toddlers go wild, but as a parent, you have to psych yourself up for it… Am I right? Flour is going to fly up in the air, flour dust is going to get everywhere, and you’re probably going to wind up mopping the floor.

Solution? Baby oil! Flour + baby oil results in a fantastic mixture that is as fluffy as a cloud, but sticks together in your hands when you squeeze it. This not only means you introduce novelty to your child’s flour play, but clean-up is much easier. I’m not saying you won’t get messy, just that clumps are easier to clean than flour dust!

So this game is totally worth the effort. In a bowl or tray, combine about 2 cups flour and 1/4 cup baby oil. Travis of course had to help, as soon as he saw me break out the measuring cups.

cloud-dough-1

Knead the mixture until you have something that is fluffy and light, but sticks together when pressed, adding more oil if needed.

At first Travis just wanted to sprinkle the mixture all around, but I soon showed him we could shape it into “snowballs.” He was fascinated, and his favorite thing to do was use a car to smash the snowballs, which went on for some time.

cloud-dough-4

Then, to experiment with the mixture’s other texture possibilities we made it “snow” down on the cars softly.

cloud-dough-7

He also loved pressing the mixture until it was very firm in the bottom of the pan, at which point you can make hand prints…

cloud-dough-6

or roll toy cars across for tire tracks.

cloud-dough-3

From a purely sensory point of view, the mixture feels fantastic, almost therapeutic – so parents, dive right in there and get your hands messy!

cloud-dough-5

Fishing for Letters

fishing-for-letters-5

When I considered whether or not to play this game, I thought it might be too simple for Travis at this stage… but he adored it!

To set up, I put all of our magnetic alphabets in a bowl. You could also use foam puzzle letters. He instantly wanted to know what I was doing, and followed me around the apartment while I gathered the rest of the supplies – a towel to cover the floor, a second bowl, and a slotted spoon.

fishing-for-letters-1

I added water to the bowl with the magnets, and this bowl and the empty bowl in front of Travis and asked him if he could transfer the letters with the slotted spoon. He didn’t hesitate a moment.

fishing-for-letters-3

At first, he was simply so excited with the mechanics of the slotted spoon (i.e. that the water trickled out but the alphabet letters stayed on) that he couldn’t concentrate on the letters at all. The letters went back and forth several times this way.

fishing-for-letters-7

Then he wanted to move the letters with his hands (have a dry shirt ready and waiting for when the game is done, because sleeves are likely to get wet!).

fishing-for-letters-8

Eventually, the initial excitement wore off and he began transferring the letters more deliberately and slowly, telling me which one he was holding, which had been my ultimate goal for this project.

Perhaps because of our Letter of the Week play, I haven’t concentrated on the full alphabet in a long time, so this was a great refresher course to make sure Travis remembers all his letters, whether in order or out of order. I was ultimately so glad I selected this as a project for our morning.

Once he tired of transferring letters, Travis asked if he could have the buckets without water, so we drained what was left, and he proudly carried his bucket of letters into the living room and continued to play with them for some time, making alphabet soup and telling me he was setting up a bakery.

fishing-for-letters-9

In sum, this was a great morning game that involved almost no forethought or special equipment, provided both tactile and educational learning, and couldn’t be easier to set up or clean up.

fishing-for-letters-6