Hairy Head

hairy-head-6

Here’s an adorable gardening project that can be done indoors in the winter. We only just planted our grass-haired man today, so I’ll update this post when and if the “hair” appears.

First, draw a face on a Styrofoam cup using markers. Travis made great eyes, as well as lots of squiggles, and I drew a complete face on one side as well.

hairy-head-2

Travis’s favorite part of the activity by far was shoveling in the dirt. He happily would have kept doing so all day except our cups were filled.

hairy-head-4

Sprinkle grass seed near the top (we used catgrass, which means hopefully our cat can enjoy the final product as well), and cover with a little more soil.

hairy-head-5

We watered the soil and then set the cups aside – hoping to see grass sprout in a few days!

G week (11).JPG

Update: Not only did our man sprout a hairy head of grass, the grass grew so fast we could hardly believe our eyes. Here are the sprouts after a couple of days:

Hairy Head.JPG

And here is our man sporting a full head of hair!

hairy-head-alt

Travis loved running his hands through the grass blades.

hairy-head-var


Chocolate Graham Crackers

chocolate-grahams-4

It can be hard to find vegan graham crackers at the store without having to special order, but this chocolatey version is surprisingly easy to make at home. Let kids help with the cookie cutters!

Ingredients:

  • 1 cup all-purpose flour
  • 1 cup whole wheat flour
  • 1/4 cup sugar
  • 1/4 cup cocoa powder
  • 1 teaspoon baking powder
  • 1/2 teaspoon salt
  • 1/4 teaspoon cinnamon
  • 1/2 cup Earth Balance butter
  • 2 tablespoons maple syrup
  • 1/2 cup water
  • 1 teaspoon vanilla extract
  1. Combine the flours, sugar, cocoa powder, baking powder, salt, and cinnamon in the bowl of a food processor, using the dough blade. Pulse until combined.
  2. Cut the butter into small pieces and drop over the flour mixture. Process until the mixture looks like coarse meal.
  3. Add the maple syrup, water, and vanilla; process until a wet dough forms.
  4. Scrape the dough out onto a well-floured surface and pat into a flat disk. Wrap in plastic wrap and refrigerate for at least 1 hour – it will firm up considerably during this time!
  5. On a lightly floured surface, roll the dough to about 1/8-inch thick. Cut into squares, or have children help cut into circles or any other shape with cookie cutters. Transfer the graham crackers to a baking sheet lined with parchment paper.
  6. Prick each cracker several times with a fork, then bake at 350 degrees F for 15 to 18 minutes, then transfer to a wire rack to cool completely.

graham-alt

Our favorite way to eat them – aside from plain – is spread with apple butter.

chocolate-grahams-3

For extra decadence, sprinkle the tops with cinnamon-sugar before baking. My perfect sugar-to-cinnamon ratio? Keep a container in your pantry with two teaspoons cinnamon stirred into 3/4 cup sugar.

graham-fix

A is for Alligator

a-for-alligator-2

Letter-shaped animals are a cute way to bring letters to life for your little one. The letter A lends itself perfectly to the big jaws of an alligator!

I cut a letter A from green construction paper, and several triangles from white paper to be the teeth. Attach the teeth to the sides of the A with glue.

a-for-alligator-1

Travis’s favorite part of the craft was applying the glue so we could add buttons as “scales,” a task he took very seriously! We used green buttons for the scales and 2 blue buttons for eyes.

a-for-alligator-3

Voila, A is for Alligator… Watch out or he might eat extra buttons!

a-for-alligator-4

What other letter and animal pairs can you think of? Please share in the comments!


Oatmeal Pancakes

oatmeal-pancakes-3

I’ve been looking for a way to make pancakes healthier than flour and sugar, and boy does this recipe, adapted from Vegan Lunch Box, deliver!

  • 1 and 3/4 cups oat flour
  • 1/4 teaspoon salt
  • 1/4 teaspoon cinnamon
  • 3 tablespoons ground flaxseed
  • 2 cups vanilla almond milk
  • 1 tablespoon applesauce
  • 1 tablespoon maple syrup
  • 2 teaspoons baking powder
  1. Combine the flour, salt, and cinnamon in a bowl; set aside.
  2. in  blender, combine the flaxseed, almond milk, applesauce, and maple syrup; blend for about 1 minute, until well combined. Add the wet ingredients to the dry ingredients and whisk until smooth.
  3. Let the batter sit for 10 minutes while you preheat an oiled griddle or skillet.
  4. Add the baking powder, and pour the batter into the skillet. Cook until the edges are browned and bubbles cover the tops, then flip over and cook an additional minute or two.

This batter definitely works best with small pancakes – perfect for kids’ appetites anyway!

oatmeal-pancakes-1

Serve with a little Earth Balance butter and a drizzle of maple syrup

Sticky Winter Wall

sticky-winter-wall-8

We loved this idea so much from our blogging friend at D.I.Y. Unlimited Fun that I had to put the game together right away for Travis! Luckily, I keep contact paper on hand for precisely these situations.

I attached a large rectangle of contact paper to a low wall, sticky side out, and provided Travis with various “wintry” items – cotton balls, cotton pads, and white q-tips.

sticky-winter-wall-4

He barely needed me to demonstrate before avidly diving in to create a winter scene.

When we made a snowman, he came up with the cotton pad hat and q-tip arms all by himself.

sticky-winter-wall-2

I also showed him how to make snowflakes with q-tips in a pretty pattern.


sticky-winter-wall-3

His favorite discovery was that the cotton balls left behind a bit of fluff if you pulled them up off of the contact paper. He loved dabbing one onto the paper several times, leaving a “snowy” scene behind.

sticky-winter-wall-7

Thanks for the fantastic idea!

H Week!

H week (20).JPG

Here we are in H week, still loving the novelty that comes from focusing on a particular letter each week. Without any further ado, here is what we enjoyed:

h-week-2

Hammers: I kicked off H week by pulling out all of Travis’s toys that involve a hammer, including some he hasn’t used in months. Some, meant for younger toddlers (including what I fondly call toddler whack-a-mole), he never paid much attention to before, but loved this week. It’s always a nice idea to bring out old toys and look at them with fresh eyes.

h-week-10

House: H is a great prompt to talk about the words “house” and “home,” including who lives in a house, and what makes a house a home. Dollhouse sets are a great way to learn the different room names or types of furniture, as well as a great prompt for the imagination. We have a neat one that assembles in different configurations and stores flat, but if you don’t have a dollhouse at home, check your local library’s play area.

h-week

Horse: Pull out any barn toys you have, with emphasis on the horses this week. Our nice variety includes a latch barn (great for fine motor skills), as well as a Playmobil set that had Travis pretending to care for and clean up after his horses. If the weather is right and there is one in your area, you might consider visiting horses at a farm or sanctuary!

h-week-16

Hibernation: I snuck in a little science with this word, teaching Travis that some animals hibernate (take a long nap) during the cold winter months. We had a berry snack to fortify us, then “slept” in a cozy den of blankets and pillows. When it was “spring,” we woke up, we stretched, and dined on more berries. Invite your stuffed animals to join in for cozy hibernation fun.

h-week-7

Hula hoops/hula dance:  Hula hoops make for great play – jumping into, using in an obstacle course, or rolling around the room. Travis looped his over his shoulders and spun in a circle, an adorable first foray into using one around his waist. You can also toss bean bags inside a hula hoop for a color-matching game.

h-week-4

Following up on the word, I made Travis a rather silly hula skirt, simply attaching green crepe paper to a child’s belt. He loved the hula dance party that ensued!

h-week-5

Hats: Play a game of guess-that-hat; show your child pictures of different hats – policeman, firefighter, construction worker – and see if they can identify which profession each one belongs to. To do this, we used the hats on our Joey magnetic doll, but you could also cut pictures from magazines. Try reading the sweet book Which Hat is That by Anna Grossnickle Hines before you play the game.

And our weekly extras…

Fine art: Make handprints of course! This painting project was easily Travis’s favorite moment of the week, impishly getting his hands goopy and slapping them down to make prints.

h-week-12

He liked seeing how the paints mixed together, and turned his hands different colors.

h-week-11

Food: Not exactly the healthiest fare, but Travis dined on Hawaiian pizza (pineapple and Tofurky ham on pizza), and hot dogs (well, tofu pups). In a healthier vein, serve honeydew melon.

h-week-13

Books: Some great picks from the library included: Hug Time by Patrick McDonnell, Hello! Goodbye! by Aliki, and Hide & Seek by Il Sung Na.

h-week-19

Songs: Two songs with H in the title are perfect for interactive and silly fun. First, teach your child the Hokey Pokey. Travis got a kick out of seeing me do the silly dance before joining in. You can also watch online, sure to elicit smiles. Then we acted out the classic If You’re Happy and You Know It.

Math: I introduced the notion of hours, thanks to a new teaching clock toy that Travis received over the holidays. Since he’s only 2 and 1/2, I stuck to hours for now and didn’t bother with the various minute positions of a clock, but Travis took right to it. Then we made a big floor clock with the numbers, and Travis was the “hands” of the clock, pointing to the hour I asked for.

h-week-17

You can also talk about halves: draw the top half of a person and enlist your child to draw the bottom half – legs, feet etc. If this seems too complicated, simply draw shapes and draw a line dividing them in half, or color the halves different colors.

h-week-15

Goodbye until G week…

I Week!

i-week-27

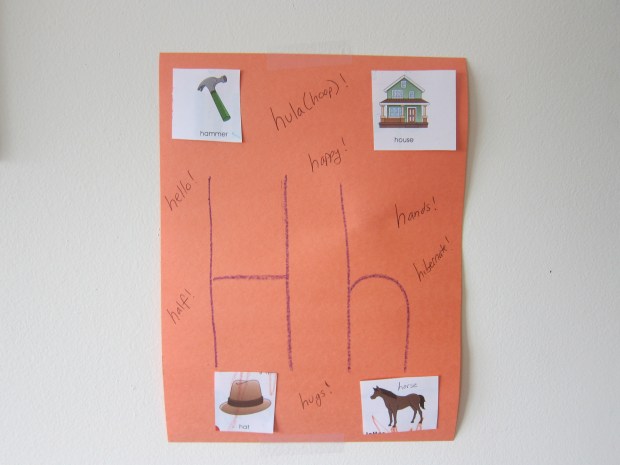
I was so happy with the items on our agenda this week, continuing our Letter of the Week journey. The letter I happens to lend itself to games that were right up Travis’s alley. So we started with…

i-week-1

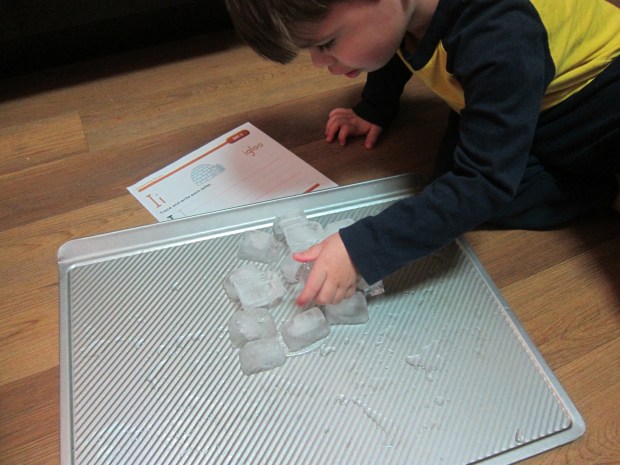
Ice/Igloo: The perfect words for games in the middle of winter, we kicked off the week with icy cold fun, building an “igloo” from ice cubes. When he tired of that, Travis loved watching the ice cubes melt. He would scrape them over a baking sheet, pour the melted water onto a towel, and then return to the task over and over. Endless entertainment!

i-week-21

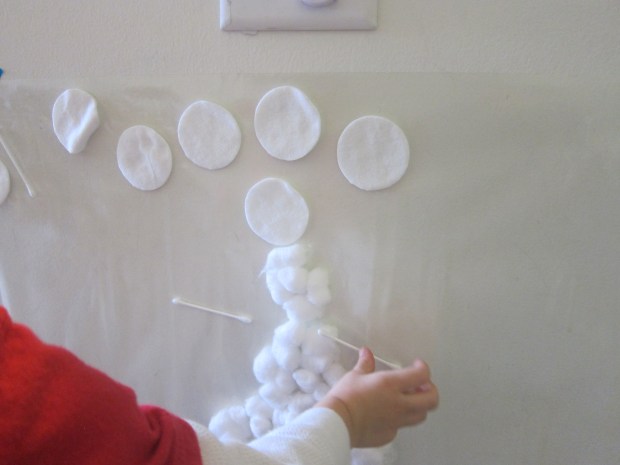
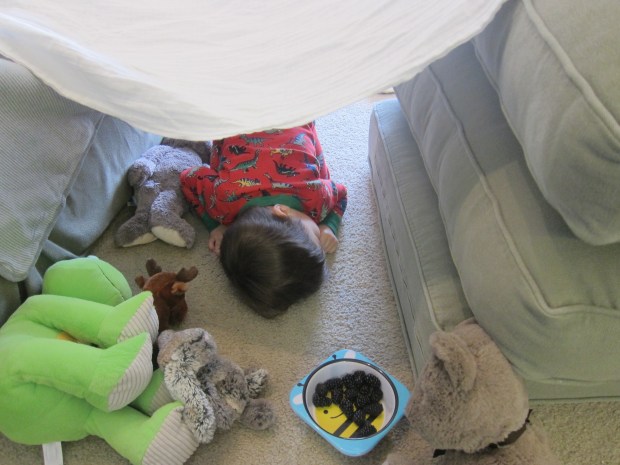
After we discussed what real igloos are, we made a life-size one from couch cushions and white blankets that he could wriggle inside of.

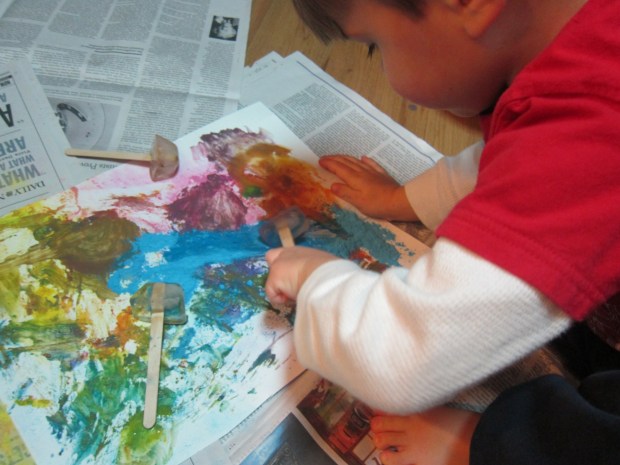
Our ice games didn’t stop there. We’ve painted with frozen paint before, but this time we turned ice cubes themselves into the paint brushes. Simply freeze Popsicle sticks into the cubes of an ice cube tray, and sprinkle powdered paint on paper.

i-week-4

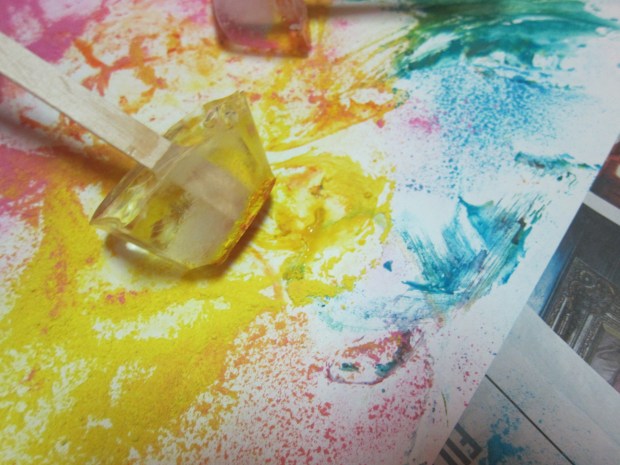
Let your ice “brushes” thaw just a little before applying over the powdered paint; Travis loved watching the colors swirl and mix together.

i-week-6

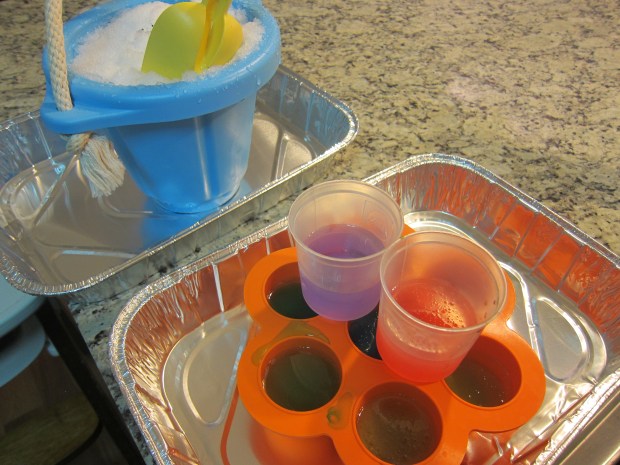
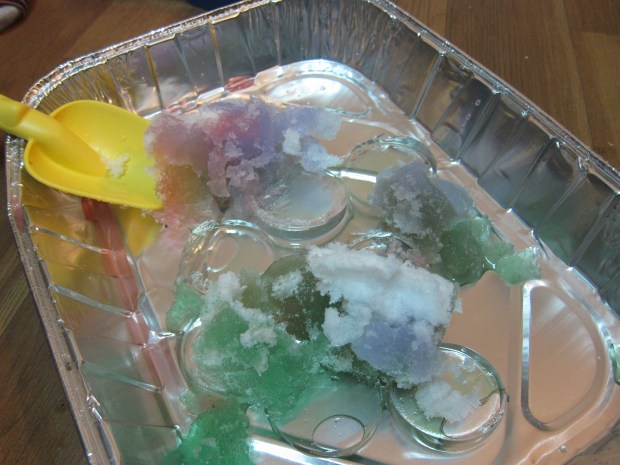
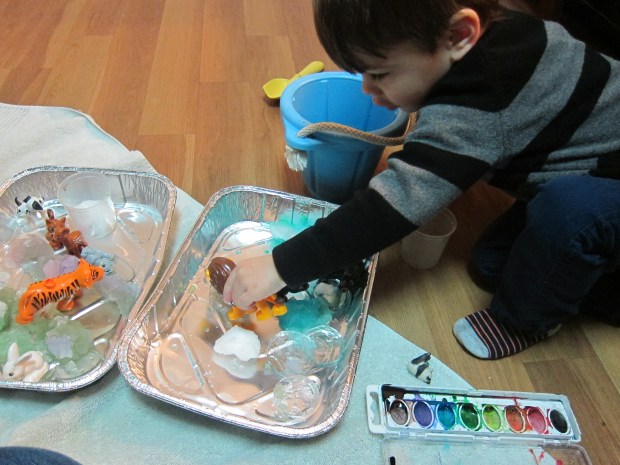
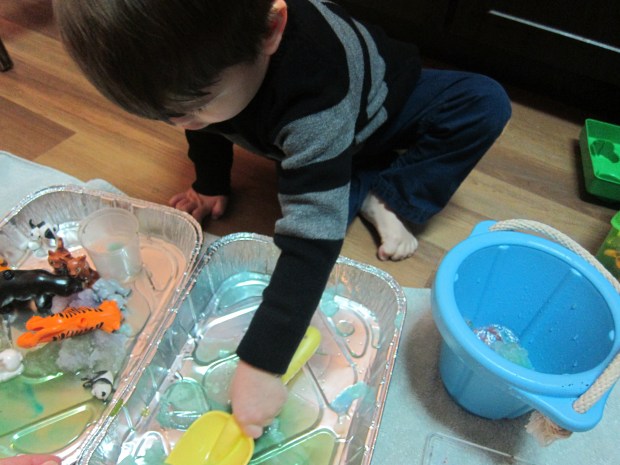
In addition, we released toys that had been frozen in ice during bath time…

i-week-7

…and made ice luminaries and ice towers, projects so fun that they merited their own blog posts.

i-week-16

Imagine: This word well applies to every week in the life of a two-year-old, but this week I stressed the point whenever we imagined during play. One game that hones imagination is to pull out any hats around the house. As your child dons each hat, have him or her imagine who they are. Travis liked being a “soldier” in a fedora, and also pretended to be the Snowman from the classic video of the same name. We also enjoyed playing with a king’s crown.

i-week-18

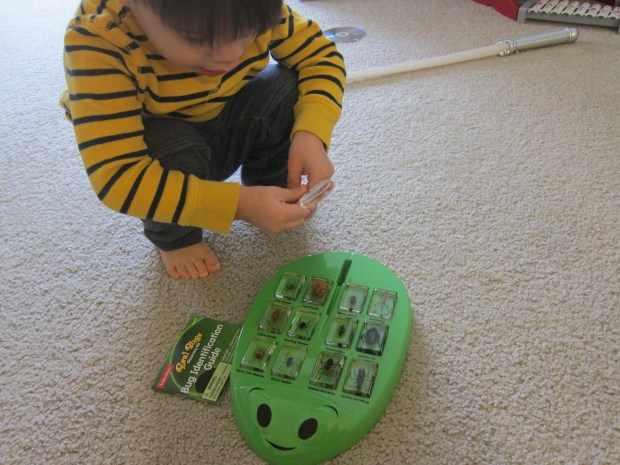
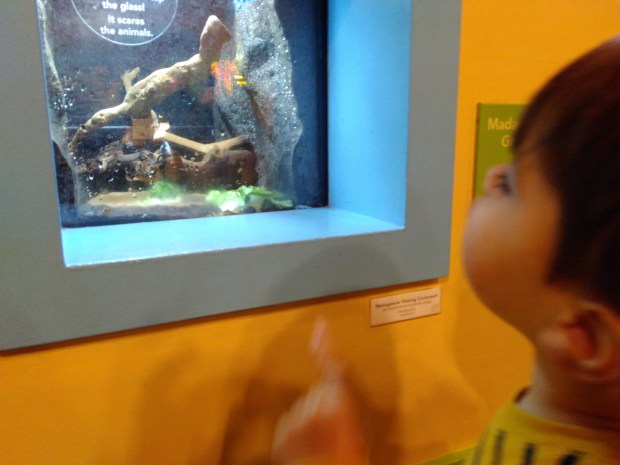
Insects: Travis adores bugs, but this week I taught him that insect is a “fancy” word for bug. We played with the bug kit he has at home, but also took a field trip to the local children’s museum, where he could see cockroaches, stick bugs, and more.

i-week-10

Indoor: I week was the perfect chance to stress the difference between indoor and outdoor voices. Travis latched right on to the concept, and loved waiting just until we were outside of the library to switch from a whisper to a yell.

i-week-25

Focusing on the words inside/indoor was also a great way to make indoor winter fun feel special… We set up an indoor beach on a yucky rainy day! We went all out, with palm trees on the wall (use brown construction paper for trunks and green crepe paper for fronds), beach towels, and even bathing shorts worn over pants. I pulled out beach toys and added Hawaiian music in the background as the finishing touch. And of course this was another great game for the imagination.

i-week-14

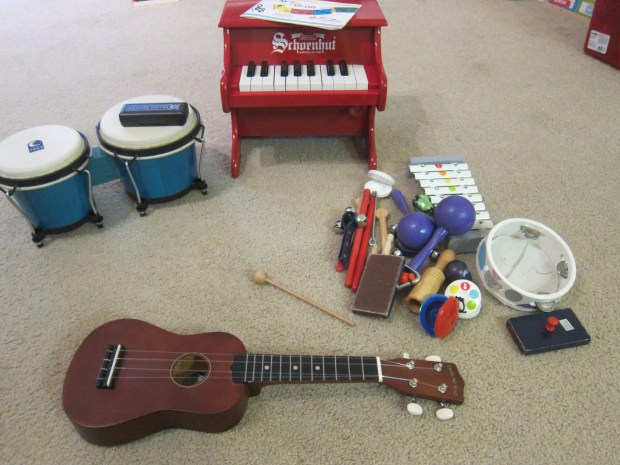
Instruments: I made a big pile of our all instruments, and we got in exercise marching around. We also enjoyed the instruments in the sound room of the children’s museum while there on our insect visit.

i-week-13

Ink: Travis loves stamps and ink pads, so this theme word made for messy enjoyable play. We also talked about how ink can be found in lots of useful things, such as pens and printers.

i-week-8

Iguana: We paid a visit to the resident iguana at a local wildlife rehabilitation facility. Of course, if there are no iguanas near you, it’s the perfect week to read a book about one.

I Spy: A fantastic game for honing observation skills, I suggest starting out with the book I Spy by Edward Gibbs to teach your child the basics of the game. The book features a hole on the last page, through which Travis said “I spy” about all the objects in our living room. Continue the game on car rides all week, for a great way to keep backseat passengers entertained.

As if that wasn’t enough, here were some extras…

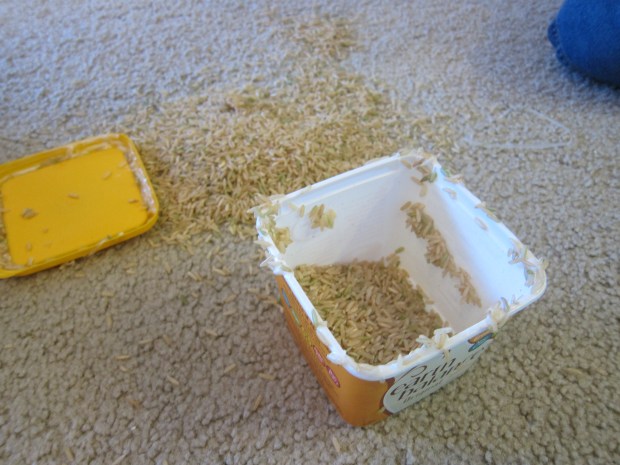
Fine art: My intended project was to make a homemade rhythm instrument from an empty Earth Balance butter tub and rice. Travis helped pour the rice in, after which I glued on the top and let it sit overnight. But when it was time to shake, he just wanted the rice, and peeled apart the glued-on top. So much for that project!

i-week-26

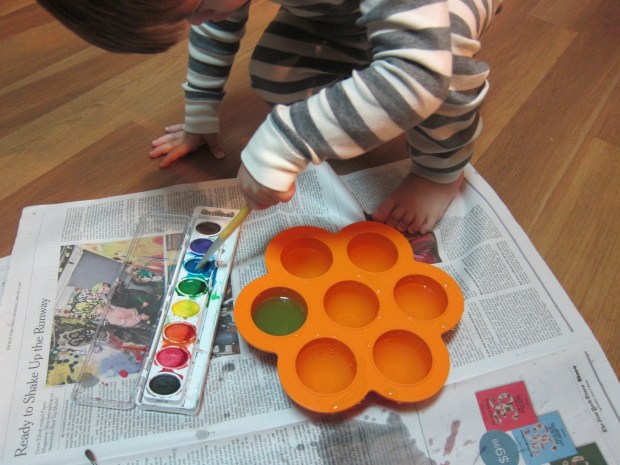
Instead, we put icing on sugar cookies, fitting in our fine motor skills that way.

i-week

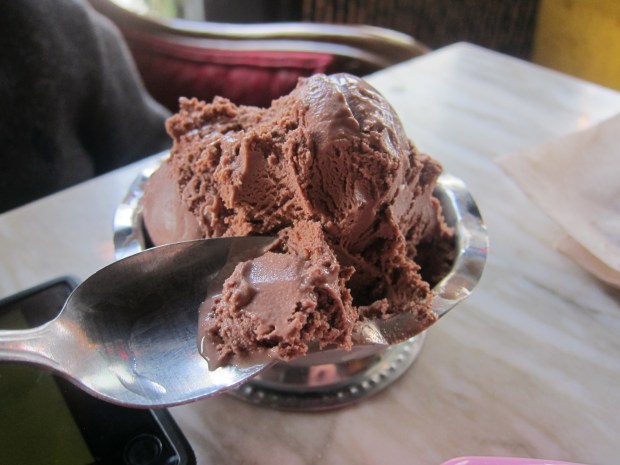
Food: Ice cream was the obvious choice. We headed out for vegan ice cream at a local restaurant for a super special treat. For healthier fare, try making a recipe from Italian or Indian cuisine.

I week (29).JPG

Books: Travis loved three picks from the library: The Indoor Noisy Book by Margaret Wise Brown, The Little Island, by Golden McDonald, and Inch by Inch by Leo Lionni.

Songs: Check out an online clip of Ice Cream from Anne of Green Gables, or – of course – Itsy Bitsy Spider.

Math: Travis loves playing with the ruler on his toy tool bench, pretending to measure things, so this week I introduced the vocab word “inches.” We got out different pieces of Duplo and had fun marking off how many inches each piece was.

i-week-22

That’s all for this time, we’ll see you in Week H.

Ice Towers

ice-towers-5

It’s an arctic 20 degrees outside, so – acting on a suggestion from Kiwi Crate’s app – we made ice towers!

I thought Travis would have the most fun if the towers were different colors, so we filled various Tupperware and plastic cups with water, and then swirled in watercolor paint with a brush. Now it was time to set them on the balcony to freeze!

ice-towers-1

As luck would have it, it snowed overnight, so when we brought in our ice the next morning, we also shoveled a bucket of fresh snow.

ice-towers-7

Now it was time to play with it all. I put out 2 disposable foil pans to catch the mess. The ice “towers” unfortunately hadn’t frozen all the way through, so we had very short little ice circles, but lots of cold colored water. When we shoveled in our fresh snow, it immediately took on beautiful hues wherever the colored water ran into it.

ice-towers-8

We added Duplo animals to play in our wintry landscape.

ice-towers-3

Because the paints ran together and soon turned a muddy brown, I took the watercolors back out so Travis could paint on the ice more vividly again.

ice-towers-4

Next time I would let our Tupperware containers freeze longer so we had taller ice towers and mountains, but Travis didn’t seem to mind! As someone who used to dislike winter, it’s projects like these that remind me to find joy on even the coldest days.

ice-towers-6

Great Granola

great-granola

Little ones can enjoy this granola in a number of ways – stirred into non-dairy yogurt for breakfast, sprinkled over fruit for dessert – or just eaten out of the bowl as a crunchy snack!

Ingredients:

  • 1 and 1/2 cups old-fashioned rolled oats
  • 1/2 cup chopped pecans
  • 1/4 teaspoon nutmeg
  • 1/2 teaspoon cinnamon
  • 1/8 teaspoon salt
  • 2 tablespoons canola oil
  • 3 tablespoons maple syrup
  • 1/4 cup diced dried apple
  • 1/4 cup raisins
  1. Combine the oats, pecans, nutmeg, cinnamon, and salt in a large bowl. Set aside.
  2. Whisk together the canola oil and maple syrup, and pour over the oat mixture, stirring to coat.
  3. Spread the mixture in an even layer on a baking sheet and bake at 300 degrees F for 30 minutes, stirring halfway through. Remove from the oven and place the baking sheet on a wire rack to cool. Stir in the apple and raisins before storing in an airtight container.

great-granola-2


Mac and Cheese in a Mug

mac-n-cheese-mug-5

Yes, your toddler can make pasta nearly him- or herself alone! This comfort food recipe is just right for a winter lunch or dinner.

In an oven-proof mug, have your child pour in the following: 1/2 cup uncooked elbow macaroni or small shell pasta; 1/4 cup shredded Daiya cheddar cheese; 1 tablespoon flour; and 1/2 cup non-dairy milk.

mac-n-cheese-mug-2

Now give the mug a big stir to combine the ingredients!

mac-n-cheese-mug-3

Adults, place the mug on a baking sheet and bake at 375 degrees F for 30 minutes – the mixture should be bubbly on top.

mac-n-cheese-mug-4

In a small bowl, combine 1 tablespoon melted Earth Balance butter and 1 tablespoon fresh bread crumbs. Spoon over the mac and cheese, then return to the oven for a final 5 minutes.

Let cool at least 5 minutes before serving. Travis was so proud to have stirred the ingredients together, and couldn’t wait to try the recipe – especially because of the novelty of eating from a mug!

mac-n-cheese-mug-6

You can double the recipe and use two mugs; reheat the second portion of mac and cheese in the microwave the next day.

Mac in mug (2).JPG